

DIY Wrinkle Remover: Are you tired of those pesky lines etching their way onto your face, but dread the thought of expensive creams and procedures? I get it! We all want to look our best, and sometimes, the answer is right in our kitchen cabinet. This article is your ultimate guide to crafting your own effective and affordable DIY wrinkle remover solutions.
For centuries, people have sought ways to preserve their youthful appearance. From ancient Egyptians using milk and honey masks to traditional Chinese medicine incorporating herbs and acupuncture, the desire to combat wrinkles is deeply rooted in human history. While modern skincare offers a plethora of options, many of these are laden with chemicals and come with a hefty price tag.
That’s where the magic of DIY comes in! I’m going to show you how to create powerful, natural wrinkle removers using ingredients you probably already have. Not only will you save money, but you’ll also know exactly what’s going onto your skin. This is especially important for those with sensitive skin or allergies. Plus, it’s incredibly satisfying to whip up your own beauty concoctions!
This article will provide you with easy-to-follow recipes, tips, and tricks for creating your own DIY wrinkle remover. Get ready to say goodbye to those fine lines and hello to a more radiant, youthful you, all without breaking the bank!
DIY Wrinkle Remover: A Frugal & Effective Solution!
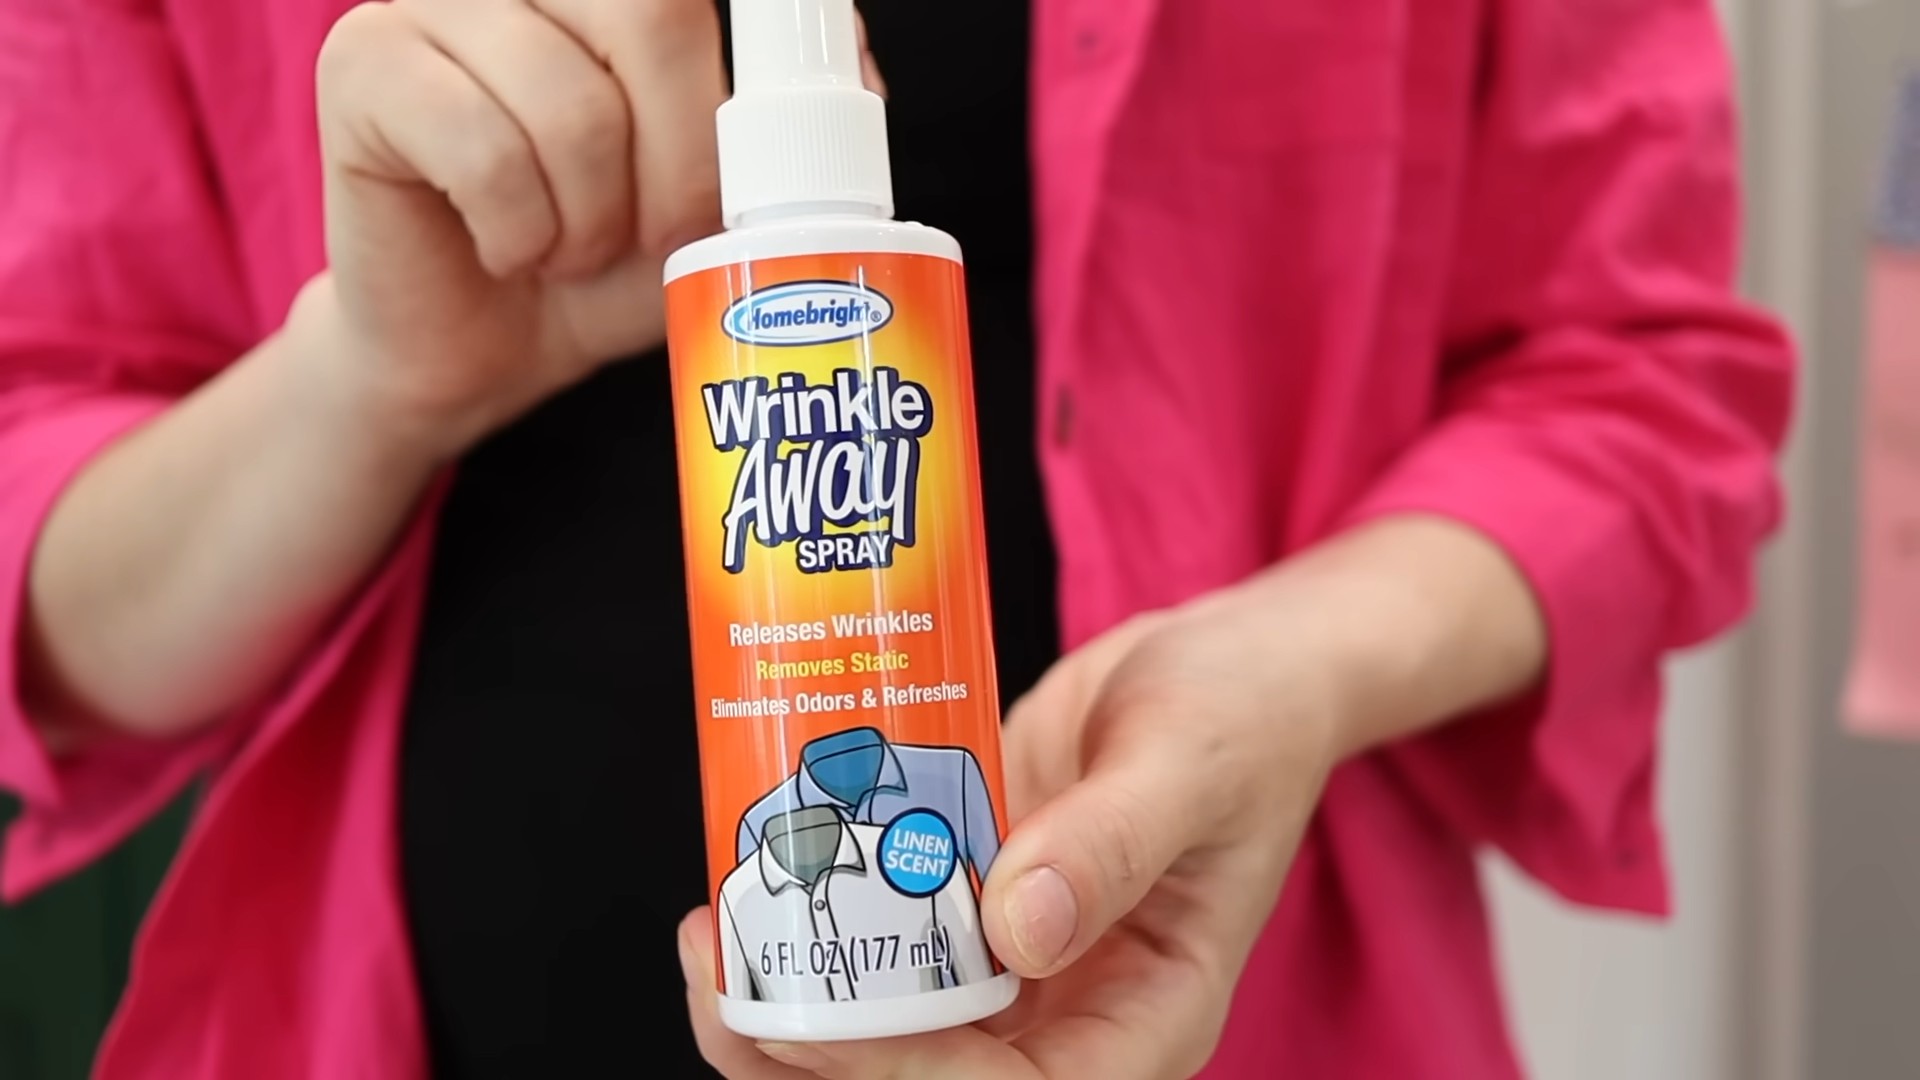
Hey there! Tired of those pesky wrinkles staring back at you from your clothes? Ironing can be a drag, and sometimes you just don’t have the time. Well, I’ve got some good news! You can ditch the iron and create your own effective wrinkle remover spray using ingredients you probably already have at home. This DIY solution is not only budget-friendly but also surprisingly effective. Let’s get started!
What You’ll Need: The Essential Ingredients
Before we dive into the mixing, let’s gather our supplies. Here’s what you’ll need to create your wrinkle-releasing magic:
* Spray Bottle: A clean, empty spray bottle is essential. I recommend a bottle that holds at least 8 ounces (240 ml) for a good batch size. Make sure it sprays a fine mist, not a stream.
* Distilled Water: This is crucial! Tap water can contain minerals that might leave residue on your clothes. Distilled water ensures a clean and effective spray.
* White Vinegar: Don’t worry, the vinegar smell dissipates quickly! White vinegar is a natural fabric softener and helps relax the fibers, releasing those wrinkles.
* Hair Conditioner (Optional): A small amount of hair conditioner adds a lovely scent and further softens the fabric. Choose a conditioner with a scent you enjoy. I personally love using a lavender-scented one.
* Essential Oil (Optional): If you’re not a fan of the conditioner idea, or just want an extra boost of fragrance, a few drops of your favorite essential oil will do the trick. Lavender, lemon, or eucalyptus are great choices.
* Measuring Spoons/Cups: For accurate measurements, grab your measuring spoons and cups.
* Funnel (Optional): A funnel makes pouring the ingredients into the spray bottle much easier and prevents spills.
Mixing Your Wrinkle-Releasing Potion: Step-by-Step Instructions
Now for the fun part! Let’s mix up our wrinkle remover. I’ve found this recipe to be super effective, but feel free to adjust the ratios slightly to suit your preferences.
1. Prepare Your Spray Bottle: Make sure your spray bottle is clean and dry. This will prevent any unwanted odors or residue from affecting your clothes.
2. Add Distilled Water: Pour 1 cup (240 ml) of distilled water into the spray bottle. This forms the base of our wrinkle remover.
3. Incorporate White Vinegar: Add 1 tablespoon (15 ml) of white vinegar to the distilled water. The vinegar is the key ingredient for relaxing those fabric fibers.
4. Conditioner or Essential Oil (Your Choice!):
* If using conditioner: Add 1 teaspoon (5 ml) of hair conditioner to the mixture.
* If using essential oil: Add 5-10 drops of your favorite essential oil. Start with a smaller amount and add more if you desire a stronger scent.
5. Shake Well: Secure the spray bottle lid tightly and shake the mixture vigorously for at least 30 seconds. This ensures that all the ingredients are thoroughly combined.
6. Label Your Bottle: It’s always a good idea to label your spray bottle with the contents and date. This prevents any confusion later on.
Using Your DIY Wrinkle Remover: A Quick Guide
Okay, you’ve got your wrinkle remover ready to go! Here’s how to use it effectively:
1. Hang the Garment: Hang the wrinkled garment on a hanger. This allows the spray to distribute evenly and helps the wrinkles to release naturally.
2. Spray Lightly: Hold the spray bottle about 6-8 inches (15-20 cm) away from the garment and spray lightly and evenly over the wrinkled areas. Don’t saturate the fabric; a light mist is all you need.
3. Smooth and Stretch: Gently smooth and stretch the fabric with your hands. This helps to further relax the fibers and release the wrinkles.
4. Let it Air Dry: Allow the garment to air dry completely. This usually takes about 15-30 minutes, depending on the fabric and humidity. You can also gently tug on the fabric as it dries to help smooth out any remaining wrinkles.
5. Enjoy Wrinkle-Free Clothes! Once the garment is dry, it should be noticeably less wrinkled. You’re ready to go!
Tips and Tricks for Optimal Results
To get the most out of your DIY wrinkle remover, here are a few extra tips and tricks I’ve learned along the way:
* Test on a Small Area First: Before spraying the entire garment, test the solution on a small, inconspicuous area to ensure it doesn’t cause any discoloration or damage. This is especially important for delicate fabrics.
* Use on a Variety of Fabrics: This wrinkle remover works well on most fabrics, including cotton, linen, and synthetic blends. However, it’s best to avoid using it on delicate fabrics like silk or rayon, as they may be more prone to water spots.
* Adjust the Vinegar Ratio: If you find the vinegar smell too strong, you can reduce the amount slightly. However, keep in mind that the vinegar is a key ingredient for wrinkle removal, so reducing it too much may affect the effectiveness of the spray.
* Experiment with Scents: Feel free to experiment with different essential oils or conditioner scents to find your favorite combination. Just make sure the scent is not too overpowering.
* Perfect for Travel: This DIY wrinkle remover is perfect for travel! Just pour some into a small travel-sized spray bottle and you’re good to go. No more wrinkled clothes on vacation!
* Refresh Between Washes: Use this spray to refresh clothes between washes. It’s a great way to eliminate odors and keep your clothes looking their best.
* For Stubborn Wrinkles: For particularly stubborn wrinkles, you may need to repeat the spraying and smoothing process. You can also try hanging the garment in a steamy bathroom for a few minutes after spraying to help relax the fibers even further.
* Storage: Store your DIY wrinkle remover in a cool, dark place. This will help to preserve the quality of the ingredients and prevent the essential oils from degrading.
* Consider Fabric Type: Thicker fabrics like denim might need a slightly heavier application of the spray compared to thinner fabrics like linen. Adjust the amount you spray based on the fabric’s weight and wrinkle severity.
* Don’t Over-Saturate: Remember, less is more! Over-saturating the fabric can lead to water spots or a longer drying time. Aim for a light, even mist.
* Shake Before Each Use: Even after the initial mixing, the ingredients might settle over time. Give the bottle a good shake before each use to ensure everything is properly combined.
* Sunlight Can Help: After spraying, hanging the garment in direct sunlight (if appropriate for the fabric) can help to further reduce wrinkles and freshen the fabric. However, be cautious with dark-colored fabrics, as sunlight can cause fading.
* Ironing Alternative: While this spray is a great alternative to ironing, it’s not a complete replacement for all situations. For crisp, formal garments, ironing might still be necessary. However, for everyday wear, this DIY wrinkle remover is a lifesaver!
Troubleshooting: Addressing Common Issues
Even with the best instructions, sometimes things don’t go exactly as planned. Here are some common issues you might encounter and how to address them:
* Vinegar Smell Lingering: If the vinegar smell is too strong, try reducing the amount of vinegar in the recipe or adding a few extra drops of essential oil. You can also try airing out the garment in a well-ventilated area after spraying.
* Water Spots: If you notice water spots on your clothes, you may be using too much spray or the water may not be distilled. Try using less spray and make sure you’re using distilled water.
* Spray Not Effective: If the spray isn’t effectively removing wrinkles, try increasing the amount of vinegar in the recipe or repeating the spraying and smoothing process. You can also try hanging the garment in a steamy bathroom after spraying.
* Clogged Sprayer: If your sprayer becomes clogged, try rinsing it with warm water. You can also try using a small needle to clear any blockages.
* Residue on Clothes: If you notice a residue on your clothes, you may be using too much conditioner or the conditioner may be too thick. Try using less conditioner or switching to a lighter formula.
Why This DIY Wrinkle Remover Works: The Science Behind It
You might be wondering why this simple DIY solution is so effective. Here’s a little bit of the science behind it:
* White Vinegar: The acetic acid in white vinegar acts as a natural fabric softener. It helps to relax the fibers of the fabric, allowing them to release wrinkles more easily.
* Dist

Conclusion
So, there you have it! Ditching expensive wrinkle creams and embracing this simple, effective DIY wrinkle remover is not just a cost-effective alternative; it’s a step towards understanding and controlling the ingredients you put on your skin. We’ve explored a method that leverages the power of natural ingredients, readily available in most homes, to combat those pesky fine lines and wrinkles.
Why is this a must-try? Because it’s gentle, customizable, and, most importantly, it works! Unlike harsh chemical treatments that can irritate sensitive skin, this DIY solution allows you to tailor the ingredients to your specific needs. Have dry skin? Add a touch more honey or olive oil for extra hydration. Dealing with oily skin? A squeeze of lemon juice can help balance things out. The possibilities are endless!
Beyond the basic recipe, consider these variations to further personalize your anti-aging routine:
* **Green Tea Infusion:** Steep a strong cup of green tea, let it cool, and use it as the liquid base for your DIY wrinkle remover. Green tea is packed with antioxidants that fight free radicals and protect your skin from damage.
* **Essential Oil Boost:** Add a drop or two of your favorite anti-aging essential oil, such as frankincense, lavender, or rosehip oil. These oils have potent regenerative properties that can enhance the effectiveness of the treatment. Remember to always dilute essential oils properly before applying them to your skin.
* **Aloe Vera Gel:** Substitute some of the water with aloe vera gel for a soothing and hydrating boost. Aloe vera is known for its anti-inflammatory and healing properties, making it ideal for sensitive or irritated skin.
* Vitamin E Oil: A few drops of Vitamin E oil can be added to the mixture. Vitamin E is a powerful antioxidant that helps protect the skin from damage and promotes healing.
This DIY wrinkle remover isn’t a magic potion that will erase wrinkles overnight. Consistency is key. Incorporate it into your daily skincare routine, and you’ll start to notice a visible improvement in the texture and appearance of your skin over time. Remember to always perform a patch test on a small area of your skin before applying the mixture to your entire face, especially if you have sensitive skin or allergies.
We are confident that this DIY wrinkle remover will become a staple in your beauty arsenal. It’s a simple, effective, and affordable way to achieve a more youthful and radiant complexion.
Now, it’s your turn! We encourage you to try this DIY wrinkle remover and share your experience with us. Let us know what variations you tried, what worked best for your skin, and any tips or tricks you discovered along the way. Your feedback will help us refine the recipe and make it even better for everyone. Share your before-and-after photos, your favorite ingredient combinations, and your overall thoughts in the comments section below. We can’t wait to hear from you!
Frequently Asked Questions (FAQ)
What exactly *is* a wrinkle, and why do we get them?
Wrinkles are creases, folds, or ridges in the skin. They are a natural part of the aging process, primarily caused by a decrease in collagen and elastin production. Collagen and elastin are proteins that provide structure and elasticity to the skin, keeping it firm and smooth. As we age, the production of these proteins slows down, leading to a loss of skin firmness and the formation of wrinkles. Other factors that contribute to wrinkle formation include sun exposure, smoking, genetics, repeated facial expressions, and dehydration. Understanding the underlying causes helps appreciate the importance of preventative measures and targeted treatments like our DIY wrinkle remover.
How often should I use this DIY wrinkle remover?
For best results, we recommend using this DIY wrinkle remover 2-3 times per week. Overuse can potentially irritate the skin, especially if you have sensitive skin. Start with once a week and gradually increase the frequency as your skin tolerates it. Pay attention to how your skin feels and adjust the frequency accordingly. Remember, consistency is key, but moderation is also important.
Can I use this DIY wrinkle remover on sensitive skin?
Yes, but with caution. This DIY wrinkle remover is generally gentle, but it’s crucial to perform a patch test before applying it to your entire face. Apply a small amount of the mixture to a discreet area of your skin, such as behind your ear or on your inner arm, and wait 24-48 hours to see if any irritation occurs. If you experience any redness, itching, or burning, discontinue use. If you have sensitive skin, consider using milder ingredients and avoiding potentially irritating additives like lemon juice. Aloe vera gel can be a soothing and hydrating addition for sensitive skin types.
How long does this DIY wrinkle remover last?
Since this DIY wrinkle remover contains fresh ingredients, it’s best to make it fresh each time you use it. However, if you have leftovers, you can store it in an airtight container in the refrigerator for up to 2-3 days. Be sure to check for any signs of spoilage before using it. For optimal results and to avoid any potential contamination, we recommend preparing a fresh batch each time.
Will this DIY wrinkle remover completely eliminate my wrinkles?
While this DIY wrinkle remover can significantly improve the appearance of wrinkles and fine lines, it’s important to have realistic expectations. It’s not a magic eraser that will completely eliminate wrinkles overnight. However, with consistent use, it can help to hydrate the skin, boost collagen production, and reduce the appearance of wrinkles over time. Think of it as a natural and gentle way to support your skin’s natural healing processes.
What other lifestyle changes can I make to prevent wrinkles?
In addition to using this DIY wrinkle remover, there are several other lifestyle changes you can make to prevent wrinkles and maintain youthful-looking skin:
* **Sun Protection:** Wear sunscreen with an SPF of 30 or higher every day, even on cloudy days. Sun exposure is the leading cause of premature aging and wrinkles.
* **Hydration:** Drink plenty of water to keep your skin hydrated from the inside out.
* **Healthy Diet:** Eat a balanced diet rich in fruits, vegetables, and antioxidants to nourish your skin.
* **Quit Smoking:** Smoking damages collagen and elastin, accelerating the aging process.
* **Get Enough Sleep:** Aim for 7-8 hours of sleep per night to allow your skin to repair and regenerate.
* **Manage Stress:** Chronic stress can contribute to premature aging. Practice stress-reducing activities like yoga, meditation, or spending time in nature.
Can I use this DIY wrinkle remover around my eyes?
Yes, you can use this DIY wrinkle remover around your eyes, but be very careful to avoid getting it into your eyes. The skin around the eyes is very delicate, so use a gentle touch and avoid rubbing or pulling the skin. If you have sensitive skin, you may want to use a milder version of the recipe with fewer potentially irritating ingredients.
What if I am allergic to one of the ingredients?
If you know you are allergic to any of the ingredients in this DIY wrinkle remover, do not use it. Substitute the allergenic ingredient with a suitable alternative or omit it altogether. Always read the ingredient list carefully and perform a patch test before using any new skincare product, especially if you have allergies.
Can I add other ingredients to this DIY wrinkle remover?
Yes, you can customize this DIY wrinkle remover by adding other ingredients that are beneficial for your skin. Some popular additions include honey, yogurt, avocado, and mashed banana. Research the benefits of each ingredient before adding it to ensure it’s suitable for your skin type and concerns. Remember to always perform a patch test before using any new ingredient on your entire face.
Is this DIY wrinkle remover safe to use during pregnancy or breastfeeding?
While the ingredients in this DIY wrinkle remover are generally considered safe, it’s always best to consult with your doctor or dermatologist before using any new skincare products during pregnancy or breastfeeding. They can advise you on which ingredients are safe to use and which to avoid.

Leave a Comment