Salt cleaning hacks – who knew something so simple could be so powerful around the house? I’m always on the lookout for easy, affordable ways to keep my home sparkling, and let me tell you, salt has become my new best friend! Forget those expensive, chemical-laden cleaners; we’re going back to basics with a natural, effective solution that’s been used for centuries.
Salt’s cleaning prowess isn’t exactly a new discovery. Historically, cultures around the world have recognized salt’s absorbent and abrasive qualities. From ancient Egyptians using it to preserve mummies to Roman soldiers being paid in salt (hence the word “salary”), this mineral has always been valued. Now, we’re rediscovering its cleaning potential in our modern homes.
Why do you need these salt cleaning hacks in your life? Because life is messy! Spills happen, stains appear, and grime accumulates. But with a little salt and some simple techniques, you can tackle everything from stubborn coffee stains in your favorite mug to grimy grout in your bathroom. I’m going to share my favorite DIY tricks that are not only budget-friendly but also eco-conscious, helping you create a cleaner, healthier home without breaking the bank or harming the environment. Get ready to be amazed by the cleaning power of salt!

DIY Salt Cleaning Hacks: Unleash the Power of Sodium Chloride!
Hey there, fellow DIY enthusiasts! I’m always on the lookout for simple, effective, and budget-friendly cleaning solutions. And guess what? Table salt, that humble kitchen staple, is a cleaning powerhouse! Forget those expensive, chemical-laden cleaners – let’s explore some amazing salt cleaning hacks that will leave your home sparkling.
Cleaning Cast Iron Like a Pro
Cast iron cookware is a kitchen essential, but cleaning it can be a pain. Soap can strip away the seasoning, leading to rust. Salt to the rescue! Its abrasive texture gently scrubs away food particles without harming the precious seasoning.
What you’ll need:
* Coarse salt (kosher or sea salt works best)
* A clean, dry cloth or sponge
* Vegetable oil or other cooking oil
Step-by-step instructions:
1. Scrape Away Excess Food: After cooking, use a spatula or scraper to remove any large food particles from your cast iron skillet while it’s still warm (but not hot enough to burn you!).
2. Add Salt and Scrub: Pour a generous amount of coarse salt into the skillet. Using a dry cloth or sponge, scrub the skillet in a circular motion. Apply firm pressure to dislodge any stuck-on food. I usually spend a few minutes on this step, making sure to get into all the nooks and crannies.
3. Rinse (Optional): If the skillet is particularly dirty, you can rinse it with hot water. However, avoid using soap! If you do rinse, make sure to dry it immediately and thoroughly.
4. Dry and Season: Place the skillet back on the stovetop over low heat. This will ensure it’s completely dry. Once dry, remove it from the heat and add a teaspoon or two of vegetable oil (or your preferred cooking oil). Use a clean cloth to rub the oil all over the inside and outside of the skillet, including the handle.
5. Buff Away Excess Oil: Using a clean, dry cloth, buff away any excess oil. You want the skillet to be lightly coated, not greasy.
6. Heat it Up: Place the skillet back on the stovetop over medium heat until it begins to smoke slightly. This will help the oil polymerize and create a protective layer. Let it cool completely before storing.
Reviving Dull Copper
Copper pots, pans, and decorative items can lose their shine over time, developing a dull patina. But don’t despair! A simple salt paste can bring back their luster.
What you’ll need:
* Salt
* White vinegar (or lemon juice)
* A soft cloth or sponge
Step-by-step instructions:
1. Make a Paste: In a small bowl, mix equal parts salt and white vinegar (or lemon juice) to form a paste. The consistency should be thick enough to stick to the copper surface. I usually start with a tablespoon of each and adjust as needed.
2. Apply the Paste: Apply the paste to the copper item, focusing on areas that are particularly tarnished.
3. Scrub Gently: Using a soft cloth or sponge, gently scrub the copper in a circular motion. You should start to see the tarnish lifting away.
4. Rinse Thoroughly: Rinse the copper item thoroughly with warm water to remove all traces of the paste.
5. Dry Completely: Dry the copper item immediately with a clean, soft cloth. This will prevent water spots from forming.
Cleaning Your Iron
Is your iron leaving scorch marks on your clothes? Mineral buildup and residue can accumulate on the soleplate, hindering its performance. Salt can help!
What you’ll need:
* Salt
* A clean cotton cloth or ironing board cover
* An iron
Step-by-step instructions:
1. Prepare the Surface: Spread a clean cotton cloth or ironing board cover on a flat surface.
2. Sprinkle Salt: Generously sprinkle salt onto the cloth.
3. Heat the Iron: Turn on your iron to the highest dry setting (no steam).
4. Iron the Salt: Run the hot iron over the salt-covered cloth in a circular motion for a few minutes. The salt will help to loosen and remove any residue from the soleplate.
5. Wipe Clean: Unplug the iron and let it cool completely. Once cool, wipe the soleplate with a clean, damp cloth to remove any remaining salt and residue.
Freshening Up Your Sink Drain
A smelly sink drain is never pleasant. Salt can help to deodorize and unclog minor blockages.
What you’ll need:
* Salt
* Hot water
Step-by-step instructions:
1. Pour Salt Down the Drain: Pour about half a cup of salt down the drain.
2. Flush with Hot Water: Immediately follow with a pot of boiling water.
3. Let it Sit: Let the mixture sit in the drain for several hours, or preferably overnight.
4. Flush Again: Flush the drain again with hot water. This should help to dislodge any debris and eliminate odors. I usually do this once a month to keep my drains fresh.
Cleaning Sponges and Dishcloths
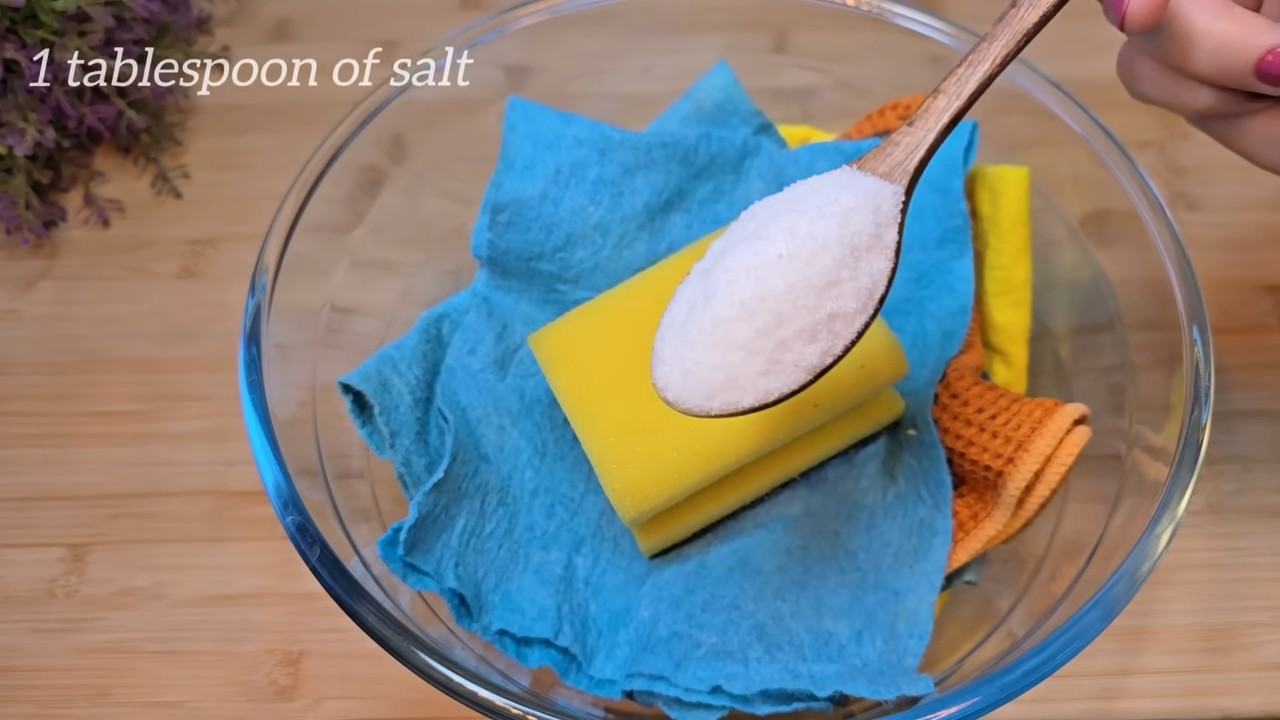
Sponges and dishcloths can harbor bacteria and odors. A salt soak can help to sanitize and freshen them up.
What you’ll need:
* Salt
* Warm water
* A bowl or sink
Step-by-step instructions:
1. Prepare the Salt Solution: Fill a bowl or sink with warm water. Add about ¼ cup of salt and stir until dissolved.
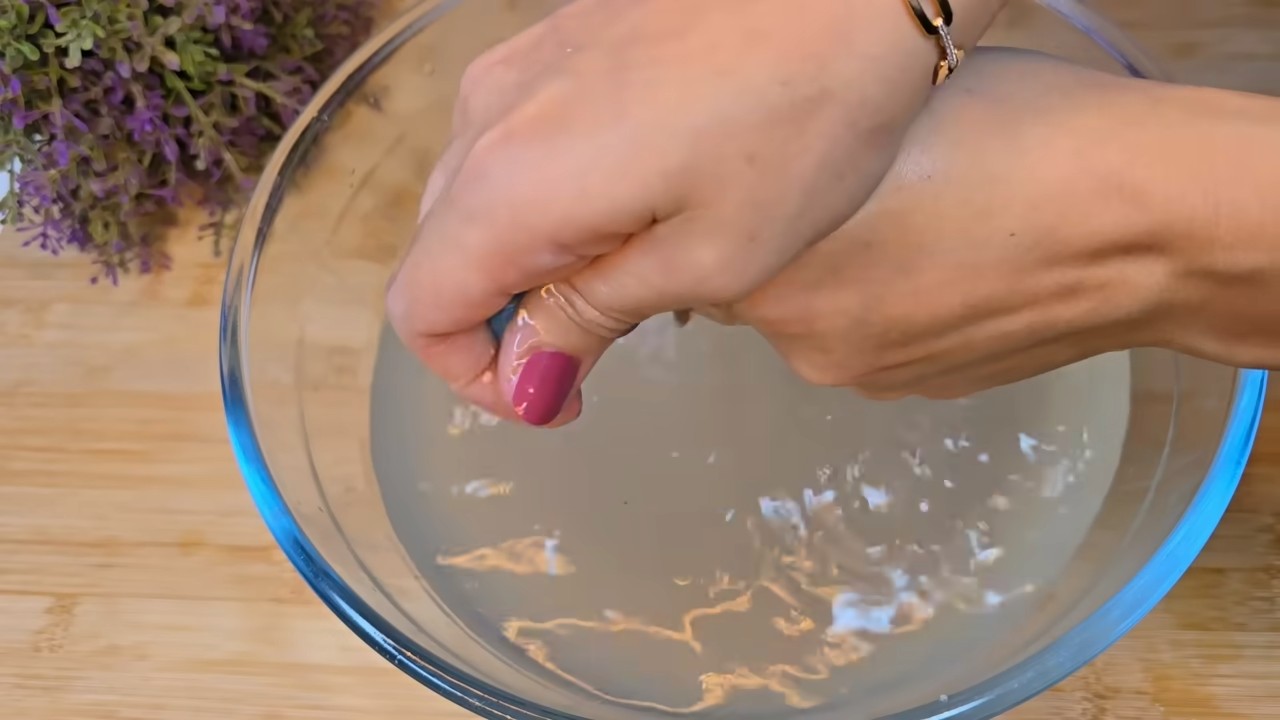
2. Soak the Sponges/Dishcloths: Submerge the sponges and dishcloths in the salt solution.
3. Soak for Several Hours: Let them soak for several hours, or preferably overnight.
4. Rinse and Dry: Rinse the sponges and dishcloths thoroughly with clean water and allow them to air dry completely.
Removing Water Stains from Wood Furniture
Those pesky white rings left by glasses on your wood furniture? Salt can help to draw out the moisture.
What you’ll need:
* Salt
* Olive oil
* A soft cloth
Step-by-step instructions:
1. Make a Paste: Mix equal parts salt and olive oil to form a paste.
2. Apply to the Stain: Gently apply the paste to the water stain.
3. Rub Gently: Using a soft cloth, gently rub the paste into the stain in a circular motion.
4. Wipe Away Excess: Wipe away any excess paste with a clean, damp cloth.
5. Buff Dry: Buff the area dry with a clean, dry cloth.
Cleaning Greasy Pans
Tired of scrubbing greasy pans? Salt can help to absorb the grease and make cleaning easier.
What you’ll need:
* Salt
* Paper towels
Step-by-step instructions:
1. Sprinkle Salt: While the pan is still warm (but not hot!), sprinkle a generous amount of salt over the greasy surface.
2. Let it Sit: Let the salt sit for a few minutes to absorb the grease.
3. Wipe Clean: Use paper towels to wipe away the salt and grease. You’ll be surprised at how easily the grease comes off!
4. Wash as Usual: Wash the pan as usual with soap and water.
Preventing Fruit from Browning
Cut apples, pears, and other fruits can quickly turn brown due to oxidation. A salt water soak can help to prevent this.
What you’ll need:
* Salt
* Water
* A bowl
Step-by-step instructions:
1. Prepare the Salt Solution: Fill a bowl with cold water. Add about ½ teaspoon of salt per cup of water and stir until dissolved.
2. Soak the Fruit: Place the cut fruit in the salt water solution.
3. Soak for a Few Minutes: Let the fruit soak for a few minutes.
4. Rinse and Drain: Rinse the fruit with clean water and drain well. The fruit will stay fresh and prevent browning for longer. Don’t worry, you won’t taste the salt!
Cleaning Egg Residue
Ever tried to clean a pan with cooked egg residue? It’s a nightmare! Salt can make it much easier.
What you’ll need:
* Salt
* Water
* A pan
Step-by-step instructions:
1. Sprinkle Salt: Immediately after cooking eggs, sprinkle a generous amount of salt over the egg residue in the pan.
2. Add Water: Add a small amount

Conclusion
So, there you have it! This simple yet incredibly effective salt cleaning hacks is a game-changer for anyone looking to simplify their cleaning routine and achieve sparkling results without harsh chemicals. We’ve explored how the abrasive nature of salt, combined with its natural disinfecting properties, can tackle a surprising range of cleaning challenges around your home. From reviving tarnished copper pots to scrubbing stubborn grime off your cast iron skillet, salt proves to be a versatile and budget-friendly cleaning agent.
But the benefits extend beyond just cost savings. By embracing these salt cleaning hacks, you’re also making a conscious choice to reduce your reliance on potentially harmful chemicals that can irritate skin, pollute waterways, and contribute to indoor air pollution. It’s a win-win for your home and the environment.
Don’t be afraid to experiment with different types of salt, too. While table salt is perfectly adequate for most cleaning tasks, coarser salts like kosher salt or sea salt can provide extra scrubbing power for tougher stains. You can also infuse your salt with essential oils like lemon, lavender, or tea tree for an added boost of fragrance and antibacterial properties. Imagine the refreshing scent of lemon filling your kitchen as you effortlessly scrub away grease and grime!
Consider these variations to tailor the salt cleaning hacks to your specific needs:
* **Salt and Vinegar Paste:** For particularly stubborn stains on surfaces like bathtubs or sinks, create a paste by mixing equal parts salt and white vinegar. Apply the paste to the stain, let it sit for 15-20 minutes, and then scrub with a non-abrasive sponge or cloth. The acidity of the vinegar will help to break down the stain, while the salt provides the necessary scrubbing power.
* **Salt and Lemon Scrub:** For a natural and refreshing cleaning solution, combine salt with lemon juice. This mixture is particularly effective for cleaning cutting boards, removing rust stains, and polishing brass or copper. The citric acid in lemon juice acts as a natural disinfectant and brightener, leaving your surfaces sparkling clean and smelling fresh.
* **Salt and Baking Soda Mixture:** For a powerful deodorizing and cleaning combination, mix equal parts salt and baking soda. This mixture is ideal for cleaning carpets, upholstery, and even your washing machine. Simply sprinkle the mixture onto the surface, let it sit for 30 minutes, and then vacuum or wipe away.
We truly believe that once you experience the cleaning power of salt, you’ll wonder how you ever lived without it. It’s a simple, affordable, and eco-friendly solution that can transform your cleaning routine.
So, what are you waiting for? Grab a box of salt and start experimenting! We’re confident that you’ll be amazed by the results. And most importantly, we want to hear about your experiences. Share your before-and-after photos, your favorite salt cleaning hacks, and any variations you’ve discovered in the comments below. Let’s build a community of salt cleaning enthusiasts and share our knowledge to make our homes cleaner, healthier, and more sustainable. Let us know how this salt cleaning hacks worked for you!
Frequently Asked Questions (FAQ)
Is salt safe to use on all surfaces?
While salt is generally safe for most surfaces, it’s always a good idea to test it in an inconspicuous area first, especially on delicate or easily scratched materials. Avoid using salt on polished or varnished wood, as it can dull the finish. For surfaces like stainless steel, use a fine salt and a gentle touch to avoid scratching. Always rinse thoroughly after cleaning with salt to remove any residue.
What types of salt are best for cleaning?
Table salt, kosher salt, and sea salt can all be used for cleaning, but the best choice depends on the task at hand. Table salt is the most readily available and affordable option, and it works well for general cleaning purposes. Kosher salt has larger crystals, making it a good choice for scrubbing tougher stains. Sea salt also has larger crystals and often contains minerals that can enhance its cleaning power. Epsom salt, while technically a mineral compound, can also be used for cleaning and deodorizing.
Can salt be used to clean cast iron skillets?
Yes, salt is an excellent choice for cleaning cast iron skillets. Its abrasive texture helps to remove food residue without damaging the seasoning. Simply pour a generous amount of salt into the skillet, add a little water, and scrub with a stiff brush or sponge. Rinse thoroughly and dry immediately to prevent rust. You can also heat the skillet on the stovetop after cleaning to ensure it’s completely dry.
How can salt be used to remove rust?
Salt can be used to remove rust from metal surfaces. Create a paste by mixing salt with lemon juice or white vinegar. Apply the paste to the rusted area and let it sit for several hours or overnight. Then, scrub with a stiff brush or steel wool. Rinse thoroughly and dry immediately. For heavily rusted items, you may need to repeat the process several times.
Is salt effective for cleaning drains?
Yes, salt can help to unclog and deodorize drains. Pour a cup of salt down the drain, followed by a cup of boiling water. Let it sit for 30 minutes, then flush with hot water. The salt will help to break down grease and grime, while the boiling water will flush it away. For stubborn clogs, you can also add baking soda to the mixture.
Can salt be used to clean carpets?
Yes, salt can be used to clean and deodorize carpets. Sprinkle a generous amount of salt onto the carpet, let it sit for 30 minutes to an hour, and then vacuum thoroughly. The salt will help to absorb odors and loosen dirt and debris. For stains, you can create a paste by mixing salt with water or white vinegar. Apply the paste to the stain, let it sit for a few minutes, and then blot with a clean cloth.
How does salt compare to commercial cleaning products?
Salt is a natural and non-toxic alternative to commercial cleaning products, which often contain harsh chemicals that can be harmful to your health and the environment. While salt may not be as powerful as some commercial cleaners, it’s effective for a wide range of cleaning tasks and is a much safer and more sustainable option. Plus, it’s significantly cheaper!
Can I use salt to clean my microwave?
Yes, you can use salt to clean your microwave. Mix a tablespoon of salt with a cup of water in a microwave-safe bowl. Microwave on high for 5 minutes. The steam will loosen food particles, making them easy to wipe away. Be careful when removing the bowl, as it will be hot. Wipe down the inside of the microwave with a clean cloth.
How do I store salt for cleaning purposes?
Store your cleaning salt in an airtight container in a cool, dry place. This will prevent it from clumping or absorbing moisture. You can also add a few drops of essential oil to the container for added fragrance and antibacterial properties.
What if I have more questions about salt cleaning hacks?
We’re here to help! Feel free to leave your questions in the comments section below, and we’ll do our best to answer them. We’re also constantly updating our content with new tips and tricks, so be sure to check back often for more salt cleaning hacks. We encourage you to share your own experiences and insights as well, so we can all learn from each other.


Leave a Comment