

Effective cleaning hacks are the secret weapon every homeowner needs in their arsenal! Let’s face it, cleaning isn’t exactly anyone’s favorite pastime. It’s often seen as a chore, a necessary evil standing between us and a sparkling, stress-free home. But what if I told you that cleaning could be less of a drag and more of a breeze?
For centuries, people have been devising clever ways to keep their homes tidy. From ancient civilizations using natural remedies like vinegar and baking soda to modern innovations in cleaning technology, the quest for a spotless space is a timeless pursuit. Think about your grandmother’s cleaning rituals – those time-tested methods passed down through generations. They often hold the key to simple, yet incredibly effective cleaning hacks.
In today’s fast-paced world, who has time to spend hours scrubbing and scouring? That’s where these DIY cleaning tricks come in! We all crave a clean and organized living space, not just for aesthetic reasons, but also for our mental well-being. A cluttered home can lead to a cluttered mind, increasing stress and anxiety. These DIY cleaning hacks will not only save you time and money but also help you create a healthier and happier environment for yourself and your family. I’m excited to share some of my favorite tips and tricks that have transformed my cleaning routine – and I know they’ll do the same for you!
DIY Cleaning Hacks That Will Save You Time and Money!
Okay, let’s dive into some seriously effective cleaning hacks that I’ve personally tested and swear by. These aren’t your grandma’s cleaning tips (well, some might be!), but they’re all designed to make your life easier and your home sparkling without breaking the bank. Get ready to ditch those expensive cleaning products and embrace the power of DIY!
Cleaning Your Microwave Like a Pro
Microwaves – they’re lifesavers, but also magnets for splatters and grime. Here’s how to clean yours without scrubbing for hours:
* The Lemon Steam Clean: This is my go-to method. It’s quick, easy, and leaves your microwave smelling fresh.
* Vinegar Power: If lemon isn’t your thing, vinegar works wonders too.
* Baking Soda Scrub (for stubborn spots): When all else fails, baking soda is your best friend.
Step-by-Step Instructions:
1. Lemon Steam Clean: Grab a microwave-safe bowl and fill it with about 1 cup of water. Slice a lemon in half and squeeze the juice into the water. Then, drop the lemon halves into the bowl as well.
2. Microwave the mixture on high for 3-5 minutes, or until the water is boiling and the microwave is filled with steam.
3. Let the bowl sit inside the microwave for another 5-10 minutes. This allows the steam to loosen all the grime. Don’t open the door immediately!
4. Carefully remove the bowl (it will be hot!). Use a damp cloth or sponge to wipe down the inside of the microwave. You’ll be amazed at how easily the splatters come off.
5. Vinegar Power: Follow the same steps as above, but substitute the lemon with 1/2 cup of white vinegar. The vinegar smell might be a bit strong, but it dissipates quickly.
6. Baking Soda Scrub: If you have stubborn spots that won’t budge, make a paste of baking soda and water. Apply the paste to the spots, let it sit for a few minutes, and then scrub gently with a sponge. Rinse with a damp cloth.
De-Gunking Your Showerhead for Better Water Pressure
A clogged showerhead can ruin your shower experience. Mineral buildup restricts water flow, leaving you with a weak and unsatisfying spray. Here’s how to fix it:
* Vinegar Soak: This is the most effective method for dissolving mineral deposits.
* Toothpick Power: For those stubborn clogs, a toothpick can be your best friend.
Step-by-Step Instructions:
1. Vinegar Soak: Pour white vinegar into a plastic bag (a Ziploc bag works great).
2. Attach the bag to your showerhead using a rubber band, ensuring that the showerhead is completely submerged in the vinegar.
3. Let it soak for at least 30 minutes, or even better, overnight. The longer it soaks, the more mineral deposits will dissolve.
4. Remove the bag and run the shower for a few minutes to flush out any remaining vinegar and debris.
5. Toothpick Power: If you still notice some clogged holes, use a toothpick or a small needle to gently poke out any remaining mineral deposits. Be careful not to damage the showerhead.
Cleaning Your Grout Without Harsh Chemicals
Dirty grout can make your entire bathroom look dingy. But you don’t need harsh chemicals to get it clean. Here are a couple of effective DIY solutions:
* Baking Soda Paste: A simple and effective way to scrub away grime.
* Baking Soda and Vinegar Volcano: For a more powerful cleaning action.
Step-by-Step Instructions:
1. Baking Soda Paste: Mix baking soda with a little water to form a thick paste.
2. Apply the paste to the grout lines.
3. Let it sit for 10-15 minutes.
4. Scrub the grout with an old toothbrush or a grout brush.
5. Rinse with water.
6. Baking Soda and Vinegar Volcano: Sprinkle baking soda generously over the grout lines.
7. Pour white vinegar over the baking soda. It will fizz and bubble – that’s the cleaning action!
8. Let it sit for 5-10 minutes.
9. Scrub the grout with an old toothbrush or a grout brush.
10. Rinse with water. Be careful not to inhale the fumes too closely.
Freshening Up Your Mattress
We spend a third of our lives sleeping, so keeping our mattresses clean is crucial. Here’s how to freshen yours up without calling a professional:
* Baking Soda Deodorizer: Absorbs odors and moisture.
* Vacuum Power: Removes dust mites and allergens.
Step-by-Step Instructions:
1. Remove all bedding from your mattress.
2. Sprinkle a generous amount of baking soda over the entire surface of the mattress.
3. Let it sit for at least 30 minutes, or even better, a few hours. The longer it sits, the more odors and moisture it will absorb.
4. Vacuum the mattress thoroughly using the upholstery attachment. Make sure to get into all the nooks and crannies.
5. For extra freshness, add a few drops of essential oil (like lavender or eucalyptus) to the baking soda before sprinkling it on the mattress.
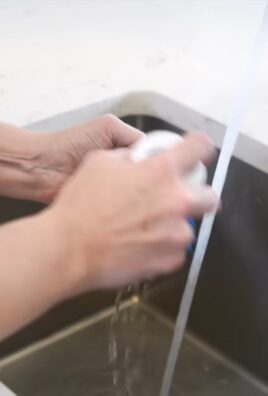
Cleaning Your Blender Like a Pro
Blenders can be a pain to clean, especially after making smoothies or sauces. But this simple trick will make your life so much easier:
* The Soap and Water Whirl: A quick and easy way to clean your blender.
Step-by-Step Instructions:
1. After using your blender, rinse it out with water.
2. Fill the blender halfway with warm water.
3. Add a drop or two of dish soap.
4. Secure the lid and blend on high speed for 30-60 seconds.
5. Rinse the blender thoroughly with water.
6. Let it air dry. This works best if you clean the blender immediately after using it.
Unclogging Drains Naturally
Clogged drains are a common household problem. But you don’t need harsh chemicals to clear them. Here’s a natural solution:
* Baking Soda and Vinegar Drain Cleaner: A safe and effective way to unclog drains.
Step-by-Step Instructions:
1. Pour about 1 cup of baking soda down the drain.
2. Follow with 2 cups of white vinegar.
3. Let it fizz and bubble for 30 minutes.
4. Pour a pot of boiling water down the drain to flush out any remaining debris.
5. If the drain is still clogged, repeat the process.
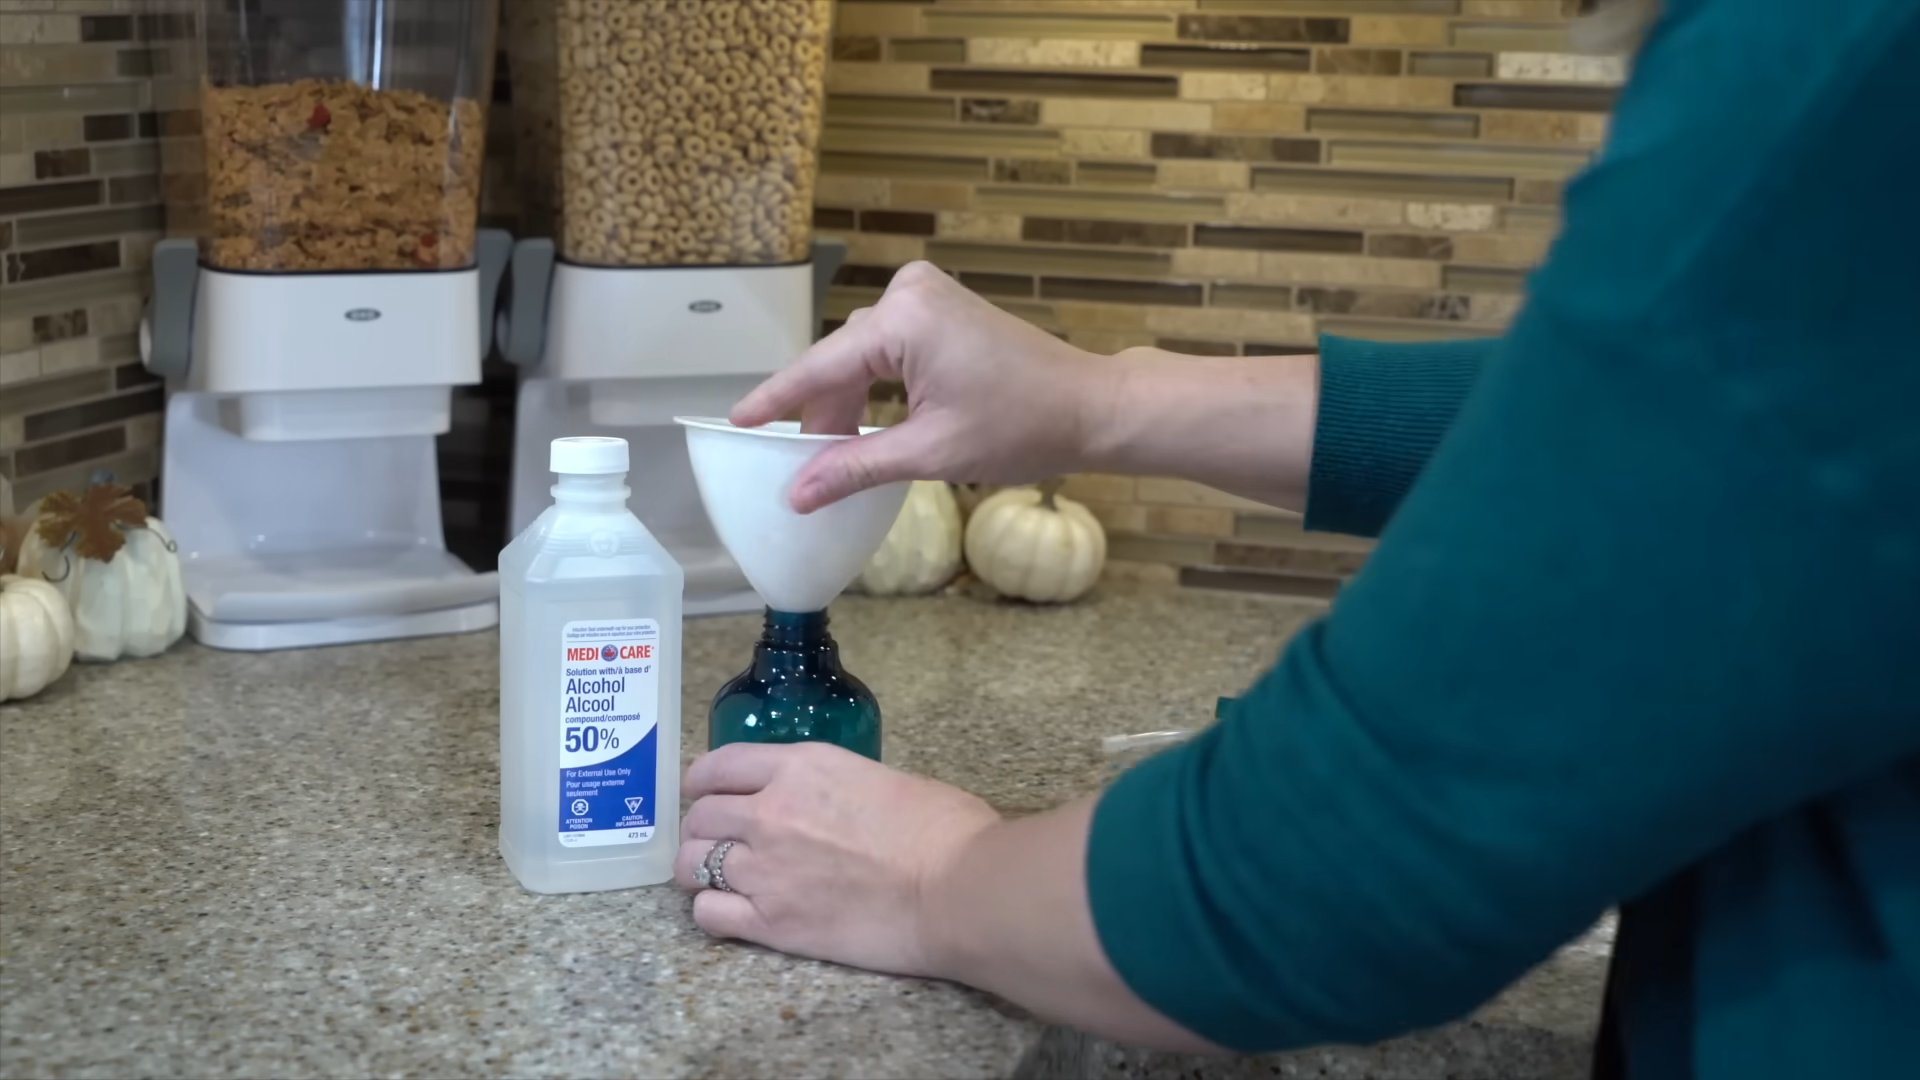
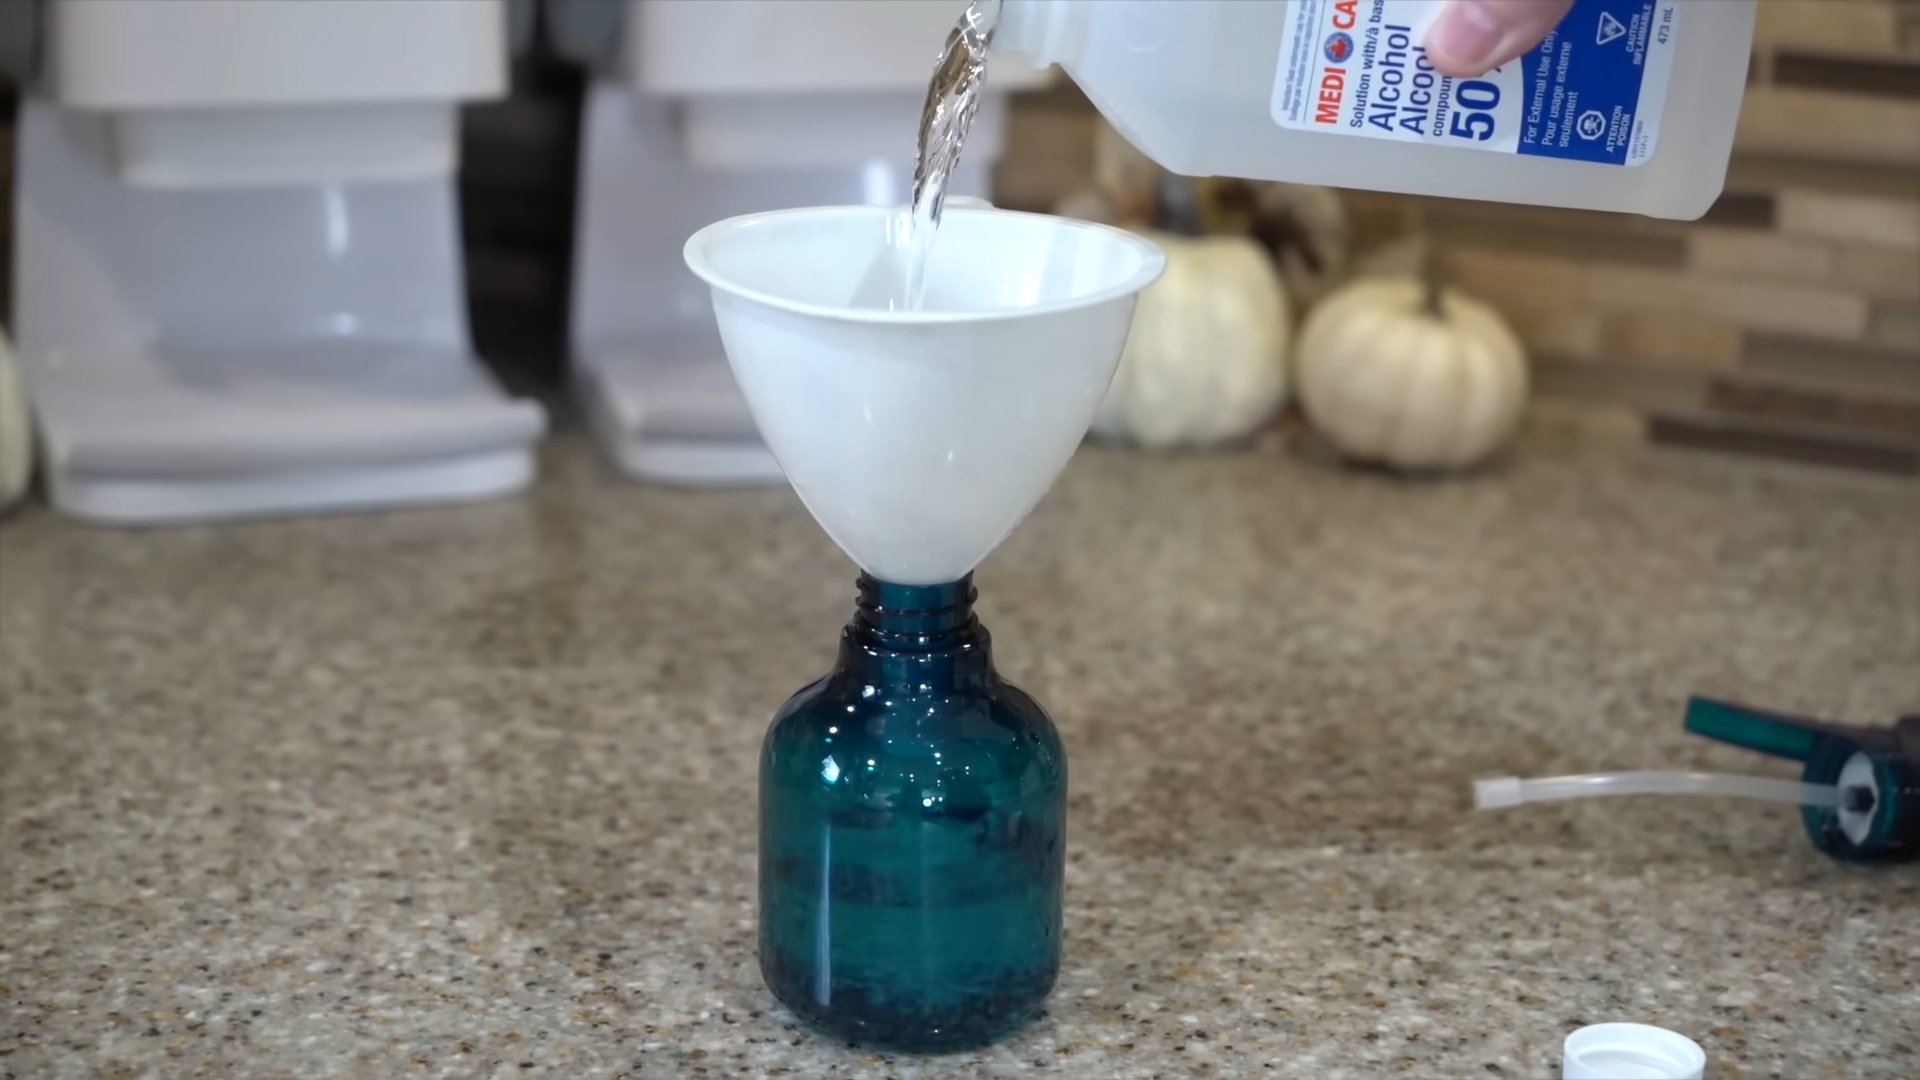
Making Your Own All-Purpose Cleaner
Why buy expensive all-purpose cleaners when you can make your own for pennies? This recipe is simple, effective, and smells great:
* Vinegar and Essential Oil Cleaner: A natural and versatile cleaner.
Step-by-Step Instructions:
1. In a spray bottle, combine equal parts white vinegar and water.
2. Add 10-20 drops of your favorite essential oil (lemon, lavender, tea tree, and eucalyptus are all great choices).
3. Shake well to combine.
4. Use this cleaner on countertops, sinks, floors, and other surfaces. Avoid using it on marble or granite, as the vinegar can damage these surfaces.
Cleaning Burnt Food from Pots and Pans
Burnt food stuck to the bottom of your pots and pans? Don’t despair! Here’s how to rescue them:
* Baking Soda Soak: A gentle and effective way to loosen burnt food.
Step-by-Step Instructions:
1. Fill the pot or pan with water.
2. Add 2-3 tablespoons of baking soda.
3. Bring the mixture to a boil.
4. Let it simmer for 10-15 minutes.
5. Remove from heat and let it cool.
6. Scrub the pot or pan with a non-abrasive sponge or scrub brush. The burnt food should come off easily.
Removing Hard Water Stains
Hard water stains can be unsightly and difficult to remove. But here’s a simple solution:
* Vinegar Power: Vinegar dissolves hard water stains like magic.
Step-by-Step Instructions:
1. Soak a cloth or paper towel in white vinegar.
2. Place the cloth or paper towel over the hard water stain.
3. Let it sit for 30-60 minutes.
4. Remove the cloth or paper towel and scrub the stain with a non-abrasive sponge or scrub brush.
Conclusion
So there you have it! This simple yet incredibly effective cleaning hack is a game-changer for anyone looking to streamline their cleaning routine and achieve sparkling results without breaking the bank or relying on harsh chemicals. We’ve shown you how to transform readily available household items into powerful cleaning agents, saving you time, money, and effort.
The beauty of this DIY approach lies not only in its cost-effectiveness but also in its adaptability. Feel free to experiment with different essential oils to customize the scent of your cleaning solution. Lavender, lemon, tea tree, and eucalyptus are all excellent choices, each offering unique aromatherapy benefits alongside their cleaning properties. For tougher stains or grime, consider adding a tablespoon of borax to your mixture for an extra boost of cleaning power. Remember to always test any new cleaning solution on an inconspicuous area first to ensure it doesn’t damage the surface.
Beyond the specific recipe we’ve outlined, the core principle here is about embracing a more mindful and resourceful approach to cleaning. It’s about recognizing the potential of everyday ingredients and empowering yourself to create solutions that are both effective and environmentally friendly. This is more than just a cleaning trick; it’s a shift in perspective.
We firmly believe that this **effective cleaning hack** will revolutionize your cleaning routine. Imagine spending less time scrubbing and more time enjoying your sparkling clean home. Think of the money you’ll save by ditching expensive commercial cleaners. And consider the peace of mind knowing that you’re using safer, more natural products in your home.
But don’t just take our word for it. We urge you to try this DIY cleaning hack for yourself. Gather your ingredients, follow the simple steps, and witness the amazing results firsthand. We’re confident that you’ll be amazed by how easy and effective it is.
Once you’ve experienced the magic of this cleaning hack, we encourage you to share your experience with us and the wider community. Let us know what variations you tried, what surfaces you cleaned, and what results you achieved. Your feedback is invaluable and will help us refine and improve this cleaning hack even further. Share your tips, tricks, and before-and-after photos on social media using [Your Hashtag Here]. Let’s inspire others to embrace a more sustainable and effective approach to cleaning!
We’re excited to hear your success stories and learn from your experiences. Together, we can create a cleaner, healthier, and more sustainable world, one DIY cleaning hack at a time. So go ahead, give it a try, and discover the joy of effortless cleaning!
Frequently Asked Questions (FAQ)
Q: What makes this cleaning hack so effective?
A: The effectiveness of this cleaning hack stems from the synergistic combination of its ingredients. For example, vinegar is a natural disinfectant and degreaser, while baking soda acts as a mild abrasive and deodorizer. When combined, they create a powerful cleaning solution that can tackle a wide range of household messes. The addition of essential oils not only provides a pleasant scent but also contributes to the cleaning power, as many essential oils possess antibacterial and antifungal properties. The beauty of this **effective cleaning hack** is that it harnesses the natural cleaning abilities of these ingredients, making it a safe and potent alternative to harsh chemical cleaners.
Q: Can I use this cleaning hack on all surfaces?
A: While this cleaning hack is generally safe for most surfaces, it’s always a good idea to test it on an inconspicuous area first, especially on delicate or sensitive materials. Avoid using vinegar-based solutions on natural stone surfaces like marble or granite, as the acidity can etch and damage them. Similarly, be cautious when using abrasive ingredients like baking soda on polished surfaces, as it may cause scratches. For wood surfaces, use a diluted solution and wipe dry immediately to prevent water damage. When in doubt, consult the manufacturer’s instructions for the specific surface you’re cleaning.
Q: What are some good essential oil alternatives for cleaning?
A: There are many essential oils that are well-suited for cleaning, each offering unique benefits. Lemon essential oil is a powerful degreaser and has a refreshing scent. Tea tree oil is a potent antibacterial and antifungal agent, making it ideal for disinfecting surfaces. Lavender essential oil has calming properties and can help create a relaxing atmosphere while you clean. Eucalyptus essential oil is known for its antiseptic and antiviral properties and can help clear congestion. Experiment with different essential oils to find your favorite combination and enjoy the added aromatherapy benefits.
Q: How long will the cleaning solution last?
A: The shelf life of your DIY cleaning solution will depend on the ingredients you use. Generally, vinegar-based solutions can last for several months, while solutions containing fresh ingredients like lemon juice may have a shorter shelf life. To prolong the shelf life of your cleaning solution, store it in an airtight container in a cool, dark place. It’s also a good idea to label the container with the date you made the solution. If you notice any changes in color, odor, or consistency, it’s best to discard the solution and make a fresh batch.
Q: Can I use this cleaning hack to clean my bathroom?
A: Absolutely! This cleaning hack is particularly effective for cleaning bathrooms. The vinegar helps to dissolve soap scum and hard water stains, while the baking soda acts as a mild abrasive to scrub away grime. The essential oils can help to disinfect and deodorize the bathroom, leaving it smelling fresh and clean. Use the solution to clean your shower, toilet, sink, and countertops. For stubborn stains, let the solution sit for a few minutes before scrubbing.
Q: Is this cleaning hack safe for pets and children?
A: While this cleaning hack is generally safer than commercial cleaners, it’s still important to take precautions when using it around pets and children. Keep the cleaning solution out of reach of children and pets. Avoid spraying the solution directly on pets or in areas where they frequently spend time. If your pet accidentally ingests the solution, contact your veterinarian immediately. When cleaning surfaces that pets and children come into contact with, rinse thoroughly with water after cleaning.
Q: What if I don’t have all the ingredients listed in the recipe?
A: The beauty of DIY cleaning is that you can often substitute ingredients based on what you have on hand. For example, if you don’t have white vinegar, you can use apple cider vinegar instead. If you don’t have baking soda, you can use washing soda. If you don’t have essential oils, you can simply omit them or use a different natural fragrance like lemon peels or orange peels. The key is to experiment and find what works best for you.
Q: How can I make this cleaning hack even more eco-friendly?
A: There are several ways to make this cleaning hack even more eco-friendly. Use recycled or repurposed containers to store your cleaning solution. Choose essential oils that are sustainably sourced and ethically produced. Consider using reusable cleaning cloths instead of paper towels. Dispose of any leftover cleaning solution responsibly. By making small changes to your cleaning routine, you can significantly reduce your environmental impact.
Leave a Comment