

Continuous White Radish Growing: Imagine harvesting crisp, peppery radishes from your garden all season long! No more waiting for that fleeting spring window – with a few clever tricks, you can enjoy a continuous supply of these delightful root vegetables. For centuries, radishes have been a staple in gardens worldwide, prized for their quick growth and vibrant flavor. From ancient Egypt, where they were a common offering to the gods, to modern-day salads, radishes have earned their place at the table.
But let’s face it, getting a consistent radish crop can be tricky. One week you’re swimming in them, the next… nothing! That’s where these DIY tricks come in. I’m going to share my secrets to ensure you always have fresh, crunchy radishes ready to harvest. Whether you’re a seasoned gardener or just starting out, these simple hacks will transform your radish-growing game.
Why do you need this? Because store-bought radishes simply can’t compare to the taste of freshly picked ones. Plus, knowing you grew them yourself is incredibly rewarding. So, let’s dive into the world of continuous white radish growing and unlock the secrets to a never-ending radish harvest!
Growing Radishes Continuously: A DIY Guide to a Never-Ending Harvest
Hey there, fellow gardening enthusiasts! Are you tired of that radish-induced feast-or-famine cycle? Do you dream of having crisp, peppery radishes available whenever your heart (or salad) desires? Well, dream no more! I’m going to walk you through a simple, yet effective, DIY method for growing radishes continuously. Get ready for a never-ending radish party!
Why Continuous Radish Growing?
Let’s be honest, radishes are quick growers. That’s fantastic, but it also means they’re quick to bolt (go to seed) in hot weather, and you end up with woody, unpleasant roots. Continuous sowing solves this problem by ensuring you always have young, tender radishes ready to harvest. Plus, it’s super satisfying!
What You’ll Need
Before we dive in, let’s gather our supplies. This is a pretty low-key project, so you probably have most of this stuff already.
* Radish Seeds: Choose varieties that mature at different rates for a more diverse harvest. I like ‘Cherry Belle’ for its classic flavor and quick growth, and ‘French Breakfast’ for its milder taste and elongated shape.
* Good Quality Soil: Radishes aren’t too picky, but well-draining soil is key. Amend your garden soil with compost or aged manure for best results.
* Gardening Tools: A trowel, hand rake, and watering can are all you’ll need.
* Row Covers (Optional): These can protect your radishes from pests and extreme weather.
* Labels and a Marker: To keep track of your sowing dates and radish varieties.
* A Sunny Spot: Radishes need at least 6 hours of sunlight per day.
Getting Started: Preparing Your Planting Area
Okay, let’s get our hands dirty! The first step is preparing the area where you’ll be planting your radishes.
1. Choose Your Location: Select a spot in your garden that gets plenty of sunlight. Radishes can tolerate some shade, especially in hotter climates, but they thrive in full sun.
2. Clear the Area: Remove any weeds, rocks, or debris from the planting area. Radishes need loose soil to develop properly.
3. Amend the Soil: This is crucial! Radishes prefer well-draining soil that’s rich in organic matter. Dig in compost, aged manure, or other organic amendments to improve the soil’s texture and fertility. I usually add a generous layer of compost, about 2-3 inches thick, and work it into the top 6-8 inches of soil.
4. Rake the Soil: Use a hand rake to smooth out the soil surface and create a level planting bed. This will make it easier to sow your seeds evenly.
5. Water the Soil: Before planting, give the soil a good watering. This will help the seeds germinate and get off to a good start.
The Secret: Staggered Planting
This is the heart of the continuous growing method. We’re going to sow small batches of radish seeds every week or two. This ensures that you’ll have a steady supply of radishes maturing over time.
1. Divide Your Planting Area: Mentally (or physically) divide your planting area into sections. You can use rows, raised beds, or even containers. The key is to have distinct areas for each sowing.
2. Sow Your First Batch: Using your trowel, create shallow furrows in the soil, about 1/2 inch deep and 1 inch apart. Sprinkle the radish seeds evenly into the furrows. Don’t overcrowd them! Overcrowding leads to smaller radishes.
3. Cover the Seeds: Gently cover the seeds with soil and lightly pat it down.
4. Water Gently: Use a watering can with a gentle rose to water the newly sown seeds. Avoid blasting them with a strong stream of water, which can dislodge them.
5. Label Your Sowing: This is important! Label the area with the date you sowed the seeds and the variety of radish you planted. This will help you keep track of your planting schedule.
6. Repeat Every 1-2 Weeks: Every week or two, repeat steps 2-5 in a new section of your planting area. This is the key to continuous radish production!
Caring for Your Radishes
Once your radishes are planted, it’s important to provide them with the care they need to thrive.
1. Water Regularly: Radishes need consistent moisture to grow quickly and develop crisp roots. Water them regularly, especially during dry spells. Aim for about 1 inch of water per week.
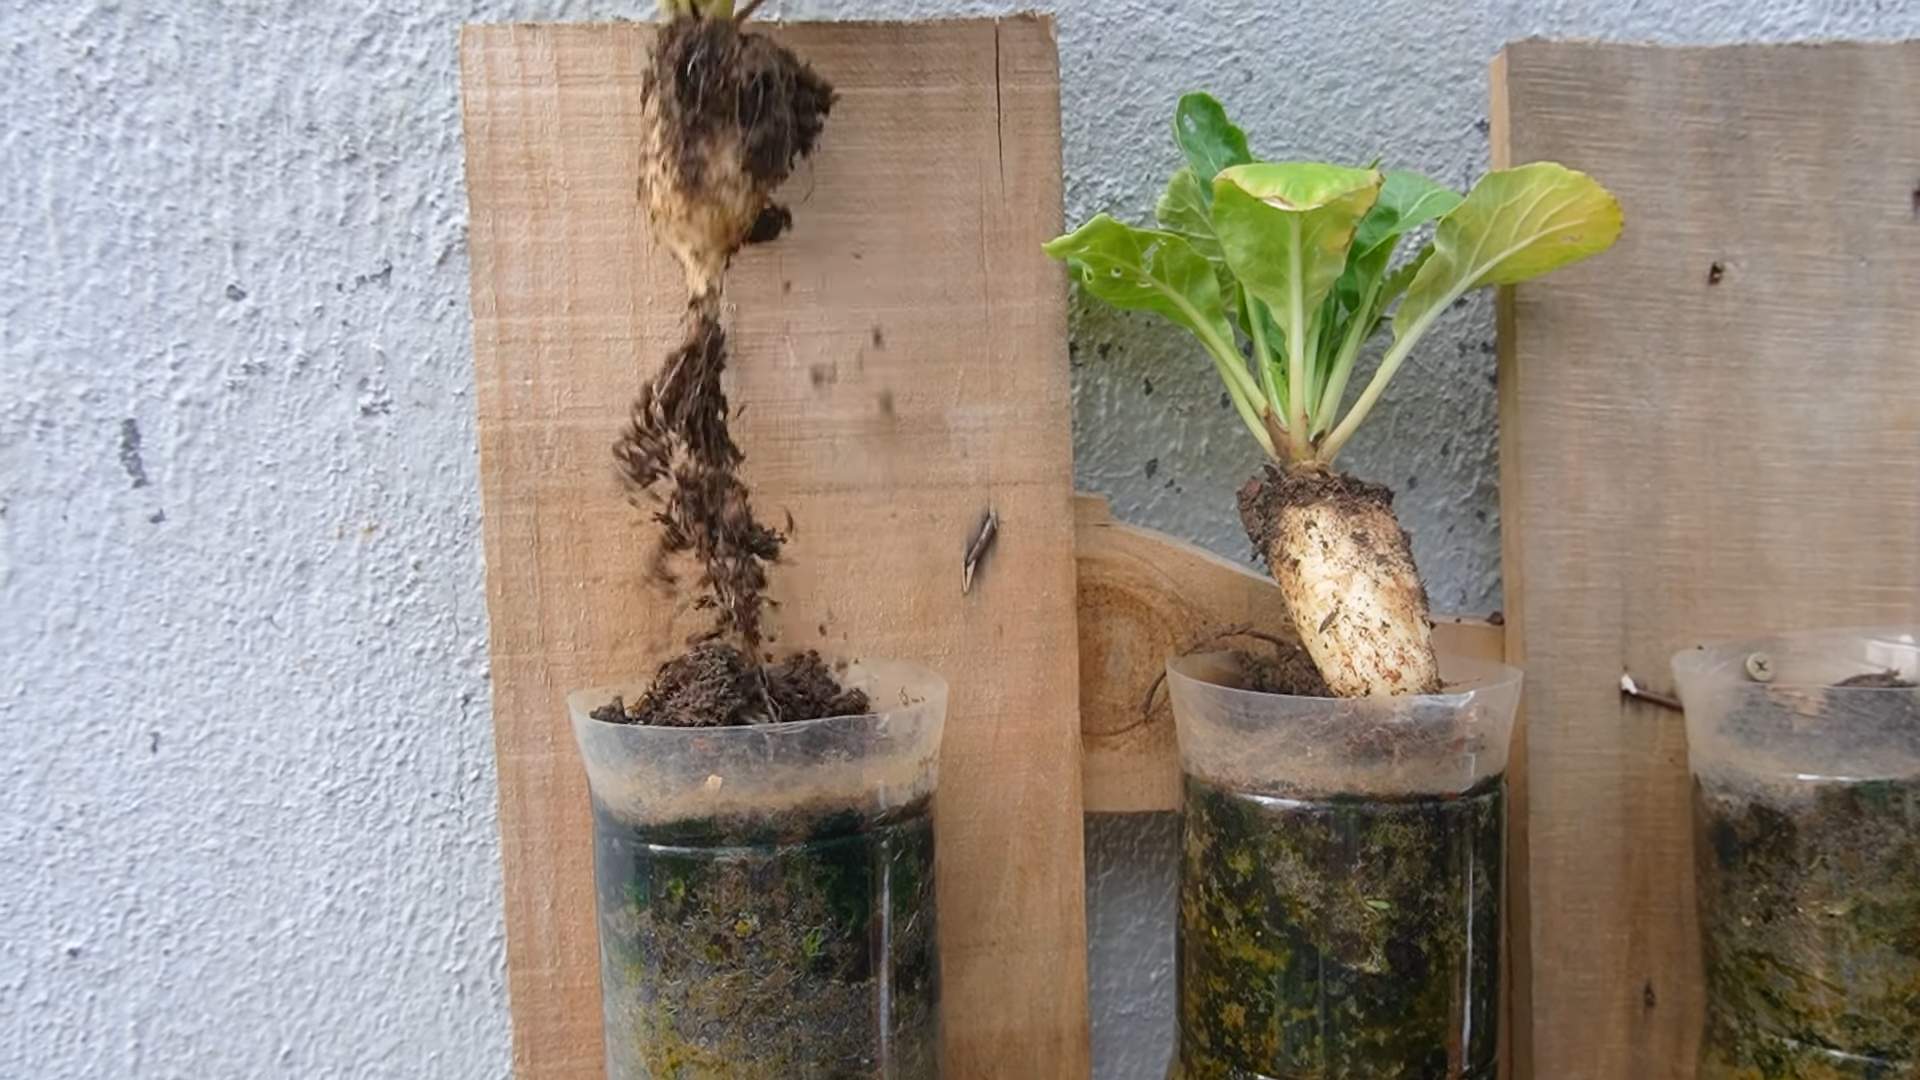
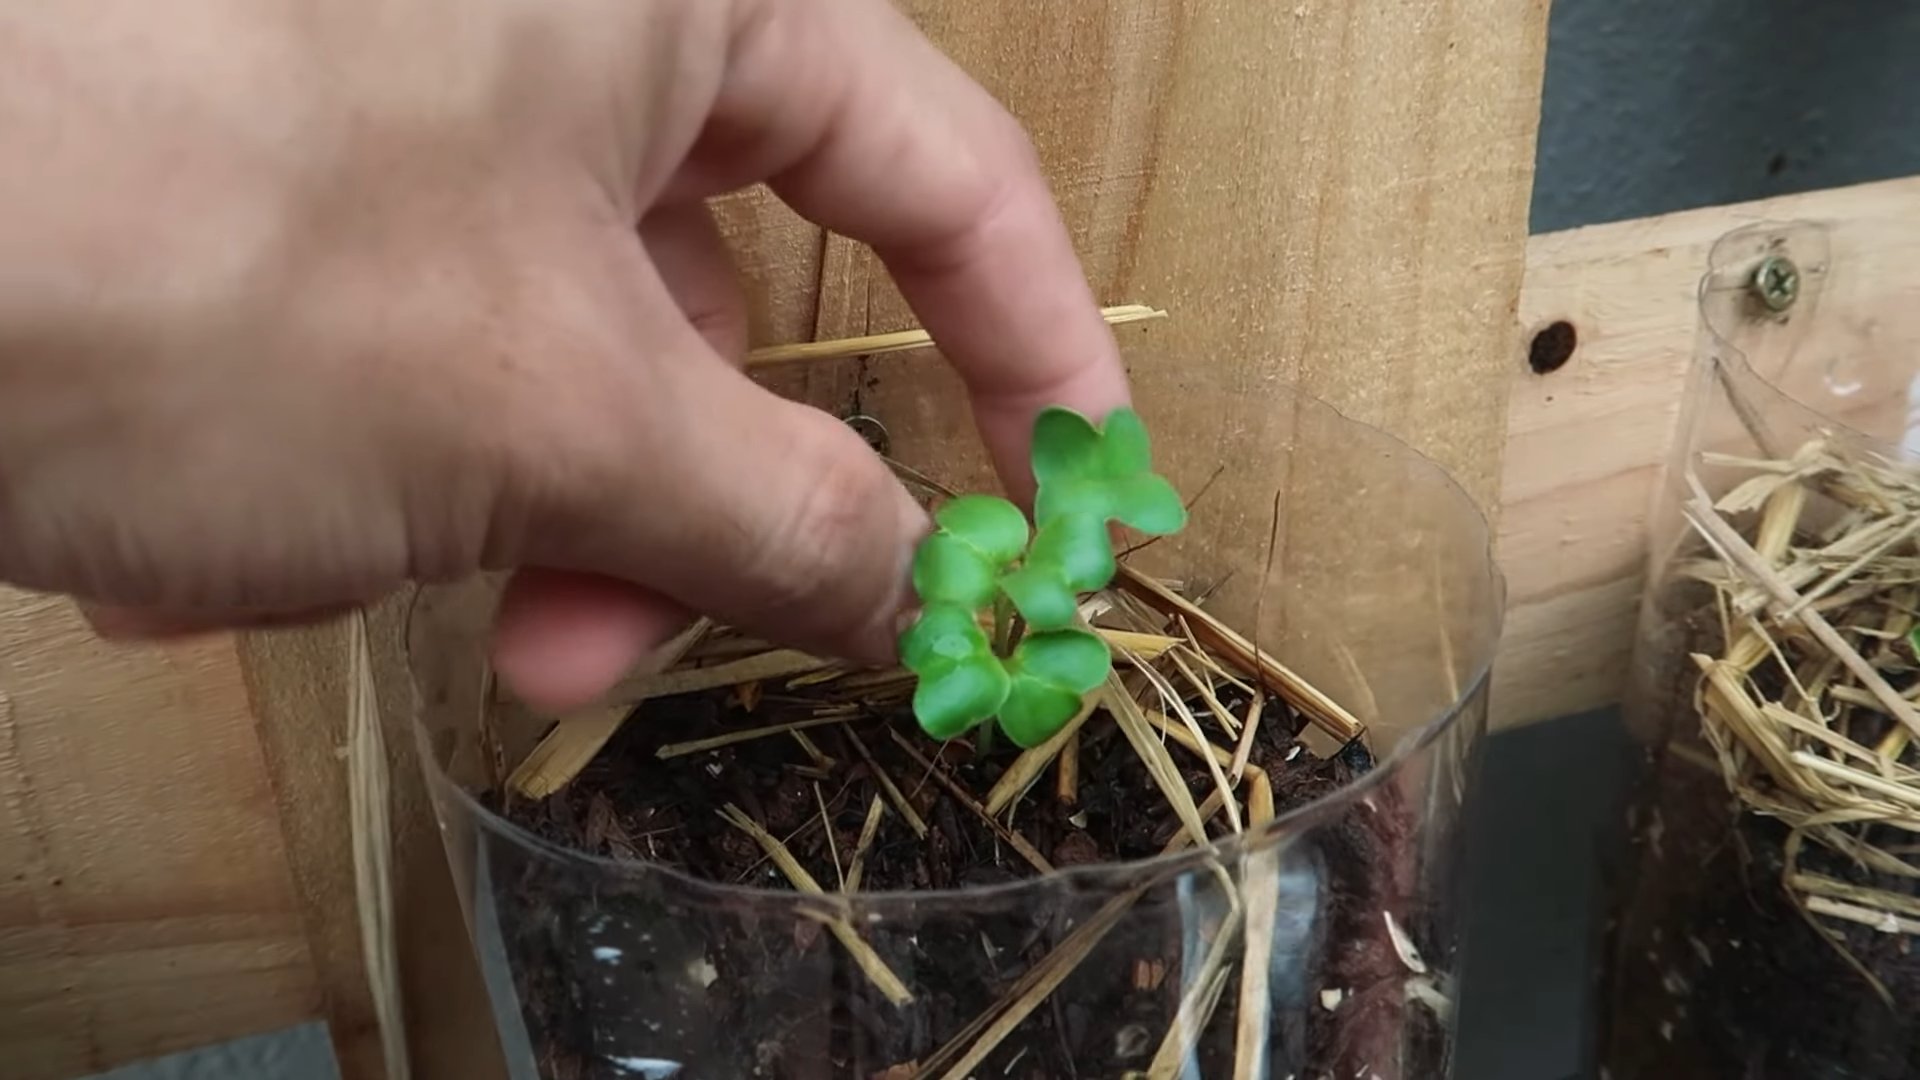
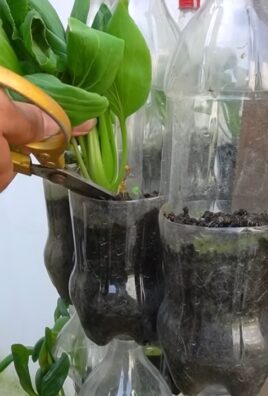
2. Thin Seedlings: Once your radish seedlings emerge, thin them out to about 1 inch apart. This will give them enough space to grow and prevent overcrowding. Use small scissors to snip the seedlings at the soil line. Don’t pull them out, as this can disturb the roots of the remaining plants.
3. Weed Regularly: Keep your radish bed free of weeds, which can compete with the radishes for nutrients and water. Hand-pull weeds carefully to avoid disturbing the radish roots.
4. Fertilize (Optional): Radishes don’t need a lot of fertilizer, but a light feeding of a balanced fertilizer can help them grow faster. I like to use a liquid seaweed fertilizer diluted according to the package directions.
5. Protect from Pests: Radishes can be susceptible to pests like flea beetles and root maggots. Row covers can help protect your plants from these pests. You can also use organic pest control methods, such as diatomaceous earth or insecticidal soap.
Harvesting Your Radishes
The best part! Radishes are usually ready to harvest in about 3-4 weeks, depending on the variety.
1. Check for Maturity: Radishes are ready to harvest when their roots are about 1 inch in diameter. You can gently brush away the soil around the base of the plant to check the size of the root.
2. Harvest Carefully: Gently pull the radishes from the soil, being careful not to damage the roots. If the soil is dry, you may need to loosen it with a trowel first.
3. Wash and Store: Wash the radishes thoroughly to remove any soil. Trim off the tops and roots. Store the radishes in a plastic bag in the refrigerator. They should keep for about a week.
4. Enjoy! Eat your radishes raw in salads, sandwiches, or as a snack. You can also cook them in stir-fries or soups. The radish greens are also edible and can be used in salads or cooked like spinach.
Troubleshooting
Even with the best planning, things can sometimes go wrong. Here are a few common radish-growing problems and how to solve them:
* Radishes are Bolting (Going to Seed): This is usually caused by hot weather or inconsistent watering. Make sure to water your radishes regularly and provide them with some shade during the hottest part of the day. Choose bolt-resistant varieties for summer planting.
* Radishes are Small and Woody: This can be caused by overcrowding, poor soil, or lack of water. Thin your seedlings to provide them with enough space to grow. Amend your soil with compost or aged manure to improve its fertility. Water your radishes regularly, especially during dry spells.
* Radishes are Cracked: This is usually caused by inconsistent watering. Water your radishes regularly and avoid letting the soil dry out completely.
* Pests are Attacking My Radishes: Use row covers to protect your plants from pests. You can also use organic pest control methods, such as diatomaceous earth or insecticidal soap.
Tips for Success
Here are a few extra tips to help you achieve radish-growing success:
* Choose the Right Varieties: Select radish varieties that are well-suited to your climate and growing conditions.
* Plant in Succession: Sow small batches of radish seeds every week or two to ensure a continuous harvest.
* Provide Consistent Moisture: Radishes need consistent moisture to grow quickly and develop crisp roots.
* Thin Seedlings: Thin your seedlings to provide them with enough space to grow.
* Protect from Pests: Use row covers or organic pest control methods to protect your plants from pests.
* Harvest Regularly: Harvest your radishes when they are about 1 inch in diameter.
* Don’t Forget the Greens! Radish greens are edible and nutritious. Use them in salads or cooked like spinach.
Experiment and Have Fun!
Gardening is all about experimentation. Don’t be afraid to try different radish varieties, planting techniques, and pest control methods. The more you experiment, the more you’ll learn and the better you’ll become at growing radishes. And most importantly, have fun! Growing your own food is a rewarding experience, and it’s a great way to
Conclusion
So, there you have it! Growing continuous white radish isn’t just a gardening project; it’s a gateway to a constant supply of fresh, crisp, and peppery goodness right at your fingertips. We’ve walked through the steps, from selecting the right varieties to mastering succession planting, and addressed the common challenges you might encounter along the way. But why is this DIY trick a must-try?
Simply put, it’s about maximizing your garden’s potential and enjoying the unparalleled flavor of homegrown produce. Store-bought radishes, while convenient, often lack the vibrancy and freshness of those plucked straight from your own soil. Plus, by implementing succession planting, you’re ensuring a steady harvest throughout the growing season, eliminating the feast-or-famine cycle that can plague many gardens.
Beyond the practical benefits, there’s a certain satisfaction that comes from nurturing your own food. Watching those tiny seeds sprout and transform into plump, juicy radishes is a rewarding experience that connects you to the natural world. And let’s not forget the cost savings! Over time, growing your own radishes can significantly reduce your grocery bill, freeing up your budget for other gardening adventures.
Now, let’s talk about variations. While we’ve focused on white radishes, the principles of continuous growing can be applied to other radish varieties as well. Experiment with different colors, shapes, and flavors to create a diverse and exciting radish patch. Consider adding companion plants like carrots or lettuce to your radish beds to further enhance your garden’s ecosystem. You can also try growing radishes in containers if you have limited space. A sunny balcony or patio can be transformed into a mini-radish farm with just a few pots and some well-draining soil.
Don’t be afraid to get creative! Try pickling your radishes for a tangy treat, adding them to salads for a peppery kick, or even roasting them for a surprisingly sweet and savory side dish. The possibilities are endless!
We understand that gardening can sometimes feel daunting, especially for beginners. But trust us, growing continuous white radish is a relatively simple and forgiving process. With a little bit of planning and effort, you can enjoy a bountiful harvest of delicious radishes all season long.
So, what are you waiting for? Grab some seeds, prepare your soil, and get ready to embark on your own radish-growing adventure. We’re confident that you’ll be amazed by the results. And most importantly, don’t forget to share your experience with us! We’d love to hear about your successes, challenges, and favorite radish recipes. Share your photos and stories on our social media channels using #ContinuousRadishGrowing. Let’s build a community of radish enthusiasts and inspire others to discover the joys of homegrown produce. Happy gardening!
Frequently Asked Questions (FAQ)
What exactly is “continuous growing” and why is it important for radishes?
Continuous growing, also known as succession planting, is the practice of planting small batches of a crop at regular intervals, rather than planting everything all at once. This ensures a steady supply of produce over an extended period. For radishes, which mature quickly (often in just 3-4 weeks), continuous growing is crucial to avoid a glut of radishes followed by a long period of nothing. Without it, you’ll have a radish feast for a week or two, then no radishes for the rest of the season. Continuous growing allows you to enjoy fresh radishes throughout the spring, summer, and fall (depending on your climate).
How often should I plant new radish seeds for continuous growing?
The ideal planting interval depends on the specific radish variety and your local climate. However, a good rule of thumb is to plant a new batch of seeds every 1-2 weeks. This will ensure a continuous harvest as the earlier plantings mature. Keep detailed records of your planting dates and harvest times to fine-tune your planting schedule for optimal results in your garden. Remember to adjust your planting schedule based on weather conditions; hotter weather may speed up maturity, while cooler weather may slow it down.
What are the best white radish varieties for continuous growing?
Several white radish varieties are well-suited for continuous growing. ‘White Icicle’ is a popular choice due to its crisp texture and mild flavor. ‘French Breakfast’ (though technically bi-color, it’s mostly white) is another excellent option, known for its quick maturity and delicate taste. ‘Snow Belle’ is a round, white radish that is also a good choice. Experiment with different varieties to find the ones that you enjoy the most and that thrive in your specific growing conditions. Consider factors like disease resistance, bolt resistance (resistance to premature flowering), and flavor when making your selection.
What kind of soil is best for growing radishes?
Radishes prefer loose, well-drained soil that is rich in organic matter. Heavy clay soil can hinder root development and result in misshapen or stunted radishes. Amend heavy soil with compost, aged manure, or other organic materials to improve drainage and aeration. A slightly acidic to neutral soil pH (around 6.0 to 7.0) is ideal. Before planting, work the soil to a depth of at least 6 inches to ensure that the radish roots have plenty of room to grow. Avoid using fertilizers that are high in nitrogen, as this can promote leafy growth at the expense of root development.
How much sunlight do radishes need?
Radishes need at least 6 hours of sunlight per day to thrive. However, they can tolerate partial shade, especially in hot climates. In areas with intense summer heat, providing some afternoon shade can help prevent the radishes from bolting (going to seed prematurely). If you’re growing radishes indoors, use grow lights to supplement natural sunlight and ensure adequate light exposure.
How much water do radishes need?
Radishes need consistent moisture to grow quickly and develop crisp, flavorful roots. Water deeply and regularly, especially during dry periods. Avoid overwatering, as this can lead to root rot. A good rule of thumb is to water when the top inch of soil feels dry to the touch. Mulching around the plants can help retain moisture and suppress weeds.
What are some common pests and diseases that affect radishes, and how can I control them?
Common pests that affect radishes include flea beetles, root maggots, and aphids. Flea beetles can be controlled with row covers or by spraying with insecticidal soap. Root maggots can be prevented by using floating row covers and practicing crop rotation. Aphids can be controlled with a strong spray of water or by introducing beneficial insects like ladybugs. Diseases that can affect radishes include damping-off and white rust. Damping-off can be prevented by using well-drained soil and avoiding overwatering. White rust can be controlled by removing and destroying infected plants.
My radishes are all leaves and no root. What am I doing wrong?
Several factors can contribute to radishes producing excessive foliage and small or non-existent roots. These include:
* **Too much nitrogen:** Excessive nitrogen in the soil promotes leafy growth at the expense of root development. Avoid using fertilizers that are high in nitrogen.
* **Overcrowding:** Radishes need adequate space to develop properly. Thin seedlings to the recommended spacing (usually 1-2 inches apart).
* **Insufficient sunlight:** Radishes need at least 6 hours of sunlight per day to thrive.
* **High temperatures:** Hot weather can cause radishes to bolt (go to seed prematurely), which can inhibit root development.
* **Poor soil:** Heavy, compacted soil can restrict root growth. Amend the soil with compost or other organic matter to improve drainage and aeration.
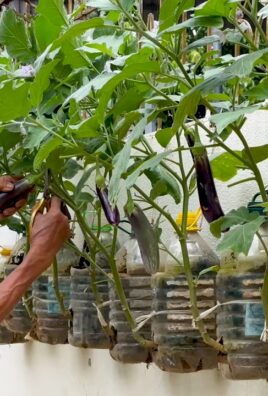
Can I grow radishes in containers?
Yes, radishes are well-suited for container gardening. Choose a container that is at least 6 inches deep and has drainage holes. Use a well-draining potting mix and provide adequate sunlight and water. Container-grown radishes may need more frequent watering than those grown in the ground.
How do I know when my radishes are ready to harvest?
Radishes are typically ready to harvest 3-4 weeks after planting, depending on the variety. Check the seed packet for specific maturity dates. The roots should be firm and plump, and the tops should be about 4-6 inches tall. Gently pull up a few radishes to check their size and maturity. If they are the desired size, harvest the rest. Don’t leave radishes in the ground for too long, as they can become woody and bitter.
Leave a Comment