

Grow Water Spinach at Home: Imagine stepping into your backyard and harvesting fresh, vibrant greens for your dinner, all thanks to your own green thumb! It’s not just a dream; it’s an achievable reality with a little know-how. For centuries, water spinach, also known as Ong Choy or Kang Kong, has been a staple in Asian cuisine, prized for its delicious flavor and nutritional benefits. From stir-fries to soups, this versatile vegetable adds a delightful crunch and earthy taste to any dish.
But why rely on grocery stores when you can easily grow water spinach at home? In today’s world, where we’re increasingly conscious of where our food comes from and the impact of our choices, cultivating your own produce is more relevant than ever. Plus, let’s be honest, there’s something incredibly satisfying about nurturing a plant from seed to table. This DIY guide will walk you through simple, effective tricks and hacks to successfully cultivate water spinach, even if you’re a complete beginner.
I’m going to share my secrets to ensure you have a thriving water spinach patch, providing you with a constant supply of fresh, organic greens. Say goodbye to wilted, overpriced vegetables from the store and hello to a bountiful harvest right in your backyard! Let’s get started!
Grow Your Own Delicious Water Spinach (Ong Choy) at Home!
Hey there, fellow gardening enthusiasts! I’m so excited to share my experience with growing water spinach, also known as Ong Choy, right in my own backyard. It’s surprisingly easy, incredibly rewarding, and you’ll have a constant supply of fresh, leafy greens for your stir-fries, soups, and salads. Trust me, once you taste homegrown water spinach, you’ll never want to buy it from the store again!
This guide will walk you through everything you need to know, from choosing the right container to harvesting your bountiful crop. Let’s get started!
What You’ll Need
Before we dive into the nitty-gritty, let’s gather all the necessary supplies. Here’s a checklist to make things easier:
* Water Spinach Seeds or Cuttings: You can find seeds online or at your local garden center. Cuttings from mature plants also work great!
* A Large Container or Tub: Choose a container that’s at least 12 inches deep and wide. The bigger, the better!
* Potting Soil: A good quality potting mix is essential for healthy growth.
* Water: Obviously! You’ll need a consistent supply of water to keep your water spinach happy.
* Fertilizer (Optional): A balanced liquid fertilizer can boost growth, but it’s not strictly necessary.
* Sunlight: Water spinach loves sunshine, so choose a location that gets at least 6 hours of direct sunlight per day.
* Gardening Gloves: To keep your hands clean and protected.
* Watering Can or Hose: For easy watering.
Getting Started: Planting Your Water Spinach
Okay, now that we have everything we need, let’s get our hands dirty! This section covers the initial planting process, whether you’re starting from seeds or cuttings.
From Seeds:
1. Soaking the Seeds: To improve germination, I like to soak the water spinach seeds in warm water for 12-24 hours before planting. This helps soften the seed coat and encourages sprouting.
2. Preparing the Container: Fill your container with potting soil, leaving about an inch or two of space at the top. Gently pat down the soil to create a firm surface.
3. Sowing the Seeds: Sprinkle the soaked seeds evenly over the surface of the soil. You don’t need to bury them too deep; just lightly press them into the soil.
4. Covering the Seeds: Sprinkle a thin layer of potting soil over the seeds, just enough to cover them.
5. Watering: Gently water the soil until it’s thoroughly moist. Be careful not to dislodge the seeds.
6. Finding the Right Spot: Place the container in a sunny location that receives at least 6 hours of direct sunlight per day.
7. Keeping it Moist: Keep the soil consistently moist, but not waterlogged. Water daily, or more often if the weather is hot and dry.
8. Waiting for Germination: Be patient! Water spinach seeds typically germinate within 7-14 days.
From Cuttings:
1. Selecting Cuttings: Choose healthy, mature stems from an existing water spinach plant. The cuttings should be about 6-8 inches long.
2. Preparing the Cuttings: Remove the leaves from the bottom 2-3 inches of each cutting. This will encourage root development.
3. Rooting in Water (Optional): You can root the cuttings in a glass of water before planting them in soil. Simply place the cuttings in water, ensuring that the bottom portion is submerged. Change the water every 1-2 days. Roots should start to appear within a week or two.
4. Planting the Cuttings: Fill your container with potting soil, leaving about an inch or two of space at the top.
5. Creating Planting Holes: Use your finger or a small tool to create holes in the soil, spaced about 4-6 inches apart.
6. Inserting the Cuttings: Gently insert the cuttings into the holes, making sure that the bottom 2-3 inches are buried in the soil.
7. Watering: Water the soil thoroughly until it’s moist.
8. Finding the Right Spot: Place the container in a sunny location that receives at least 6 hours of direct sunlight per day.
9. Keeping it Moist: Keep the soil consistently moist, but not waterlogged. Water daily, or more often if the weather is hot and dry.
Caring for Your Water Spinach
Once your water spinach seedlings or cuttings are established, it’s time to focus on providing them with the care they need to thrive.
1. Watering: Water spinach loves water, so keep the soil consistently moist. I usually water mine every day, especially during hot weather. You can even submerge the bottom of the container in a tray of water to provide extra moisture.
2. Sunlight: Ensure your water spinach receives at least 6 hours of direct sunlight per day. If you live in a particularly hot climate, you may need to provide some afternoon shade to prevent the leaves from scorching.
3. Fertilizing (Optional): To boost growth, you can fertilize your water spinach every 2-3 weeks with a balanced liquid fertilizer. Follow the instructions on the fertilizer label.
4. Pest Control: Water spinach is generally pest-resistant, but occasionally aphids or spider mites may appear. If you notice any pests, you can spray them off with a strong stream of water or use an insecticidal soap.
5. Weeding: Keep the container free of weeds, as they can compete with your water spinach for nutrients and water.
Harvesting Your Water Spinach
The best part of growing your own water spinach is, of course, the harvest! You can start harvesting your water spinach about 4-6 weeks after planting.
1. When to Harvest: Harvest your water spinach when the stems are about 8-12 inches long.
2. How to Harvest: Use scissors or a sharp knife to cut the stems about 2-3 inches above the soil line. This will encourage new growth.
3. Continuous Harvesting: You can harvest your water spinach continuously throughout the growing season. Just keep cutting the stems back, and they will continue to produce new growth.
4. Enjoying Your Harvest: Water spinach is delicious in stir-fries, soups, salads, and even as a side dish. It has a mild, slightly sweet flavor and a crisp texture.
Troubleshooting
Even with the best care, you might encounter a few challenges along the way. Here are some common problems and how to address them:
* Yellowing Leaves: This could be a sign of overwatering, underwatering, or nutrient deficiency. Adjust your watering schedule and consider fertilizing your plants.
* Slow Growth: This could be due to insufficient sunlight, poor soil, or lack of fertilizer. Make sure your water spinach is getting enough sunlight, and consider amending the soil with compost or fertilizer.
* Pests: As mentioned earlier, aphids and spider mites can sometimes be a problem. Spray them off with water or use an insecticidal soap.
Tips for Success
Here are a few extra tips to help you grow the best water spinach possible:
* Choose the Right Variety: There are several varieties of water spinach available, so choose one that is well-suited to your climate.
* Provide Support: As your water spinach grows, it may need some support to prevent the stems from sprawling. You can use stakes or a trellis to provide support.
* Succession Planting: To ensure a continuous harvest, plant new seeds or cuttings every few weeks.
* Experiment: Don’t be afraid to experiment with different growing techniques to see what works best for you.
Growing water spinach at home is a fun and rewarding experience. With a little bit of care and attention, you can enjoy a constant supply of fresh, delicious greens right from your own backyard. So, what are you waiting for? Get planting! Happy gardening!
Conclusion
So, there you have it! Growing your own water spinach at home is not only surprisingly simple, but it’s also incredibly rewarding. Forget those wilted, overpriced bunches at the grocery store. Imagine stepping out to your own backyard or balcony and harvesting fresh, vibrant water spinach whenever you need it. The taste difference alone is a game-changer – the homegrown variety boasts a crispness and subtle sweetness that store-bought just can’t match.
This DIY trick is a must-try for several reasons. First, it’s incredibly cost-effective. A single packet of seeds can yield a continuous supply of water spinach for months, saving you money in the long run. Second, you have complete control over the growing process, ensuring that your water spinach is free from harmful pesticides and chemicals. Third, it’s a fantastic way to connect with nature and experience the satisfaction of growing your own food.
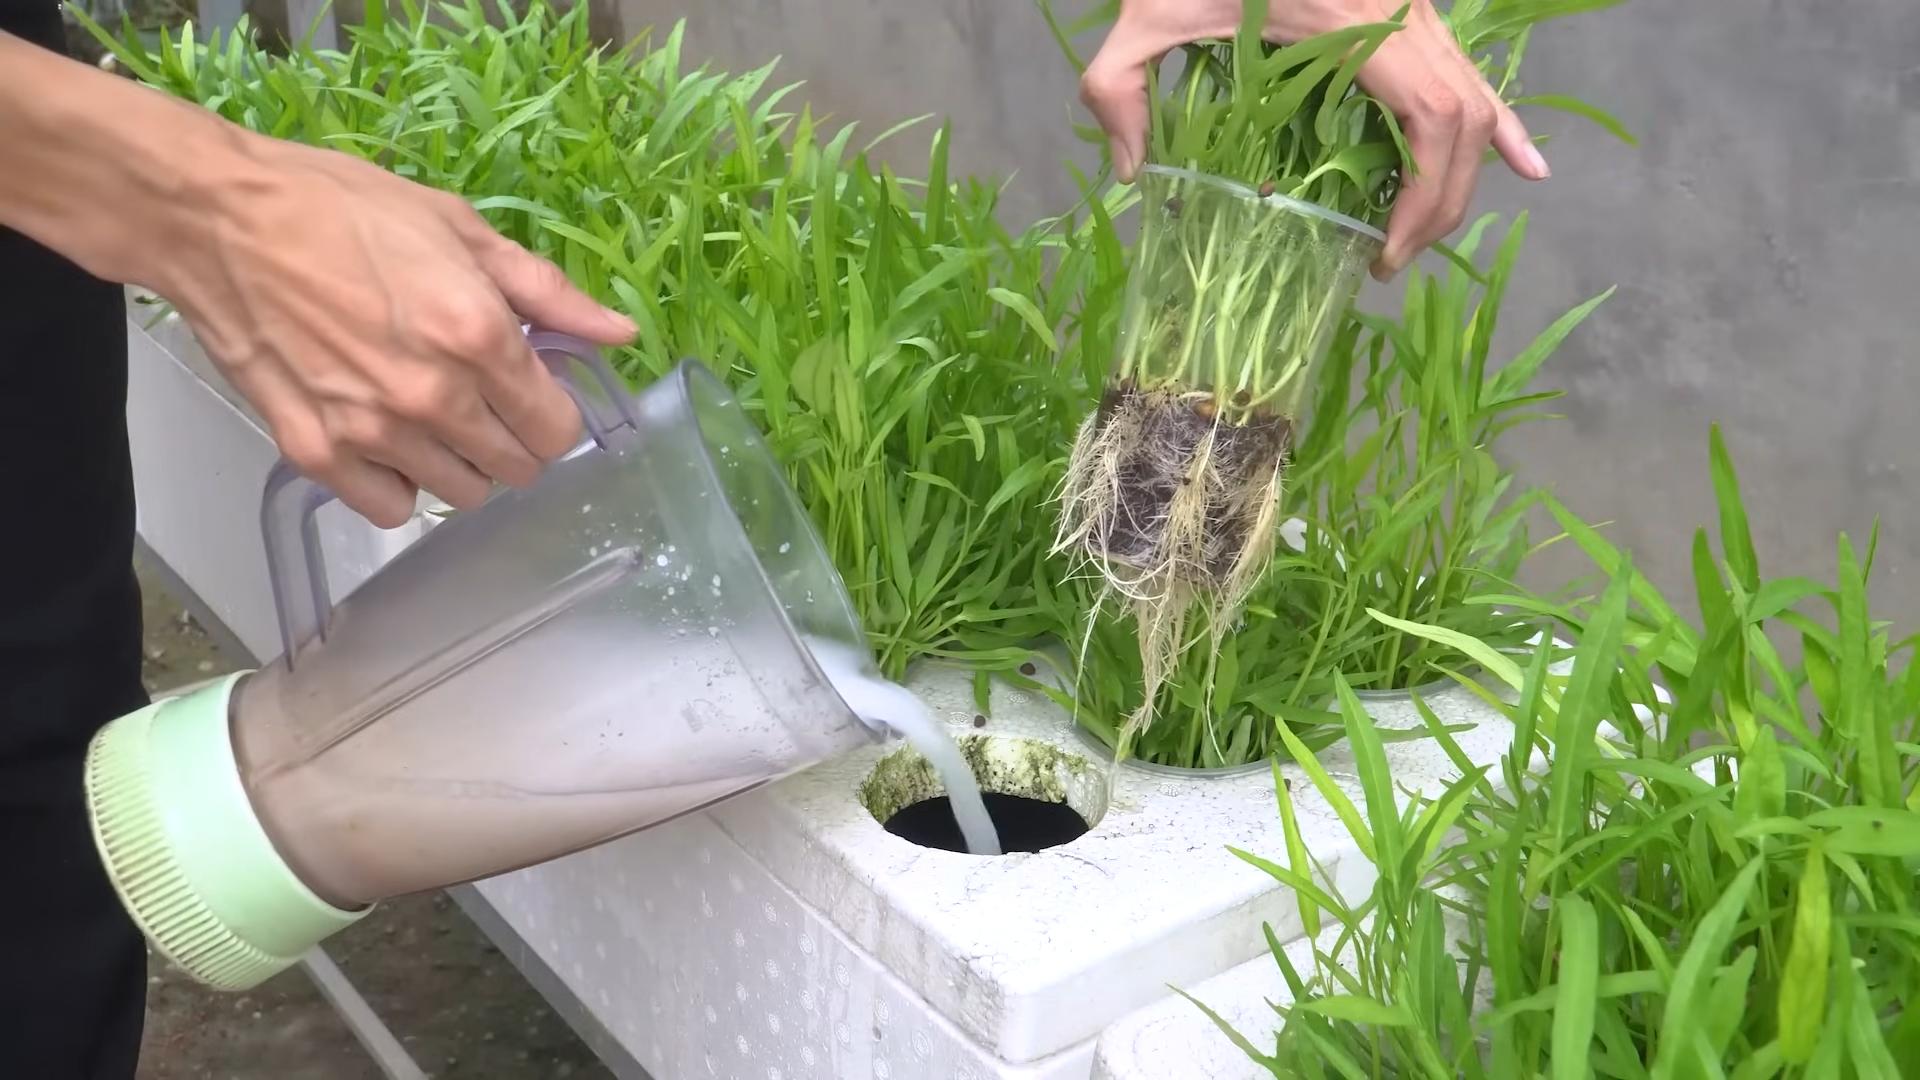
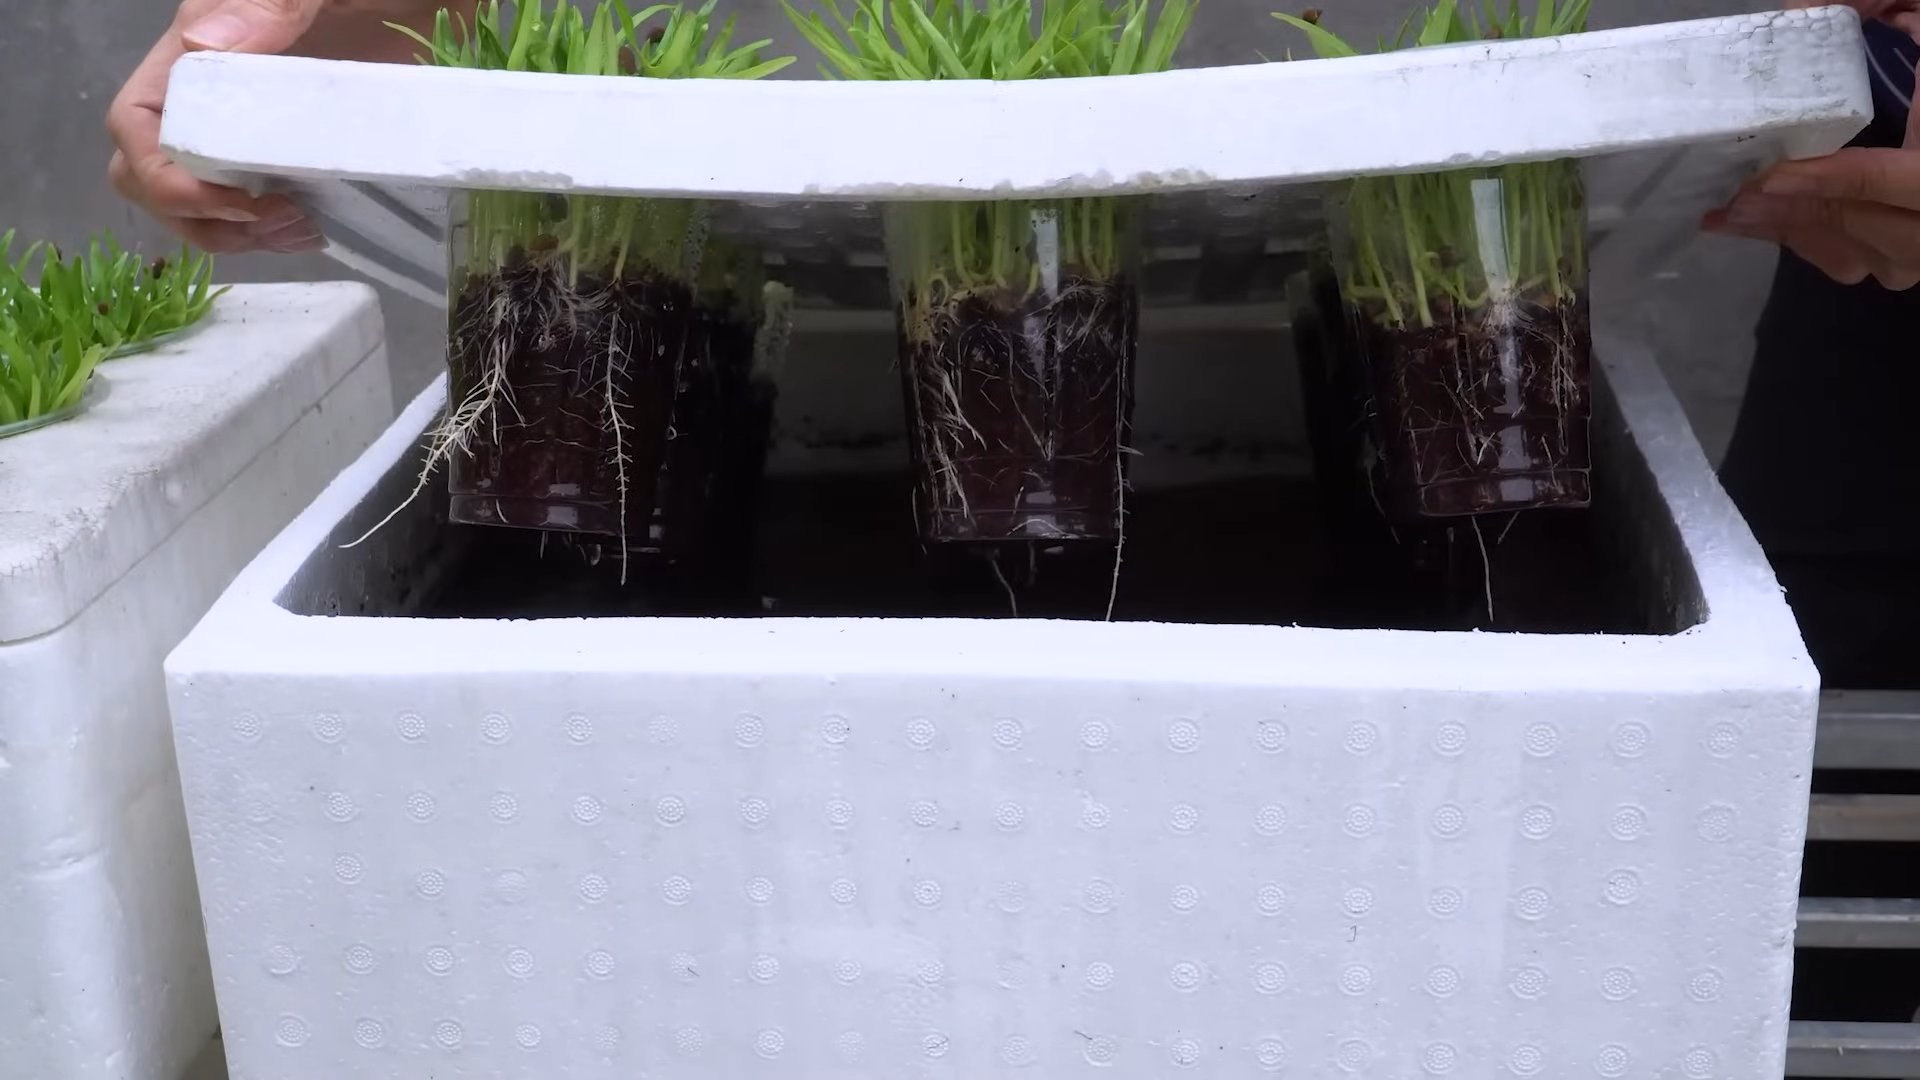
But the benefits don’t stop there. Growing water spinach is also a great way to add a touch of greenery to your living space. Whether you choose to grow it in a container on your balcony or in a dedicated hydroponic setup, it’s sure to brighten up your surroundings.
Looking for variations? Consider experimenting with different growing mediums. While soil works perfectly well, you can also try growing water spinach hydroponically for even faster growth. You can also adjust the nutrient solution to optimize growth and flavor. For example, adding a small amount of Epsom salts can help to boost magnesium levels, resulting in healthier, more vibrant leaves.
Another fun variation is to try growing different varieties of water spinach. Some varieties have thicker stems, while others have more delicate leaves. Experimenting with different varieties can help you find your favorite.
We’ve covered the basics, but don’t be afraid to get creative and adapt the process to suit your own needs and preferences. The most important thing is to give it a try and see for yourself just how easy and rewarding it can be.
We are confident that you will find this DIY trick to be a valuable addition to your gardening repertoire. It’s a simple, sustainable, and delicious way to enjoy fresh, healthy water spinach all year round.
So, what are you waiting for? Grab some seeds, find a sunny spot, and get growing! We encourage you to try this DIY trick for growing water spinach at home and share your experiences with us in the comments below. We’d love to hear about your successes, your challenges, and any tips or tricks that you’ve discovered along the way. Let’s build a community of water spinach enthusiasts and share the joy of homegrown goodness!
Frequently Asked Questions (FAQ)
What are the ideal growing conditions for water spinach?
Water spinach thrives in warm, humid environments with plenty of sunlight. Aim for at least 6 hours of direct sunlight per day. The ideal temperature range is between 70°F and 85°F (21°C and 29°C). Water spinach also needs consistently moist soil or water to thrive. If growing in soil, make sure to water it regularly to keep the soil damp but not waterlogged. If growing hydroponically, ensure that the roots are constantly submerged in water.
How long does it take for water spinach to grow?
Water spinach is a fast-growing plant. You can typically expect to harvest your first crop within 4-6 weeks of planting the seeds. After the initial harvest, you can continue to harvest leaves regularly, allowing the plant to regrow. With proper care, you can enjoy a continuous supply of water spinach for several months.
What kind of soil is best for growing water spinach?
Water spinach prefers rich, well-draining soil with a slightly acidic to neutral pH (around 6.0 to 7.0). You can use a standard potting mix or create your own mix by combining equal parts of compost, peat moss, and perlite. Adding some organic matter, such as well-rotted manure or compost, can also help to improve the soil’s fertility and drainage.
Can I grow water spinach indoors?
Yes, you can grow water spinach indoors, but you’ll need to provide it with adequate light. A sunny windowsill that receives at least 6 hours of direct sunlight per day is ideal. If you don’t have enough natural light, you can supplement with grow lights. Make sure to choose grow lights that emit a full spectrum of light to promote healthy growth. You’ll also need to ensure that the plant has access to consistent moisture, either through regular watering or a hydroponic setup.
What are some common pests and diseases that affect water spinach?
Water spinach is generally a relatively pest-resistant plant, but it can be susceptible to certain pests and diseases, such as aphids, spider mites, and fungal infections. To prevent pest infestations, inspect your plants regularly and remove any pests that you find. You can also use insecticidal soap or neem oil to control pests. To prevent fungal infections, avoid overwatering and ensure that the plants have good air circulation. If you notice any signs of disease, remove the affected leaves immediately.
How do I harvest water spinach?
To harvest water spinach, simply cut the stems about 4-6 inches above the soil line. The plant will regrow from the cut stems, allowing you to harvest multiple times. It’s best to harvest water spinach in the morning, when the leaves are at their freshest. You can store harvested water spinach in the refrigerator for up to a week.
What are some ways to use water spinach in cooking?
Water spinach is a versatile vegetable that can be used in a variety of dishes. It’s commonly used in stir-fries, soups, and salads. You can also steam, boil, or blanch water spinach. Some popular dishes that feature water spinach include stir-fried water spinach with garlic, water spinach soup, and water spinach salad with peanut dressing. The leaves and stems are both edible, but the stems may require a longer cooking time.
Is water spinach safe to eat?
Yes, water spinach is generally safe to eat, but it’s important to wash it thoroughly before cooking to remove any dirt or debris. It’s also important to source your water spinach from a reputable source to ensure that it hasn’t been exposed to harmful chemicals or pollutants. People with kidney problems should consult their doctor before consuming large amounts of water spinach, as it contains oxalates.
Can I grow water spinach from cuttings?
Yes, water spinach can be easily propagated from cuttings. Simply take a cutting that is about 4-6 inches long and remove the lower leaves. Place the cutting in a glass of water and wait for roots to develop. Once the roots are about an inch long, you can transplant the cutting into soil or a hydroponic setup. This is a great way to propagate new plants from your existing water spinach.
What kind of fertilizer should I use for water spinach?
Water spinach benefits from regular fertilization. You can use a balanced liquid fertilizer or a slow-release granular fertilizer. Follow the instructions on the fertilizer package for application rates. You can also supplement with organic fertilizers, such as compost tea or fish emulsion. Avoid over-fertilizing, as this can lead to excessive vegetative growth and reduced flavor. Remember that **growing water spinach** successfully relies on consistent care and attention.


Leave a Comment