

Baseboard Dusting Tips: Let’s face it, baseboards are the unsung heroes of our homes, quietly enduring the daily onslaught of dust, dirt, and pet hair. But when was the last time you actually gave them the attention they deserve? If you’re like me, probably not recently enough! We often overlook these architectural details in our cleaning routines, leading to a buildup that can make even the cleanest room look a little…dingy.
Baseboards have been a staple in homes for centuries, evolving from purely functional elements protecting walls to decorative features adding character and charm. Think about the grand estates of the past, where intricately carved baseboards showcased wealth and craftsmanship. While our modern baseboards might be less ornate, they still play a crucial role in defining our living spaces.
But why bother with baseboard dusting? Well, beyond the obvious aesthetic benefits, keeping your baseboards clean can actually improve your indoor air quality. Dust accumulation can trigger allergies and respiratory issues, making regular cleaning a must, especially for those with sensitivities. Plus, tackling this chore regularly prevents grime from becoming deeply embedded, saving you time and effort in the long run. I’m here to share some simple, effective, and even fun baseboard dusting tips and DIY hacks that will have your baseboards looking sparkling clean in no time. Get ready to transform your home, one baseboard at a time!
DIY Baseboard Dusting Hack: Sparkling Clean Baseboards with Minimal Effort!
Okay, let’s be honest, dusting baseboards is probably nobody’s favorite chore. It’s awkward, it’s back-breaking, and it feels like you’re just pushing dust around half the time. But fear not, my friends! I’ve discovered a super simple, surprisingly effective DIY hack that will have your baseboards looking sparkling clean with minimal effort. Get ready to say goodbye to dusty baseboards and hello to a cleaner, happier home!
What You’ll Need: The Secret Weapon and Supplies
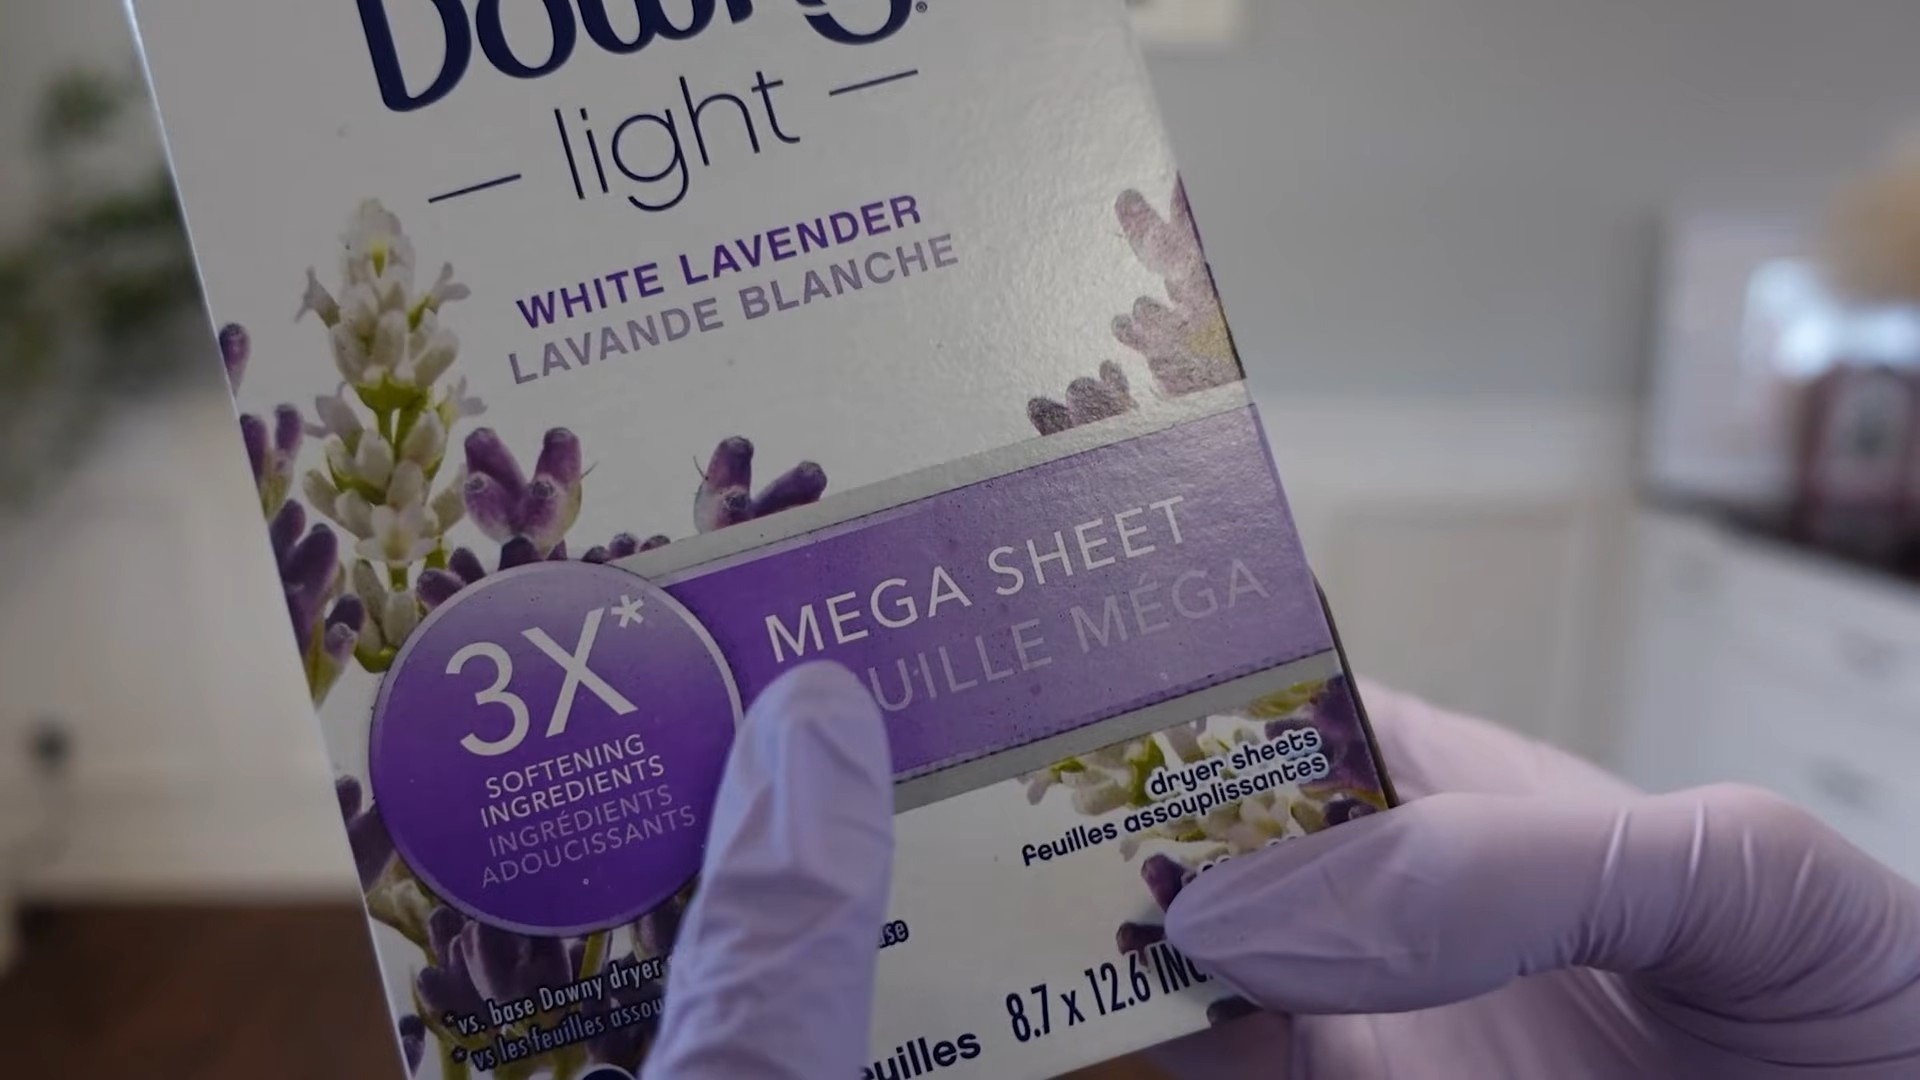
Before we dive in, let’s gather our supplies. This hack relies on a common household item that you probably already have: dryer sheets! That’s right, those little sheets of fabric softener are the key to dusting success.
Here’s a complete list of what you’ll need:
* Dryer Sheets (New or Used): Both work, but I find new ones are slightly more effective for initial cleaning. Used ones are great for maintenance!
* A Broom or Mop: This is your extension tool. You want something with a flat, wide head.
* Rubber Bands or Tape: To secure the dryer sheet to your broom or mop.
* Vacuum Cleaner with Brush Attachment (Optional but Recommended): For pre-cleaning and picking up any stray dust bunnies.
* Spray Bottle with Water (Optional): For tackling stubborn spots.
* Microfiber Cloth (Optional): For spot cleaning and final touch-ups.
* All-Purpose Cleaner (Optional): For extra dirty baseboards.
Step-by-Step Guide: Dusting Like a Pro
Now for the fun part! Let’s get those baseboards looking their best.
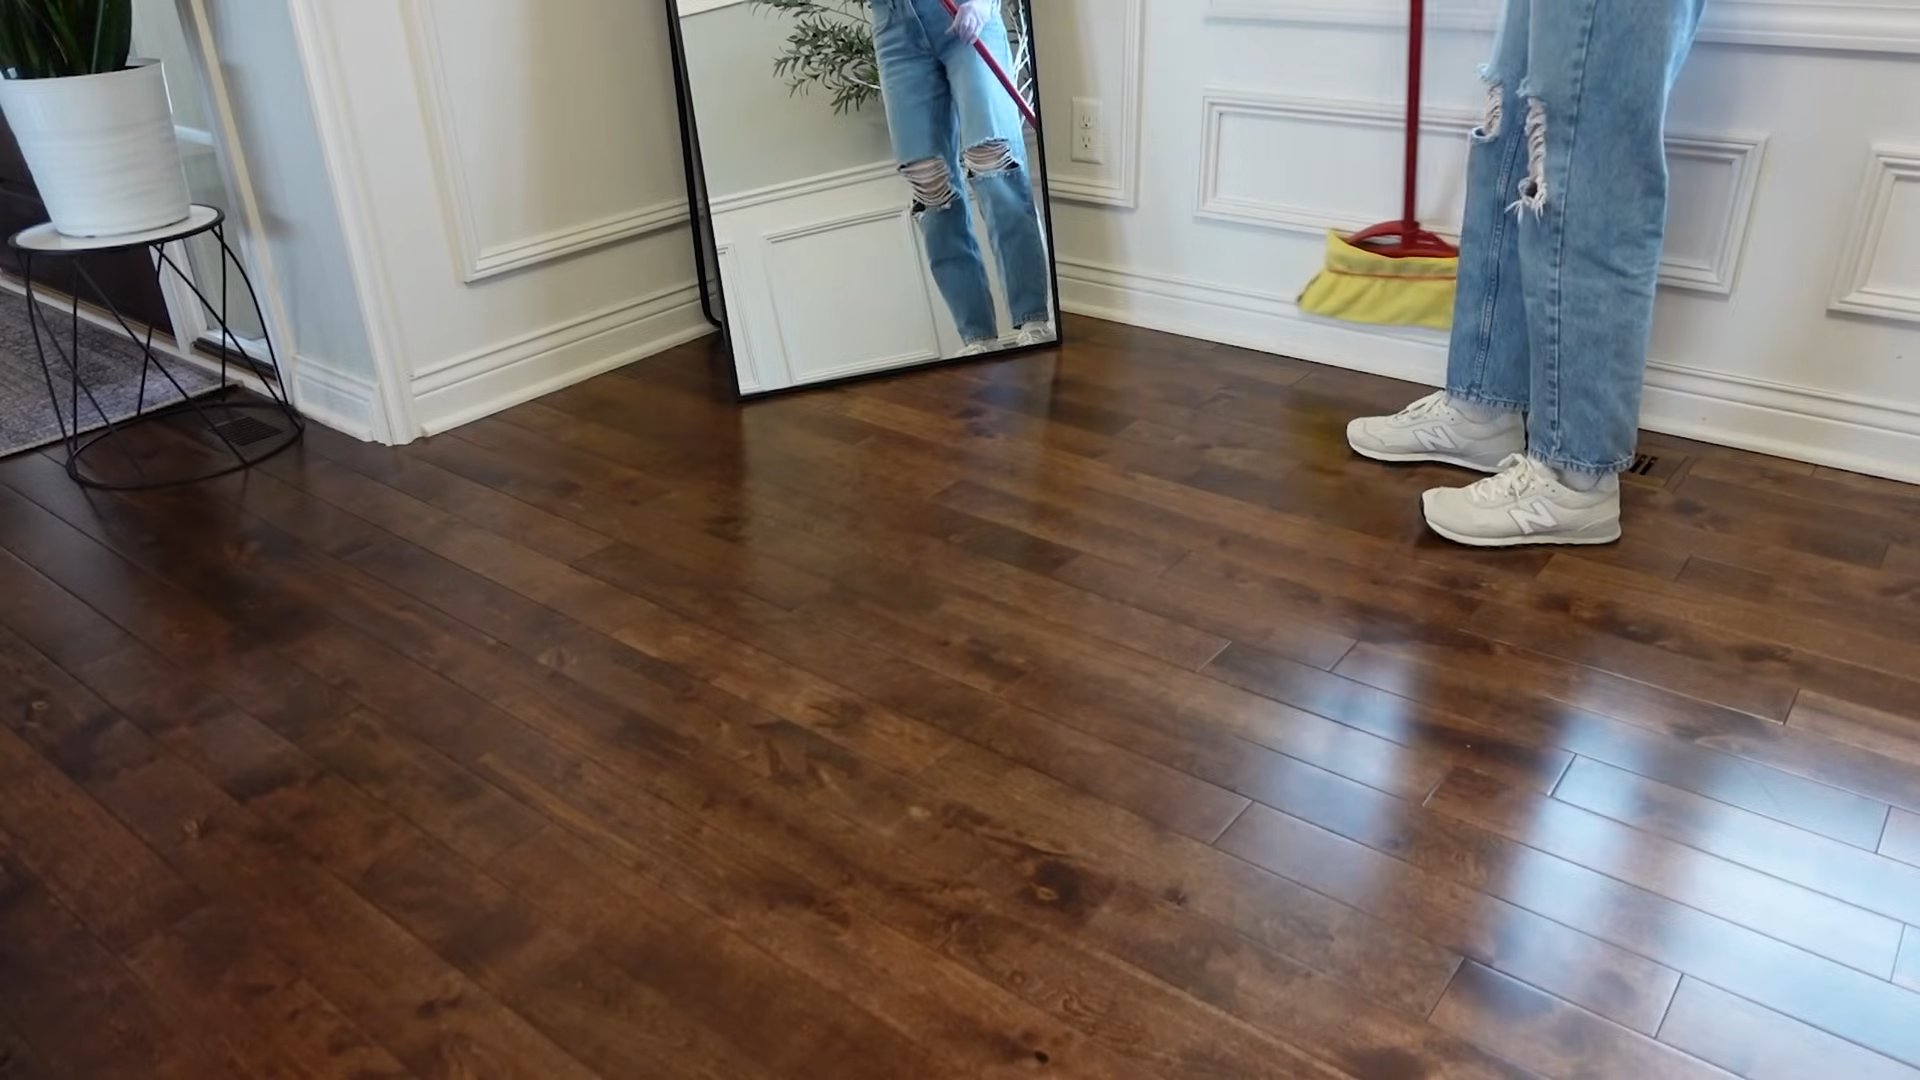
1. Prepare Your Weapon (Broom/Mop): This is where the magic happens. Take a dryer sheet (new or used) and wrap it around the head of your broom or mop. Make sure the dryer sheet covers the entire surface that will be touching the baseboard.
2. Secure the Dryer Sheet: Use rubber bands or tape to firmly secure the dryer sheet to the broom or mop head. You want it to stay in place while you’re dusting. I prefer rubber bands because they’re easy to remove and reuse.
3. Pre-Clean (Optional but Highly Recommended): Before you start dusting with the dryer sheet, it’s a good idea to give your baseboards a quick once-over with a vacuum cleaner using the brush attachment. This will remove any loose dust, dirt, and pet hair, making the dryer sheet more effective.
4. Dusting Time! Now, gently run the dryer sheet-covered broom or mop along your baseboards. Apply light pressure and move in smooth, even strokes. You’ll be amazed at how easily the dryer sheet picks up dust and dirt! The dryer sheet’s texture and anti-static properties help attract and trap dust, leaving your baseboards clean and shiny.
5. Tackle Stubborn Spots (Optional): If you encounter any stubborn spots or grime, lightly spray the area with water or a diluted all-purpose cleaner. Then, use the dryer sheet to scrub the spot gently. You can also use a microfiber cloth for this step if you prefer.
6. Replace the Dryer Sheet: As you dust, the dryer sheet will become saturated with dust and dirt. When you notice it’s no longer picking up dust effectively, simply remove the dirty dryer sheet and replace it with a fresh one.
7. Final Touch-Ups (Optional): After you’ve dusted all your baseboards, you can use a clean, damp microfiber cloth to wipe them down for a final touch-up. This will remove any remaining streaks or residue.
Why This Hack Works: The Science Behind the Sparkle
You might be wondering, “Why dryer sheets?” Well, here’s the secret:
* Anti-Static Properties: Dryer sheets are designed to reduce static cling in your laundry. This same property helps them attract and trap dust on your baseboards.
* Textured Surface: The slightly textured surface of a dryer sheet helps to grab and hold onto dust and dirt, preventing it from simply being pushed around.
* Gentle Cleaning: Dryer sheets are gentle enough to use on most surfaces without scratching or damaging them.
Maintaining Your Sparkling Baseboards: Prevention is Key
Once you’ve got your baseboards looking clean, you’ll want to keep them that way. Here are a few tips for maintaining your sparkling baseboards:
* Regular Dusting: Dust your baseboards regularly, at least once a month, to prevent dust from building up. Using the dryer sheet hack makes this a quick and easy task!
* Vacuum Regularly: Vacuum your floors regularly to remove dust and dirt that can accumulate on your baseboards.
* Use Doormats: Place doormats at all entrances to your home to trap dirt and debris before they can be tracked onto your floors and baseboards.
* Clean Spills Immediately: Clean up any spills or messes on your baseboards immediately to prevent them from staining or damaging the surface.
* Consider a Baseboard Buddy: If you really want to invest in baseboard cleaning, there are tools specifically designed for the job, like the Baseboard Buddy. These tools often have microfiber pads that are effective at picking up dust and dirt.
Troubleshooting: Common Issues and Solutions
Even with the best hacks, you might encounter a few challenges. Here are some common issues and how to solve them:
* Dryer Sheet Not Picking Up Dust: Make sure the dryer sheet is securely attached to your broom or mop. If it’s still not working, try using a fresh dryer sheet. Also, ensure your baseboards aren’t overly dirty; a pre-cleaning with a vacuum might be necessary.
* Streaks on Baseboards: If you’re leaving streaks, try using a slightly damp microfiber cloth to wipe down the baseboards after dusting. You might also be using too much cleaner if you’re using a spray bottle.
* Dryer Sheet Falling Off: Use stronger rubber bands or tape to secure the dryer sheet. You can also try folding the dryer sheet over the edge of the broom or mop head before securing it.
* Baseboards Still Look Dirty: If your baseboards are heavily soiled, you may need to use a stronger cleaner. Try a diluted all-purpose cleaner or a baseboard cleaner specifically designed for the type of baseboard you have. Always test the cleaner in an inconspicuous area first to make sure it doesn’t damage the finish.
Alternative Methods: Exploring Other Options
While I love the dryer sheet hack, there are other ways to clean your baseboards. Here are a few alternative methods you might want to try:
* Microfiber Cloth and Water: A simple and effective method for light dusting. Just dampen a microfiber cloth and wipe down your baseboards.
* Magic Eraser: For stubborn scuff marks and stains, a Magic Eraser can work wonders. Be careful not to scrub too hard, as it can damage the finish.
* Baseboard Cleaning Brush: These brushes are specifically designed for cleaning baseboards and often have angled bristles to reach tight spaces.
* Steam Cleaner: A steam cleaner can be used to deep clean baseboards and remove stubborn dirt and grime. Be sure to use a low setting and avoid getting the baseboards too wet.
Safety First: Important Precautions
Before you start cleaning, keep these safety precautions in mind:
* Protect Your Hands: Wear gloves to protect your hands from harsh chemicals and dirt.
* Ventilation: Ensure good ventilation in the room you’re cleaning.
* Test Cleaners: Always test any new cleaner in an inconspicuous area before using it on your entire baseboard.
* Avoid Over-Wetting: Avoid getting your baseboards too wet, as this can damage the wood or paint.
* Be Careful on Ladders: If you need to use a ladder to reach high baseboards, be sure to use it safely and follow all safety guidelines.
Beyond Dusting: Addressing Other Baseboard Issues
Sometimes, baseboards need more than just dusting. Here are some common baseboard issues and how to address them:
* Scuff Marks: Use a Magic Eraser or a mild abrasive cleaner to remove scuff marks.
* Paint Chips: Touch up paint chips with a matching paint color.
* Mold and Mildew: Clean mold and mildew with a bleach solution (1 part bleach to 10 parts water). Be sure to wear gloves and eye protection when using bleach.
* Gaps and Cracks: Fill gaps and cracks with caulk or wood filler.
Conclusion: Enjoy Your Sparkling Clean Baseboards!
And there you have it! With this simple dryer sheet hack, you can easily keep your baseboards looking clean and dust-free. Say goodbye to back-breaking chores and hello to a cleaner, happier home. Happy dusting!
Conclusion
So, there you have it! Mastering the art of baseboard dusting doesn’t require expensive tools or harsh chemicals. This simple, effective DIY trick, using items you likely already have at home, will revolutionize your cleaning routine and leave your baseboards looking pristine. We’ve shown you how to banish dust bunnies and grime with minimal effort, achieving a level of cleanliness that truly elevates the look and feel of your entire home.
Why is this DIY method a must-try? Because it’s efficient, cost-effective, and gentle on your baseboards. Unlike abrasive cleaners that can strip paint or damage delicate surfaces, our approach focuses on lifting dust and dirt without causing harm. Plus, it’s incredibly versatile.
Here are a few suggestions and variations to personalize your baseboard dusting experience:
* Scented Cleaning: Add a few drops of your favorite essential oil (like lavender, lemon, or eucalyptus) to your cleaning solution for a refreshing aroma that lingers long after you’ve finished dusting.
* Microfiber Magic: While socks work wonders, consider investing in a set of microfiber cloths specifically designed for dusting. Their ultra-fine fibers trap even more dust and dirt, leaving your baseboards exceptionally clean.
* Extendable Duster: For those hard-to-reach areas behind furniture or in tight corners, attach your sock-covered tool to an extendable handle. This will save you from bending and straining, making the task even easier.
* Preventative Measures: After dusting, consider applying a thin layer of furniture polish or a dust repellent spray to your baseboards. This will help prevent dust from accumulating as quickly, reducing the frequency of future cleanings.
* Tackle Stubborn Stains: For stubborn stains or scuff marks, create a paste of baking soda and water. Gently apply the paste to the affected area, let it sit for a few minutes, and then wipe clean with a damp cloth.
We are confident that this DIY baseboard dusting trick will become an indispensable part of your cleaning arsenal. It’s a simple yet powerful way to maintain a clean and healthy home environment.
Now, it’s your turn! We encourage you to try this method and see the difference it makes. Don’t be surprised if you find yourself enjoying the process – it’s surprisingly satisfying to watch the dust disappear!
We’d love to hear about your experience. Share your tips, variations, and before-and-after photos in the comments below. Let’s create a community of clean baseboard enthusiasts! Your feedback will help others discover the joy of a dust-free home. Happy dusting!
Frequently Asked Questions (FAQs)
What kind of sock should I use for baseboard dusting?
The best type of sock to use is an old, clean sock made of cotton or microfiber. Avoid using socks with holes or excessive wear, as they may leave lint behind. A slightly damp sock works best for attracting and trapping dust. You can also use a clean, dry sock if you prefer. Experiment to see what works best for your baseboards and the type of dust you’re dealing with.
How often should I dust my baseboards?
The frequency of baseboard dusting depends on several factors, including the number of people and pets in your home, the amount of foot traffic, and the overall air quality. As a general guideline, aim to dust your baseboards every 1-2 months. However, if you notice dust accumulating more quickly, you may need to increase the frequency. Regular dusting will prevent dust buildup and make the task easier in the long run.
What if my baseboards are painted with a delicate finish?
If your baseboards are painted with a delicate finish, such as a matte or chalk paint, it’s essential to use a gentle approach. Avoid using harsh chemicals or abrasive cleaners, as they can damage the paint. Instead, use a soft, slightly damp sock or microfiber cloth and a mild cleaning solution. Test the solution on an inconspicuous area first to ensure it doesn’t cause any discoloration or damage.
Can I use this method on other surfaces besides baseboards?
Yes, this DIY dusting trick can be used on other surfaces as well, such as window sills, door frames, and crown molding. The key is to use a soft, non-abrasive material and a gentle cleaning solution. Be careful when dusting delicate surfaces, such as antique furniture or painted walls, and always test the solution on an inconspicuous area first.
What kind of cleaning solution should I use?
A simple solution of warm water and a few drops of dish soap is usually sufficient for baseboard dusting. However, you can also use a commercial all-purpose cleaner or a homemade solution of vinegar and water (1 part vinegar to 2 parts water). Avoid using harsh chemicals or abrasive cleaners, as they can damage your baseboards. Always test the solution on an inconspicuous area first to ensure it doesn’t cause any discoloration or damage.
How do I clean baseboards that have a lot of built-up grime?
For baseboards with a lot of built-up grime, you may need to use a more aggressive cleaning approach. Start by vacuuming the baseboards to remove loose dust and debris. Then, create a paste of baking soda and water and apply it to the affected areas. Let the paste sit for a few minutes to loosen the grime, and then scrub gently with a soft brush or cloth. Rinse with clean water and dry thoroughly.
My baseboards are made of wood. Can I still use this method?
Yes, you can use this method on wooden baseboards, but it’s essential to use a wood-friendly cleaning solution. Avoid using harsh chemicals or excessive water, as they can damage the wood. Instead, use a wood cleaner or a solution of warm water and a few drops of dish soap. Be sure to dry the baseboards thoroughly after cleaning to prevent water damage. You may also want to apply a wood polish or sealant to protect the wood and enhance its appearance.
How do I prevent dust from accumulating on my baseboards?
There are several things you can do to prevent dust from accumulating on your baseboards. First, vacuum regularly to remove dust and debris from your floors. Second, use an air purifier to filter the air and reduce the amount of dust in your home. Third, dust your furniture and other surfaces regularly to prevent dust from settling on your baseboards. Finally, consider applying a dust repellent spray to your baseboards after cleaning to help prevent dust from accumulating as quickly.
What if I have pets that shed a lot?
If you have pets that shed a lot, you may need to dust your baseboards more frequently. Pet hair can quickly accumulate on baseboards, creating a dusty and unsightly mess. In addition to dusting regularly, consider using a pet hair vacuum cleaner or a lint roller to remove pet hair from your floors and furniture. You may also want to bathe your pets regularly to reduce shedding.
Is this DIY baseboard dusting trick safe for people with allergies?
Yes, this DIY baseboard dusting trick is generally safe for people with allergies, as it avoids the use of harsh chemicals and abrasive cleaners. However, if you are highly sensitive to dust, you may want to wear a mask while dusting to avoid inhaling dust particles. You can also use a hypoallergenic cleaning solution to further reduce the risk of allergic reactions.

Leave a Comment