

Balcony Chili Growing Tips: Unleash your inner gardener and ignite your taste buds! Imagine plucking fiery, fresh chilies right from your own balcony – no sprawling garden required. Sounds amazing, right? This isn’t just a dream; it’s an achievable reality with the right know-how. For centuries, cultivating chilies has been a vibrant part of cultures worldwide, adding zest and spice to cuisines from Asia to the Americas. From ancient Aztec gardens to modern-day urban farms, the chili pepper’s journey is a testament to its enduring appeal.
But why should you embark on this spicy adventure? Well, beyond the sheer joy of growing your own food, balcony chili growing tips offer a fantastic way to connect with nature, even in the heart of the city. Plus, let’s be honest, store-bought chilies can sometimes lack that vibrant flavor and satisfying heat. I’m here to guide you through simple, effective DIY tricks and hacks that will transform your balcony into a thriving chili haven. Whether you’re a seasoned gardener or a complete beginner, I’ll show you how to choose the right varieties, optimize your growing conditions, and troubleshoot common problems. Get ready to spice up your life, one chili pepper at a time!
Growing Chili Peppers on Your Balcony: A Spicy DIY Guide
Hey there, fellow chili enthusiasts! Dreaming of fresh, fiery peppers right outside your door? You’ve come to the right place. I’m going to walk you through everything you need to know to successfully grow chili peppers on your balcony, even if you’re a complete beginner. Get ready for a bountiful harvest of homegrown heat!
Choosing the Right Chili Pepper Variety
First things first, let’s talk chili varieties. Not all peppers are created equal, and some are definitely better suited for balcony life than others. Consider these factors when making your selection:
* Size: Balconies usually have limited space, so compact varieties are your best bet. Think about bushier plants rather than sprawling vines.
* Heat Level: This is totally personal preference! Do you crave scorching habaneros, or are you more of a mild jalapeño kind of person? Choose accordingly.
* Growing Season: Check the days to maturity for each variety. If you have a short growing season, opt for peppers that mature quickly.
* Popular Balcony-Friendly Varieties: Some great options include:
* Jalapeño
* Serrano
* Thai Chili
* Cayenne
* Habanero (if you’re brave!)
* ‘Patio Fire’ Hybrid (specifically bred for containers)
Gathering Your Supplies
Okay, now that you’ve picked your pepper(s), let’s gather the necessary supplies. Here’s what you’ll need:
* Chili Pepper Seeds or Seedlings: You can start from seed or buy established seedlings from a nursery. Seedlings will give you a head start.
* Pots or Containers: Choose pots that are at least 12 inches in diameter and depth. Make sure they have drainage holes! Terra cotta or plastic pots work well. Fabric pots are also a great option as they allow for better aeration.
* Potting Mix: Use a high-quality potting mix specifically formulated for containers. Avoid using garden soil, as it can become compacted and doesn’t drain well.
* Fertilizer: A balanced fertilizer (e.g., 10-10-10) or one specifically formulated for tomatoes and peppers will provide the nutrients your plants need.
* Watering Can or Hose: For, well, watering!
* Trowel or Small Shovel: For planting and transplanting.
* Plant Markers: To label your different chili varieties. Trust me, you’ll forget otherwise!
* Optional:
* Grow lights (if your balcony doesn’t get enough sunlight)
* Tomato cages or stakes (for support as the plants grow)
* Gloves (to protect your hands, especially when handling hot peppers)
* Pruning shears
Planting Your Chili Peppers
Alright, let’s get our hands dirty! Here’s how to plant your chili peppers:
1. Starting from Seed (Optional): If you’re starting from seed, sow them indoors 6-8 weeks before the last expected frost. Plant the seeds about 1/4 inch deep in seed-starting mix. Keep the soil moist and warm (around 70-80°F). Once the seedlings have a few sets of true leaves, you can transplant them into larger pots.
2. Preparing the Pots: Fill your pots with potting mix, leaving about an inch or two of space at the top.
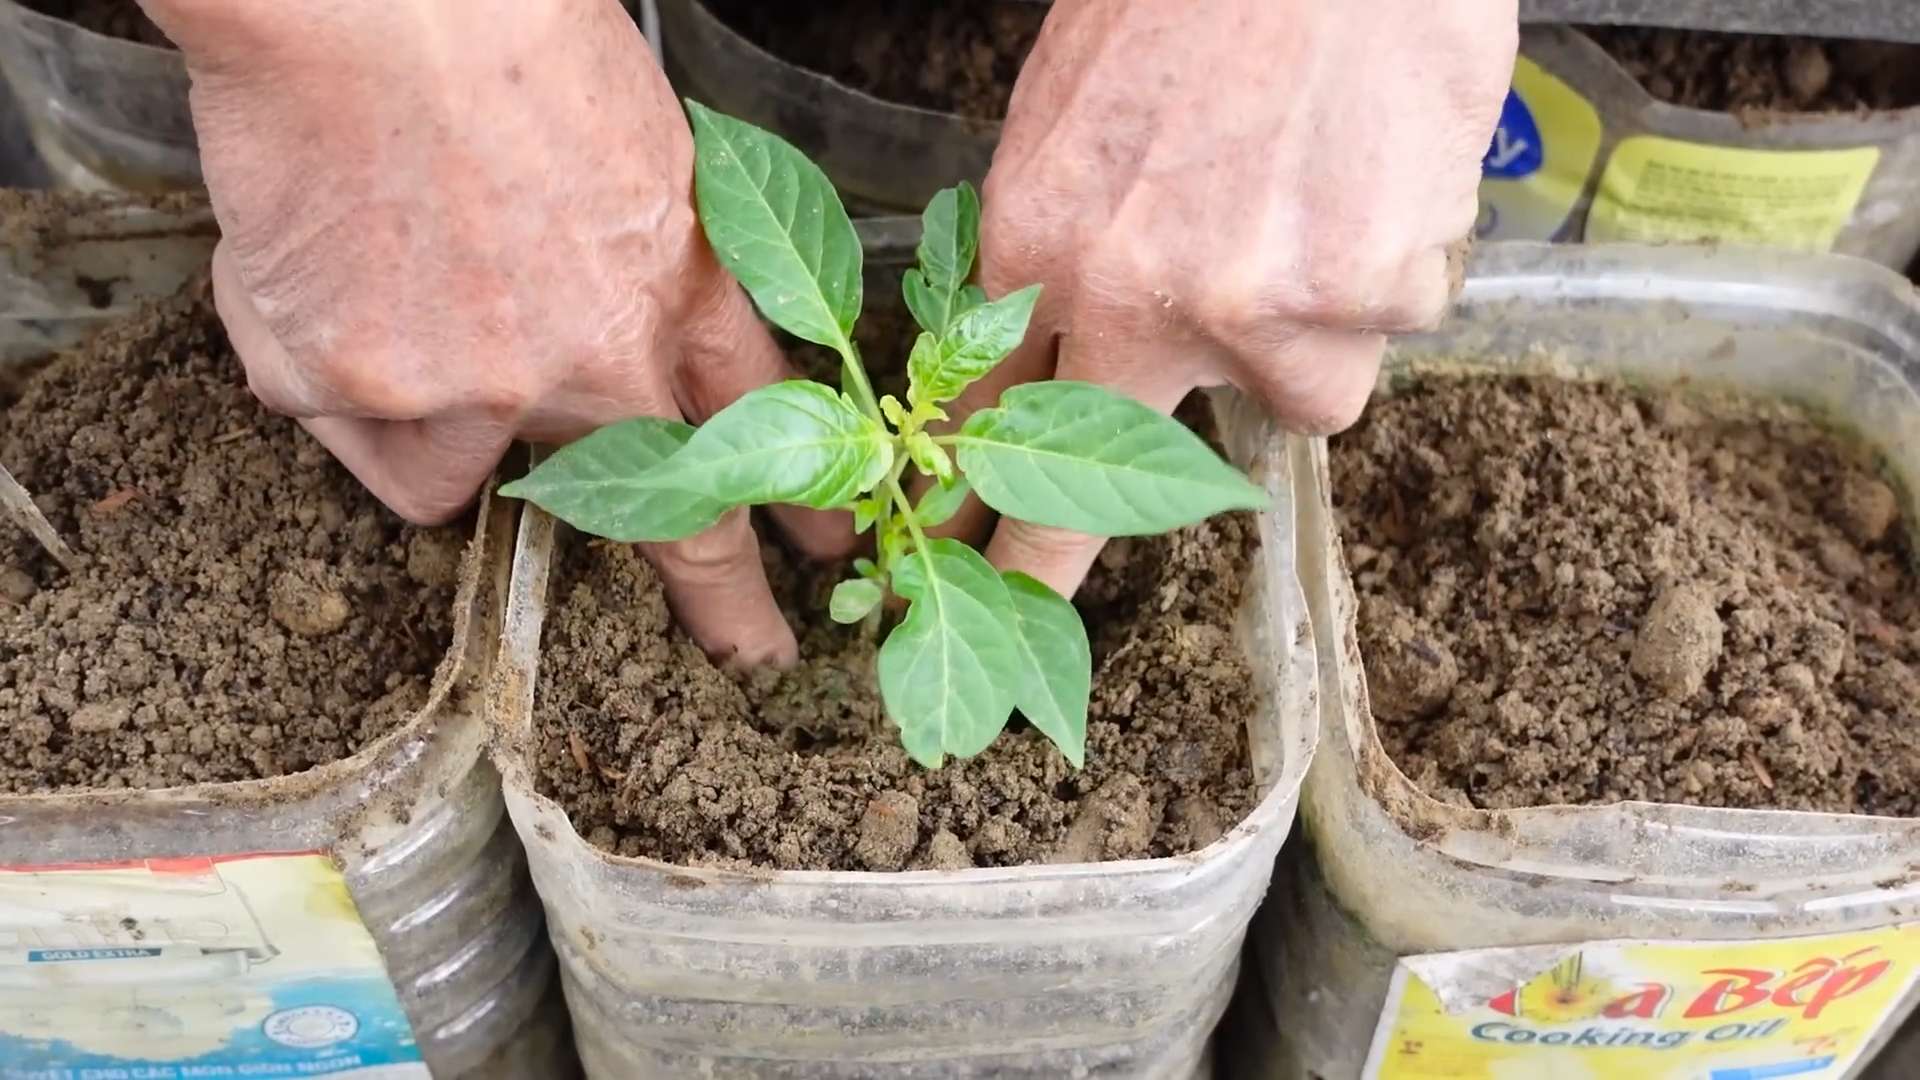
3. Planting Seedlings: Gently remove the seedlings from their containers. Loosen the roots slightly.
4. Placing the Seedlings: Dig a hole in the potting mix large enough to accommodate the root ball. Place the seedling in the hole, making sure the top of the root ball is level with the soil surface.
5. Filling and Firming: Fill in the hole with potting mix and gently firm the soil around the base of the plant.
6. Watering: Water thoroughly after planting.
7. Labeling: Don’t forget to label your plants!
Caring for Your Chili Peppers
Now that your chili peppers are planted, it’s time to provide them with the care they need to thrive.
1. Sunlight: Chili peppers need at least 6-8 hours of direct sunlight per day. If your balcony doesn’t get enough sunlight, consider using grow lights.
2. Watering: Water your chili peppers regularly, especially during hot, dry weather. The soil should be consistently moist, but not waterlogged. Check the soil moisture by sticking your finger about an inch into the soil. If it feels dry, it’s time to water.
3. Fertilizing: Fertilize your chili peppers every 2-3 weeks with a balanced fertilizer or one specifically formulated for tomatoes and peppers. Follow the instructions on the fertilizer package.
4. Pruning: Pruning can help to encourage bushier growth and more fruit production. Remove any yellowing or dead leaves. You can also pinch off the tips of the branches to encourage branching.
5. Supporting: As your chili peppers grow, they may need support to prevent them from falling over. Use tomato cages or stakes to provide support.
6. Pest and Disease Control: Keep an eye out for pests and diseases. Common pests include aphids, spider mites, and whiteflies. Common diseases include blossom end rot and fungal infections. Treat any problems promptly with appropriate organic or chemical controls. A strong blast of water from the hose can often dislodge aphids and spider mites.
7. Pollination: Chili peppers are self-pollinating, but you can help them along by gently shaking the plants or using a small brush to transfer pollen from one flower to another. This is especially important if you’re growing your peppers indoors or in a sheltered location.
Harvesting Your Chili Peppers
The most exciting part! Knowing when to harvest your chili peppers is key to getting the best flavor and heat.
1. Color: The color of the pepper will change as it ripens. Most chili peppers start out green and then turn red, yellow, orange, or brown, depending on the variety.
2. Firmness: The pepper should be firm to the touch.
3. Size: The pepper should be the size specified for the variety.
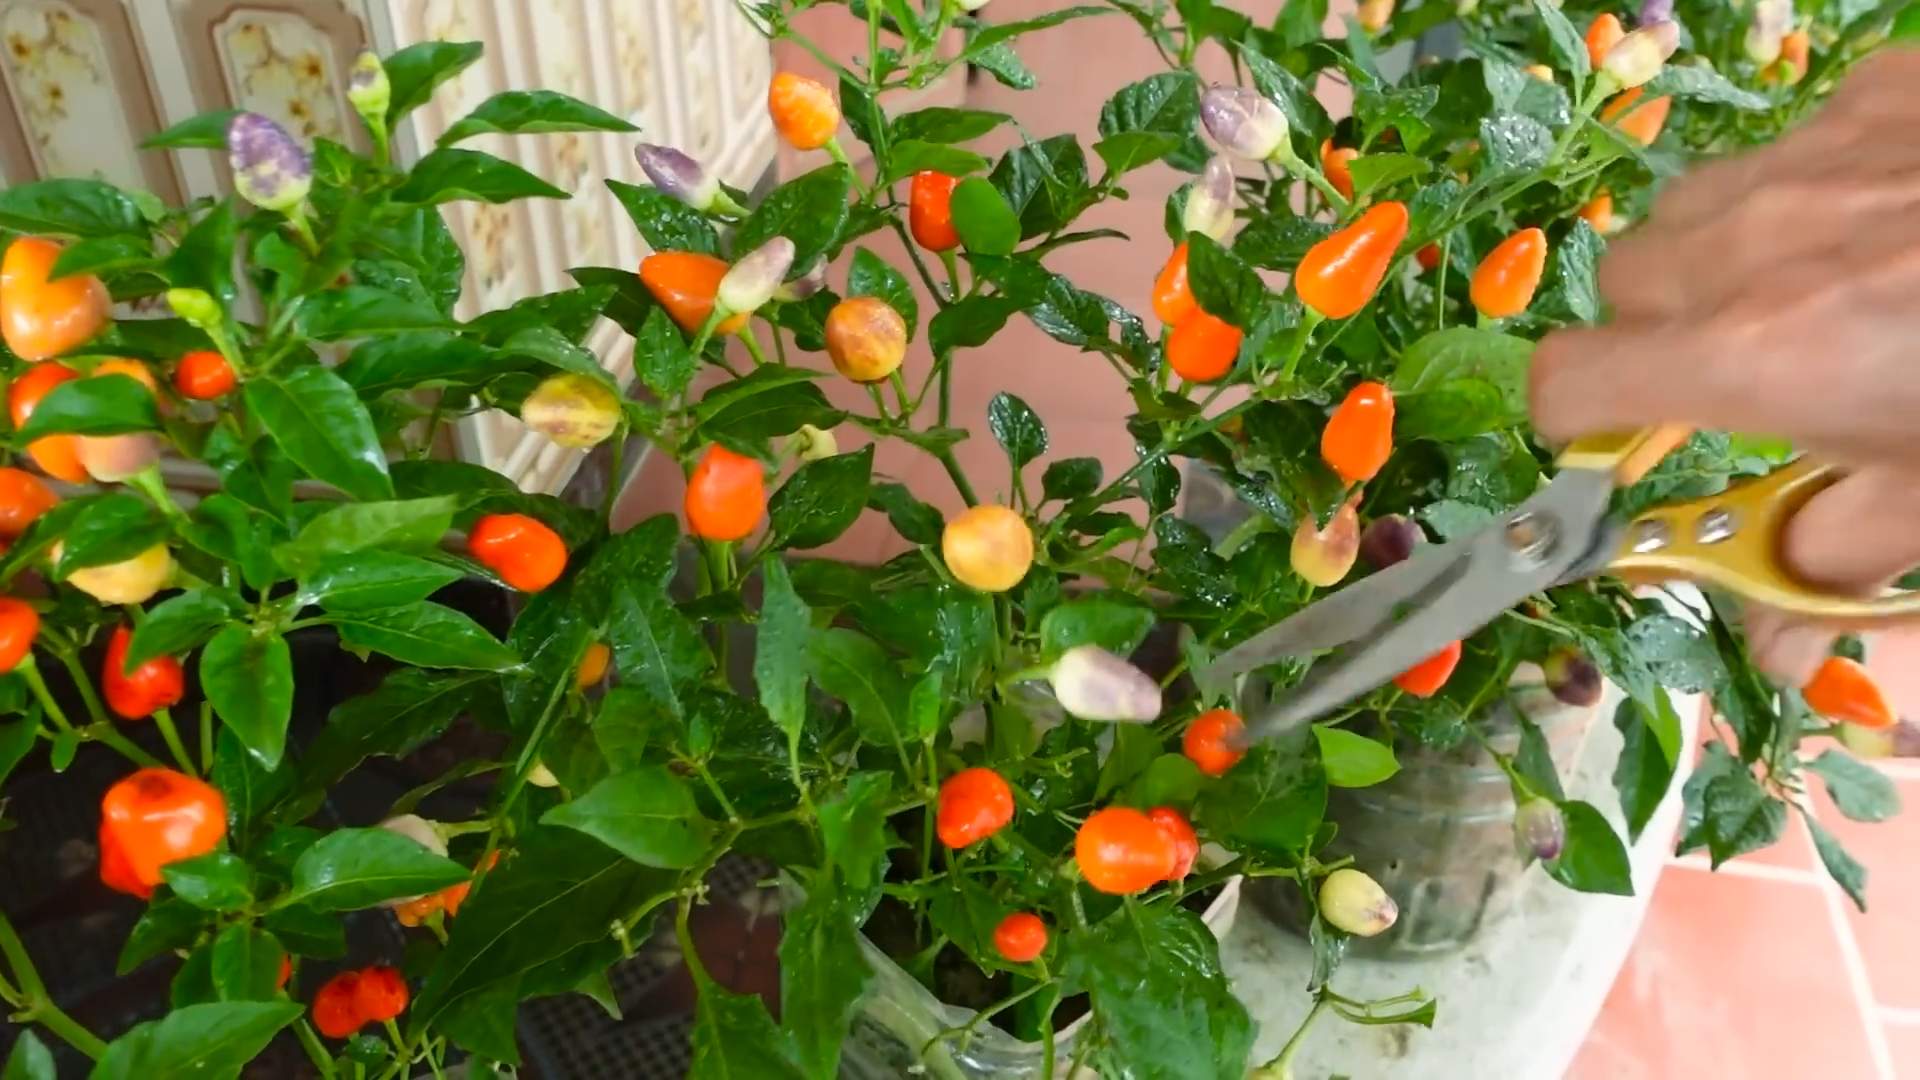
4. Harvesting: Use pruning shears or scissors to cut the peppers from the plant. Be careful not to damage the plant.
5. Handling Hot Peppers: Wear gloves when handling hot peppers to avoid burning your skin. Avoid touching your eyes or face after handling hot peppers.
Troubleshooting Common Problems
Even with the best care, you might encounter some problems along the way. Here are a few common issues and how to address them:
* Blossom End Rot: This is a calcium deficiency that causes the bottom of the pepper to rot. To prevent blossom end rot, make sure your soil is well-drained and that you’re providing your plants with enough calcium. You can add calcium to the soil by using bone meal or eggshells.
* Aphids: These small, sap-sucking insects can weaken your plants. To control aphids, spray them with a strong blast of water from the hose or use insecticidal soap.
* Spider Mites: These tiny pests can cause yellowing and stippling on the leaves. To control spider mites, spray them with a strong blast of water from the hose or use insecticidal soap.
* Fungal Infections: These can cause spots or lesions on the leaves and stems. To prevent fungal infections, make sure your plants have good air circulation and avoid overwatering. Treat any infections with a fungicide.
* Lack of Fruit: If your chili peppers aren’t producing fruit, it could be due to a number of factors, including lack of sunlight, poor pollination, or nutrient deficiencies. Make sure your plants are getting enough sunlight, pollinate them by hand if necessary, and fertilize them regularly.
Enjoying Your Harvest
Congratulations! You’ve successfully grown chili peppers on your balcony. Now it’s time to enjoy the fruits (or should I say, peppers?) of your labor.
* Fresh: Use your fresh chili peppers in your favorite recipes.
* Dried: Dry your chili peppers for later use. You can dry them in a dehydrator, in the oven, or by hanging them in a warm, dry place.
* Pickled: Pickle your chili peppers for a tangy treat.
* Frozen: Freeze your chili peppers for long-term storage.
Growing chili peppers on your balcony is a rewarding experience. With a little care and attention, you can enjoy a bountiful harvest of homegrown heat. Happy growing!
Conclusion
So, there you have it! Transforming your balcony into a vibrant chili pepper paradise is not only achievable but also incredibly rewarding. We’ve walked through the essential steps, from selecting the right chili varieties to nurturing them with the proper care. But why is this DIY balcony chili growing endeavor a must-try?
Firstly, imagine the sheer satisfaction of harvesting your own fiery chilies, knowing you cultivated them from seed (or seedling!) to spicy perfection. Forget those bland, store-bought peppers; you’ll have a constant supply of fresh, flavorful chilies right at your fingertips. This is about more than just saving money; it’s about connecting with your food and experiencing the joy of homegrown goodness.
Secondly, growing chilies on your balcony is a fantastic way to add a touch of green to your urban space. These plants are not only productive but also visually appealing, with their vibrant foliage and colorful peppers. They can transform a dull balcony into a thriving oasis, attracting beneficial insects and adding a touch of nature to your daily life.
Thirdly, and perhaps most importantly, mastering the art of balcony chili growing empowers you to control the quality and intensity of your chilies. You can experiment with different varieties, from mild jalapeños to scorching habaneros, tailoring your harvest to your exact preferences. Plus, you’ll know exactly what went into growing your chilies, avoiding any unwanted pesticides or chemicals.
Ready to take your balcony chili growing to the next level? Consider these variations:
* **Hydroponic Chili Growing:** For a more advanced approach, explore hydroponic systems. These soilless setups can be incredibly efficient and allow for precise control over nutrient delivery.
* **Companion Planting:** Enhance your chili plants’ growth by planting them alongside beneficial herbs like basil or marigolds. These companions can deter pests and improve the overall health of your balcony garden.
* **Vertical Gardening:** Maximize your space by utilizing vertical gardening techniques. Trellises, hanging baskets, and stacked planters can create a stunning and productive chili wall.
* **Chili Oils and Sauces:** Once you’ve harvested your chilies, experiment with making your own chili oils, sauces, and powders. These homemade condiments are perfect for adding a fiery kick to your favorite dishes.
Don’t be intimidated by the prospect of growing your own chilies. With a little planning and effort, you can transform your balcony into a chili-producing powerhouse. We encourage you to embrace this DIY project and experience the satisfaction of harvesting your own homegrown chilies.
Now, it’s your turn! Grab some seeds, pots, and soil, and get started on your balcony chili growing adventure. We’re confident that you’ll be amazed by the results. And most importantly, share your experiences with us! We’d love to hear about your successes, challenges, and favorite chili varieties. Let’s build a community of balcony chili growers and inspire others to embrace the joys of homegrown spice. Happy growing!
Frequently Asked Questions (FAQ)
What are the best chili varieties to grow on a balcony?
Choosing the right chili variety is crucial for successful balcony growing. Compact varieties that thrive in containers are ideal. Some excellent options include:
* **Jalapeños:** A classic choice, jalapeños are relatively easy to grow and produce a moderate level of heat. They’re perfect for adding a kick to salsas, nachos, and other dishes.
* **Serranos:** Slightly hotter than jalapeños, serranos are another great option for balcony gardens. They’re known for their bright, fresh flavor and are often used in Mexican cuisine.
* **Thai Chilies:** These small, fiery chilies are perfect for adding intense heat to Asian dishes. They’re relatively easy to grow and produce a prolific harvest.
* **Cayenne Peppers:** A popular choice for making chili powder and hot sauce, cayenne peppers are relatively easy to grow and produce a good yield.
* **Habaneros:** For those who crave extreme heat, habaneros are a must-try. However, they require more care and attention than other varieties.
* **Poblano:** Milder than many other chilies, poblanos are great for stuffing or roasting. They have a rich, smoky flavor that adds depth to any dish.
Consider your personal preferences and the amount of space you have available when selecting your chili varieties.
What type of soil is best for growing chilies in containers?
Chilies thrive in well-draining soil that is rich in organic matter. A good potting mix specifically formulated for vegetables is an excellent choice. Avoid using garden soil, as it can become compacted in containers and hinder drainage. You can also amend your potting mix with compost or other organic materials to improve its fertility and drainage.
How much sunlight do chili plants need?
Chili plants require at least 6-8 hours of direct sunlight per day to thrive. Choose a sunny spot on your balcony that receives ample sunlight throughout the day. If your balcony doesn’t receive enough sunlight, you may need to supplement with grow lights.
How often should I water my chili plants?
Water your chili plants regularly, especially during hot, dry weather. The soil should be kept consistently moist but not waterlogged. Check the soil moisture by sticking your finger into the soil. If the top inch of soil feels dry, it’s time to water. Avoid overwatering, as this can lead to root rot.
What are some common pests and diseases that affect chili plants?
Chili plants can be susceptible to various pests and diseases, including aphids, spider mites, whiteflies, and fungal infections. Regularly inspect your plants for signs of infestation or disease. If you spot any problems, take action immediately.
* **Aphids:** These small, sap-sucking insects can cause stunted growth and distorted leaves. Control aphids by spraying your plants with insecticidal soap or neem oil.
* **Spider Mites:** These tiny pests can cause yellowing and stippling of leaves. Control spider mites by spraying your plants with miticidal soap or neem oil.
* **Whiteflies:** These small, white insects can cause yellowing and wilting of leaves. Control whiteflies by spraying your plants with insecticidal soap or neem oil.
* **Fungal Infections:** Fungal infections, such as powdery mildew and leaf spot, can cause unsightly spots and lesions on leaves. Prevent fungal infections by providing good air circulation and avoiding overwatering. Treat fungal infections with a fungicide.
How do I fertilize my chili plants?
Chili plants benefit from regular fertilization. Use a balanced fertilizer specifically formulated for vegetables. Follow the instructions on the fertilizer label for application rates and frequency. You can also supplement with organic fertilizers, such as compost tea or fish emulsion.
When should I harvest my chilies?
The timing of harvest depends on the variety of chili and your personal preferences. Most chilies are ready to harvest when they have reached their mature color and size. You can harvest chilies at any stage of ripeness, but the flavor and heat will vary. Use scissors or pruning shears to harvest your chilies, leaving a small stem attached.
How do I store my harvested chilies?
Fresh chilies can be stored in the refrigerator for up to a week. For longer storage, you can dry, freeze, or pickle your chilies. Drying chilies is a simple process that involves hanging them in a well-ventilated area until they are completely dry. Frozen chilies can be stored in freezer bags for up to a year. Pickled chilies can be stored in jars in the refrigerator for several months.
Can I grow chilies indoors?
Yes, you can grow chilies indoors, but they will require bright light and consistent care. Place your chili plants near a sunny window or supplement with grow lights. Ensure that your plants receive adequate ventilation and water them regularly.
What if my chili plant is not producing any peppers?
Several factors can contribute to a lack of pepper production. Ensure your plant is receiving enough sunlight (at least 6-8 hours daily). Inadequate pollination can also be a culprit; gently shake the plant or use a small brush to transfer pollen between flowers. Over-fertilization with nitrogen can promote leafy growth at the expense of fruit production; switch to a fertilizer higher in phosphorus and potassium. Finally, check for pests or diseases that may be stressing the plant.
Leave a Comment