

Growing Chili Peppers Anywhere might seem like a fiery dream reserved for seasoned gardeners, but I’m here to tell you it’s totally achievable, even if you’re a complete beginner with limited space! Forget those sprawling fields – we’re talking balconies, windowsills, and even indoor setups. Have you ever imagined plucking fresh, vibrant chili peppers right from your own home to spice up your dinner? That’s the magic we’re unlocking today.
Chili peppers have a rich history, dating back thousands of years in South America, where they were not just a food source but also held cultural and medicinal significance. From ancient rituals to modern-day culinary masterpieces, these fiery fruits have captivated palates worldwide. Now, you can be a part of that story, cultivating your own little piece of pepper paradise.
Why is growing chili peppers anywhere such a game-changer? Well, think about it: access to fresh, organic ingredients, a rewarding hobby that connects you with nature, and the sheer satisfaction of nurturing something from seed to harvest. Plus, store-bought chili peppers can sometimes lack that intense flavor and freshness. With these DIY tricks and hacks, you’ll not only save money but also enjoy a superior taste experience. So, let’s dive in and discover how to bring the heat to your home, no matter where you live!
Growing Chili Peppers Anywhere: A DIY Guide
Hey there, fellow chili enthusiasts! Ever dreamt of having a constant supply of fiery peppers right at your fingertips, no matter where you live? Well, you’re in the right place! I’m going to walk you through a comprehensive guide on how to grow chili peppers practically anywhere, from a sunny balcony to a small indoor space. Get ready to spice up your life!
Choosing Your Chili Pepper Variety
Before we dive into the nitty-gritty, let’s talk peppers! The variety you choose will significantly impact your growing experience and the final heat level. Here’s a quick rundown to get you started:
* Beginner-Friendly: Jalapeños, Anaheim, Poblano. These are relatively easy to grow and offer a mild to medium heat.
* Intermediate: Serrano, Cayenne. Stepping up the heat a bit, these require a little more attention but are still manageable.
* Advanced: Habanero, Scotch Bonnet, Ghost Pepper. Brace yourself! These are for the seasoned chili grower who loves intense heat and is prepared to provide optimal conditions.
Consider your climate, available space, and, of course, your heat tolerance when making your selection. I personally love growing Jalapeños because they’re versatile and productive.
Materials You’ll Need
Okay, let’s gather our supplies. Here’s what you’ll need to get started:
* Chili Pepper Seeds or Seedlings: You can buy seeds online or at your local garden center. Seedlings will give you a head start.
* Potting Mix: Use a well-draining potting mix specifically formulated for vegetables. Avoid using garden soil, as it can compact and hinder drainage.
* Containers: Choose pots that are at least 8-12 inches in diameter for smaller varieties and larger for bigger plants like Habaneros. Make sure they have drainage holes!
* Watering Can or Hose: For regular watering.
* Fertilizer: A balanced fertilizer (e.g., 10-10-10) or one specifically formulated for peppers.
* Grow Lights (Optional): If you’re growing indoors and don’t have enough natural light.
* Spray Bottle: For misting seedlings.
* Small Shovel or Trowel: For transplanting.
* Gloves: To protect your hands, especially when handling hot peppers later on.
* Plant Markers: To label your different varieties.
* Pest Control (Optional): Neem oil or insecticidal soap for dealing with pests.
Starting from Seeds: A Step-by-Step Guide
If you’re starting from seeds, here’s how to do it:
1. Soaking the Seeds (Optional): I like to soak my chili pepper seeds in warm water for 12-24 hours before planting. This can help speed up germination.
2. Planting the Seeds: Fill small seed trays or pots with potting mix. Moisten the soil. Plant the seeds about ¼ inch deep and gently cover them with soil.
3. Creating a Humid Environment: Cover the seed trays or pots with a plastic dome or plastic wrap to create a humid environment. This helps with germination.
4. Providing Warmth: Chili pepper seeds need warmth to germinate. Aim for a soil temperature of 75-85°F (24-29°C). You can use a heat mat to provide bottom heat.
5. Germination Time: Be patient! Chili pepper seeds can take anywhere from 1-3 weeks to germinate, depending on the variety and conditions.
6. Providing Light: Once the seedlings emerge, remove the plastic cover and provide them with plenty of light. If you’re growing indoors, use grow lights.
7. Watering: Keep the soil consistently moist but not waterlogged. Water gently to avoid disturbing the seedlings.
8. Thinning (If Necessary): If you planted multiple seeds in one pot, thin them out to the strongest seedling once they have a few true leaves.
Transplanting Seedlings or Planting Purchased Seedlings
Whether you’ve grown your own seedlings or purchased them from a nursery, here’s how to transplant them into their final containers:
1. Hardening Off (For Home-Grown Seedlings): If you’ve grown your own seedlings indoors, you’ll need to “harden them off” before transplanting them outdoors. This means gradually exposing them to outdoor conditions over a period of 7-10 days. Start by placing them in a sheltered spot for a few hours each day, gradually increasing the amount of time they spend outdoors.
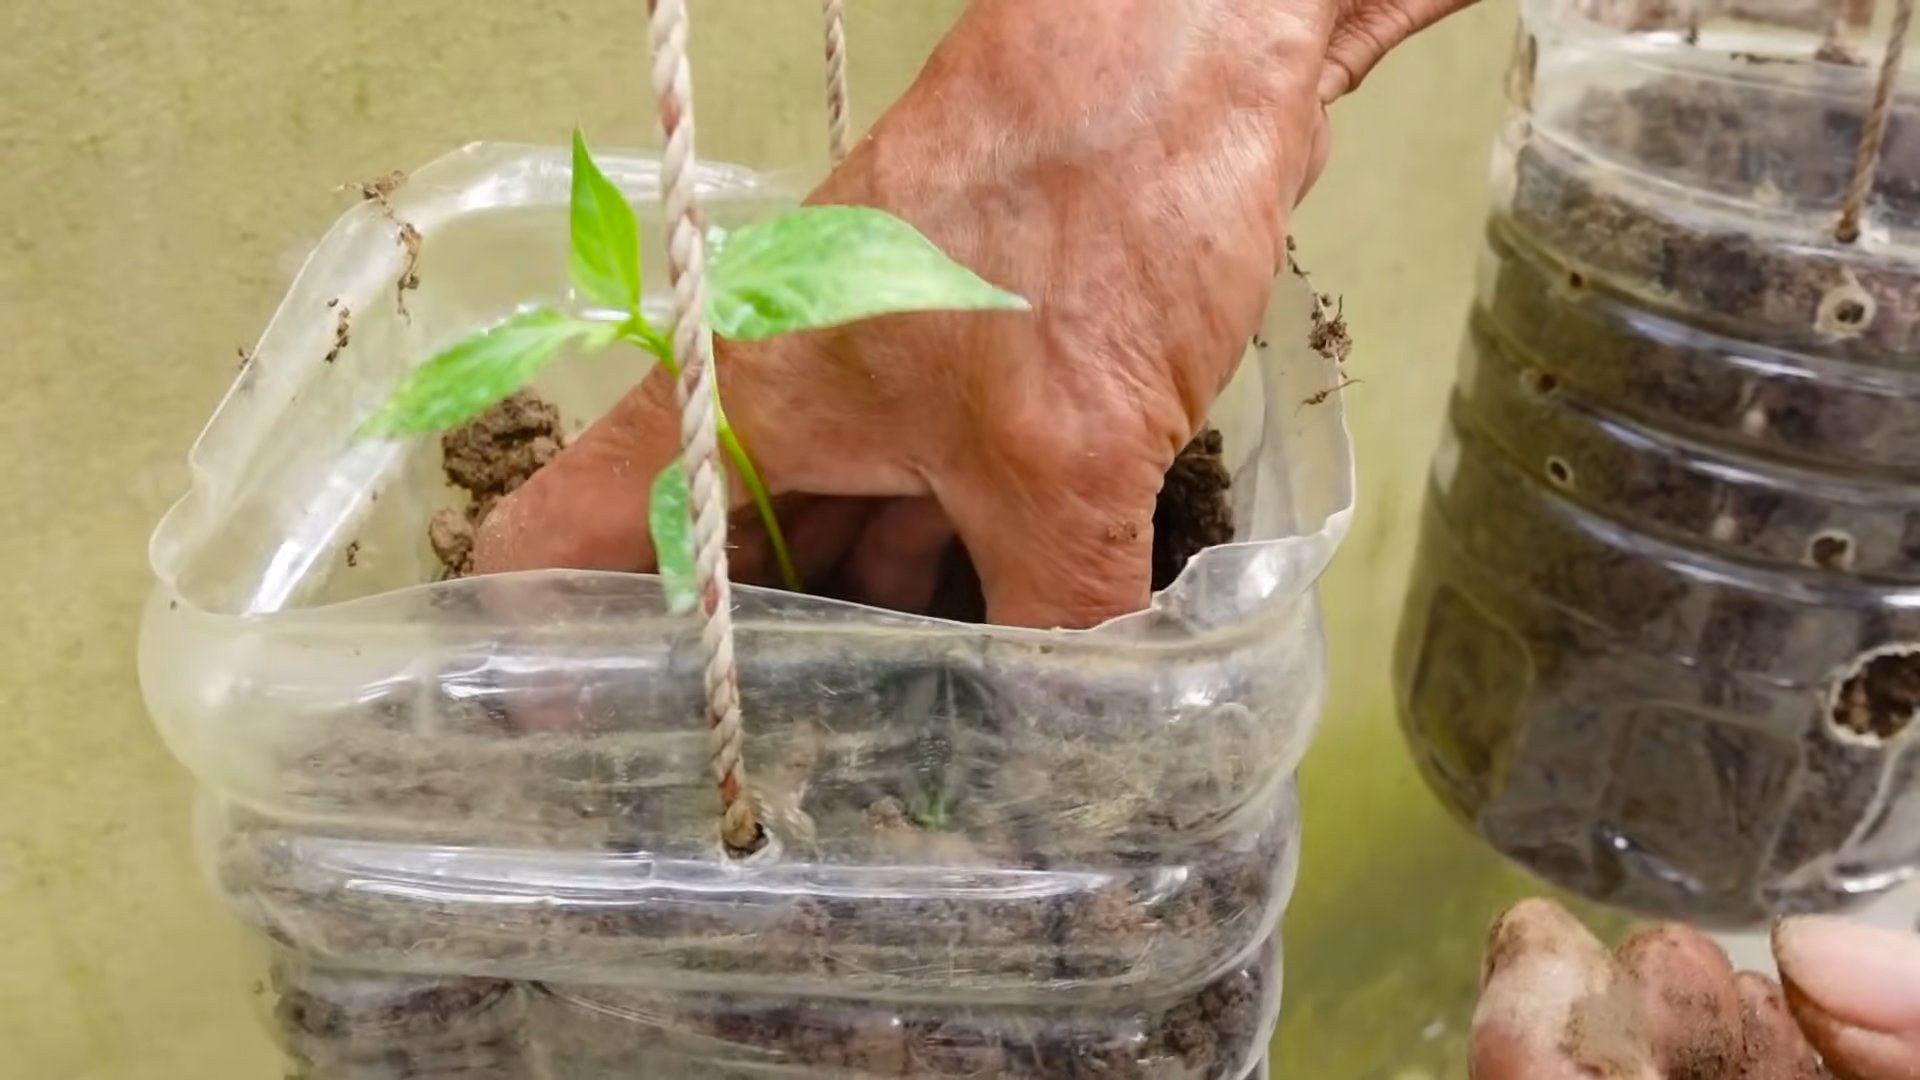
2. Preparing the Container: Fill your chosen container with potting mix, leaving a few inches of space at the top.
3. Removing the Seedling: Gently remove the seedling from its original container. If it’s root-bound (the roots are tightly circling the pot), gently loosen the roots before planting.
4. Planting the Seedling: Dig a hole in the potting mix that’s large enough to accommodate the seedling’s root ball. Place the seedling in the hole and gently backfill with potting mix.
5. Watering: Water the seedling thoroughly after transplanting.
6. Providing Support (If Necessary): For taller varieties, you may need to provide support with a stake or tomato cage.
Caring for Your Chili Pepper Plants
Now that your chili pepper plants are in their final containers, here’s how to care for them:
* Sunlight: Chili peppers need at least 6-8 hours of sunlight per day. If you’re growing indoors, use grow lights to supplement natural light.
* Watering: Water your chili pepper plants regularly, especially during hot weather. Allow the soil to dry out slightly between waterings. Avoid overwatering, as this can lead to root rot.
* Fertilizing: Fertilize your chili pepper plants every 2-3 weeks with a balanced fertilizer or one specifically formulated for peppers. Follow the instructions on the fertilizer label.
* Pruning: Pruning can help improve air circulation and encourage bushier growth. Remove any yellowing or dead leaves. You can also pinch off the tips of the branches to encourage branching.
* Pest Control: Keep an eye out for pests like aphids, spider mites, and whiteflies. If you spot any pests, treat them with neem oil or insecticidal soap.
* Pollination: Chili peppers are self-pollinating, but you can help them along by gently shaking the plants or using a small brush to transfer pollen from one flower to another. This is especially important for indoor plants.
Troubleshooting Common Problems
Even with the best care, you might encounter some problems along the way. Here are some common issues and how to address them:
* Yellowing Leaves: This can be caused by overwatering, underwatering, nutrient deficiencies, or pests. Check the soil moisture and adjust your watering accordingly. Fertilize your plants to address nutrient deficiencies. Inspect the leaves for pests and treat them as needed.
* Blossom End Rot: This is a condition where the bottom of the fruit turns black and rots. It’s usually caused by a calcium deficiency. Make sure your soil is well-draining and add calcium to the soil.
* Lack of Fruit: This can be caused by insufficient sunlight, poor pollination, or extreme temperatures. Make sure your plants are getting enough sunlight. Hand-pollinate the flowers to improve pollination. Protect your plants from extreme temperatures.
* Pests: As mentioned earlier, keep an eye out for pests and treat them with neem oil or insecticidal soap.
Harvesting Your Chili Peppers
The moment you’ve been waiting for! Here’s how to harvest your chili peppers:
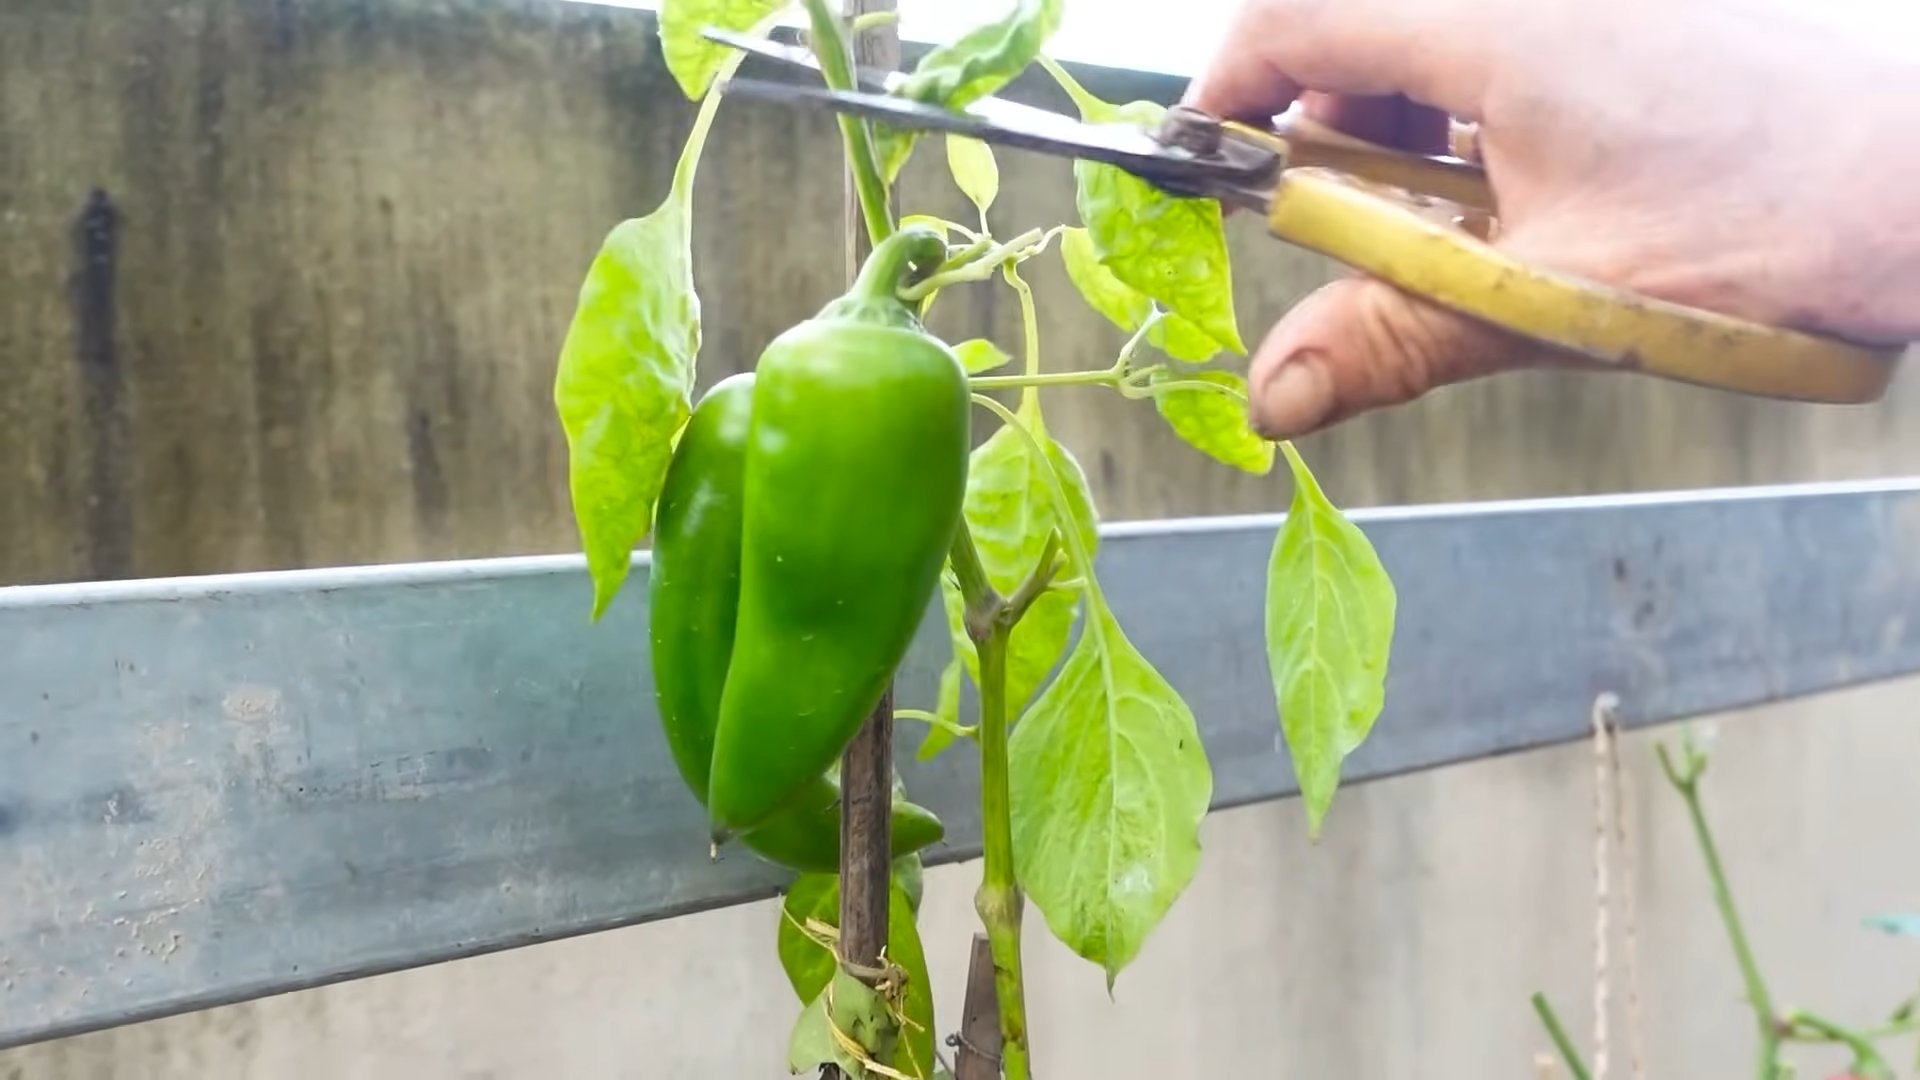
1. Maturity: Chili peppers are typically ready to harvest when they reach their mature color and size. The color will depend on the variety.
2. Harvesting: Use scissors or pruning shears to cut the peppers from the plant. Be careful not to damage the plant.
3. Handling: Wear gloves when handling hot peppers, as the oils can irritate your skin.
4. Storage: You can store fresh chili peppers in the refrigerator for up to a week. You can also dry them, freeze them, or pickle them for longer storage.
Growing Chili Peppers Indoors: Special Considerations
Growing chili peppers indoors requires a few extra considerations:
* Light: You’ll need to provide your plants with adequate light using grow lights. Choose grow lights that are specifically designed for plants.
* Pollination: Since there are no bees or other insects indoors, you’ll need to hand-pollinate the flowers.
* Air Circulation: Good air circulation is important to prevent fungal diseases. Use a fan to circulate the air around your plants.
* Humidity: Indoor environments can be dry, which can be detrimental
Conclusion
So, there you have it! Growing chili peppers, even if you lack a sprawling garden, is entirely within your reach. This DIY approach to cultivating these fiery fruits is more than just a gardening hack; it’s a gateway to fresh, flavorful ingredients right at your fingertips. We’ve explored how to nurture these plants from seed to harvest, focusing on creating the ideal environment, even in the most unconventional spaces.
Why is this a must-try? Because it empowers you to control the quality and freshness of your chili peppers. No more relying on store-bought varieties that may have lost their zing during transit or storage. Imagine the satisfaction of adding a pinch of homegrown heat to your favorite dishes, knowing exactly where it came from and how it was grown. Plus, it’s incredibly rewarding to witness the entire life cycle of a plant, from a tiny seed to a vibrant, fruit-bearing beauty.
But the beauty of this DIY chili pepper growing method lies in its adaptability. Feel free to experiment with different varieties of chili peppers. From the mild Anaheim to the scorching Scotch Bonnet, the possibilities are endless. Consider using different types of containers – terracotta pots for better drainage, hanging baskets for a decorative touch, or even repurposed containers for an eco-friendly approach. You can also explore different soil mixes to find what works best for your specific climate and chili pepper variety.
Furthermore, think about companion planting. Basil, for example, is known to deter pests and improve the flavor of chili peppers. Marigolds are another excellent choice for keeping unwanted insects away. These additions not only enhance your chili pepper garden but also create a more diverse and thriving ecosystem.
Don’t be afraid to get creative with your setup. If you live in a particularly cold climate, consider using a grow light to supplement natural sunlight. You can also build a mini greenhouse to protect your plants from frost. The key is to adapt the techniques to your specific needs and circumstances.
Ultimately, this DIY project is about more than just growing chili peppers; it’s about connecting with nature, learning new skills, and enjoying the fruits (or peppers!) of your labor. It’s about embracing the joy of gardening, regardless of your space constraints.
We wholeheartedly encourage you to give this DIY trick a try. Start small, experiment, and don’t be discouraged by initial setbacks. Gardening is a learning process, and every mistake is an opportunity to improve.
And most importantly, we want to hear about your experience! Share your photos, tips, and challenges in the comments below. Let’s create a community of chili pepper enthusiasts who are passionate about growing their own fresh, flavorful ingredients. Tell us what varieties you’re growing, what challenges you’ve faced, and what successes you’ve celebrated. Your insights can help others on their chili pepper growing journey. Let’s cultivate a vibrant community of DIY gardeners, one chili pepper at a time! This DIY chili pepper growing method is a game changer.
Frequently Asked Questions (FAQ)
What kind of chili peppers are easiest to grow for beginners?
For beginners, milder varieties like Anaheim, Poblano, or Jalapeño are excellent choices. They are generally more forgiving and less demanding than hotter varieties. These peppers also tend to mature relatively quickly, providing a faster sense of accomplishment. Look for seeds or starter plants that are labeled as “easy to grow” or “beginner-friendly.” Remember to provide them with plenty of sunlight and well-draining soil.
How much sunlight do chili peppers need?
Chili peppers thrive in full sun, requiring at least 6-8 hours of direct sunlight per day. If you’re growing them indoors, supplement natural light with grow lights, especially during the shorter days of winter. Insufficient sunlight can lead to leggy growth, reduced flowering, and smaller, less flavorful peppers. Position your plants in the sunniest spot available, and rotate them regularly to ensure even exposure.
What is the best type of soil for growing chili peppers?
Chili peppers prefer well-draining soil that is rich in organic matter. A good potting mix specifically formulated for vegetables is ideal. You can also amend your existing soil with compost, aged manure, or other organic materials to improve drainage and fertility. Avoid heavy clay soils, as they can retain too much moisture and lead to root rot. The ideal pH for chili peppers is between 6.0 and 7.0.
How often should I water my chili pepper plants?
Water your chili pepper plants regularly, especially during hot, dry weather. The soil should be kept consistently moist but not waterlogged. Check the soil moisture by sticking your finger about an inch deep. If it feels dry, it’s time to water. Avoid overwatering, as this can lead to root rot. Water deeply and thoroughly, allowing the excess water to drain out of the bottom of the pot. Reduce watering frequency during cooler periods.
How do I fertilize my chili pepper plants?
Chili peppers benefit from regular fertilization, especially during the growing season. Use a balanced fertilizer with equal amounts of nitrogen, phosphorus, and potassium (e.g., 10-10-10) or a fertilizer specifically formulated for vegetables. Follow the instructions on the fertilizer package for application rates and frequency. Avoid over-fertilizing, as this can lead to excessive foliage growth at the expense of fruit production. You can also supplement with organic fertilizers like compost tea or fish emulsion.
What are common pests and diseases that affect chili peppers?
Common pests that affect chili peppers include aphids, spider mites, whiteflies, and thrips. These pests can suck the sap from the plants, causing damage and weakening them. Diseases that can affect chili peppers include fungal diseases like powdery mildew, blossom end rot, and root rot. To prevent pests and diseases, keep your plants healthy and well-ventilated. Inspect them regularly for signs of infestation or disease. Use organic pest control methods like insecticidal soap or neem oil to control pests. Ensure proper drainage to prevent root rot.
How do I prevent blossom end rot in my chili peppers?
Blossom end rot is a common problem in chili peppers, caused by a calcium deficiency. To prevent it, ensure that your soil is rich in calcium and that your plants are getting consistent watering. You can add calcium to the soil by incorporating bone meal or crushed eggshells. Avoid over-fertilizing with nitrogen, as this can interfere with calcium uptake. Mulching around the plants can also help to retain moisture and prevent fluctuations in soil moisture levels.
When should I harvest my chili peppers?
The timing of harvest depends on the variety of chili pepper and your personal preference. Generally, chili peppers are ready to harvest when they have reached their mature size and color. The color will vary depending on the variety, ranging from green to red, yellow, or orange. You can also harvest chili peppers when they are green if you prefer a milder flavor. Use pruning shears or scissors to cut the peppers from the plant, leaving a small stem attached.
Can I grow chili peppers indoors year-round?
Yes, you can grow chili peppers indoors year-round, provided you provide them with the necessary conditions. This includes adequate sunlight (or grow lights), well-draining soil, regular watering, and fertilization. Choose compact varieties that are well-suited for container growing. You may also need to hand-pollinate the flowers to ensure fruit production.
How do I save seeds from my chili peppers for future planting?
To save seeds from your chili peppers, allow the peppers to fully ripen on the plant. Once they are fully ripe, carefully remove the seeds from the peppers. Spread the seeds out on a paper towel and allow them to dry completely. Once the seeds are dry, store them in an airtight container in a cool, dark, and dry place. Label the container with the variety of chili pepper and the date of harvest. These seeds can be used to grow new chili pepper plants in the future.
Leave a Comment