

Grow Chives Kitchen Garden: Imagine stepping into your kitchen, snipping fresh, flavorful chives right from your windowsill, and adding them to your omelet, salad, or baked potato. Sounds dreamy, right? Well, it doesn’t have to be just a dream! I’m here to show you how incredibly easy it is to cultivate your own thriving chive patch, even if you have limited space or zero gardening experience.
Chives, with their delicate oniony flavor, have been a culinary staple for centuries. Originating in Asia, they’ve journeyed across continents, gracing dishes from simple peasant fare to gourmet creations. But beyond their delicious taste, growing your own chives offers a unique connection to nature and a sense of self-sufficiency that’s incredibly rewarding.
In today’s busy world, finding moments of calm and connection is more important than ever. That’s where this DIY guide comes in. I’ll walk you through simple, step-by-step instructions to grow chives kitchen garden, transforming your kitchen into a mini-oasis of fresh herbs. Forget those expensive, often wilted bunches from the grocery store! With a little effort, you can have a constant supply of vibrant, flavorful chives at your fingertips. Plus, I’ll share some clever hacks to maximize your yield and keep your chives thriving all year round. Let’s get started and bring a touch of green goodness into your home!
Grow Your Own Chives: A Beginner’s Guide to a Thriving Kitchen Garden
Hey there, fellow plant enthusiasts! I’m so excited to share my experience with growing chives right in my kitchen. It’s surprisingly easy, incredibly rewarding, and adds a fresh, flavorful touch to so many dishes. Plus, having fresh herbs on hand is a total game-changer. Let’s dive into how you can create your own thriving chive patch, even if you don’t have a green thumb (yet!).
What You’ll Need
Before we get started, let’s gather all the necessary supplies. Trust me, having everything ready beforehand will make the process so much smoother.
* Chive Seeds or a Chive Plant: You can start from seeds, which is more budget-friendly, or buy a small established plant for quicker results. I’ve done both, and both work great!
* A Pot with Drainage: Choose a pot that’s at least 6 inches in diameter and has drainage holes. Good drainage is crucial to prevent root rot.
* Potting Mix: Use a good quality potting mix, not garden soil. Potting mix is lighter and provides better drainage and aeration.
* Watering Can or Spray Bottle: For gentle watering.
* Sunny Windowsill or Grow Light: Chives need at least 6 hours of sunlight per day. If you don’t have enough natural light, a grow light is a great investment.
* Optional: Fertilizer (organic liquid fertilizer is best), small gardening trowel, plant labels.
Starting from Seeds: A Step-by-Step Guide
Starting from seeds is a bit more time-consuming, but it’s also super satisfying to watch those tiny sprouts emerge. Here’s how I do it:
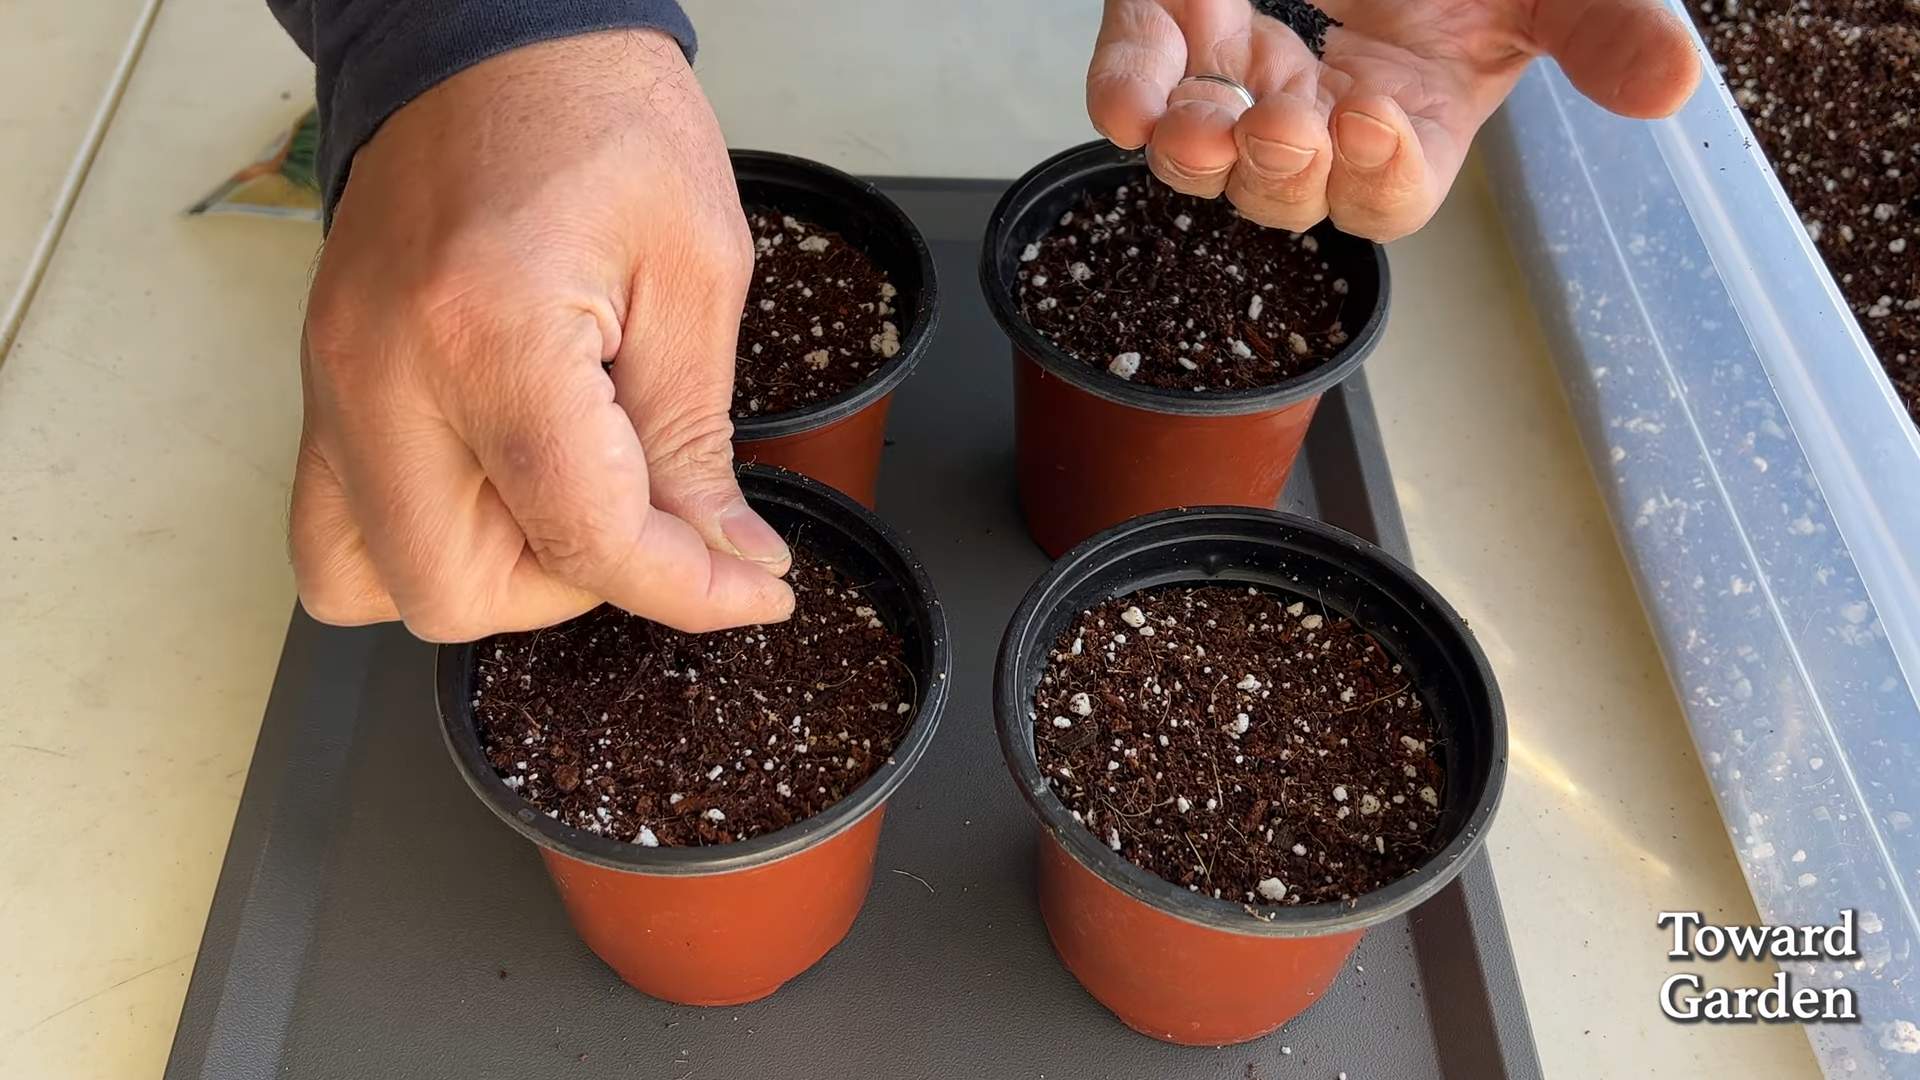
1. Prepare the Pot: Fill your pot with potting mix, leaving about an inch of space at the top. Gently pat down the soil to create a firm, even surface.
2. Sow the Seeds: Sprinkle the chive seeds evenly over the surface of the soil. You don’t need to bury them too deep; just lightly press them into the soil. I usually aim for about 5-10 seeds per square inch.
3. Cover with a Thin Layer of Soil: Sprinkle a very thin layer of potting mix over the seeds, just enough to cover them.
4. Water Gently: Use a spray bottle or watering can with a gentle nozzle to water the soil thoroughly. You want the soil to be moist but not soggy.
5. Create a Humid Environment: Cover the pot with plastic wrap or a clear plastic bag to create a humid environment. This will help the seeds germinate. Make sure to poke a few holes in the plastic for ventilation.
6. Place in a Warm, Sunny Location: Place the pot in a warm, sunny location, like a windowsill that gets plenty of sunlight. If you’re using a grow light, position it a few inches above the pot.
7. Monitor and Water: Check the soil moisture daily. Keep the soil consistently moist, but don’t overwater. Remove the plastic wrap once the seeds have germinated (usually within 7-14 days).
8. Thin the Seedlings: Once the seedlings have a few sets of leaves, thin them out so that they’re about an inch apart. This will give them enough space to grow. I know it feels harsh to pull out the little guys, but it’s necessary for the overall health of your chive patch.
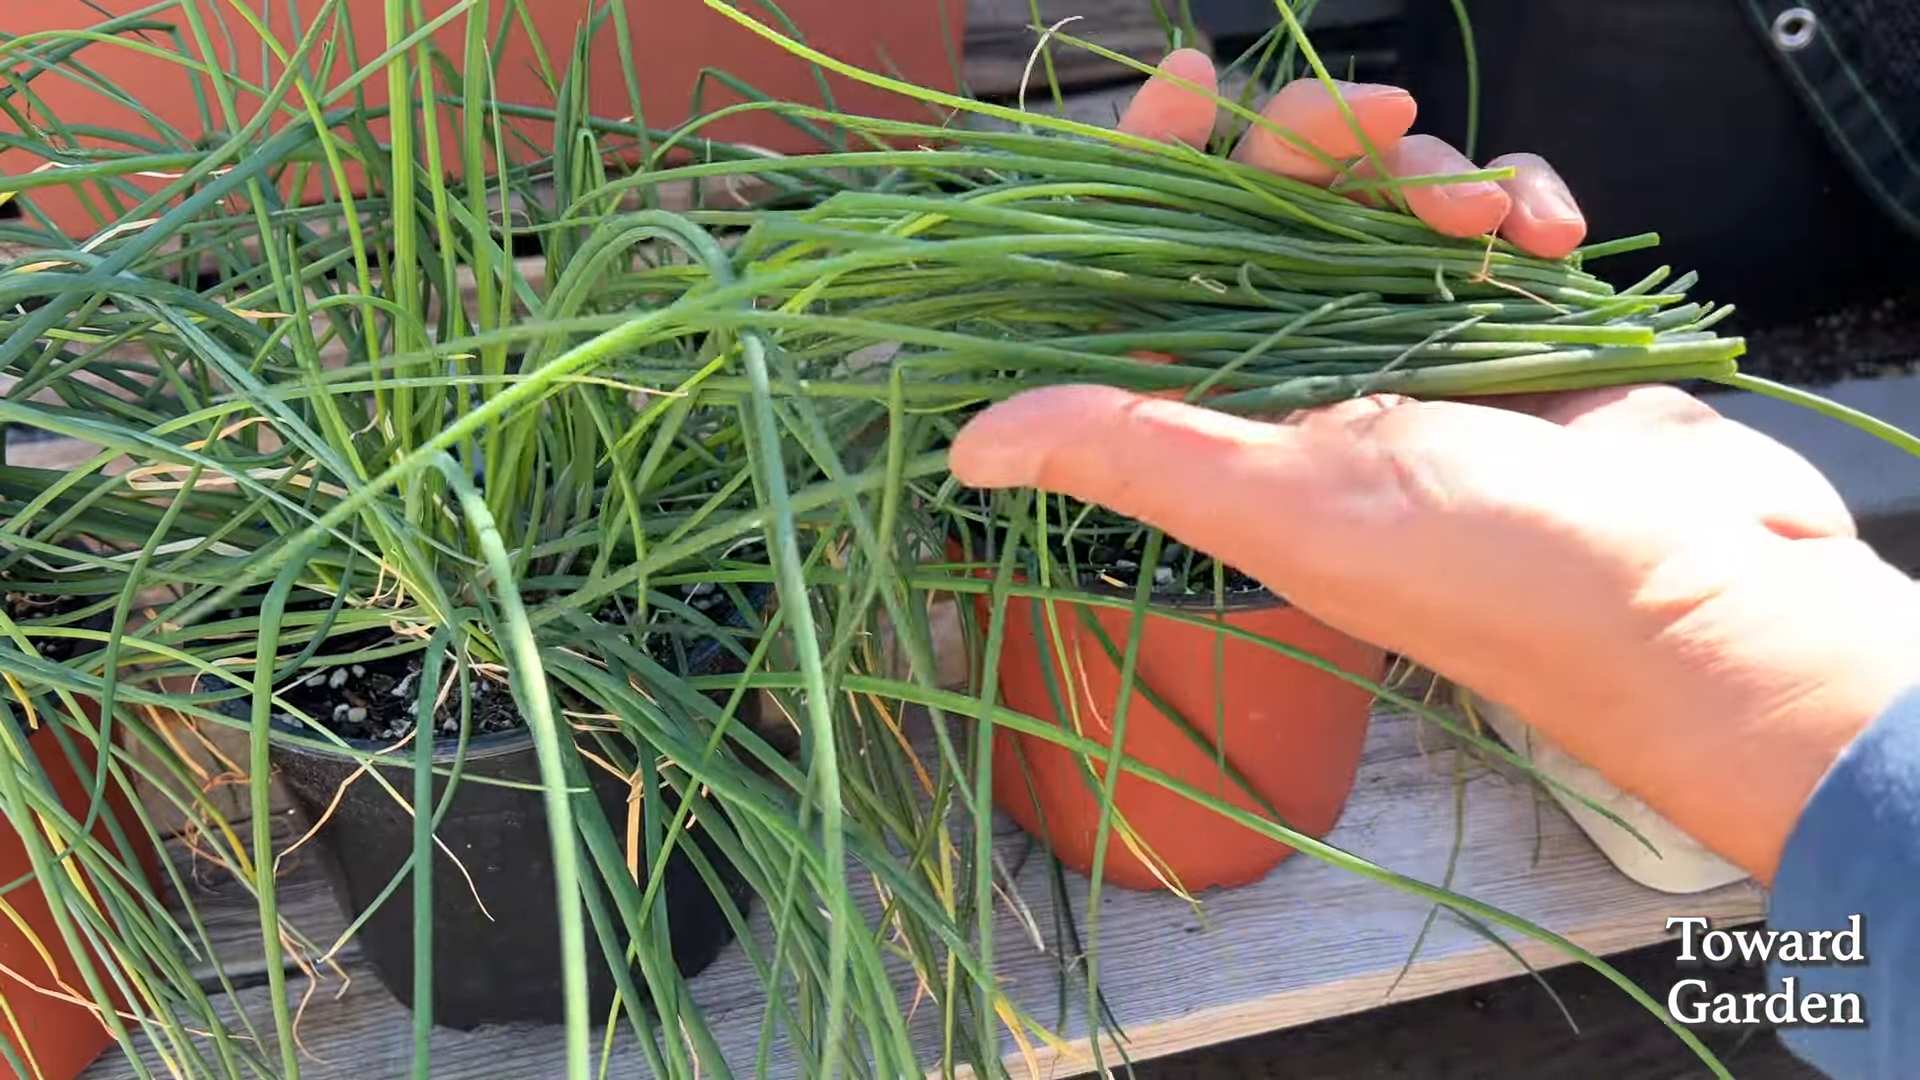
Starting with a Plant: The Quick Route to Chive Heaven
If you’re impatient like me sometimes, starting with a plant is the way to go. It’s faster and easier, and you’ll have fresh chives ready to harvest almost immediately.
1. Prepare the Pot: Fill your pot with potting mix, leaving about an inch of space at the top.
2. Remove the Plant from its Container: Gently remove the chive plant from its original container. If the roots are tightly packed, gently loosen them with your fingers.
3. Plant the Chives: Dig a hole in the center of the pot that’s large enough to accommodate the root ball of the chive plant. Place the plant in the hole and fill in around it with potting mix.
4. Water Thoroughly: Water the plant thoroughly until the water drains out of the bottom of the pot.
5. Place in a Sunny Location: Place the pot in a sunny location, like a windowsill that gets plenty of sunlight.
Caring for Your Chives: Keeping Them Happy and Healthy
Now that you have your chives planted, it’s important to provide them with the right care to keep them thriving.
* Watering: Water your chives regularly, especially during hot, dry weather. The soil should be consistently moist, but not soggy. I usually water mine every 2-3 days, but it depends on the weather and the humidity.
* Sunlight: Chives need at least 6 hours of sunlight per day. If you don’t have enough natural light, use a grow light.
* Fertilizing: Fertilize your chives every 2-3 weeks with an organic liquid fertilizer. This will help them grow strong and healthy.
* Pruning: Prune your chives regularly to encourage new growth. Simply snip off the tips of the leaves with scissors. This will also prevent them from flowering, which can make the leaves taste bitter.
* Dividing: Every year or two, you may need to divide your chive plant to prevent it from becoming overcrowded. To do this, gently dig up the plant and separate it into smaller clumps. Replant the clumps in separate pots or in the garden.
Harvesting Your Chives: The Best Part!
Harvesting your chives is the most rewarding part of the process. It’s so satisfying to snip off fresh herbs that you’ve grown yourself.
1. Wait Until the Chives are Established: Don’t start harvesting until the chives are at least 6 inches tall. This will give them enough time to establish themselves.
2. Use Scissors: Use sharp scissors to snip off the chives about an inch above the soil.
3. Harvest Regularly: Harvest your chives regularly to encourage new growth. The more you harvest, the more they’ll grow!
4. Use Fresh or Freeze: Use your fresh chives immediately or freeze them for later use. To freeze chives, simply chop them up and place them in a freezer bag. They’ll keep in the freezer for several months.
Troubleshooting: Common Chive Problems and Solutions
Even with the best care, you might encounter some problems with your chives. Here are some common issues and how to fix them:
* Yellowing Leaves: Yellowing leaves can be caused by overwatering, underwatering, or nutrient deficiencies. Make sure you’re watering your chives properly and fertilizing them regularly.
* Slow Growth: Slow growth can be caused by lack of sunlight or poor soil. Make sure your chives are getting enough sunlight and that you’re using a good quality potting mix.
* Pests: Chives are generally pest-resistant, but they can sometimes be attacked by aphids or spider mites. If you notice pests on your chives, spray them with insecticidal soap.
* Flowering: While chive blossoms are pretty, flowering can make the leaves taste bitter. To prevent flowering, prune your chives regularly.
Chive Varieties: Exploring Different Flavors
While common chives are the most popular, there are other varieties you might want to try:
* Garlic Chives: These have a mild garlic flavor and are great in Asian dishes.
* Giant Siberian Chives: These have larger leaves and a stronger flavor than common chives.
* Blue Chives: These have a beautiful blue-green color and a mild onion flavor.
Culinary Uses: Adding Chives to Your Dishes
Chives are incredibly versatile and can be used in a wide variety of dishes. Here are some of my favorite ways to use them:
* Garnish: Sprinkle chopped chives over soups, salads, and baked potatoes.
* Omelets and Scrambled Eggs: Add chopped chives to omelets and scrambled eggs for a burst of flavor.
* Dips and Sauces: Mix chopped chives into dips and sauces, such as sour cream, cream cheese, or pesto.
* Salads: Add chopped chives to salads for a fresh, oniony flavor.
* Baked Goods: Add chopped chives to savory baked goods, such as scones or muffins.
Propagating Chives: Expanding Your Herb Garden
Once you have a thriving chive patch, you can easily propagate it to create even more plants. The easiest way to propagate chives is by division.
1. Dig Up the Plant: Gently dig up
Conclusion
So, there you have it! Growing your own chives in a kitchen garden is not just a fun project; it’s a game-changer for your culinary adventures. Forget those sad, wilted bunches from the grocery store. Imagine snipping fresh, vibrant chives right from your windowsill whenever you need them. The difference in flavor is truly remarkable – a bright, oniony zest that elevates everything from scrambled eggs to baked potatoes.
This DIY trick is a must-try because it’s incredibly easy, cost-effective, and rewarding. You don’t need a green thumb or a sprawling garden to enjoy the benefits of fresh herbs. A simple pot, some soil, and a sunny spot are all you need to embark on this flavorful journey. Plus, think of the satisfaction of knowing exactly where your food comes from and that you nurtured it yourself.
Beyond the basic method, there are plenty of ways to customize your chive-growing experience. Consider using different types of containers, from repurposed teacups to stylish ceramic pots, to match your kitchen decor. You can also experiment with companion planting. Chives are known to deter pests, so planting them near other herbs or vegetables can be beneficial. Try pairing them with tomatoes, carrots, or even strawberries!
Another variation is to explore different varieties of chives. While common chives (Allium schoenoprasum) are the most popular, garlic chives (Allium tuberosum) offer a milder, garlic-infused flavor that’s perfect for Asian-inspired dishes. You could even try growing Siberian chives (Allium nutans), which have a slightly sweeter taste.
But the real magic of this DIY project lies in its accessibility. It’s a fantastic way to introduce children to gardening and teach them about where their food comes from. It’s also a great stress reliever – there’s something incredibly therapeutic about tending to plants and watching them grow.
We wholeheartedly encourage you to give this DIY trick a try. It’s a small investment of time and effort that yields a huge return in flavor and satisfaction. Once you experience the joy of harvesting your own fresh chives, you’ll never go back to store-bought again.
Don’t just take our word for it, though. We want to hear about your experiences! Share your photos, tips, and stories in the comments below. Let us know what variations you’ve tried, what dishes you’ve used your fresh chives in, and any challenges you’ve encountered along the way. Together, we can create a community of chive-growing enthusiasts and inspire others to embrace the joys of homegrown herbs. So, grab a pot, some soil, and some chive seeds or seedlings, and get ready to elevate your cooking with the freshest, most flavorful chives imaginable. Happy growing!
Frequently Asked Questions (FAQ)
What kind of soil should I use for growing chives?
Chives thrive in well-draining soil that is rich in organic matter. A good potting mix specifically formulated for herbs or vegetables is ideal. You can also amend regular potting soil with compost or aged manure to improve its fertility and drainage. Avoid using heavy clay soil, as it can become waterlogged and lead to root rot. A slightly acidic to neutral pH (around 6.0 to 7.0) is optimal.
How much sunlight do chives need?
Chives need at least 6 hours of direct sunlight per day to thrive. If you’re growing them indoors, place them near a sunny window that receives plenty of light. If you don’t have enough natural light, you can supplement with a grow light. Insufficient sunlight can result in leggy, weak growth and reduced flavor. Rotate the pot regularly to ensure even exposure to sunlight.
How often should I water my chives?
Water your chives regularly, keeping the soil consistently moist but not waterlogged. Check the soil moisture by sticking your finger about an inch deep. If it feels dry, it’s time to water. Water thoroughly until excess water drains out of the bottom of the pot. Avoid overwatering, as this can lead to root rot. Reduce watering during the winter months when growth slows down.
How do I harvest chives?
Harvest chives by snipping the leaves close to the base of the plant with scissors or kitchen shears. Avoid pulling the leaves, as this can damage the plant. Harvest regularly to encourage new growth. You can harvest up to one-third of the plant at a time without harming it. The more you harvest, the more the chives will grow.
Can I grow chives from seed?
Yes, you can easily grow chives from seed. Start seeds indoors 6-8 weeks before the last expected frost. Sow the seeds about ¼ inch deep in a seed-starting mix. Keep the soil moist and warm (around 70-75°F). Once the seedlings have developed a few sets of true leaves, you can transplant them into individual pots or directly into your kitchen garden. You can also sow seeds directly outdoors after the last frost.
Do chives need fertilizer?
Chives are not heavy feeders, but they will benefit from occasional fertilization. Use a balanced liquid fertilizer diluted to half strength every 2-3 weeks during the growing season. Alternatively, you can amend the soil with compost or aged manure to provide a slow-release source of nutrients. Avoid over-fertilizing, as this can lead to excessive foliage growth at the expense of flavor.
How do I prevent pests and diseases?
Chives are generally pest-resistant, but they can occasionally be affected by aphids or spider mites. If you notice any pests, spray the plants with a strong stream of water or use an insecticidal soap. To prevent fungal diseases, ensure good air circulation and avoid overwatering. Remove any dead or dying leaves promptly.
Can I freeze or dry chives?
Yes, you can preserve chives by freezing or drying them. To freeze chives, chop them finely and spread them out on a baking sheet lined with parchment paper. Freeze for a few hours until solid, then transfer them to a freezer bag or container. To dry chives, spread them out on a baking sheet and dry them in a low oven (around 170°F) for several hours, or use a dehydrator. Store dried chives in an airtight container in a cool, dark place.
My chives are flowering. Should I cut off the flowers?
Chive flowers are edible and have a mild onion flavor. However, allowing the plant to flower can reduce leaf production. If you want to maximize leaf growth, cut off the flower buds as soon as they appear. If you enjoy the flowers, you can leave them on the plant and use them in salads or as a garnish.
How long will my chive plant last?
Chives are perennial plants, meaning they will come back year after year. With proper care, a chive plant can last for several years. Divide the plant every 2-3 years to prevent overcrowding and maintain its vigor. This involves digging up the plant and separating it into smaller clumps, which can then be replanted.

Leave a Comment