

Shaving Foam Cleaning Hacks: Who knew that the foamy stuff you use to get a smooth shave could be your secret weapon against household grime? I certainly didn’t, until I stumbled upon a few amazing cleaning tricks that have completely transformed my cleaning routine! Forget spending a fortune on specialized cleaners – this simple, affordable product is about to become your new best friend.
The history of using unconventional items for cleaning stretches back centuries. Think about it – our grandmothers used lemon juice and vinegar long before fancy cleaning sprays were even a thought. This tradition of resourceful cleaning continues today, and shaving foam is just the latest addition to the arsenal of clever DIY solutions.
Let’s face it, cleaning can be a real drag. We all want a sparkling home, but who has the time or energy to scrub endlessly? That’s where these shaving foam cleaning hacks come in. They’re quick, easy, and surprisingly effective, saving you time and money while delivering impressive results. From tackling stubborn stains to polishing surfaces, I’m excited to share these game-changing tricks that will make your home shine!
Shaving Foam: Your Unexpected Cleaning Superhero!
Okay, friends, let’s talk about shaving foam. Yes, you read that right! That fluffy stuff you (or someone you know!) uses to get a smooth shave is actually a surprisingly versatile cleaning agent. I know, I know, it sounds crazy, but trust me on this one. I’ve tried these hacks myself, and they work like a charm. Get ready to be amazed by the cleaning power of shaving foam!
Why Shaving Foam Works as a Cleaner
Before we dive into the how-to, let’s quickly touch on why shaving foam is such a cleaning whiz. It’s all about the ingredients! Most shaving foams contain:
* Surfactants: These are the magic ingredients that break down dirt and grime. They essentially lift the gunk away from the surface, making it easy to wipe clean.
* Soaps: Similar to surfactants, soaps help to emulsify grease and oil, allowing them to be washed away with water.
* Humectants: These ingredients attract and retain moisture, which can be helpful for loosening stubborn stains.
Basically, it’s a gentle but effective cleaning cocktail! Now, let’s get to the good stuff – the hacks!
Hack 1: Sparkling Clean Mirrors and Glass
Tired of streaks and smudges on your mirrors and windows? Shaving foam to the rescue! This is one of my absolute favorite uses.
What you’ll need:
* Shaving foam (any kind will do, but I prefer the foamy kind)
* A clean, dry microfiber cloth
* Water (optional, for rinsing)
Step-by-Step Instructions:
1. Apply the Shaving Foam: Squirt a generous amount of shaving foam directly onto the mirror or glass surface. Don’t be shy! You want a nice, even layer.
2. Spread it Around: Using your hand or the microfiber cloth, spread the shaving foam evenly over the entire surface. Make sure to cover all the areas you want to clean.
3. Let it Sit: Allow the shaving foam to sit for a minute or two. This gives the surfactants time to work their magic and break down any dirt or grime.
4. Wipe it Clean: Using a clean, dry microfiber cloth, wipe away the shaving foam in a circular motion. You’ll immediately see the streaks and smudges disappearing.
5. Rinse (Optional): If you prefer, you can rinse the surface with water after wiping away the shaving foam. This is especially helpful if you used a lot of foam. Just make sure to dry the surface thoroughly with a clean cloth to prevent water spots.
6. Admire Your Sparkly Clean Mirror! Step back and admire your streak-free, sparkling clean mirror or window. It’s like magic, I tell you!
Hack 2: Stain Remover for Carpets and Upholstery
Spilled something on your carpet or upholstery? Don’t panic! Shaving foam can often lift the stain before it sets in.
What you’ll need:
* Shaving foam (again, the foamy kind works best)
* A clean, damp cloth or sponge
* Water (for rinsing)
* A vacuum cleaner
Step-by-Step Instructions:
1. Act Fast! The sooner you treat the stain, the better your chances of removing it completely.
2. Apply the Shaving Foam: Apply a generous amount of shaving foam directly onto the stain. Make sure to cover the entire affected area.
3. Let it Sit: Allow the shaving foam to sit for 10-15 minutes. This gives it time to penetrate the stain and break it down.
4. Blot, Don’t Rub: Using a clean, damp cloth or sponge, gently blot the stain. Avoid rubbing, as this can spread the stain and damage the fibers. Work from the outside of the stain towards the center.
5. Rinse (If Necessary): If the stain is particularly stubborn, you may need to rinse the area with water. Use a clean, damp cloth to blot away any remaining shaving foam and stain residue.
6. Dry Thoroughly: Use a clean, dry towel to blot the area and absorb any excess moisture. You can also use a fan or hairdryer on a low setting to speed up the drying process.
7. Vacuum: Once the area is completely dry, vacuum it to restore the fibers and remove any remaining residue.
Important Note: Always test the shaving foam on a small, inconspicuous area of the carpet or upholstery before applying it to the entire stain. This will help you ensure that it doesn’t damage or discolor the fabric.
Hack 3: Cleaning Stainless Steel Appliances
Stainless steel appliances can be a pain to keep clean. Fingerprints, smudges, and water spots seem to appear out of nowhere! But guess what? Shaving foam can help with that too!
What you’ll need:
* Shaving foam
* A clean, dry microfiber cloth
Step-by-Step Instructions:
1. Apply the Shaving Foam: Apply a small amount of shaving foam to a clean, dry microfiber cloth.
2. Wipe the Appliance: Gently wipe the stainless steel appliance in the direction of the grain. This will help to remove fingerprints, smudges, and water spots.
3. Buff to a Shine: Use a clean, dry section of the microfiber cloth to buff the appliance to a shine.
4. Enjoy Your Spotless Appliances! Stand back and admire your gleaming stainless steel appliances. They’ll look brand new!
Hack 4: Polishing Chrome Fixtures
Chrome fixtures in your bathroom and kitchen can lose their shine over time due to water spots and soap scum. Shaving foam can help restore their luster.
What you’ll need:
* Shaving foam
* A clean, dry microfiber cloth
Step-by-Step Instructions:
1. Apply the Shaving Foam: Apply a small amount of shaving foam directly to the chrome fixture.
2. Rub it In: Gently rub the shaving foam over the entire surface of the fixture.
3. Let it Sit: Allow the shaving foam to sit for a minute or two.
4. Wipe it Clean: Using a clean, dry microfiber cloth, wipe away the shaving foam.
5. Buff to a Shine: Use a clean, dry section of the microfiber cloth to buff the fixture to a shine.
6. Be Amazed by the Shine! Your chrome fixtures will look like they just came out of the box!
Hack 5: Preventing Foggy Bathroom Mirrors
This is a game-changer! Tired of your bathroom mirror fogging up every time you take a shower? Shaving foam can prevent that!
What you’ll need:
* Shaving foam
* A clean, dry microfiber cloth
Step-by-Step Instructions:
1. Apply the Shaving Foam: Apply a thin layer of shaving foam to the entire surface of the dry mirror.
2. Spread it Around: Using your hand or the microfiber cloth, spread the shaving foam evenly over the entire surface.
3. Wipe it Clean: Using a clean, dry microfiber cloth, wipe away the shaving foam completely. Make sure there are no streaks or residue left behind.
4. Enjoy a Fog-Free Mirror! The next time you take a shower, your mirror will stay clear and fog-free! This trick usually lasts for a few days, so you’ll need to reapply it periodically.
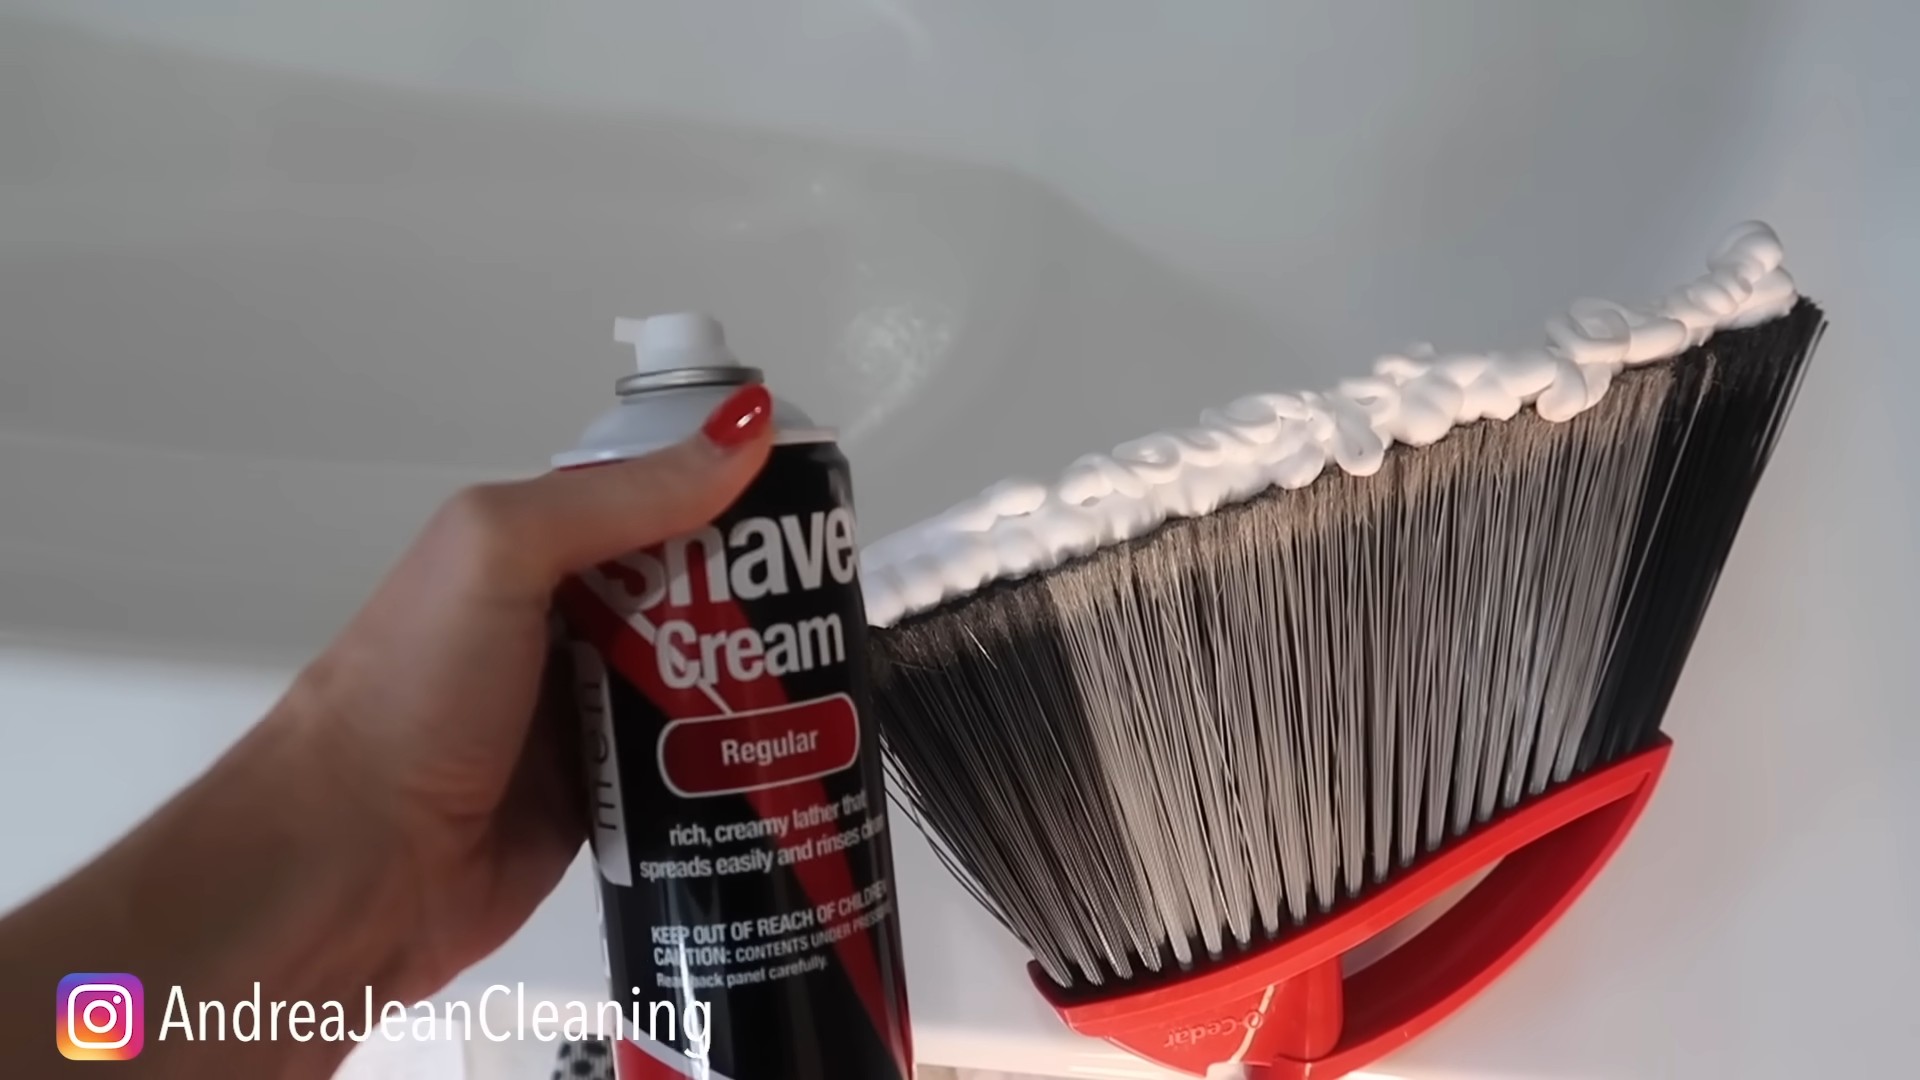
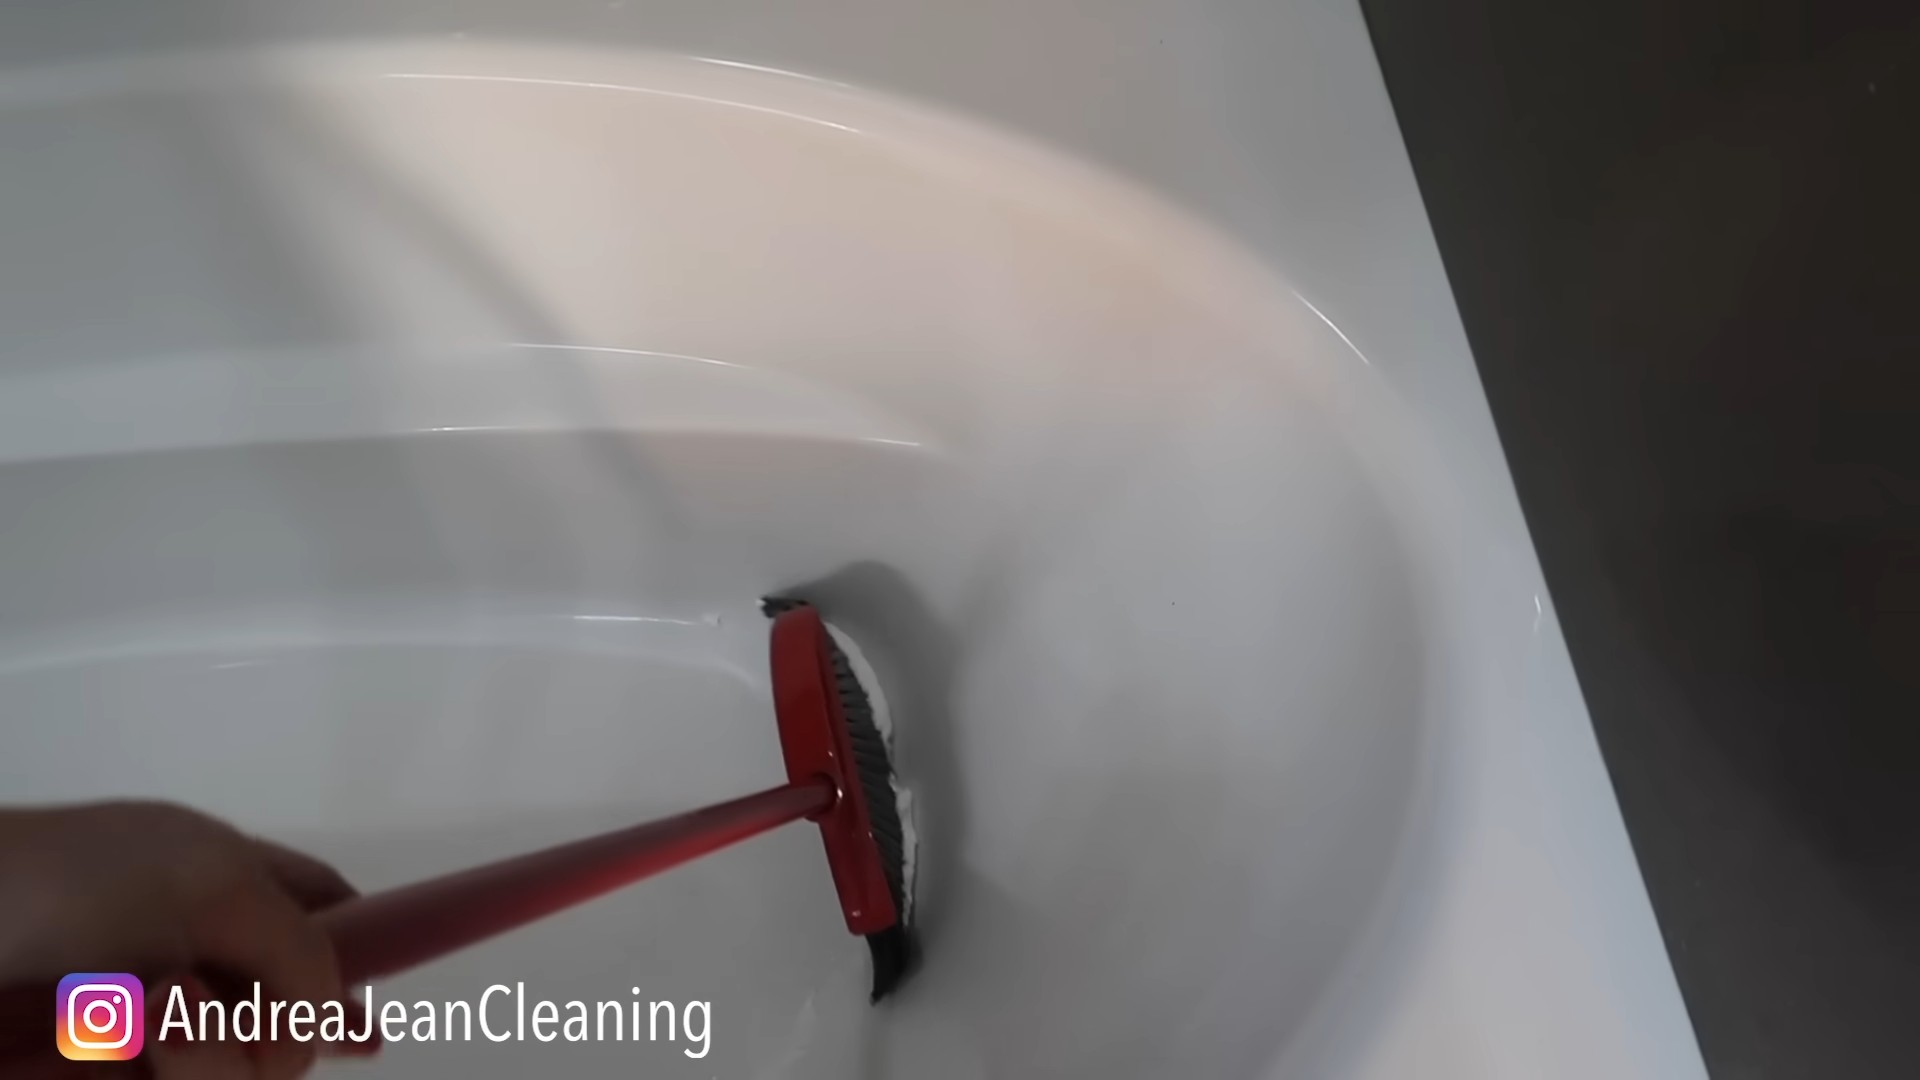
Hack 6: Cleaning Bathroom Tile and Grout
Bathroom tile and grout can be a breeding ground for mold and mildew. Shaving foam can help to clean and disinfect these surfaces.
What you’ll need:
* Shaving foam
* A scrub brush or sponge
* Water (for rinsing)
Step-by-Step Instructions:
1. Apply the Shaving Foam: Apply a generous amount of shaving foam to the tile and grout.
2. Scrub it In: Using a scrub brush or sponge, scrub the tile and grout to remove dirt, grime, and mildew.
3. Let it Sit: Allow the shaving foam to sit for 5-10 minutes.
4. Rinse Thoroughly: Rinse the tile and grout thoroughly with water to remove all traces of shaving foam.
5. Dry the Surface: Use a clean towel to dry the surface.
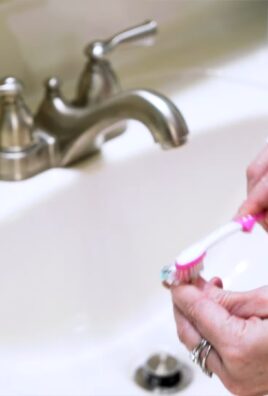
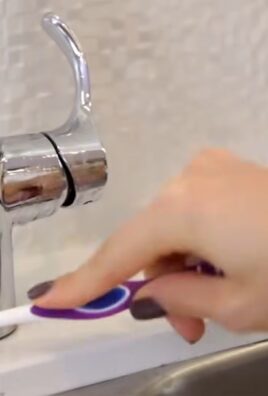
Hack 7: Cleaning Jewelry
Want to give your jewelry a quick shine without harsh chemicals? Shaving foam can help!
What you’ll need:
* Shaving foam
* A soft-bristled toothbrush
* Water (for rinsing)
* A soft cloth
Step-by-Step Instructions:
1. Apply the Shaving Foam:
Conclusion
So, there you have it! Shaving foam isn’t just for a smooth shave; it’s a surprisingly versatile cleaning agent that can tackle a multitude of household messes. From banishing stubborn carpet stains to restoring the sparkle to your stainless steel appliances, this simple bathroom staple offers a cost-effective and surprisingly effective alternative to harsh chemical cleaners.
Why is this DIY trick a must-try? Because it’s simple, affordable, and readily available. You likely already have a can of shaving foam under your sink, making it an incredibly convenient cleaning solution. Plus, it’s generally gentler than many commercial cleaners, making it a safer option for your family and your home. The mild formulation of most shaving foams means you can often avoid the harsh fumes and potential skin irritation associated with stronger chemicals.
But the benefits don’t stop there. Shaving foam’s unique texture allows it to cling to surfaces, providing ample time for the cleaning agents to work their magic. This is particularly useful for tackling vertical surfaces like shower doors or greasy stovetops. And because it’s so easy to apply and wipe away, cleaning with shaving foam is a breeze, saving you time and effort.
Looking for variations? Consider adding a few drops of your favorite essential oil to the shaving foam for a pleasant scent while you clean. Lavender, lemon, or tea tree oil can add a refreshing aroma and even provide additional cleaning benefits. For tougher stains, let the shaving foam sit for a longer period before wiping it away. You can also experiment with different types of shaving foam to see which works best for your specific cleaning needs. Some people find that thicker foams are more effective for lifting stubborn grime, while others prefer the lighter texture of gel-based foams.
We’re confident that once you try these shaving foam cleaning hacks, you’ll be amazed by the results. It’s a game-changer for anyone looking for a simple, effective, and budget-friendly way to keep their home clean and fresh.
So, ditch the expensive cleaning products and give shaving foam a try! We encourage you to experiment with these tips and discover new ways to utilize this unexpected cleaning powerhouse. Don’t forget to share your experiences and any other shaving foam cleaning secrets you uncover in the comments below. We’re eager to hear how this simple trick has transformed your cleaning routine! Let us know what surfaces you cleaned, what type of shaving foam you used, and any variations you tried. Your feedback will help other readers discover the full potential of this amazing cleaning hack. Happy cleaning!
Frequently Asked Questions (FAQ)
What kind of shaving foam should I use?
Generally, any type of shaving foam will work for cleaning purposes. However, plain, white shaving foam is often preferred as it doesn’t contain dyes or perfumes that could potentially stain or leave a residue. Gel-based shaving foams can also be used, but they may not cling to surfaces as well as traditional foams. Experiment to see which type works best for your specific cleaning needs. Avoid using shaving creams that are heavily scented or contain moisturizing oils, as these can sometimes leave a greasy film.
Is shaving foam safe to use on all surfaces?
While shaving foam is generally gentle, it’s always a good idea to test it on an inconspicuous area first, especially on delicate or sensitive surfaces like painted walls, wood furniture, or natural stone. Avoid using shaving foam on electronics or any surface that could be damaged by moisture. If you’re unsure, consult the manufacturer’s instructions for the surface you’re cleaning.
Can I use shaving foam to clean my car?
Yes, shaving foam can be used to clean certain parts of your car. It’s particularly effective for cleaning upholstery stains and removing bug splatters from the windshield. However, avoid using it on the car’s paint, as it could potentially damage the clear coat over time. Always test a small, hidden area first to ensure it doesn’t cause any discoloration or damage.
How long should I leave the shaving foam on before wiping it off?
The amount of time you leave the shaving foam on depends on the severity of the stain or grime. For light cleaning, a few minutes may be sufficient. For tougher stains, you may need to let it sit for 15-20 minutes or even longer. Keep an eye on the surface and don’t let the shaving foam dry completely, as this can make it more difficult to remove.
Does shaving foam disinfect as well as clean?
While shaving foam can help remove dirt and grime, it doesn’t have strong disinfecting properties like bleach or other specialized disinfectants. If you need to disinfect a surface, you’ll need to use a separate disinfectant product after cleaning with shaving foam.
Can I use shaving foam to clean my oven?
Yes, shaving foam can be used to clean your oven, but it’s best suited for light cleaning and maintenance rather than tackling heavily baked-on grease. Apply a layer of shaving foam to the interior of the oven, let it sit for several hours or overnight, and then wipe it clean with a damp cloth. For stubborn grease, you may need to use a specialized oven cleaner.
Will shaving foam remove hard water stains?
Shaving foam can help loosen and remove some hard water stains, especially on shower doors and faucets. However, for severe hard water stains, you may need to use a dedicated hard water stain remover or a solution of vinegar and water.
Is shaving foam safe for pets and children?
While shaving foam is generally considered safe, it’s always best to keep it out of reach of children and pets. Avoid using it on surfaces that pets or children are likely to lick or chew on. If ingested, shaving foam can cause mild stomach upset. If you’re concerned, contact your veterinarian or a poison control center.
What are some other unexpected uses for shaving foam around the house?
Besides the cleaning hacks mentioned in the article, shaving foam can also be used to:
* Prevent fogging on mirrors and windows.
* Shine stainless steel appliances.
* Remove makeup stains from clothing.
* Clean jewelry.
* Loosen stuck zippers.
Where can I find more information about DIY cleaning solutions?
There are many online resources and books available that provide information about DIY cleaning solutions. A simple internet search for “DIY cleaning recipes” or “natural cleaning solutions” will yield a wealth of information. Be sure to research the safety and effectiveness of any DIY cleaning solution before using it.

Leave a Comment