

Grow Celery at Home? Absolutely! Imagine stepping into your backyard and snipping fresh, crisp celery stalks for your salads, soups, or even just a healthy snack. No more limp, store-bought celery that’s been sitting on the shelf for days. This isn’t just a dream; it’s a reality you can easily achieve with a few simple tricks and a little bit of DIY magic.
Celery, with its refreshing crunch, has been cultivated for centuries. Originating in the Mediterranean, it was initially valued for its medicinal properties before becoming a culinary staple. Now, you can bring this piece of history right to your own garden! But why bother growing your own celery? Well, for starters, homegrown celery tastes significantly better. Plus, you know exactly what’s gone into growing it – no harmful pesticides or chemicals.
In this article, I’m going to share some easy-to-follow DIY hacks that will help you grow celery at home, even if you don’t have a green thumb. We’ll cover everything from starting seeds to transplanting seedlings and even some clever tips for pest control. Get ready to enjoy the satisfaction of harvesting your own delicious, healthy celery – it’s easier than you think!

Grow Your Own Celery: A Beginner’s Guide
Hey there, fellow gardening enthusiasts! Ever thought about growing your own celery? It’s easier than you might think, and nothing beats the fresh, crisp taste of homegrown celery. Plus, you’ll know exactly where it came from and what went into growing it. I’m going to walk you through the whole process, from starting from seed (or even a leftover stalk!) to harvesting your crunchy bounty.
Starting Your Celery Journey
There are two main ways to get started: from seed or by regrowing from a store-bought stalk. Both have their pros and cons, so let’s explore them.
Starting from Seed: The Patient Gardener’s Route
Growing celery from seed requires a bit more patience, as it takes longer to mature. But it gives you more control over the variety and allows you to start earlier in the season.
What You’ll Need:
* Celery seeds (choose a variety you like!)
* Seed starting trays or small pots
* Seed starting mix (a light, well-draining soil)
* Spray bottle with water
* Grow lights (optional, but recommended)
* Heat mat (optional, but helpful for germination)
Step-by-Step Instructions:
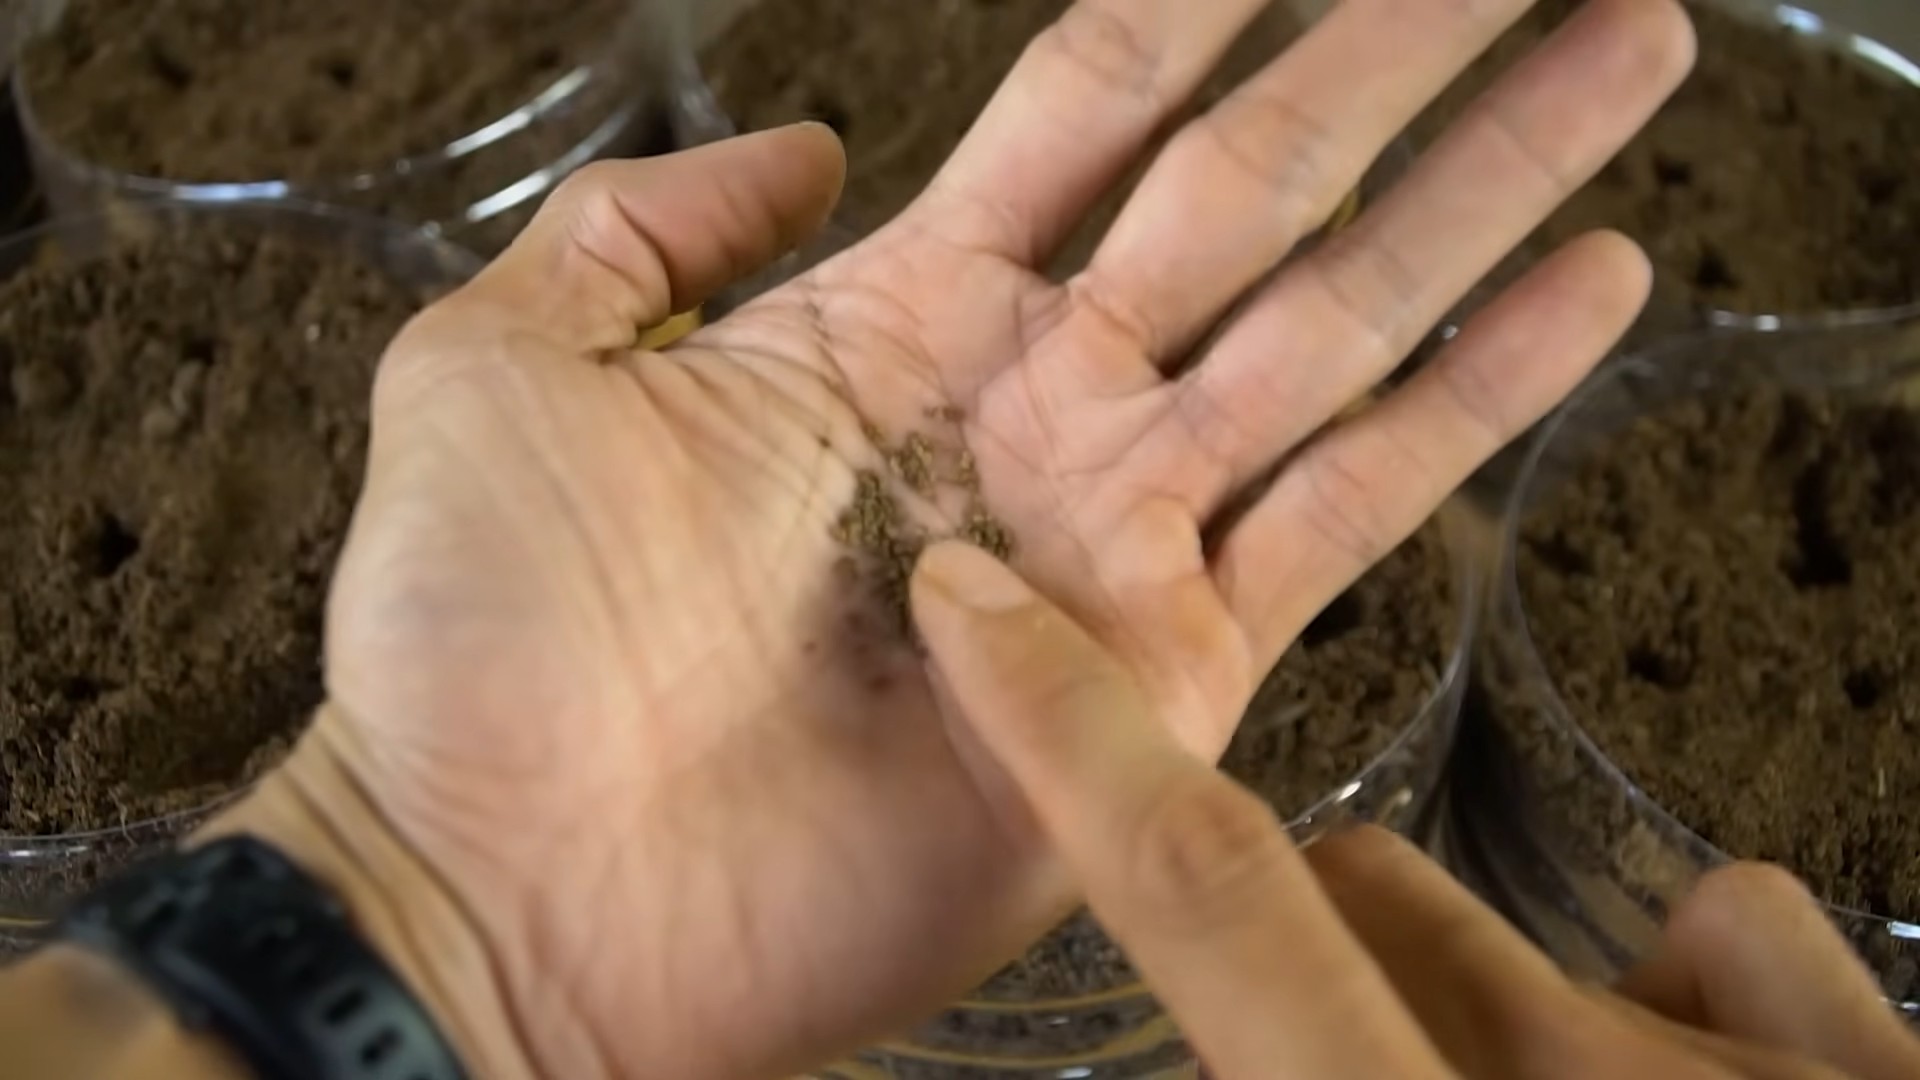
1. Sow the Seeds: Celery seeds are tiny and need light to germinate, so don’t bury them too deep. Sprinkle the seeds thinly over the surface of the seed starting mix in your trays or pots. Gently press them down to ensure good contact with the soil.
2. Water Carefully: Use a spray bottle to mist the soil gently. You want to keep the soil consistently moist but not soggy. Avoid pouring water directly onto the seeds, as this can wash them away.
3. Provide Light and Warmth: Celery seeds germinate best in warm conditions (around 70-75°F or 21-24°C). Place your seed trays on a heat mat if you have one. Position grow lights about 2-4 inches above the trays and keep them on for 14-16 hours a day. If you don’t have grow lights, a sunny windowsill can work, but be sure to rotate the trays regularly to prevent the seedlings from leaning towards the light.
4. Be Patient: Celery seeds can take anywhere from 2 to 3 weeks to germinate, so don’t get discouraged if you don’t see sprouts right away. Keep the soil moist and the temperature consistent.
5. Thin the Seedlings: Once the seedlings have developed a few true leaves (the second set of leaves that appear after the initial seed leaves), thin them out so that only the strongest seedling remains in each cell or pot. This gives them enough space to grow.
6. Harden Off the Seedlings: Before transplanting your celery seedlings outdoors, you need to “harden them off.” This process gradually acclimates them to the outdoor environment. Start by placing the seedlings outdoors in a sheltered location for an hour or two each day, gradually increasing the amount of time they spend outside over the course of a week or two. This will help them adjust to the sun, wind, and temperature changes.
Regrowing from a Stalk: The Quick and Easy Method
This is a fun and easy way to get a head start on your celery growing. It’s also a great way to reduce food waste!
What You’ll Need:
* The base of a celery stalk (about 2 inches from the bottom)
* A shallow dish or glass
* Water
* Potting soil
* A pot or garden bed
Step-by-Step Instructions:
1. Prepare the Stalk: After you’ve used the celery stalks, save the base (the part where the stalks are connected). Make sure it’s still firm and healthy-looking.
2. Place in Water: Put the celery base in a shallow dish or glass filled with about an inch of water. Place it in a sunny location, like a windowsill.
3. Change the Water Regularly: Change the water every day or two to prevent it from getting cloudy or stagnant.
4. Watch for Growth: After a few days, you should start to see new leaves sprouting from the center of the celery base. Roots will also begin to grow from the bottom.
5. Transplant to Soil: Once the roots are about an inch or two long, it’s time to transplant the celery base to soil. Choose a pot or garden bed with well-draining soil. Dig a hole large enough to accommodate the celery base and its roots. Gently place the celery base in the hole and cover the roots with soil. Water thoroughly.
Caring for Your Celery Plants
Whether you started from seed or regrew from a stalk, your celery plants will need proper care to thrive.
What You’ll Need:
* Well-draining soil
* Compost or other organic matter
* Water
* Fertilizer (optional)
* Mulch (optional)
Step-by-Step Instructions:
1. Choose the Right Location: Celery needs at least 6 hours of sunlight per day. It also prefers cool temperatures (60-70°F or 15-21°C). Choose a location in your garden that meets these requirements. If you’re growing in pots, you can move them around to find the best spot.
2. Prepare the Soil: Celery needs rich, well-draining soil. Amend your soil with compost or other organic matter to improve its fertility and drainage.
3. Transplant Carefully: If you started your celery from seed, transplant the seedlings outdoors after the last frost. Space the plants about 6-8 inches apart. If you’re growing in rows, space the rows about 12 inches apart.
4. Water Regularly: Celery needs consistent moisture to grow well. Water deeply and regularly, especially during hot, dry weather. Aim to keep the soil consistently moist but not soggy.
5. Fertilize (Optional): Celery is a heavy feeder, so you may want to fertilize it regularly. Use a balanced fertilizer or a fertilizer specifically formulated for vegetables. Follow the instructions on the fertilizer package.
6. Mulch (Optional): Mulching around your celery plants can help to retain moisture, suppress weeds, and regulate soil temperature. Use organic mulch, such as straw, hay, or wood chips.
7. Blanching (Optional): Blanching celery stalks makes them more tender and less bitter. To blanch celery, you can either mound soil around the stalks or wrap them with paper or cardboard. Start blanching about 2-3 weeks before you plan to harvest.
Dealing with Pests and Diseases
Celery can be susceptible to a few pests and diseases. Here’s how to deal with them:
* Celery Leaf Tier: These caterpillars feed on celery leaves, causing damage. Handpick them off the plants or use an organic insecticide.
* Aphids: These small insects suck sap from celery plants, causing them to weaken. Spray the plants with a strong stream of water or use an insecticidal soap.
* Early Blight: This fungal disease causes brown spots on celery leaves. Remove infected leaves and spray the plants with a fungicide.
* Pink Rot: This fungal disease causes the celery stalks to rot. Avoid overhead watering and ensure good air circulation.
Harvesting Your Celery
You can start harvesting celery when the stalks are at least 6 inches tall.
Step-by-Step Instructions:
1. Choose the Stalks: Select the outer stalks that are thick and well-developed.
2. Cut the Stalks: Use a sharp knife to cut the stalks at the base of the plant.
3. Harvest Gradually: You can harvest celery stalks gradually as needed, or you can harvest the entire plant at once.
4. Store Properly: Store harvested celery in the refrigerator. Wrap it in a damp paper towel and place it in a plastic bag. It should last for several weeks.
Enjoying Your Homegrown Celery
Now that you’ve grown your own celery, it’s time to enjoy it! Here are a few ideas:
* Eat it raw as a snack with peanut butter or hummus.
* Add it to salads, soups, and stews.
* Use it as an ingredient in smoothies and juices.
* Make celery sticks for dipping in your favorite sauces.
Growing your own celery is a rewarding experience. With a little patience and care, you can enjoy fresh, delicious celery straight from your garden. Happy gardening!
Conclusion
So, there you have it! Growing celery at home from kitchen scraps is not just a fun experiment; it’s a rewarding way to reduce food waste, enjoy fresh, flavorful celery, and connect with the natural world. It’s a simple, sustainable practice that anyone can undertake, regardless of gardening experience. Forget those limp, flavorless stalks from the grocery store – imagine the crisp, vibrant taste of homegrown celery gracing your salads, soups, and snacks.
This DIY trick is a must-try because it’s incredibly easy, cost-effective, and environmentally friendly. You’re essentially giving new life to something that would otherwise end up in the compost bin. Plus, the satisfaction of nurturing a plant from a humble base to a thriving vegetable is truly unparalleled. It’s a fantastic project for families, teaching children about plant life cycles and the importance of reducing waste.
But the fun doesn’t stop there! Once you’ve mastered the basic technique, you can explore different varieties of celery. Try growing Pascal celery for its classic flavor and crisp texture, or experiment with a red variety for a splash of color in your dishes. You can also adjust the growing conditions to influence the flavor and texture of your celery. For example, providing consistent moisture and partial shade will result in sweeter, more tender stalks.
Consider companion planting your celery with other vegetables and herbs. Onions, garlic, and marigolds are known to deter pests and enhance the growth of celery. You can also interplant with herbs like parsley and cilantro, creating a mini-herb garden alongside your celery patch.
Don’t be afraid to experiment with different potting mixes and fertilizers to find what works best for your growing environment. Organic fertilizers, such as compost tea or fish emulsion, can provide essential nutrients without the risk of chemical buildup.
We wholeheartedly encourage you to give this DIY trick a try. It’s a small step towards a more sustainable lifestyle, and the rewards are well worth the effort. Once you’ve harvested your first batch of homegrown celery, we’d love to hear about your experience! Share your photos, tips, and stories in the comments below. Let’s build a community of home gardeners and inspire others to embrace the joy of growing their own food. Remember, even the smallest garden can make a big difference. So, grab a celery base, get your hands dirty, and start growing your own delicious, homegrown celery today! This method of growing celery at home is a game changer.
Frequently Asked Questions (FAQ)
What part of the celery do I need to start growing it?
You need the base of the celery stalk, the part that you would normally discard after using the stalks. This base contains the root end and the potential for new growth. Make sure to cut it about 2 inches from the bottom, leaving the stalks intact.
How long does it take to see new growth?
You should start to see new growth within a week or two. The exact timeframe depends on factors like temperature, sunlight, and the overall health of the celery base. Be patient and continue to provide water and sunlight.
What kind of container should I use for growing celery?
Initially, you can use a small glass or jar to root the celery base in water. Once roots have developed, transplant it to a larger pot (at least 6 inches in diameter) filled with well-draining potting mix.
How much sunlight does celery need?
Celery thrives in partial shade, especially during the hottest part of the day. Aim for at least 6 hours of indirect sunlight per day. If you’re growing it indoors, place it near a sunny window or use a grow light.
How often should I water my celery?
Celery needs consistent moisture to thrive. Water it regularly, keeping the soil consistently moist but not waterlogged. Check the soil moisture daily and water when the top inch feels dry.
What kind of soil is best for growing celery?
Celery prefers rich, well-draining soil with plenty of organic matter. A good potting mix amended with compost or aged manure is ideal.
Can I grow celery indoors year-round?
Yes, you can grow celery indoors year-round, provided you can provide adequate light and moisture. Use a grow light if necessary and monitor the soil moisture carefully.
How do I know when my celery is ready to harvest?
Celery is ready to harvest when the stalks are at least 6-8 inches long and have reached the desired thickness. You can harvest individual stalks as needed or harvest the entire plant at once.
Are there any common pests or diseases that affect celery?
Celery can be susceptible to pests like aphids, celery leaf tiers, and carrot rust flies. Diseases like early blight and pink rot can also be a problem. Regularly inspect your plants for signs of pests or diseases and take appropriate action, such as using insecticidal soap or fungicide.
Can I use fertilizer to help my celery grow?
Yes, fertilizing your celery can help it grow faster and produce larger stalks. Use a balanced organic fertilizer, such as compost tea or fish emulsion, every few weeks.
My celery is bolting (going to seed). What should I do?
Bolting can occur when celery is exposed to stress, such as extreme temperatures or lack of water. Once celery bolts, the stalks become bitter and less palatable. To prevent bolting, provide consistent moisture, partial shade, and avoid exposing your plants to extreme temperatures.
Can I grow celery from seed instead of using a base?
Yes, you can grow celery from seed, but it requires more patience and effort. Celery seeds are very small and need to be started indoors several weeks before the last frost.
Is homegrown celery more nutritious than store-bought celery?
Homegrown celery is often more nutritious than store-bought celery because it’s fresher and hasn’t been exposed to the same level of processing and transportation. It may also contain higher levels of vitamins and minerals.
What are some creative ways to use homegrown celery?
Besides using it in salads, soups, and snacks, you can also juice it, add it to smoothies, use it as a garnish, or pickle it. The possibilities are endless!
How can I prevent my celery from becoming bitter?
To prevent celery from becoming bitter, provide consistent moisture, partial shade, and avoid exposing your plants to extreme temperatures. Also, harvest your celery when it’s young and tender.

Leave a Comment