

Grow Juicy Strawberries Easily, right in your own backyard! Imagine biting into a sun-ripened, intensely sweet strawberry, bursting with flavor – a flavor far superior to anything you can find in a grocery store. Sounds dreamy, doesn’t it? Well, it doesn’t have to be just a dream! For centuries, strawberries have been cherished for their delicious taste and vibrant color, even holding symbolic meaning in some cultures, representing love and perfection. But let’s be honest, achieving that perfect strawberry harvest can sometimes feel like an uphill battle.
That’s where these DIY tricks and hacks come in! I know, I know, you’ve probably tried a few things already. Maybe your strawberries are small, bland, or constantly being devoured by pests. Or perhaps you’re short on space and think growing your own strawberries is simply impossible. But trust me, with a few clever techniques, you can overcome these challenges and grow juicy strawberries easily, no matter your experience level or garden size. I’m going to share some simple, yet effective, DIY methods that will transform your strawberry patch and have you enjoying a bountiful harvest in no time. Get ready to unlock the secrets to strawberry success!
Grow Juicy Strawberries Easily: My Foolproof DIY Guide
Okay, strawberry lovers, gather ’round! I’m about to share my tried-and-true method for growing the juiciest, most delicious strawberries you’ve ever tasted, right in your own backyard (or even on your balcony!). Forget those bland, watery supermarket berries – we’re talking about sun-ripened, bursting-with-flavor goodness. This isn’t just a guide; it’s my personal strawberry-growing bible, and I’m so excited to share it with you.
Choosing the Right Strawberry Variety
Before we get our hands dirty, let’s talk about strawberry varieties. This is crucial because not all strawberries are created equal, and what thrives in my garden might not be the best choice for yours.
* June-Bearing Strawberries: These are your classic, one-big-harvest-per-year type. They produce a large crop of berries, usually in late spring or early summer (hence the name!). If you want to make a big batch of jam or freeze a bunch for later, these are a great option. Popular varieties include ‘Chandler,’ ‘Honeoye,’ and ‘Earliglow.’
* Everbearing Strawberries: Don’t let the name fool you; they don’t produce berries *constantly*. Instead, they give you two or three harvests throughout the growing season – one in spring, one in late summer/early fall, and sometimes a smaller one in between. These are perfect if you want a steady supply of strawberries for snacking. Good choices are ‘Seascape,’ ‘Ozark Beauty,’ and ‘Albion.’
* Day-Neutral Strawberries: These are the most consistent producers, giving you berries throughout the entire growing season, as long as the temperature is right (between 35°F and 85°F). They’re less affected by day length than the other types. ‘Tristar,’ ‘Tribute,’ and ‘Mara des Bois’ are excellent day-neutral varieties.
My Recommendation: I personally love growing a mix of everbearing and day-neutral varieties. This way, I get a good initial harvest and then a continuous supply of berries throughout the summer and into the fall.
Preparing Your Strawberry Patch
Strawberries need a sunny spot and well-drained soil. Seriously, well-drained soil is non-negotiable. Soggy roots are a strawberry’s worst enemy.
* Sunlight: Aim for at least 6-8 hours of direct sunlight per day. The more sun, the sweeter the berries!
* Soil: Strawberries prefer slightly acidic soil with a pH between 5.5 and 6.5. If you’re not sure about your soil’s pH, you can get a soil testing kit at most garden centers.
* Soil Preparation: This is where the magic happens. Before planting, amend your soil with plenty of organic matter, like compost or well-rotted manure. This will improve drainage, add nutrients, and create a happy home for your strawberry plants.
Step-by-Step Planting Guide
Alright, let’s get those strawberry plants in the ground!
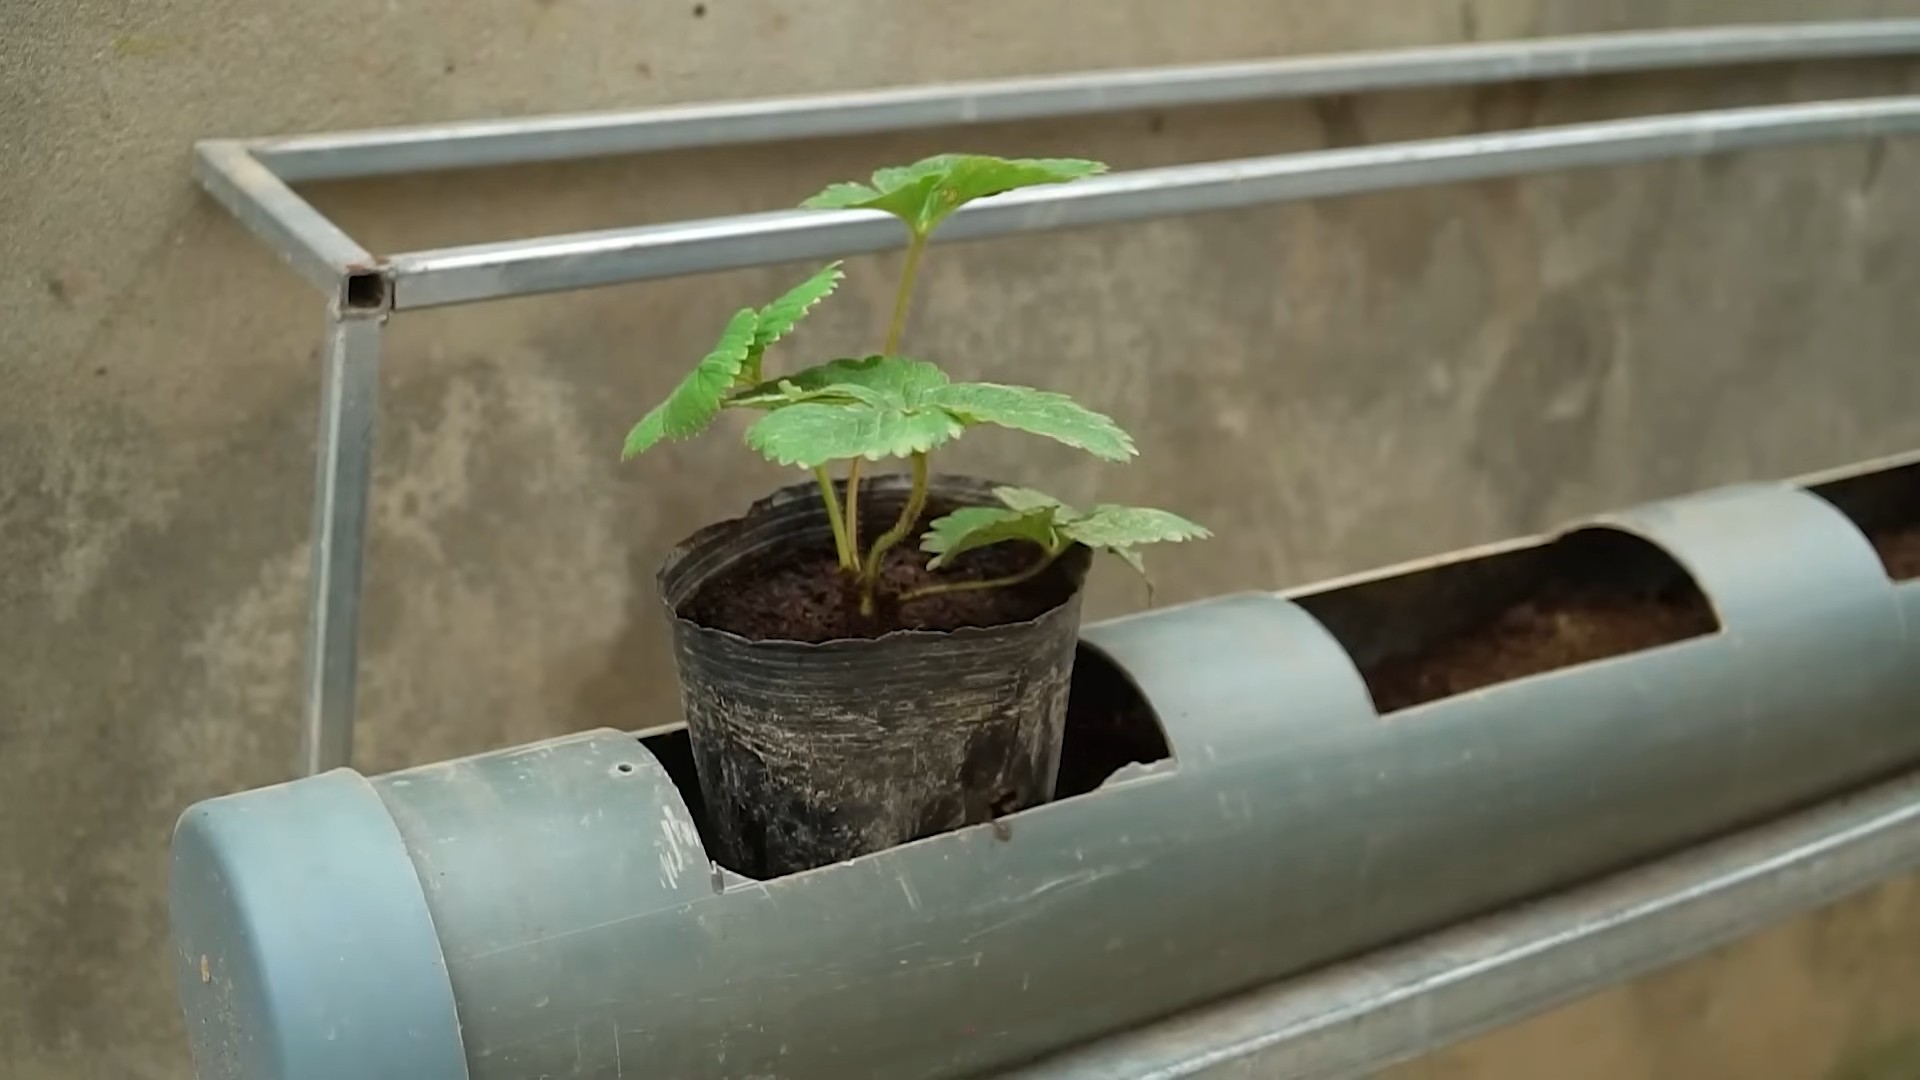
1. Choose Your Planting Method: You can grow strawberries in raised beds, containers, or directly in the ground. Raised beds are great for drainage, containers are perfect for small spaces, and in-ground planting is the most traditional method. I personally use raised beds because they make weeding and harvesting easier on my back.
2. Prepare the Planting Area: Whether you’re using a raised bed, container, or the ground, make sure the soil is loose and free of weeds. Dig a hole that’s large enough to accommodate the strawberry plant’s root ball.
3. Planting Depth: This is super important! The crown of the strawberry plant (the point where the roots meet the stem) should be level with the soil surface. Planting too deep can cause the crown to rot, and planting too shallow can dry out the roots.
4. Spacing: Space your strawberry plants about 12-18 inches apart. This will give them enough room to spread out and produce plenty of berries.
5. Water Thoroughly: After planting, water your strawberry plants thoroughly. This will help settle the soil and encourage root growth.
Caring for Your Strawberry Plants
Now that your strawberry plants are in the ground, it’s time to give them some TLC.
* Watering: Strawberries need consistent moisture, especially during fruiting. Water deeply whenever the top inch of soil feels dry. Avoid overhead watering, as this can promote fungal diseases. Drip irrigation or soaker hoses are ideal.
* Fertilizing: Feed your strawberry plants with a balanced fertilizer (like 10-10-10) in the spring, after the first flush of blooms. You can also use a fertilizer specifically formulated for berries. Follow the instructions on the fertilizer package.
* Weeding: Keep your strawberry patch free of weeds. Weeds compete with strawberry plants for nutrients and water. Mulching with straw or wood chips can help suppress weeds.
* Pest Control: Keep an eye out for common strawberry pests, like slugs, snails, and aphids. Hand-picking pests is often the easiest solution. You can also use organic pest control methods, like diatomaceous earth or insecticidal soap.
* Disease Prevention: Strawberries are susceptible to fungal diseases, especially in humid climates. To prevent diseases, ensure good air circulation, avoid overhead watering, and remove any diseased leaves promptly.
* Renovating Your Strawberry Patch: After a few years, your strawberry plants will start to decline in productivity. To keep your patch healthy and productive, you’ll need to renovate it. This involves thinning out the plants, removing old foliage, and adding fresh compost. The best time to renovate is after the harvest in late summer or early fall.
Protecting Your Strawberries from Birds
Ah, the age-old battle between gardeners and birds! Birds love strawberries just as much as we do, and they can quickly decimate your crop if you’re not careful.
* Netting: The most effective way to protect your strawberries from birds is to cover them with netting. Make sure the netting is securely anchored to the ground so the birds can’t get underneath it.
* Bird Scare Devices: You can also try using bird scare devices, like shiny streamers, aluminum pie plates, or plastic owls. These devices can help deter birds, but they’re not always as effective as netting.
* Sacrifice Berries: Plant some extra strawberry plants specifically for the birds. This way, they’ll have their own supply of berries and hopefully leave yours alone. (Okay, this might be wishful thinking, but it’s worth a try!)
Harvesting Your Strawberries
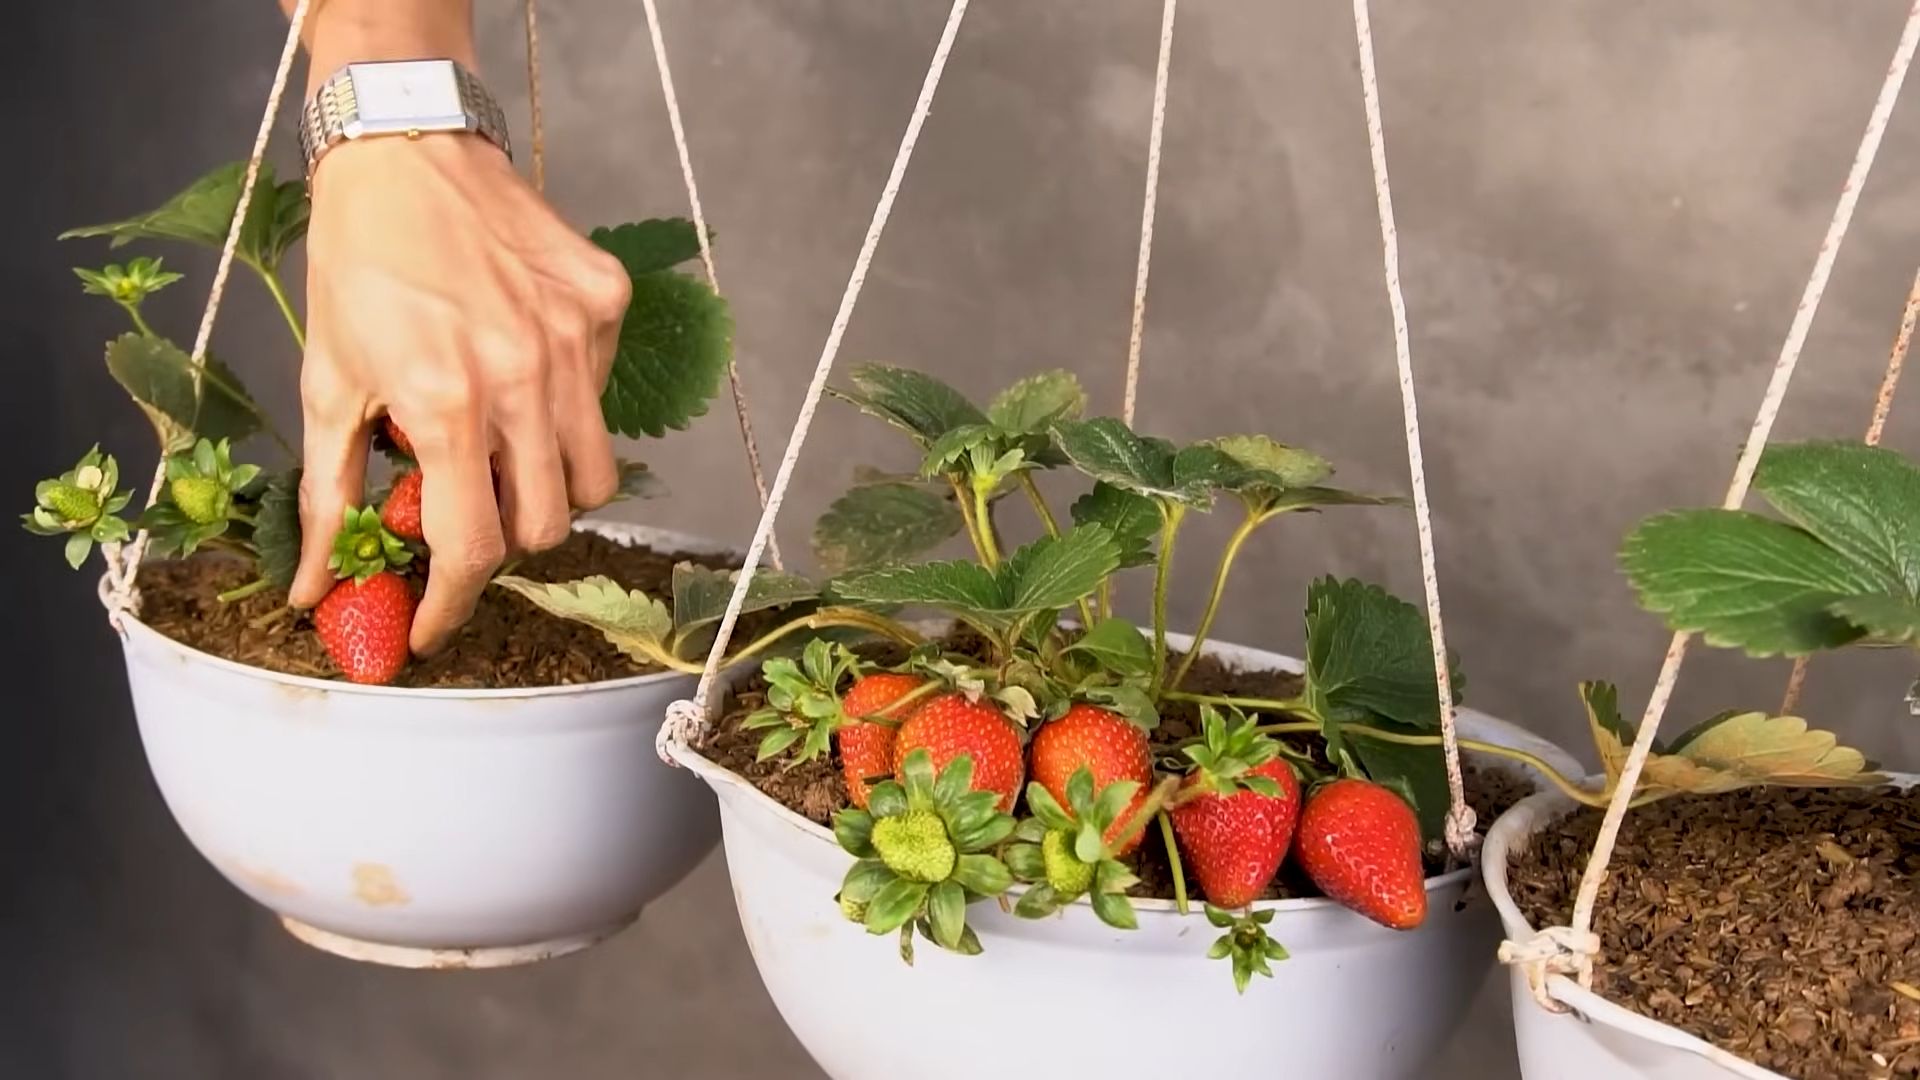
This is the moment we’ve all been waiting for! Harvesting your own juicy, sun-ripened strawberries is one of the most rewarding experiences a gardener can have.
* When to Harvest: Strawberries are ready to harvest when they’re fully red and slightly soft to the touch. They should also detach easily from the plant.
* How to Harvest: Gently grasp the strawberry near the stem and twist it off the plant. Avoid pulling or yanking, as this can damage the plant.
* Harvesting Time: Harvest your strawberries in the morning, after the dew has dried. This is when they’re at their peak flavor.
* Storage: Freshly harvested strawberries are best eaten right away. If you need to store them, keep them in the refrigerator in a single layer. Don’t wash them until you’re ready to eat them.
Troubleshooting Common Strawberry Problems
Even with the best care, you might encounter some problems along the way. Here are a few common issues and how to deal with them:
* Small Berries: Small berries can be caused by a lack of water, nutrients, or sunlight. Make sure your strawberry plants are getting enough of all three.
* Rotting Berries: Rotting berries are often caused by fungal diseases. Ensure good air circulation, avoid overhead watering, and remove any diseased berries promptly.
* Pest Infestations: Keep an eye out for common strawberry pests, like slugs, snails, and aphids. Hand-picking pests is often the easiest solution. You can also use organic pest control methods.
* Lack of Fruit: If your strawberry plants aren’t producing any fruit, it could be due to a lack of pollination. Strawberries are self-pollinating, but they benefit from insect pollination. Attract pollinators to your garden by planting flowers that attract bees and butterflies.
My Secret Weapon: Strawberry Jar Planting
Want to maximize your strawberry yield in a small space? Try planting in a strawberry jar! These terracotta pots have multiple openings, allowing you to plant several strawberry plants in one container.
1. Choose a Strawberry Jar: Select a strawberry jar with plenty of planting holes.
2. Fill with Soil: Fill the jar with a well-draining potting mix.
3. Plant the Strawberries: Insert strawberry
Conclusion
So, there you have it! Growing juicy strawberries easily doesn’t have to be a daunting task. By implementing this simple DIY trick, you’re not just planting strawberries; you’re cultivating a thriving ecosystem that promotes healthy growth and abundant harvests. This method, focusing on optimizing soil conditions and providing adequate support, is a game-changer for both novice and experienced gardeners alike.
Think about the satisfaction of biting into a sun-ripened strawberry, bursting with flavor, knowing that you nurtured it from a tiny plant to a delicious treat. This isn’t just about saving money on store-bought berries; it’s about connecting with nature, learning new skills, and enjoying the fruits (literally!) of your labor.
But don’t stop there! Experiment with different variations to personalize your strawberry-growing experience. Try using different types of organic mulch, such as pine needles or shredded leaves, to see which works best in your climate. Consider adding companion plants like basil or marigolds to deter pests naturally. You could even explore different strawberry varieties, from everbearing to June-bearing, to extend your harvest season.
This DIY trick is more than just a method; it’s a starting point for a rewarding gardening journey. It’s about empowering you to take control of your food source and create a sustainable, delicious addition to your backyard.
We wholeheartedly encourage you to give this method a try. Don’t be afraid to get your hands dirty and embrace the learning process. And most importantly, share your experiences with us! Let us know how this DIY trick worked for you, what variations you tried, and any tips or tricks you discovered along the way. Your feedback will not only help us improve this guide but also inspire other gardeners to embark on their own strawberry-growing adventures. So, grab your gardening gloves, gather your supplies, and get ready to enjoy a bountiful harvest of juicy, homegrown strawberries!
Frequently Asked Questions (FAQs)
What kind of soil is best for growing strawberries using this DIY trick?
Strawberries thrive in well-draining, slightly acidic soil with a pH between 5.5 and 6.5. Amending your soil with compost or other organic matter is crucial to improve drainage, fertility, and water retention. Avoid heavy clay soils, as they can lead to root rot. If you have clay soil, consider growing your strawberries in raised beds or containers using a potting mix specifically formulated for fruits and vegetables. Before planting, conduct a soil test to determine its pH and nutrient levels. You can purchase a soil testing kit at most garden centers or send a sample to a local agricultural extension office for analysis. Based on the results, you can amend the soil with lime to raise the pH or sulfur to lower it.
How often should I water my strawberries grown using this method?
Watering frequency depends on several factors, including the climate, soil type, and stage of plant growth. Generally, strawberries need about 1 inch of water per week. During hot, dry periods, you may need to water more frequently. The best way to determine if your strawberries need water is to check the soil moisture. Stick your finger about an inch into the soil; if it feels dry, it’s time to water. Avoid overwatering, as this can lead to root rot. When watering, water deeply and thoroughly, ensuring that the water reaches the roots. Drip irrigation or soaker hoses are excellent options for watering strawberries, as they deliver water directly to the roots and minimize water loss through evaporation. Water in the morning to allow the foliage to dry before nightfall, which can help prevent fungal diseases.
What kind of fertilizer should I use for my strawberry plants?
Strawberries benefit from regular fertilization, especially during the growing season. Use a balanced fertilizer with an N-P-K ratio of 10-10-10 or 12-12-12. Alternatively, you can use a fertilizer specifically formulated for berries. Apply fertilizer according to the package instructions, typically every 4-6 weeks during the growing season. Avoid over-fertilizing, as this can lead to excessive foliage growth and reduced fruit production. Organic fertilizers, such as compost tea or fish emulsion, are also excellent options for feeding strawberry plants. These fertilizers provide essential nutrients while also improving soil health. Apply organic fertilizers every 2-3 weeks during the growing season.
How do I protect my strawberries from pests and diseases?
Strawberries are susceptible to various pests and diseases, including slugs, snails, aphids, spider mites, and fungal diseases like gray mold and powdery mildew. To protect your strawberries, implement a combination of preventative measures and targeted treatments.
* **Slugs and Snails:** Handpick slugs and snails in the early morning or evening. You can also use beer traps or diatomaceous earth to control these pests.
* **Aphids and Spider Mites:** Spray plants with insecticidal soap or neem oil. Encourage beneficial insects like ladybugs and lacewings, which prey on aphids and spider mites.
* **Fungal Diseases:** Ensure good air circulation around plants by spacing them properly and pruning away dead or diseased foliage. Apply a fungicide if necessary, following the package instructions carefully.
Can I grow strawberries in containers using this DIY trick?
Absolutely! Growing strawberries in containers is an excellent option, especially if you have limited space or poor soil. Choose a container that is at least 12 inches in diameter and 8 inches deep. Use a potting mix specifically formulated for fruits and vegetables. Ensure that the container has drainage holes to prevent waterlogging. Follow the same planting and care instructions as you would for growing strawberries in the ground. Container-grown strawberries may require more frequent watering and fertilization than those grown in the ground.
What are some good companion plants for strawberries?
Companion planting can help improve the health and productivity of your strawberry plants. Some good companion plants for strawberries include:
* **Basil:** Repels pests and improves the flavor of strawberries.
* **Marigolds:** Repel nematodes and other soil pests.
* **Borage:** Attracts beneficial insects and improves pollination.
* **Thyme:** Repels cabbage moths and other pests.
* **Garlic:** Repels aphids and other pests.
How do I overwinter my strawberry plants?
In colder climates, strawberry plants need protection during the winter months. After the first frost, mulch the plants with a thick layer of straw or pine needles. This will help insulate the roots and protect them from freezing temperatures. In very cold climates, you may need to cover the plants with a row cover or cold frame. Remove the mulch in the spring when the weather warms up.
How long does it take for strawberry plants to produce fruit?
The time it takes for strawberry plants to produce fruit depends on the variety and growing conditions. June-bearing strawberries typically produce fruit in the spring, while everbearing strawberries produce fruit throughout the summer and fall. Generally, you can expect to harvest your first strawberries about 4-6 weeks after the plants begin to bloom.
How do I know when my strawberries are ripe?
Strawberries are ripe when they are fully red and slightly soft to the touch. The berries should also detach easily from the plant. Pick strawberries in the morning when they are cool and dry. Avoid picking strawberries that are bruised or damaged.
What are some different varieties of strawberries I can grow?
There are many different varieties of strawberries to choose from, each with its own unique characteristics. Some popular varieties include:
* **June-bearing:** Earliglow, Honeoye, Chandler
* **Everbearing:** Ozark Beauty, Quinault, Albion
* **Day-neutral:** Seascape, Tristar, San Andreas
Choose a variety that is well-suited to your climate and growing conditions. Consider factors such as disease resistance, fruit size, and flavor when selecting a variety.

Leave a Comment