

Mung Bean Sprouts DIY: Ever dreamt of having fresh, crunchy sprouts at your fingertips, ready to add a burst of flavor and nutrition to your meals? Forget those pricey, often wilted sprouts from the grocery store! I’m going to show you how incredibly easy it is to grow your own delicious mung bean sprouts right in your kitchen.
Sprouting beans is an ancient practice, dating back thousands of years in Asian cultures. It’s a testament to resourcefulness and a deep understanding of how to unlock the nutritional power of seeds. Think about it – for centuries, people have relied on sprouting as a way to access vital vitamins and minerals, especially during times when fresh produce was scarce. It’s a tradition we can easily bring into our modern lives!
In today’s fast-paced world, we’re all looking for ways to eat healthier and save money. That’s where this mung bean sprouts DIY project comes in. Not only are mung bean sprouts packed with vitamins, minerals, and enzymes, but they’re also incredibly versatile. Add them to salads, stir-fries, sandwiches, or even enjoy them as a crunchy snack. Plus, growing your own means you know exactly what you’re eating – no hidden additives or preservatives. Ready to ditch the store-bought sprouts and embark on this simple, rewarding journey with me? Let’s get sprouting!
Growing Your Own Mung Bean Sprouts: A Beginner’s Guide
Hey there, fellow food enthusiasts! Have you ever wanted to grow your own fresh, crunchy mung bean sprouts at home? It’s surprisingly easy, incredibly rewarding, and a fantastic way to add a healthy boost to your meals. Plus, you’ll save money compared to buying them at the store. I’m going to walk you through the whole process, step-by-step, so you can enjoy delicious, homegrown sprouts in just a few days.
What You’ll Need
Before we dive in, let’s gather our supplies. The beauty of this project is that you probably already have most of these things lying around!
* Mung Beans: Obviously! You can find these at most grocery stores, Asian markets, or online. Make sure they’re whole, not split. About 1/2 cup of dry beans will yield a good amount of sprouts.
* A Wide-Mouth Jar: A quart-sized mason jar works perfectly.
* Sprouting Lid or Cheesecloth: You need something to cover the jar that allows for drainage and airflow. A sprouting lid is ideal, but a piece of cheesecloth secured with a rubber band works just as well.
* Water: Clean, filtered water is best.
* A Bowl: For soaking the beans.
* A Dark Place: A cupboard or pantry will do the trick.
* Optional: A sprouting stand or a bowl to angle the jar for better drainage.
The Sprouting Process: Step-by-Step
Alright, let’s get sprouting! This process takes about 3-5 days, so plan accordingly.
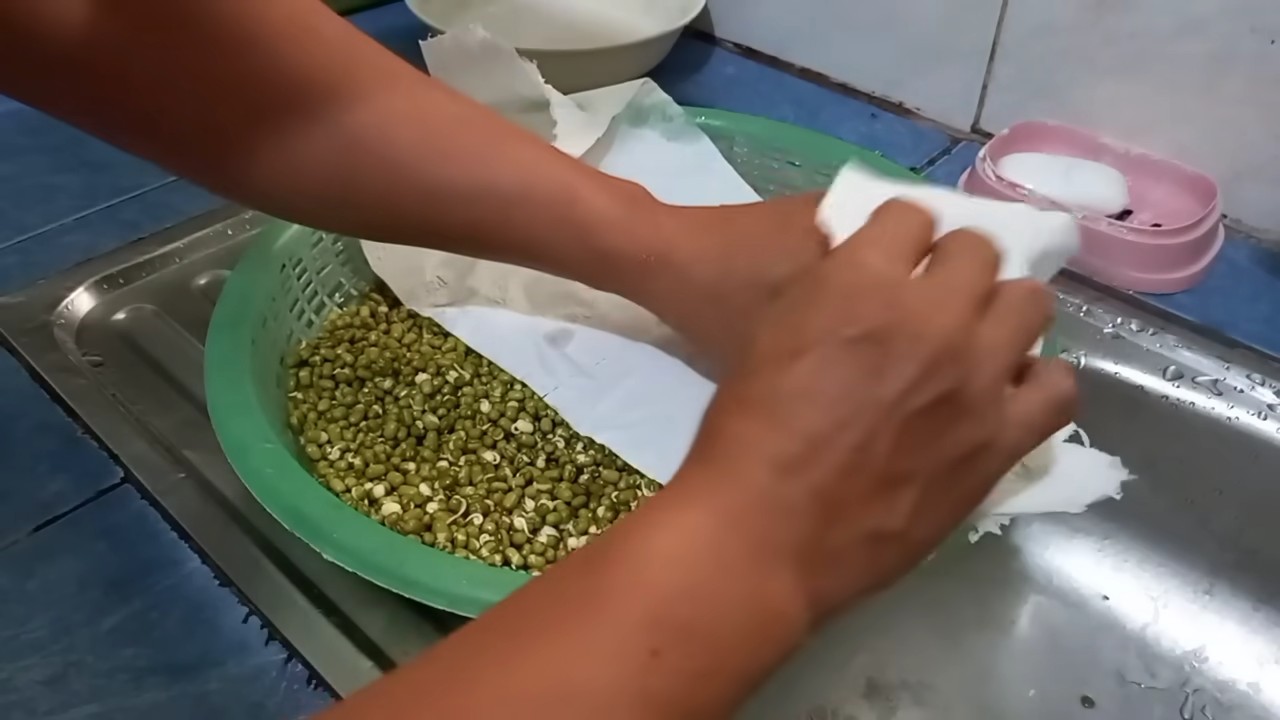
1. Rinse the Beans: Pour your 1/2 cup of mung beans into the bowl. Add plenty of cool water and give them a good rinse. This removes any dirt or debris. Discard any beans that float to the surface – they’re likely not viable.
2. Soak the Beans: Cover the rinsed beans with fresh, cool water. You want about 2-3 times the amount of water as beans, as they’ll expand significantly. Let them soak for 8-12 hours, or even overnight. This is crucial for activating the germination process. I usually soak mine before I go to bed and they are ready in the morning.
3. Drain and Rinse Again: After soaking, drain the beans thoroughly using a colander or strainer. Rinse them again with cool water to remove any lingering debris.
4. Transfer to the Jar: Place the soaked and rinsed beans into your wide-mouth jar.
5. Cover with Sprouting Lid or Cheesecloth: Secure the sprouting lid or cheesecloth over the mouth of the jar. If using cheesecloth, make sure it’s tightly secured with a rubber band.
6. Rinse and Drain (Twice a Day): This is the most important step! Rinse the beans thoroughly with cool water twice a day – once in the morning and once in the evening. To do this, simply pour water into the jar through the sprouting lid or cheesecloth, swirl the beans around gently, and then drain all the water out. Make sure to drain as much water as possible. Excess moisture can lead to mold growth.
7. Dark Storage: After each rinse and drain, place the jar in a dark, well-ventilated place, such as a cupboard or pantry. You can angle the jar slightly (using a sprouting stand or a bowl) to help with drainage.
8. Repeat Rinse and Drain: Continue rinsing and draining the beans twice a day for the next 3-5 days. You’ll start to see tiny sprouts emerging within the first day or two.
9. Observe and Adjust: Keep an eye on your sprouts. If you notice any mold growth (it will usually appear as fuzzy white or gray patches), discard the entire batch. Proper rinsing and drainage are key to preventing mold.
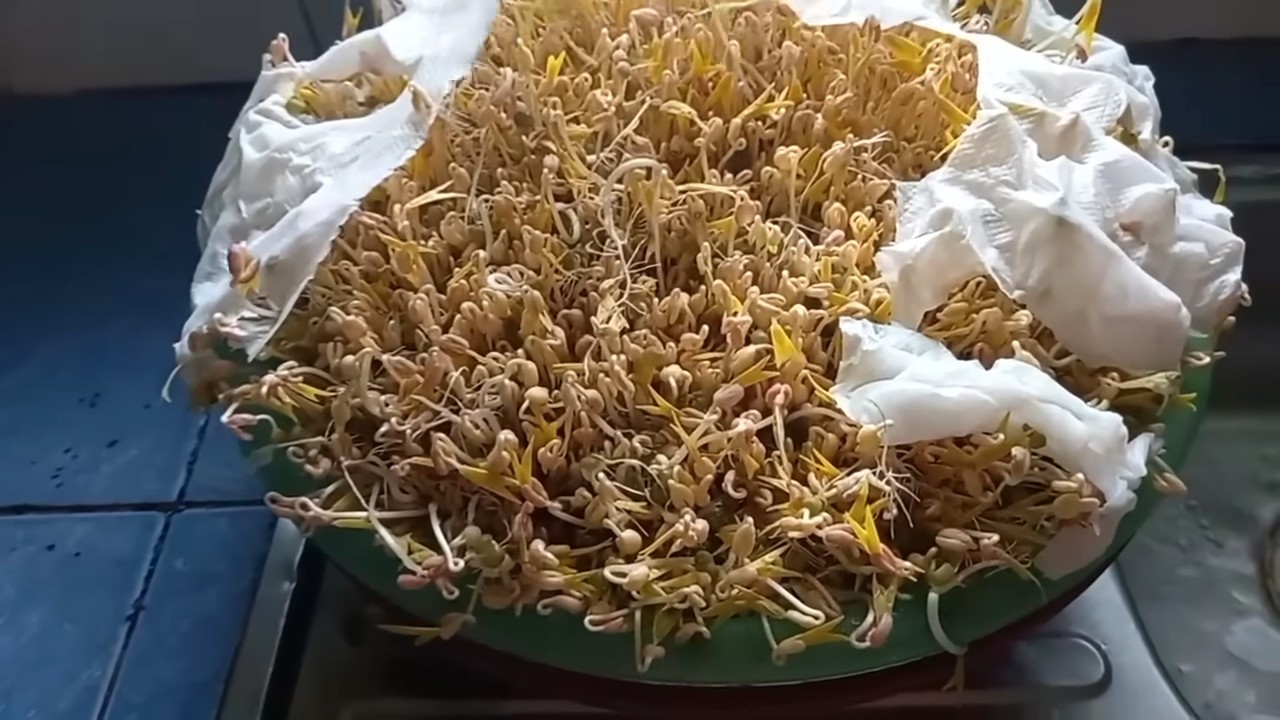
10. Harvest Time!: Your mung bean sprouts are ready to harvest when they are about 1-2 inches long. They should be plump and crunchy.
11. Final Rinse: Give your sprouts one final rinse in cool water to remove any remaining hulls (the bean skins). You can try to remove as many hulls as possible, but don’t worry if you can’t get them all. They’re perfectly safe to eat.
12. Dry Thoroughly: Spread the sprouts out on a clean kitchen towel or paper towels to dry. This will help them stay fresh longer.
13. Storage: Store your freshly grown mung bean sprouts in an airtight container in the refrigerator. They should last for about 5-7 days.
Troubleshooting and Tips
Even with the best instructions, sometimes things don’t go exactly as planned. Here are a few common issues and how to address them:
* Mold Growth: As I mentioned earlier, mold is the biggest enemy of sprouting. The key to preventing it is proper rinsing and drainage. Make sure you’re rinsing the beans thoroughly twice a day and draining as much water as possible. Good ventilation is also important. If you live in a humid environment, you may need to rinse them more frequently.
* Slow Sprouting: If your sprouts are taking longer than 5 days to grow, it could be due to a few factors. The temperature might be too cold (mung beans prefer a slightly warmer environment). The beans might be old or not viable. Or you might not be rinsing them frequently enough.
* Bitter Taste: Sometimes, mung bean sprouts can have a slightly bitter taste. This is usually due to the presence of hulls. Try to remove as many hulls as possible during the final rinse. Soaking the beans for a longer period (up to 12 hours) can also help reduce bitterness.
* Uneven Sprouting: It’s normal for some beans to sprout faster than others. Don’t worry if you have a mix of sprouts at different stages of growth.
Using Your Homegrown Mung Bean Sprouts
Now for the fun part – eating your delicious sprouts! Mung bean sprouts are incredibly versatile and can be used in a variety of dishes.
* Salads: Add them to salads for a crunchy and refreshing element.
* Stir-fries: They’re a classic addition to stir-fries, adding a satisfying crunch. Add them towards the end of cooking to prevent them from becoming soggy.
* Sandwiches and Wraps: Use them as a topping for sandwiches and wraps for added texture and nutrients.
* Soups: Toss them into soups just before serving for a fresh and crunchy garnish.
* Spring Rolls: A must-have ingredient in fresh spring rolls.
* On Their Own: I sometimes just eat them raw as a snack!
Why Grow Your Own?
Besides the satisfaction of growing your own food, there are several other benefits to making your own mung bean sprouts:
* Freshness: Homegrown sprouts are much fresher than store-bought ones, which can often be several days old.
* Cost Savings: Growing your own sprouts is significantly cheaper than buying them at the store.
* Nutritional Value: Sprouts are packed with vitamins, minerals, and enzymes.
* No Additives: You know exactly what’s going into your sprouts – no preservatives or other unwanted additives.
* Sustainability: Growing your own food reduces your carbon footprint.
A Few Extra Tips for Sprouting Success
* Use High-Quality Beans: Start with fresh, high-quality mung beans for the best results.
* Maintain Hygiene: Keep your sprouting equipment clean to prevent contamination.
* Don’t Overcrowd the Jar: Use the right amount of beans for the size of your jar. Overcrowding can lead to poor ventilation and mold growth.
* Experiment with Different Beans: Once you’ve mastered mung bean sprouts, try sprouting other types of beans and seeds, such as alfalfa, lentils, or radish seeds.
Growing your own mung bean sprouts is a simple and rewarding project that anyone can do. With a little patience and attention to detail, you’ll be enjoying fresh, crunchy sprouts in no time. Happy sprouting!
Conclusion
So, there you have it! Growing your own mung bean sprouts at home is not only incredibly easy and cost-effective, but it also guarantees you’re getting the freshest, most nutritious sprouts possible. Forget those limp, pre-packaged sprouts from the grocery store – with this simple DIY trick, you can have a constant supply of crisp, flavorful sprouts ready to add a healthy crunch to your salads, stir-fries, sandwiches, and more.
This method is a game-changer for anyone looking to incorporate more plant-based protein and essential nutrients into their diet. Mung bean sprouts are packed with vitamins, minerals, and fiber, making them a powerhouse of goodness. Plus, knowing exactly where your food comes from and how it’s grown adds an extra layer of satisfaction.
But the best part? The possibilities are endless! Once you’ve mastered the basic technique, you can experiment with different variations. Try adding a small amount of turmeric powder to the soaking water for a boost of antioxidants and a subtle earthy flavor. Or, if you’re feeling adventurous, try sprouting other types of beans or seeds using the same method. Lentils, alfalfa seeds, and even broccoli seeds can be sprouted at home with similar success.
Don’t be intimidated by the idea of growing your own food. This mung bean sprouts DIY project is so simple that even a complete beginner can achieve impressive results. All you need is a jar, some mung beans, water, and a little bit of patience. The entire process takes just a few days, and the reward is a bounty of fresh, delicious sprouts that you can enjoy in countless ways.
We truly believe that this DIY method for growing mung bean sprouts will revolutionize the way you think about fresh produce. It’s a sustainable, healthy, and incredibly rewarding way to add more goodness to your meals.
So, what are you waiting for? Grab a jar, some mung beans, and get sprouting! We’re confident that you’ll be amazed by how easy and satisfying it is to grow your own fresh sprouts at home.
And most importantly, we want to hear about your experience! Share your photos, tips, and variations in the comments below. Let’s build a community of home sprouters and inspire others to embrace the joy of growing their own food. Happy sprouting!
Frequently Asked Questions (FAQ)
What exactly are mung bean sprouts, and why should I eat them?
Mung bean sprouts are germinated mung beans, a type of legume. They are a nutritional powerhouse, packed with vitamins (especially vitamin C and K), minerals (like iron and potassium), fiber, and plant-based protein. They are low in calories and fat, making them a healthy addition to any diet. Eating mung bean sprouts can contribute to improved digestion, boosted immunity, and overall well-being. They add a refreshing crunch and mild flavor to various dishes.
How long does it take to grow mung bean sprouts using this DIY method?
The entire process typically takes between 3 to 5 days, depending on the temperature and humidity in your environment. Warmer temperatures generally speed up the sprouting process. You’ll notice the beans starting to sprout within the first 24 hours, and they’ll be ready to harvest when the sprouts are about 1-2 inches long.
What kind of jar is best for sprouting mung beans?
Any clean glass jar will work, but a wide-mouth jar is preferable as it makes it easier to rinse and drain the sprouts. Mason jars are a popular choice. You’ll also need a breathable lid or cover. A sprouting lid with mesh is ideal, but you can also use cheesecloth or a piece of nylon screen secured with a rubber band. The key is to allow for good air circulation while preventing the beans from falling out.
How often should I rinse the mung bean sprouts?
Rinsing is crucial to prevent mold and bacteria growth. You should rinse the sprouts at least twice a day, ideally in the morning and evening. In warmer climates, you may need to rinse them three times a day. Make sure to drain the water thoroughly after each rinse.
What if I see mold growing on my mung bean sprouts?
Mold is a sign that the sprouts are not being rinsed and drained properly. If you see mold, discard the entire batch. To prevent mold, ensure you are rinsing the sprouts frequently and thoroughly, and that the jar is well-ventilated. Avoid overcrowding the jar with too many beans.
Can I eat the green hulls of the mung beans?
Yes, the green hulls are perfectly edible. However, some people find them slightly bitter. If you prefer, you can try to remove some of the hulls by gently agitating the sprouts in a bowl of water. The hulls will float to the surface and can be skimmed off.
How should I store mung bean sprouts after they are grown?
Once the sprouts are ready, rinse them thoroughly and drain them well. Store them in an airtight container lined with a paper towel in the refrigerator. The paper towel will help absorb excess moisture and keep the sprouts fresh for up to a week.
Can I use any type of mung beans for sprouting?
Yes, you can use any type of whole, dried mung beans. However, make sure they are intended for consumption and haven’t been treated with any chemicals. Look for organic mung beans if possible. Split mung beans will not sprout.
What are some creative ways to use mung bean sprouts in my cooking?
Mung bean sprouts are incredibly versatile! You can add them to salads for a crunchy texture, stir-fries for a boost of nutrients, sandwiches and wraps for added flavor, or even use them as a topping for soups and noodle dishes. They are also a key ingredient in many Asian cuisines, such as spring rolls and pad thai.
Is it safe to eat raw mung bean sprouts?
While generally safe, there is a small risk of bacterial contamination with raw sprouts. To minimize this risk, purchase high-quality mung beans from a reputable source, rinse the sprouts thoroughly before eating, and store them properly in the refrigerator. If you are concerned about food safety, you can lightly cook the sprouts before eating them.
What if my mung beans don’t sprout?
There could be several reasons why your mung beans aren’t sprouting. First, make sure the beans are fresh and viable. Old beans may have a lower germination rate. Second, ensure the beans are getting enough moisture. They should be soaked for at least 8 hours before sprouting. Third, check the temperature. Mung beans sprout best in a warm environment (around 70-75°F). Finally, make sure the beans are not overcrowded in the jar.

Leave a Comment