

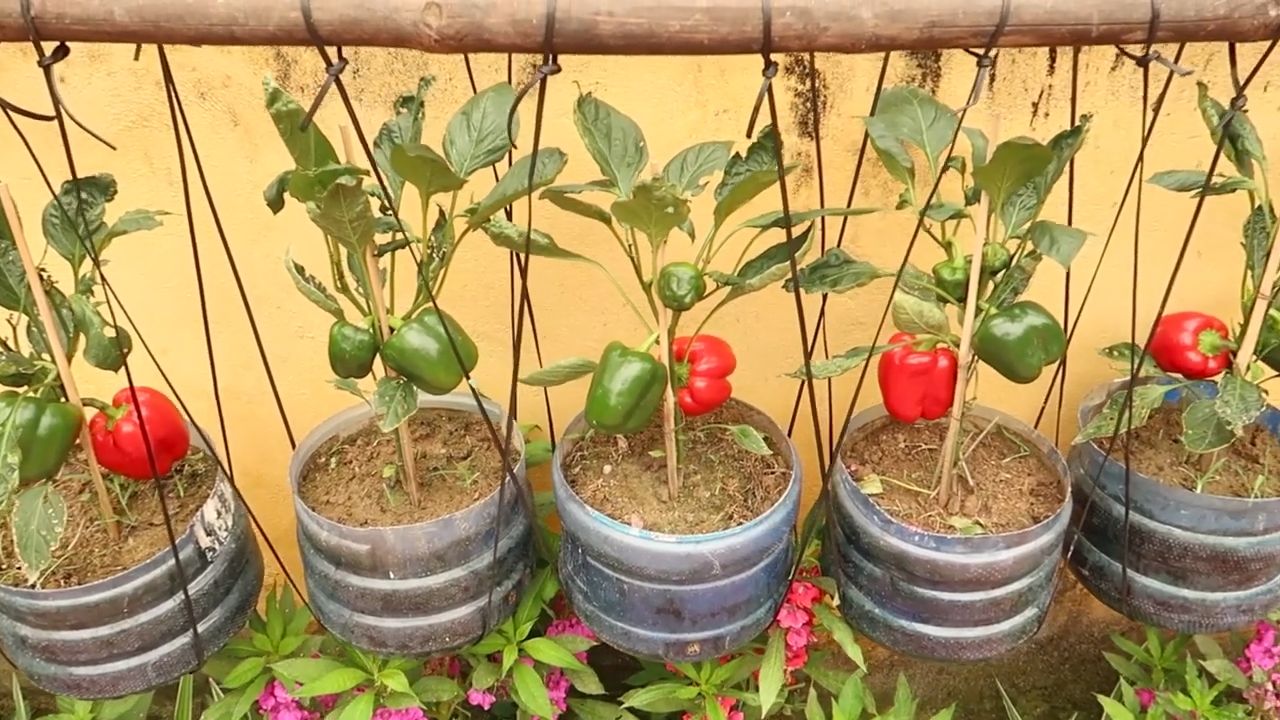
Chili pepper harvest increase – that’s what every chili-loving gardener dreams of, right? I know I do! Imagine baskets overflowing with vibrant red, green, and yellow peppers, ready to spice up your meals and impress your friends. But sometimes, despite our best efforts, our chili plants just don’t seem to produce as much as we’d hoped.
For centuries, chili peppers have been a staple in cuisines around the world, adding a fiery kick to everything from Mexican salsas to Thai curries. Their cultivation dates back thousands of years, and different cultures have developed unique techniques for maximizing their yields. But you don’t need to be an ancient Aztec farmer to achieve a bountiful harvest.
That’s why I’m so excited to share these simple, yet effective, DIY tricks and hacks that can significantly boost your chili pepper harvest increase. Whether you’re a seasoned gardener or just starting out, these tips will help you unlock the full potential of your chili plants. We’ll explore everything from soil amendments and watering techniques to pruning strategies and pest control methods. Get ready to transform your chili pepper patch into a thriving, pepper-producing paradise!
What You Need: The Ingredients for Your Chili Success
Before we begin, here’s a list of things you’ll need for this DIY chili booster treatment:
- High-quality Chili Plants: The be-all and end-all! Invest in healthy, strong young plants of varieties you enjoy.
- Large Pots or a Well-Prepared Bed: Chilies need space to grow.
- Good Chili Soil: Special chili soil or a mixture of potting soil, compost, and sand is ideal.
- Organic Fertilizer: I swear by horn meal, compost tea, and diluted stinging nettle manure.
- Epsom Salt (Magnesium Sulfate): A real secret tip for healthy plants and abundant flowering.
- Coffee Grounds: A free and effective fertilizer that improves the soil.
- Mulch Material: Straw, wood chips, or grass clippings help retain soil moisture and suppress weeds.
- Plant Supports: Especially important for heavily bearing varieties to prevent branches from breaking.
- Patience and Love: The most important thing of all!
Phase 1: The Right Start – Planting and Preparation
You lay the foundation for a successful chili harvest already during planting. Here are my proven steps:
- Choose the Right Pot Size: Chilies are deep-rooted and need sufficient space. Choose pots with at least 20 liters of volume. If planting in a bed, ensure a distance of at least 40 cm between plants.
- Prepare the Soil: Mix chili soil with compost and a little sand to ensure good drainage. A handful of horn meal per pot provides slow but steady nutrient supply.
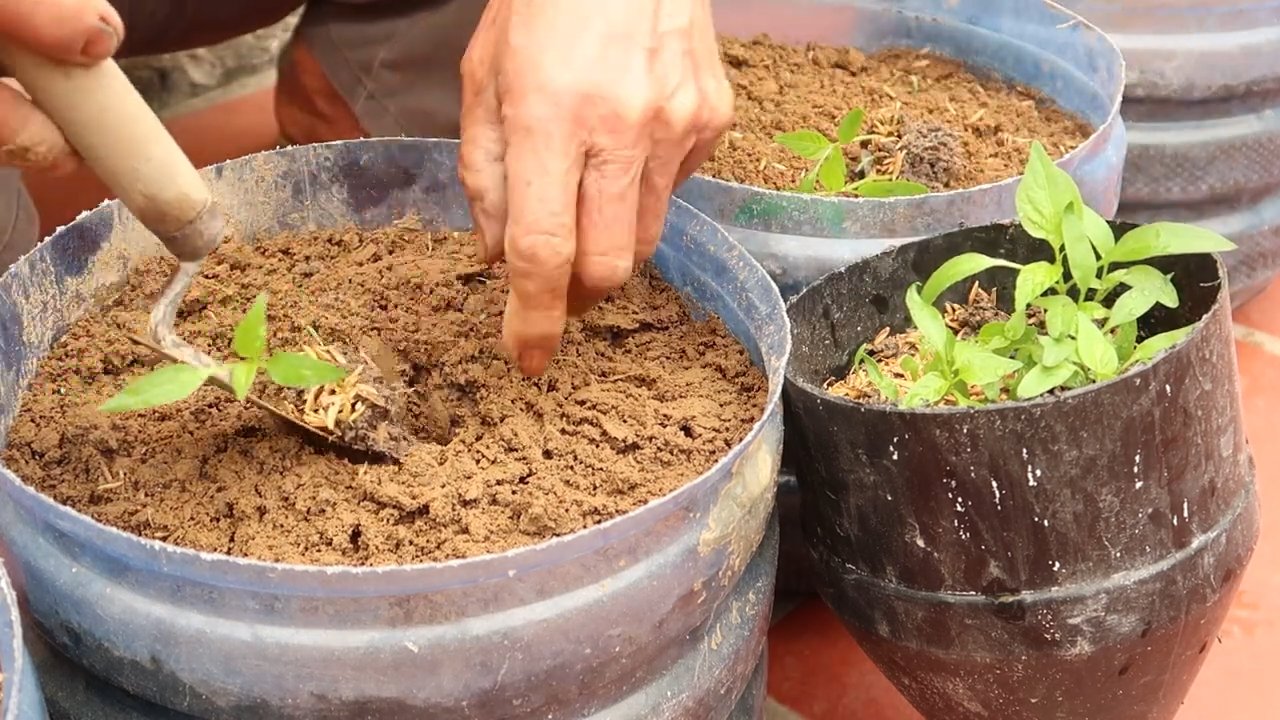
- Carefully Insert the Plants: Gently remove the chili plants from their nursery pots and plant them deep enough so that the root ball is completely covered.
- Don’t Forget to Water: Water the plants thoroughly after planting. Avoid waterlogging, but ensure the soil is well moistened.
- The Location: Sun, Sun, Sun!: Chilies love the sun! Place the pots in a sunny, warm, and sheltered spot. In a bed, the location should also be sunny.
- Mulch: Cover the soil around the plants with mulch material. This retains moisture in the soil, suppresses weeds, and protects the roots from extreme temperatures.
Phase 2: The Growth Phase – Fertilizing and Caring
Now it’s about providing optimal care for the plants so they grow vigorously and produce many flowers.
- Regular Watering: Chilies need regular water, especially during hot summer months. Ensure the soil is always slightly moist, but avoid waterlogging. It’s best to water in the morning so the leaves can dry by evening.
- The Epsom Salt Trick: Epsom salt (magnesium sulfate) is rich in magnesium and sulfur, which are essential for flowering and overall plant health. Dissolve one teaspoon of Epsom salt in one liter of water and water the plants with it every two weeks. You can also spray the solution on the leaves.
- Coffee Grounds as Fertilizer: Coffee grounds are an excellent organic fertilizer that improves the soil and provides plants with nitrogen. Simply scatter the coffee grounds around the plants and lightly work them into the soil.
- Compost Tea: Compost tea is a liquid fertilizer rich in nutrients and microorganisms. You can easily make it yourself by soaking compost in water and then using the diluted liquid for watering.
- Nettle Manure: Nettle manure is another excellent organic fertilizer that provides plants with nitrogen, potassium, and iron. It smells a bit strong, but the effect is unbeatable!
- Regular Pruning of Suckers: Regularly remove the side shoots that grow between the main stem and branches. This promotes the growth of the main shoots and ensures better air circulation for the plant.
- Install Plant Supports: Once the plants grow larger and bear fruit, you should give them supports to prevent branches from breaking. Bamboo sticks or special plant supports are ideal for this.
- Keep an Eye on Pests: Regularly check the plants for pests such as aphids, spider mites, or whiteflies. In case of infestation, you can use natural pest control agents like neem oil or soap solution.
Phase 3: The Flowering and Fruiting Phase – Patience and Support
Now it’s time to admire the flowers and watch the fruits grow. But even in this phase, there are a few things to consider.
- Support Pollination: While chilies are self-pollinating, you can support pollination by gently shaking the plants or moving from flower to flower with a small brush. This increases the likelihood of an abundant harvest.
- Continue Regular Fertilizing: Continue to fertilize the plants regularly with organic fertilizers to provide them with sufficient nutrients.
- Be Patient: The ripening time of chilies depends on the variety. Be patient and wait until the fruits have reached their final color.
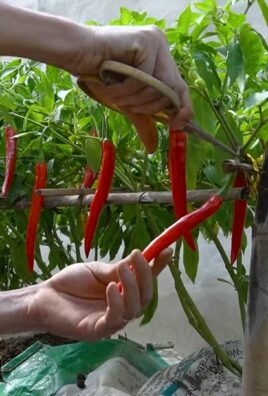
- Harvest Time: Harvest the chilies as soon as they have reached their final color and easily detach from the stem. Depending on the variety, this can be red, yellow, orange, or even purple.
- Regular Harvest: Harvest ripe chilies regularly to encourage the plant to produce new fruits.
- Seed Saving (Optional): If you want to save seeds for next year, leave some of the most beautiful and ripe fruits on the plant until they are fully mature.
Additional Tips for a Super Harvest:
- Chilies Love Company: Plant basil, marigolds, or nasturtiums near your chilies. They deter pests and promote growth.
- Regular Pruning: Light pruning of the plants can stimulate growth and improve the harvest.
- Overwintering: If you want to overwinter your chilies, cut them back severely in autumn and place them in a bright, cool spot. Water them sparingly.
I hope these tips help you double or even triple your chili harvest! With a little patience and love, you will soon enjoy an abundant harvest. Happy gardening!
Conclusion
So, there you have it! This simple, yet incredibly effective DIY trick for boosting your chili pepper harvest is a game-changer for any gardener, regardless of experience level. We’ve walked you through the process, highlighting the science behind why it works and offering practical tips to ensure your success. But why is this a must-try? Because it’s more than just a method; it’s an investment in your garden’s potential.
Imagine a garden overflowing with vibrant, fiery chili peppers, ready to be transformed into your favorite spicy dishes. This isn’t just a dream; it’s an achievable reality with a little bit of effort and this powerful technique. The beauty of this DIY approach lies in its accessibility. You don’t need expensive equipment or specialized knowledge. Just a few readily available materials and a willingness to experiment.
Why settle for a meager harvest when you can unlock the full potential of your chili pepper plants?
Beyond the increased yield, this method promotes healthier, more robust plants. By providing the right environment and stimulating growth, you’re setting your chili peppers up for long-term success. And let’s not forget the satisfaction of knowing you’ve nurtured your plants and reaped the rewards of your hard work.
But the journey doesn’t end here. We encourage you to explore variations and adapt the technique to suit your specific needs and growing conditions. For example, if you live in a particularly hot climate, you might consider adjusting the timing or intensity of the treatment to prevent overheating. Or, if you’re growing different varieties of chili peppers, you can experiment with different concentrations to find the optimal balance for each type.
Consider adding a touch of organic seaweed extract to your foliar spray for an extra boost of micronutrients. You could also try incorporating beneficial microbes into your soil to further enhance root development and nutrient absorption. The possibilities are endless!
Ultimately, the key to success is observation and adaptation. Pay close attention to your plants’ response and adjust your approach accordingly. Don’t be afraid to experiment and learn from your experiences.
We are confident that this DIY trick will revolutionize your chili pepper growing experience. It’s a simple, effective, and rewarding way to maximize your harvest and enjoy the fruits (or rather, peppers) of your labor.
Now, it’s your turn! We urge you to give this DIY trick a try and witness the difference it can make in your garden. And most importantly, we want to hear about your experience! Share your results, tips, and variations in the comments below. Let’s create a community of chili pepper enthusiasts and learn from each other’s successes. Let’s all work together to increase our chili pepper harvest.
Ready to transform your chili pepper garden?
Don’t wait any longer. Start implementing this DIY trick today and prepare to be amazed by the results. Your taste buds will thank you!
FAQ
Q: What exactly does this DIY trick do to increase my chili pepper harvest?
A: This DIY trick focuses on creating a slightly stressful, but ultimately beneficial, environment for your chili pepper plants. By carefully manipulating certain factors, such as temperature or light exposure (depending on the specific technique), we encourage the plant to prioritize reproduction (i.e., producing more peppers) as a survival mechanism. The plant senses a potential threat and responds by accelerating its reproductive cycle to ensure its survival and propagation. This results in a significantly larger yield of chili peppers compared to plants grown under standard conditions. The specific method outlined in the article provides a controlled and safe way to induce this response, maximizing pepper production without harming the plant.
Q: Is this DIY trick safe for my chili pepper plants? Will it damage them?
A: When implemented correctly, this DIY trick is perfectly safe for your chili pepper plants. The key is to follow the instructions carefully and monitor your plants closely for any signs of stress. The goal is to create a mild, temporary stress that stimulates pepper production, not to inflict permanent damage. If you notice any wilting, discoloration, or other signs of distress, immediately reduce the intensity or frequency of the treatment. Remember, every plant is different, and some varieties may be more sensitive than others. Start with a small test group of plants before applying the technique to your entire garden. It’s also crucial to ensure your plants are otherwise healthy and well-nourished before attempting this trick. A weak or unhealthy plant is more susceptible to damage from stress.
Q: How often should I apply this DIY trick to my chili pepper plants?
A: The frequency of application depends on the specific DIY trick you’re using and the environmental conditions in your area. Generally, it’s best to start with a conservative approach and gradually increase the frequency as needed. For example, if you’re using a temperature-based technique, you might start with one or two treatments per week and then increase to three or four if your plants are responding well. Pay close attention to your plants’ response and adjust the frequency accordingly. Avoid overdoing it, as excessive stress can be detrimental. Remember, the goal is to stimulate pepper production, not to overwhelm the plant.
Q: What kind of chili pepper varieties will benefit most from this DIY trick?
A: Most chili pepper varieties will benefit from this DIY trick, but some may respond more dramatically than others. Varieties known for their high yield potential, such as jalapenos, serranos, and cayenne peppers, are often particularly responsive. However, even less prolific varieties can experience a significant boost in production. It’s worth experimenting with different varieties to see which ones respond best in your specific growing conditions. Keep in mind that factors such as soil quality, sunlight exposure, and watering practices also play a crucial role in overall pepper production.
Q: Can I use this DIY trick on other types of plants besides chili peppers?
A: While this DIY trick is specifically designed for chili peppers, the underlying principles of stress-induced reproduction can potentially be applied to other fruiting plants, such as tomatoes, eggplants, and bell peppers. However, it’s important to research the specific needs and sensitivities of each plant before attempting to apply this technique. The optimal intensity and frequency of the treatment may vary significantly depending on the plant species. It’s always best to start with a small test group of plants and monitor their response closely before applying the technique to your entire garden.
Q: What are some common mistakes to avoid when using this DIY trick?
A: One of the most common mistakes is overdoing it. Applying too much stress to your plants can lead to damage and reduced yields. It’s crucial to start with a conservative approach and gradually increase the intensity or frequency of the treatment as needed. Another common mistake is neglecting other essential aspects of plant care, such as proper watering, fertilization, and pest control. This DIY trick is most effective when combined with a comprehensive approach to plant care. Finally, it’s important to monitor your plants closely for any signs of stress and adjust your approach accordingly. Don’t be afraid to experiment and learn from your experiences.
Q: How long will it take to see results from this DIY trick?
A: The time it takes to see results can vary depending on several factors, including the variety of chili pepper, the growing conditions, and the specific DIY trick you’re using. In general, you should start to see a noticeable increase in pepper production within a few weeks of implementing the technique. However, it may take longer for some varieties or in less than ideal growing conditions. Be patient and persistent, and don’t be discouraged if you don’t see immediate results. The key is to continue applying the technique consistently and monitor your plants closely for any signs of improvement.
Q: Where can I find the materials needed for this DIY trick?
A: The materials needed for this DIY trick are typically readily available at most garden centers, hardware stores, or online retailers. The specific materials will depend on the particular technique you’re using, but common items include things like shade cloth, reflective materials, or specific types of fertilizer. Be sure to check the instructions carefully to ensure you have all the necessary materials before you begin.

Leave a Comment