

Growing corn on concrete might sound like an impossible feat, a horticultural oxymoron! But what if I told you that with a little ingenuity and some clever DIY techniques, you could actually harvest sweet, juicy corn even without a traditional garden plot? Forget acres of farmland; we’re bringing the farm to you, right onto your patio or balcony!
For centuries, corn has been a staple crop, deeply woven into the fabric of numerous cultures. From the ancient civilizations of Mesoamerica, where corn was revered as a sacred gift, to its modern-day ubiquity in global cuisine, this grain has nourished and sustained communities for generations. But access to land shouldn’t be a barrier to enjoying the fruits (or rather, vegetables!) of your labor.
That’s where this DIY guide comes in. Maybe you live in an apartment with limited space, or perhaps your soil is less than ideal. Whatever the reason, growing corn on concrete offers a fantastic solution. I’m going to show you how to create a thriving corn patch in containers, utilizing simple, affordable materials and techniques. Imagine the satisfaction of biting into a cob of corn you grew yourself, knowing you defied the odds and transformed a concrete jungle into a miniature cornfield. Let’s get started and unlock the secrets to successful container corn cultivation!
Growing Corn on Concrete: A DIY Project That Will Surprise You!
I know, it sounds crazy—corn on concrete? But trust me, with a little creativity and the right tricks, you can actually grow corn even in the most unexpected places. This project is perfect for anyone with limited space, an unattractive concrete area they’d like to transform, or those who simply want to try an unusual gardening experiment. Let’s get started!
What You’ll Need
- Large planting containers: Use sturdy, deep containers made of plastic, metal, or wood. Corn develops deep roots, so choose containers at least 45–60 cm (18–24 inches) deep.
- High-quality potting soil: Corn is a heavy feeder, so nutrient-rich soil is essential. A mix of garden soil, compost, and a little sand for drainage works best.
- Corn seeds: Pick a variety suitable for container growing. Dwarf or patio corn varieties are ideal. You’ll find them at most garden centers.
- Fertilizer: Either a slow-release fertilizer or regular applications of liquid fertilizer to keep your corn well-fed.
- Drainage material: Pebbles, expanded clay, or broken pottery pieces prevent waterlogging.
- Watering can or hose: For regular watering.
- Sunny spot: Corn needs at least 6–8 hours of full sun daily.
- Optional: A trellis or support, depending on the variety.
Step-by-Step Guide
1. Preparing the Containers
- Clean thoroughly: Wash the containers with water (and mild soap if needed) to remove old soil or plant residue.
- Add drainage: Place a 5–10 cm (2–4 inch) layer of drainage material at the bottom. This prevents waterlogging and improves root aeration.
- Fill with soil: Add your prepared soil mix, leaving 5–10 cm of space at the top. Keep the soil loose and airy.
2. Sowing the Corn Seeds
- When to sow: Plant corn once all risk of frost has passed. In most temperate climates, this is mid-May onward.
- Depth: Sow seeds 2–3 cm (about 1 inch) deep.
- Spacing: Plant seeds 15–20 cm (6–8 inches) apart. In large containers, you can grow multiple plants—just give them room to develop.
- Watering: After sowing, water gently to keep soil moist but not soggy.
3. Caring for Your Corn Plants
- Watering: Corn needs consistent moisture, especially during growth and flowering. Water whenever the topsoil feels dry. Avoid waterlogging to prevent root rot.
- Fertilizing: Begin feeding 2–3 weeks after germination with either slow-release or liquid fertilizer. Follow package instructions. Corn is a heavy feeder and needs plenty of nutrients to thrive.
- Sunlight: Place containers in a sunny spot with at least 6–8 hours of sunlight daily.
- Support (optional): Tall corn varieties may need staking or a trellis, especially in windy areas.
- Pest protection: Watch for aphids, corn borers, or other pests. Use organic pest control if needed.
4. Harvesting Your Corn
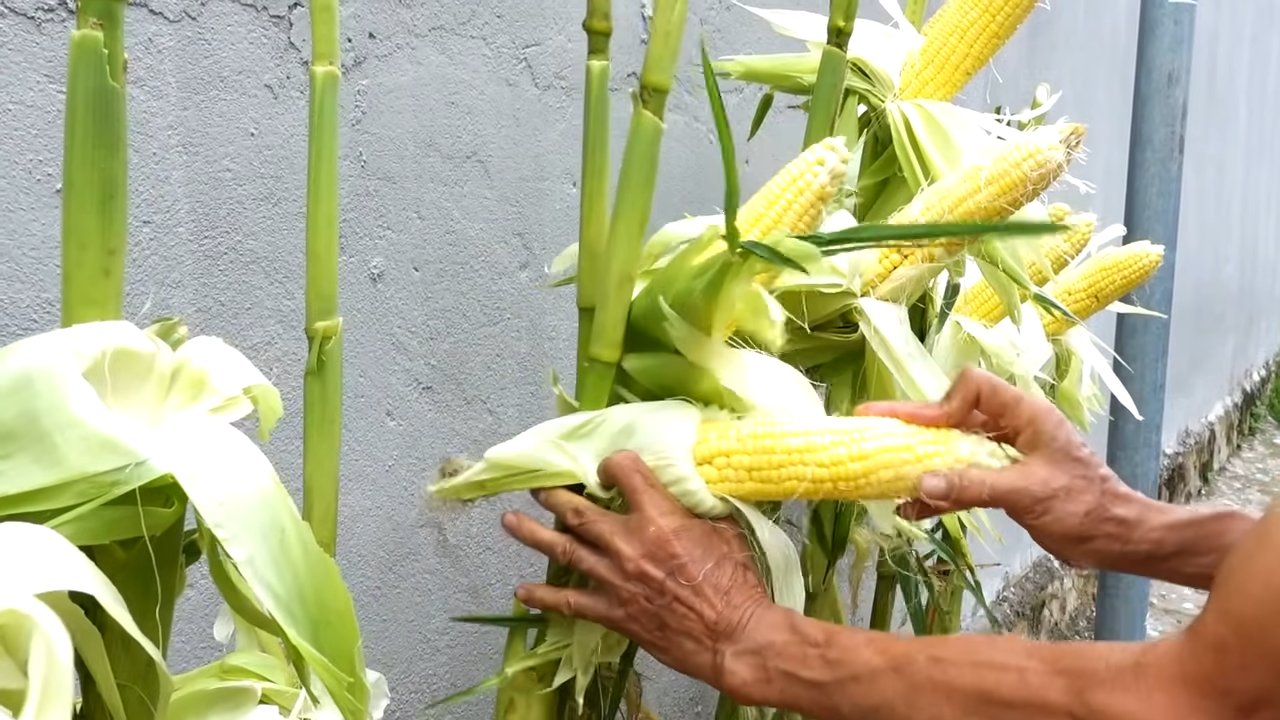
- When it’s ready: Corn is ripe when husks turn brown and dry, kernels feel plump, and release a milky liquid when pressed.
- How to harvest: Twist or cut ears off carefully.
- Enjoy: Eat fresh, grill, boil, or freeze for later use.
Extra Tips and Tricks
- Pollination: Corn is wind-pollinated. If you’re growing multiple plants, gently shake them to help spread pollen.
- Choosing the right variety: Look for dwarf or patio corn designed for containers.
- Soil enrichment: Add compost or organic amendments like bone meal for nutrient boosts.
- Mulching: Apply straw or wood chips on top to retain moisture and suppress weeds.
- Companion planting: Try the “Three Sisters” method—grow corn with beans and squash. Beans fix nitrogen, squash shades the soil, and corn provides support for beans.
- Wind protection: In exposed areas, place containers against a wall or add a windbreak.
- Patience: Corn takes time—don’t rush the process!
Common Problems and Solutions
- Yellow leaves: Usually nutrient deficiency—fertilize promptly.
- Root rot: Caused by overwatering or poor drainage. Improve drainage and adjust watering.
- Pests: Inspect plants regularly and treat with natural remedies.
- Plants tipping over: Could mean too little sunlight, water, or nutrients. Provide support and improve care conditions.
Why Growing Corn on Concrete is Worth It
- Space-saving: Perfect for balconies, patios, or small gardens.
- Unique: A fun and surprising project that turns heads.
- Sustainable: Homegrown corn reduces food miles and waste.
- Educational: A great hands-on project for kids to learn about plant growth.
- Beautifies concrete spaces: Transforms dull concrete into green, lively spots.
🌽 I hope this guide inspires you to grow your own corn on concrete! It’s a fun and rewarding project that brings both fresh food and green life to unlikely spaces.

Conclusion
So, there you have it! Growing corn on concrete might sound like an impossible feat, a horticultural oxymoron, but with this DIY trick, you can absolutely enjoy the sweet taste of homegrown corn, even without a traditional garden. This method isn’t just about defying expectations; it’s about accessibility, resourcefulness, and maximizing your space, no matter how limited it may be. Think about it: no tilling, reduced weeding, and the freedom to position your corn plants exactly where they’ll thrive, soaking up the sun’s rays and adding a touch of rustic charm to your patio, balcony, or even your driveway.
This DIY approach to growing corn on concrete is a game-changer for urban gardeners, apartment dwellers, and anyone who thought fresh, homegrown corn was beyond their reach. It’s a testament to the power of innovation and a reminder that with a little creativity, you can cultivate a thriving garden in the most unexpected places.
But don’t just take our word for it. The real magic happens when you try it yourself. Imagine the satisfaction of harvesting your own ears of corn, knowing you nurtured them from seed to table, all on a concrete surface. The taste will be sweeter, the experience more rewarding, and the bragging rights? Well, those are priceless!
Ready to take your concrete gardening to the next level? Consider these variations to personalize your corn-growing adventure:
* Vertical Corn Garden: Train your corn stalks to grow up a trellis or support structure for a stunning vertical display. This is especially effective for smaller varieties of corn.
* Companion Planting: Maximize your container space by planting companion herbs and vegetables alongside your corn. Basil, beans, and squash are excellent choices that can deter pests and improve soil health.
* Colored Corn Varieties: Experiment with different corn varieties, such as blue corn or ornamental corn, to add visual interest to your concrete garden.
* Succession Planting: Plant new corn seeds every few weeks to ensure a continuous harvest throughout the growing season.
* Hydroponic Corn on Concrete: For the truly adventurous, explore hydroponic systems adapted for container gardening on concrete. This can offer even greater control over nutrient delivery and water usage.
We’re confident that this DIY trick will transform your perception of what’s possible in the world of gardening. It’s a simple, effective, and incredibly rewarding way to enjoy the taste of fresh, homegrown corn, regardless of your living situation.
So, grab your containers, gather your supplies, and get ready to embark on a concrete corn-growing adventure. We can’t wait to hear about your experiences! Share your photos, tips, and triumphs with us in the comments below. Let’s create a community of concrete corn growers and inspire others to embrace the joy of gardening, one kernel at a time. Remember, the key to success is consistent watering, proper fertilization, and plenty of sunshine. Happy growing!
Frequently Asked Questions (FAQ)
What type of corn is best suited for growing on concrete in containers?
The best types of corn for container gardening on concrete are shorter, more compact varieties. Look for “dwarf” or “baby” corn varieties, as they are specifically bred to thrive in smaller spaces. Some popular choices include ‘On Deck’ sweet corn, ‘Golden Bantam’ (a classic heirloom), and ‘Trinity’ hybrid corn. These varieties typically reach a manageable height and produce smaller ears, making them well-suited for container cultivation. Avoid taller, field corn varieties, as they require significantly more space and resources. Consider the length of the growing season in your area when selecting a variety to ensure it has enough time to mature before the first frost.
How large of a container do I need to grow corn on concrete?
The size of the container is crucial for successful corn cultivation on concrete. Each corn plant needs ample space for its roots to develop. A minimum container size of 12 inches in diameter and 12 inches deep is recommended for dwarf varieties. However, larger containers, such as 15-20 gallons, are preferable, especially if you plan to grow multiple plants together. The larger the container, the more stable the growing environment will be, and the less frequently you’ll need to water and fertilize. Ensure the container has adequate drainage holes to prevent waterlogging, which can lead to root rot.
What kind of soil should I use for growing corn on concrete?
Corn is a heavy feeder, so it requires a rich, well-draining soil mix. A good option is a blend of equal parts potting soil, compost, and perlite or vermiculite. The potting soil provides a base for the plants to grow, the compost adds essential nutrients and improves water retention, and the perlite or vermiculite enhances drainage and aeration. Avoid using garden soil directly in containers, as it can become compacted and hinder root growth. You can also amend the soil with slow-release fertilizer to provide a steady supply of nutrients throughout the growing season.
How often should I water corn growing on concrete?
Corn plants growing in containers on concrete require regular watering, especially during hot, dry weather. The concrete surface can radiate heat, causing the soil to dry out quickly. Check the soil moisture daily by sticking your finger about an inch into the soil. If it feels dry to the touch, it’s time to water. Water deeply until excess water drains out of the bottom of the container. Avoid overwatering, as this can lead to root rot. As a general rule, water thoroughly every 2-3 days, but adjust the frequency based on weather conditions and the size of the container.
How much sunlight does corn need when growing on concrete?
Corn requires at least 6-8 hours of direct sunlight per day to thrive. Choose a location on your concrete surface that receives ample sunlight throughout the day. If you live in a particularly hot climate, consider providing some afternoon shade to prevent the plants from overheating. Insufficient sunlight can result in stunted growth, poor ear development, and reduced yields. Observe the sunlight patterns in your area and position your containers accordingly to maximize sun exposure.
How do I pollinate corn growing on concrete?
Corn is wind-pollinated, meaning the pollen from the tassels (male flowers) at the top of the plant needs to reach the silks (female flowers) on the developing ears. In a container setting, natural wind pollination may be limited. To ensure successful pollination, you can hand-pollinate the corn. Gently shake the tassels over the silks to release the pollen. You can also collect pollen from the tassels with a small brush and apply it directly to the silks. Repeat this process every day for about a week, or until the silks begin to turn brown. Planting corn in blocks rather than rows can also improve pollination rates.
What are some common pests and diseases that affect corn growing on concrete, and how can I prevent them?
Common pests that can affect corn include aphids, corn earworms, and spider mites. Diseases include fungal infections like rust and smut. To prevent these problems, inspect your plants regularly for signs of infestation or disease. Remove any affected leaves or plants promptly. Encourage beneficial insects like ladybugs, which prey on aphids. Use organic pest control methods, such as insecticidal soap or neem oil, to control pests. Ensure good air circulation around the plants to prevent fungal diseases. Avoid overhead watering, which can create a humid environment that promotes fungal growth.
How do I fertilize corn growing on concrete?
Corn is a heavy feeder and requires regular fertilization to produce healthy ears. Use a balanced fertilizer with an NPK ratio of 10-10-10 or 14-14-14. Apply fertilizer every 2-3 weeks, following the instructions on the fertilizer package. You can also supplement with compost tea or liquid seaweed extract to provide additional nutrients. Avoid over-fertilizing, as this can lead to excessive vegetative growth and reduced ear production. Monitor the plants for signs of nutrient deficiencies, such as yellowing leaves, and adjust your fertilization schedule accordingly.
When is corn ready to harvest when growing on concrete?
Corn is typically ready to harvest about 60-100 days after planting, depending on the variety. The silks will turn brown and dry, and the ears will feel plump and full. To test for ripeness, peel back a portion of the husk and puncture a kernel with your fingernail. If the liquid is milky, the corn is ready to harvest. If the liquid is clear, it needs more time to mature. If the liquid is doughy, it’s overripe. Harvest the corn by twisting and pulling the ear downward from the stalk.
Can I grow corn on concrete year-round?
Whether you can grow corn on concrete year-round depends on your climate. Corn is a warm-season crop that requires a long growing season with warm temperatures. In regions with mild winters, you may be able to grow corn year-round. However, in colder climates, you will need to start the seeds indoors and transplant them outdoors after the last frost. You can also use season extension techniques, such as row covers or greenhouses, to extend the growing season. Consider the specific climate requirements of the corn variety you choose and adjust your planting schedule accordingly.

Leave a Comment