

Grow Napa Cabbage at Home and unlock the secrets to fresh, flavorful, and homegrown goodness right in your backyard! Have you ever dreamt of strolling through your garden, harvesting crisp, juicy Napa cabbage for a delicious stir-fry or a vibrant kimchi batch? Well, dream no more! This DIY guide is your passport to transforming that dream into a reality, even if you’re a complete beginner.
Napa cabbage, also known as Chinese cabbage, boasts a rich history, deeply rooted in Asian culinary traditions. For centuries, it’s been a staple ingredient, celebrated for its mild, slightly sweet flavor and versatility. Beyond its delicious taste, Napa cabbage is packed with essential vitamins and nutrients, making it a healthy and rewarding addition to your diet.
But why should you bother growing it yourself? In today’s world, where freshness and quality are paramount, knowing exactly where your food comes from is a huge advantage. Plus, store-bought produce often lacks the vibrant flavor of homegrown vegetables. By learning how to grow Napa Cabbage at Home, you’ll not only enjoy fresher, tastier meals but also save money and reduce your environmental footprint. This DIY guide will provide you with simple, step-by-step instructions and insider tips to ensure a bountiful harvest. Let’s get started and cultivate your own little piece of Napa cabbage paradise!
Grow Napa Cabbage at Home: Your DIY Guide to a Bountiful Harvest
Hey gardening friends! Have you ever thought about growing Napa cabbage (also known as Chinese cabbage) yourself? It’s easier than you think, and the result is a crisp, delicious vegetable that’s super versatile in the kitchen. I’ll show you step by step how you can grow it at home. Let’s get started!
What You Need to Grow Napa Cabbage
Before we begin, here’s a list of the essentials:
- Napa cabbage seeds: Choose a variety suitable for your climate.
- Seed trays or pots: For starting seeds indoors.
- Seed-starting soil: A light, low-nutrient soil for germination.
- Garden soil: Well-draining, humus-rich soil for the garden bed.
- Compost or organic fertilizer: To enrich soil quality.
- Watering can or spray bottle: To keep seedlings and plants watered.
- Garden tools: Spade, rake, hand trowel.
- Protective netting (optional): To keep pests like cabbage moths away.
- Mulch (optional): Helps retain soil moisture and suppress weeds.
The Right Time to Sow
Timing is key for a successful harvest. Napa cabbage thrives in cool weather.
- Spring sowing: Start in spring as soon as the risk of frost is over.
- Summer sowing: For a fall harvest, sow in summer, but avoid extreme heat. Too much direct sun can hinder germination.
Sowing and Starting Seeds Indoors
I usually start Napa cabbage indoors to give the plants a head start.
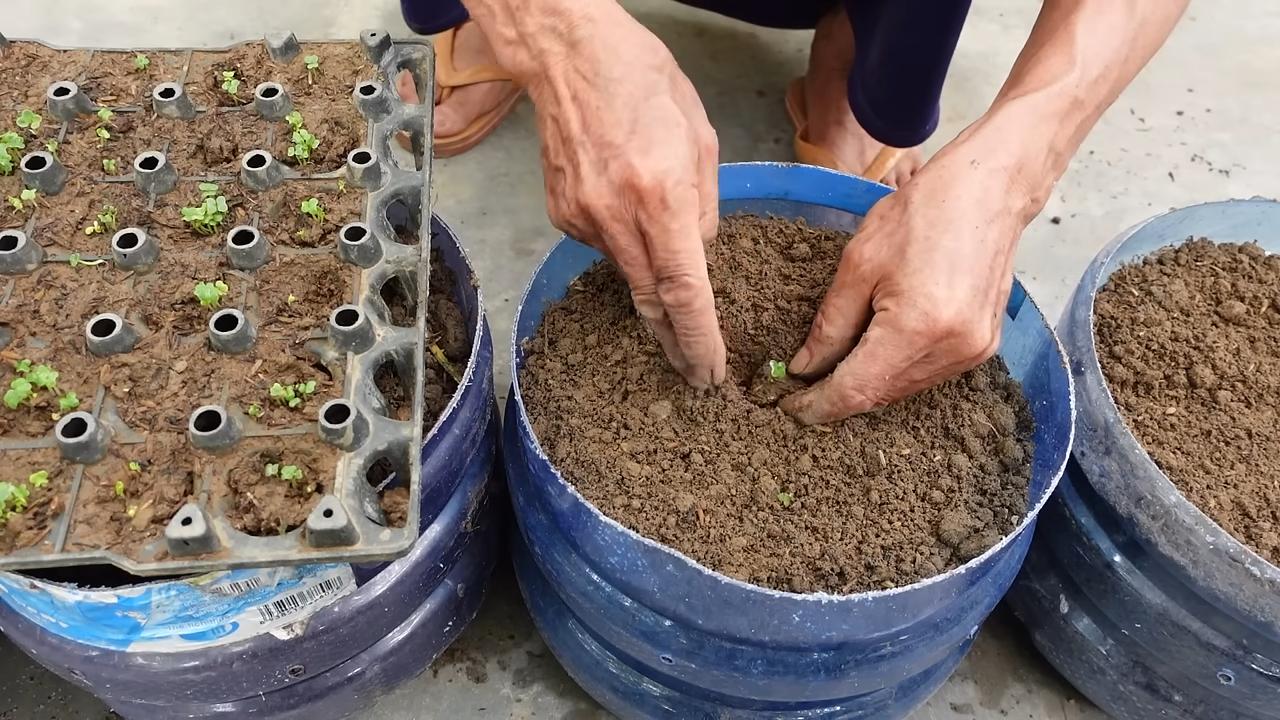
- Prepare seed pots: Fill with seed-starting soil and press down lightly.
- Sow seeds: Place 2–3 seeds per pot and cover with about 0.5 cm of soil.
- Water: Moisten gently with a spray bottle. The soil should stay moist, not soggy.
- Location: Keep pots in a bright, warm spot (18–20°C / 64–68°F). A mini greenhouse or sunny windowsill works well.
- Germination: Seeds typically sprout within 5–10 days. Keep soil evenly moist.
- Thin seedlings: Once seedlings have 2–3 true leaves, thin them so only one strong plant remains per pot.
Preparing the Garden Bed
While seedlings grow, get the bed ready. Napa cabbage needs a sunny spot and rich soil.
- Choose the location: Pick a sunny site with at least 6 hours of sun daily.
- Prepare the soil: Loosen thoroughly and remove weeds, stones, and roots.
- Improve the soil: Mix in compost or organic fertilizer. Napa cabbage is a heavy feeder.
- Check soil pH: Slightly acidic to neutral soil (6.0–7.0) is best.
Transplanting Seedlings
Once seedlings are strong (10–15 cm tall) and frost has passed, transplant them outdoors.
- Harden off: Place seedlings outdoors for a few hours daily, bringing them inside at night for several days.
- Spacing: Plant 30–40 cm apart.
- Planting holes: Dig slightly larger than the root ball.
- Transplant carefully: Place seedlings without damaging roots.
- Backfill: Fill with soil, press down lightly.
- Water: Water deeply after transplanting.
Caring for Napa Cabbage
Proper care ensures a rich harvest.
- Watering: Keep soil consistently moist, especially in dry spells. Avoid waterlogging.
- Fertilizing: Feed regularly with compost or organic fertilizer.
- Weeding: Remove weeds so they don’t compete for nutrients.
- Pest control: Watch for cabbage moths, flea beetles, and slugs. Use netting, slug pellets, or hand-pick as needed.
- Mulching: Apply straw or grass clippings to retain moisture, suppress weeds, and cool the soil.
Protection Against Pests and Diseases
Napa cabbage is prone to certain pests and diseases. Here are prevention and control tips:
- Cabbage moths: They lay eggs on leaves, and caterpillars eat them. Netting keeps moths away, or hand-pick caterpillars. Use organic sprays if necessary.
- Flea beetles: Tiny beetles that chew small holes in leaves. Mulch helps reduce damage.
- Slugs: They love cabbage leaves. Use slug pellets, traps, or hand removal.
- Clubroot (cabbage root disease): Caused by a soil fungus that swells and weakens roots. Prevent with crop rotation and resistant varieties.
Harvesting Napa Cabbage
The harvest depends on the variety and sowing time. Generally, Napa cabbage matures in 70–80 days.
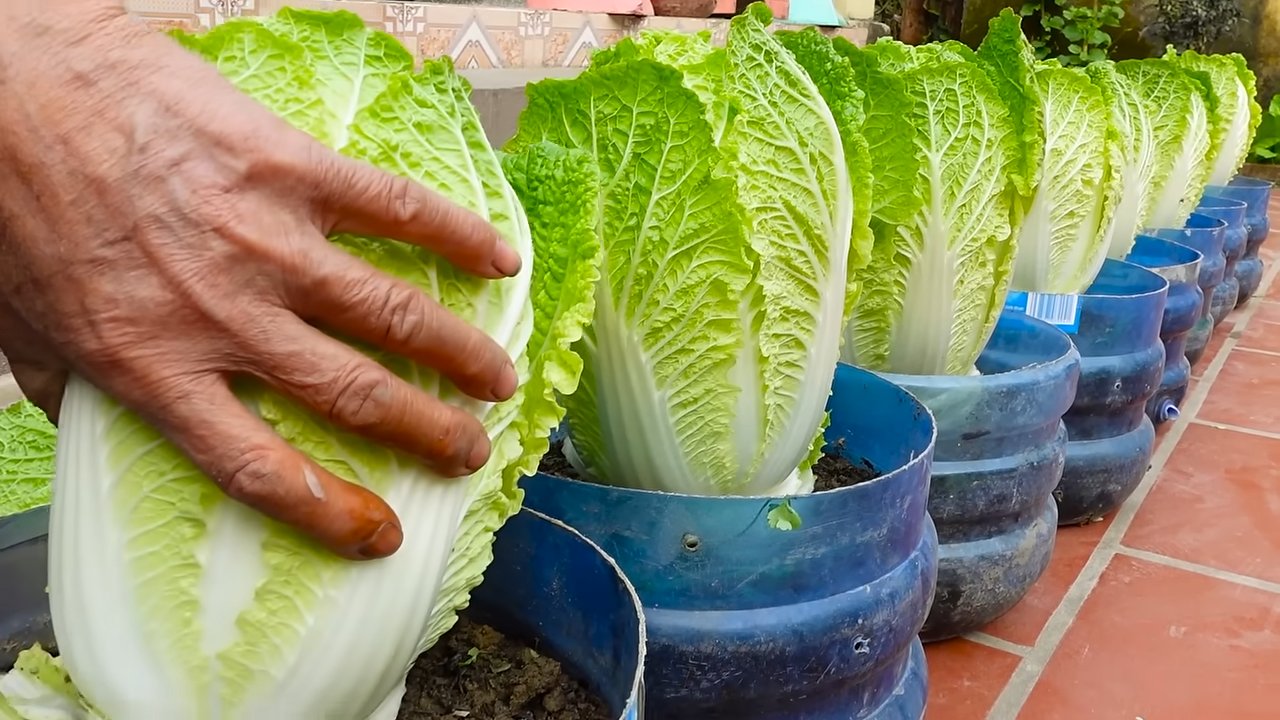
- Signs of readiness: Heads should feel firm and tightly packed.
- Harvest: Cut the head just above the soil line with a sharp knife.
- Storage: Keeps in the fridge for several weeks. Wrap in a damp cloth to stay fresh.
Using Napa Cabbage in the Kitchen
Napa cabbage is very versatile. Eat it raw, cooked, stir-fried, steamed, or fermented.
Soups and stews: Adds sweetness and texture to warm dishes.
Salads: Crunchy and mild, perfect for fresh salads.
Kimchi: The star ingredient of Korea’s national dish.
Conclusion
So, there you have it! Growing Napa cabbage at home isn’t just a gardening project; it’s an investment in fresh, flavorful, and healthy meals. From seed to harvest, the process is surprisingly rewarding, offering a connection to your food that you simply can’t get from a grocery store run. The crisp texture and mild, slightly sweet taste of homegrown Napa cabbage are unparalleled, elevating everything from stir-fries and slaws to kimchi and braised dishes.
Why is this DIY trick a must-try? Because it puts you in control. You dictate the growing conditions, ensuring your Napa cabbage is free from unwanted pesticides and herbicides. You harvest at peak ripeness, maximizing flavor and nutritional value. And you experience the satisfaction of nurturing a plant from a tiny seed into a vibrant, edible masterpiece. Plus, let’s be honest, there’s a certain bragging right that comes with saying, “I grew this myself!”
But the benefits extend beyond just the taste and control. Growing your own Napa cabbage can be a surprisingly economical choice. Think about the cost of organic Napa cabbage at the store – it can be significantly higher than the cost of seeds and a little bit of your time. And the yield from even a small garden plot can be substantial, providing you with enough Napa cabbage to enjoy for weeks, or even months, depending on your consumption.
Looking for variations? Consider succession planting to extend your harvest season. Sow seeds every few weeks to ensure a continuous supply of fresh Napa cabbage. Experiment with different varieties of Napa cabbage to discover your favorite flavor profiles. Some varieties are more compact, making them ideal for container gardening, while others are larger and more suited for in-ground planting. You can also try companion planting. Marigolds, for example, can help deter pests, while dill can attract beneficial insects.
Don’t be afraid to get creative with your growing methods. If you live in a colder climate, you can start your seeds indoors to give them a head start. If you have limited space, you can grow Napa cabbage in raised beds or containers. The key is to adapt the techniques to your specific environment and resources.
We wholeheartedly encourage you to give this DIY trick a try. It’s a fun, educational, and ultimately delicious experience. Whether you’re a seasoned gardener or a complete beginner, growing Napa cabbage at home is within your reach.
And most importantly, we want to hear about your experiences! Share your photos, tips, and challenges in the comments below. Let’s build a community of home gardeners who are passionate about growing their own fresh, healthy food. What variety did you try? What challenges did you face, and how did you overcome them? What are your favorite ways to use your homegrown Napa cabbage? Your insights can help other gardeners succeed and inspire even more people to embrace the joy of growing their own food. So, grab some seeds, get your hands dirty, and discover the magic of growing Napa cabbage at home! Let us know how your **Napa cabbage** growing journey goes!
Frequently Asked Questions (FAQ)
1. How much space does Napa cabbage need to grow?
Napa cabbage needs adequate space to develop its head properly. Generally, allow 12-18 inches between plants in rows that are 24-36 inches apart. This spacing allows for good air circulation, which helps prevent disease. If you’re growing in containers, choose a pot that is at least 12 inches in diameter and depth for each plant. Remember that compact varieties may need slightly less space.
2. What kind of soil is best for growing Napa cabbage?
Napa cabbage thrives in well-drained, fertile soil that is rich in organic matter. Amend your soil with compost or well-rotted manure before planting to improve its structure and nutrient content. A slightly acidic to neutral soil pH (around 6.0 to 7.0) is ideal. You can test your soil pH with a home testing kit or by sending a sample to your local agricultural extension office.
3. How often should I water my Napa cabbage plants?
Napa cabbage needs consistent moisture, especially during head formation. Water deeply and regularly, aiming for about 1-1.5 inches of water per week. Avoid overhead watering, as this can promote fungal diseases. Instead, water at the base of the plants. Mulching around the plants can help retain moisture and suppress weeds. Check the soil moisture regularly by sticking your finger about an inch into the soil. If it feels dry, it’s time to water.
4. What are some common pests and diseases that affect Napa cabbage, and how can I control them?
Common pests include cabbage worms, aphids, and flea beetles. Diseases include clubroot, black rot, and downy mildew. To control pests, you can use row covers to protect young plants, handpick pests off the plants, or use insecticidal soap or Bacillus thuringiensis (Bt) for cabbage worms. For diseases, ensure good air circulation, avoid overhead watering, and practice crop rotation. If clubroot is a problem, amend the soil with lime to raise the pH. Consider using disease-resistant varieties.
5. When is the best time to harvest Napa cabbage?
Napa cabbage is typically ready to harvest 70-80 days after planting. The head should be firm and compact. To harvest, cut the head at the base with a sharp knife. You can also harvest individual leaves as needed, but this will slow down the overall growth of the head.
6. Can I grow Napa cabbage in containers?
Yes, Napa cabbage can be successfully grown in containers, especially the more compact varieties. Choose a container that is at least 12 inches in diameter and depth. Use a high-quality potting mix and ensure good drainage. Water regularly and fertilize every few weeks with a balanced fertilizer. Place the container in a sunny location.
7. How can I prevent my Napa cabbage from bolting (going to seed)?
Bolting is often triggered by stress, such as extreme temperatures or lack of water. To prevent bolting, choose bolt-resistant varieties, provide consistent moisture, and protect plants from extreme heat or cold. If you live in a warmer climate, consider planting Napa cabbage in the fall for a winter harvest.
8. Can I save seeds from my Napa cabbage plants?
Saving seeds from Napa cabbage can be challenging because it is a biennial plant, meaning it typically flowers and produces seeds in its second year. However, if you live in a climate where Napa cabbage can survive the winter, you can try overwintering the plants and allowing them to flower and produce seeds the following year. Be aware that Napa cabbage can cross-pollinate with other members of the Brassica family, so you may need to isolate your plants to ensure true-to-type seeds.
9. What are some good companion plants for Napa cabbage?
Good companion plants for Napa cabbage include dill, chamomile, rosemary, thyme, and marigolds. Dill attracts beneficial insects that prey on pests, while marigolds deter nematodes and other soil pests. Aromatic herbs like rosemary and thyme can also help repel pests. Avoid planting Napa cabbage near other members of the Brassica family, such as broccoli, cauliflower, and kale, as they can attract the same pests and diseases.
10. How do I store Napa cabbage after harvesting?
To store Napa cabbage, wrap it loosely in plastic wrap and store it in the refrigerator. It can typically last for several weeks if stored properly. You can also ferment Napa cabbage to make kimchi or sauerkraut, which will extend its shelf life even further.
Leave a Comment