

Growing Collard Greens at Home doesn’t have to be a daunting task! Imagine stepping outside your back door and harvesting fresh, vibrant greens for a delicious and nutritious meal. Forget those limp, pre-packaged greens from the grocery store – with a few simple tricks, you can cultivate your own thriving collard patch right in your backyard, balcony, or even on a sunny windowsill.
Collard greens boast a rich history, deeply rooted in Southern American cuisine and African heritage. They were brought to the Americas by enslaved Africans and quickly became a staple, symbolizing resilience, resourcefulness, and community. Beyond their cultural significance, collard greens are nutritional powerhouses, packed with vitamins, minerals, and antioxidants.
But why should you bother with growing collard greens at home? Well, for starters, you’ll have access to the freshest, most flavorful greens imaginable. Plus, you’ll know exactly what’s going into your food – no harmful pesticides or herbicides! I’m going to share some easy DIY tricks and hacks that will help you succeed, even if you’re a complete beginner. From choosing the right soil to warding off pests naturally, I’ll guide you through every step of the process. Get ready to enjoy the satisfaction of harvesting your own homegrown goodness and discover the joy of growing collard greens at home!
Köstliche Collard Greens selbst anbauen: Dein DIY-Leitfaden
Ich liebe Collard Greens! Dieses herzhafte, nahrhafte Gemüse ist ein fester Bestandteil der südlichen Küche und lässt sich überraschend einfach zu Hause anbauen. Egal, ob du einen großen Garten oder nur einen kleinen Balkon hast, mit diesem Leitfaden zeige ich dir, wie du deine eigenen Collard Greens erfolgreich anbauen kannst. Los geht’s!
Die Grundlagen: Was du brauchst
Bevor wir loslegen, lass uns sicherstellen, dass du alles hast, was du brauchst. Hier ist eine Liste der wichtigsten Dinge:
* Collard Greens Samen: Wähle eine Sorte, die dir schmeckt! Es gibt viele verschiedene Sorten, von denen jede ihren eigenen Geschmack und ihre eigenen Eigenschaften hat. Einige beliebte Sorten sind ‘Georgia Southern’, ‘Vates’ und ‘Champion’.
* Gute Erde: Collard Greens gedeihen in reichhaltiger, gut durchlässiger Erde. Du kannst entweder Gartenerde verwenden oder eine spezielle Gemüsemischung kaufen.
* Dünger: Collard Greens sind hungrige Pflanzen, daher ist ein guter Dünger unerlässlich. Ich empfehle einen ausgewogenen Dünger mit einem NPK-Verhältnis von 10-10-10 oder 14-14-14.
* Gefäße (optional): Wenn du Collard Greens in Töpfen anbauen möchtest, benötigst du ausreichend große Gefäße mit Drainagelöchern.
* Gießkanne oder Schlauch: Um deine Pflanzen regelmäßig zu gießen.
* Gartenwerkzeuge: Eine Schaufel, eine Harke und eventuell ein kleiner Spaten.
* Mulch (optional): Mulch hilft, Feuchtigkeit zu speichern und Unkraut zu unterdrücken.
Schritt-für-Schritt-Anleitung: Collard Greens pflanzen
Jetzt, wo wir alles haben, können wir mit dem Pflanzen beginnen! Hier ist eine detaillierte Anleitung:
1. Den richtigen Zeitpunkt wählen: Collard Greens sind ein kühles Saisongemüse, das am besten im Frühjahr oder Herbst angebaut wird. In den meisten Regionen kannst du sie 2-4 Wochen vor dem letzten erwarteten Frost im Frühjahr oder 6-8 Wochen vor dem ersten erwarteten Frost im Herbst pflanzen. Ich persönlich bevorzuge den Herbstanbau, da die Pflanzen dann weniger unter Schädlingen leiden.
2. Den Boden vorbereiten: Collard Greens bevorzugen einen sonnigen Standort mit mindestens 6 Stunden direkter Sonneneinstrahlung pro Tag. Bereite den Boden vor, indem du ihn mit einer Harke lockerst und Steine oder Unkraut entfernst. Arbeite dann Kompost oder gut verrotteten Mist ein, um die Bodenfruchtbarkeit zu verbessern. Wenn du in Töpfen anbaust, fülle die Gefäße mit der Gemüsemischung.
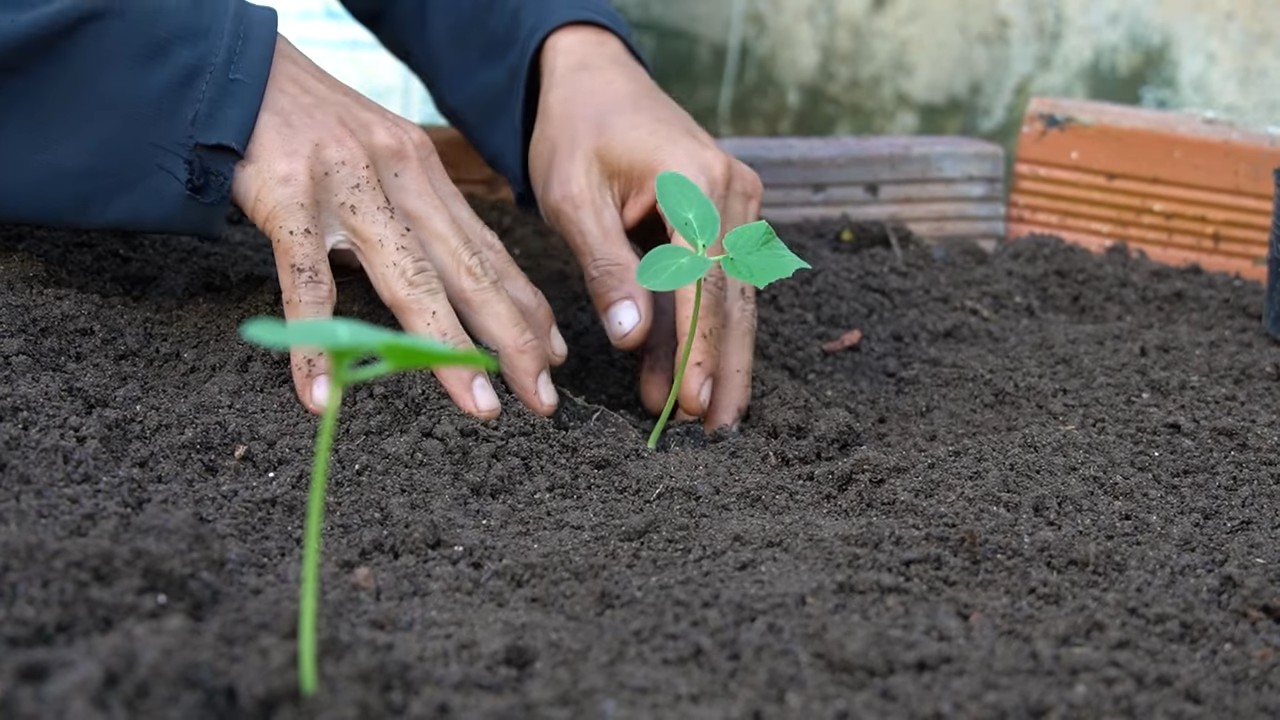
3. Die Samen säen: Es gibt zwei Möglichkeiten, Collard Greens zu säen: direkt in den Boden oder in Anzuchtschalen.
* Direktsaat: Säe die Samen etwa 1 cm tief und 5-7 cm auseinander. Bedecke sie leicht mit Erde und gieße sie vorsichtig an.
* Anzucht in Schalen: Säe die Samen in Anzuchtschalen mit Anzuchterde. Halte die Erde feucht und stelle die Schalen an einen warmen, hellen Ort. Sobald die Sämlinge 5-7 cm groß sind, kannst du sie in den Garten oder in Töpfe umpflanzen.
4. Die Sämlinge ausdünnen: Sobald die Sämlinge ein paar Blätter haben, dünne sie aus, so dass die Pflanzen etwa 30-45 cm auseinander stehen. Dies gibt ihnen genügend Platz zum Wachsen. Die ausgedünnten Sämlinge kannst du übrigens in Salaten verwenden!
5. Regelmäßig gießen: Collard Greens brauchen regelmäßige Bewässerung, besonders während trockener Perioden. Gieße die Pflanzen tief, so dass die Erde gleichmäßig feucht ist. Vermeide es, die Blätter zu benetzen, da dies Pilzkrankheiten fördern kann.
6. Düngen: Dünge die Pflanzen alle 4-6 Wochen mit einem ausgewogenen Dünger. Befolge die Anweisungen auf der Verpackung.
7. Mulchen (optional): Trage eine Schicht Mulch um die Pflanzen auf, um Feuchtigkeit zu speichern und Unkraut zu unterdrücken. Stroh, Holzhackschnitzel oder Grasschnitt eignen sich gut als Mulch.
Schutz vor Schädlingen und Krankheiten
Collard Greens können anfällig für verschiedene Schädlinge und Krankheiten sein. Hier sind einige häufige Probleme und wie du sie bekämpfen kannst:
* Kohlweißlinge: Diese Schmetterlinge legen ihre Eier auf die Blätter, und die Raupen fressen die Blätter auf. Du kannst sie von Hand absammeln oder ein Insektizid auf Bacillus thuringiensis (Bt) Basis verwenden.
* Erdflöhe: Diese kleinen Käfer fressen Löcher in die Blätter. Du kannst sie mit einem Insektizid auf Pyrethrum Basis bekämpfen oder die Pflanzen mit einem Kulturschutznetz abdecken.
* Blattläuse: Diese kleinen Insekten saugen den Saft aus den Blättern. Du kannst sie mit einem starken Wasserstrahl abspritzen oder ein Insektizid auf Neemöl Basis verwenden.
* Pilzkrankheiten: Collard Greens können anfällig für Pilzkrankheiten wie Mehltau und Blattflecken sein. Um Pilzkrankheiten vorzubeugen, sorge für eine gute Luftzirkulation um die Pflanzen und vermeide es, die Blätter zu benetzen. Wenn du Anzeichen einer Pilzkrankheit bemerkst, behandle die Pflanzen mit einem Fungizid.
Die Ernte: Wann und wie
Collard Greens können geerntet werden, sobald die Blätter groß genug sind, um sie zu essen. In der Regel sind das etwa 70-80 Tage nach dem Pflanzen.
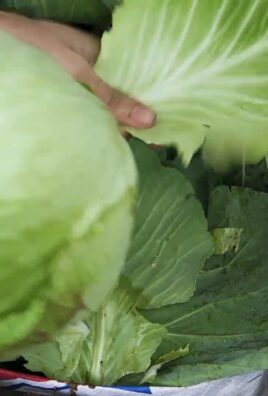
1. Die unteren Blätter ernten: Beginne mit der Ernte der unteren Blätter, da diese am ältesten sind. Schneide die Blätter mit einem scharfen Messer oder einer Schere ab.
2. Die Pflanze weiterwachsen lassen: Lasse die oberen Blätter an der Pflanze, damit sie weiterwachsen kann. Du kannst die Pflanze mehrmals ernten, solange sie gesund bleibt.
3. Nach der Ernte: Wasche die geernteten Blätter gründlich und lagere sie im Kühlschrank. Sie halten sich dort etwa eine Woche.
Zusätzliche Tipps für den Erfolg
Hier sind noch ein paar zusätzliche Tipps, die dir helfen, erfolgreich Collard Greens anzubauen:
* Boden testen: Bevor du mit dem Pflanzen beginnst, solltest du den Boden testen, um sicherzustellen, dass er den richtigen pH-Wert hat. Collard Greens bevorzugen einen pH-Wert zwischen 6,0 und 6,8.
* Fruchtfolge: Um Krankheiten und Schädlinge vorzubeugen, solltest du Collard Greens nicht jedes Jahr am selben Ort anbauen. Wechsle die Anbaufläche mit anderen Gemüsesorten ab.
* Begleitpflanzung: Einige Pflanzen können das Wachstum von Collard Greens fördern. Gute Begleitpflanzen sind zum Beispiel Ringelblumen, Knoblauch und Zwiebeln.
* Winterharte Sorten wählen: Wenn du in einer Region mit kalten Wintern lebst, wähle winterharte Sorten, die den Frost überstehen können.
* Regelmäßige Kontrolle: Kontrolliere deine Pflanzen regelmäßig auf Schädlinge und Krankheiten. Je früher du ein Problem erkennst, desto einfacher ist es, es zu beheben.
Collard Greens in Töpfen anbauen: Eine Alternative für kleine Räume
Wenn du keinen Garten hast, kannst du Collard Greens auch problemlos in Töpfen anbauen. Hier sind einige Tipps für den Anbau in Töpfen:
* Wähle die richtigen Töpfe: Verwende Töpfe mit einem Durchmesser von mindestens 30 cm. Achte darauf, dass die Töpfe Drainagelöcher haben, damit das Wasser ablaufen kann.
* Verwende hochwertige Erde: Verwende eine hochwertige Gemüsemischung, die gut durchlässig ist.
* Regelmäßig gießen und düngen: Collard Greens in Töpfen trocknen schneller aus als im Garten, daher musst du sie regelmäßig gießen. Dünge sie auch regelmäßig mit einem Flüssigdünger.
* Stelle die Töpfe an einen sonnigen Standort:
Conclusion
So, there you have it! Growing collard greens at home is not only achievable, but it’s also a deeply rewarding experience. From the vibrant green leaves gracing your garden to the delicious, nutrient-packed meals you’ll create, the benefits are undeniable. We’ve walked you through the entire process, from selecting the right seeds and preparing your soil to nurturing your plants and harvesting your bounty.
But why is this DIY trick a must-try? Beyond the satisfaction of growing your own food, consider the advantages of fresh, organic produce right at your fingertips. No more trips to the grocery store for wilted, overpriced greens. You’ll have access to the freshest, most flavorful collard greens imaginable, free from harmful pesticides and chemicals. Plus, you’ll be contributing to a more sustainable lifestyle by reducing your carbon footprint and supporting local food production, even if it’s just your own backyard!
And the possibilities don’t stop there. Feel free to experiment with different varieties of collard greens to find your favorite flavor profile. Try adding companion plants like marigolds or nasturtiums to deter pests and attract beneficial insects. You can even explore different cooking methods to showcase the versatility of your homegrown harvest. From classic Southern-style braised collards to vibrant salads and smoothies, the culinary options are endless.
Don’t be intimidated by the prospect of gardening. Growing collard greens at home is a surprisingly simple and straightforward process, even for beginners. With a little patience, dedication, and the guidance provided in this article, you’ll be well on your way to enjoying a bountiful harvest of delicious, healthy greens.
We wholeheartedly encourage you to give this DIY project a try. Embrace the opportunity to connect with nature, cultivate your own food, and experience the joy of growing collard greens at home. And most importantly, we want to hear about your experiences! Share your successes, your challenges, and your favorite recipes in the comments below. Let’s create a community of home gardeners who are passionate about growing their own food and sharing their knowledge with others. Your insights could inspire someone else to embark on their own gardening journey. So, grab your seeds, get your hands dirty, and let’s start growing!
Frequently Asked Questions (FAQ)
What is the best time of year to plant collard greens?
The ideal time to plant collard greens depends on your climate. In warmer regions with mild winters, you can plant them in the fall for a winter harvest or in early spring for a spring harvest. In colder regions with harsh winters, it’s best to plant them in the spring after the last frost. You can also start seeds indoors 6-8 weeks before the last frost and transplant them outdoors once the weather warms up. Consider your local climate and growing season to determine the optimal planting time for your area.
How much sunlight do collard greens need?
Collard greens thrive in full sun, which means they need at least 6-8 hours of direct sunlight per day. If you live in a particularly hot climate, some afternoon shade can be beneficial to prevent the leaves from scorching. However, insufficient sunlight can result in leggy plants with poor leaf production. Choose a planting location that receives ample sunlight throughout the day.
What type of soil is best for growing collard greens?
Collard greens prefer well-drained, fertile soil that is rich in organic matter. The ideal soil pH is between 6.0 and 7.5. Before planting, amend your soil with compost, aged manure, or other organic materials to improve its fertility and drainage. You can also conduct a soil test to determine if your soil is lacking any essential nutrients and amend it accordingly.
How often should I water my collard greens?
Collard greens need consistent moisture to thrive. Water them deeply whenever the top inch of soil feels dry to the touch. Avoid overwatering, as this can lead to root rot. During hot, dry weather, you may need to water them more frequently. Mulching around the plants can help retain moisture in the soil and reduce the need for frequent watering.
What are some common pests and diseases that affect collard greens?
Collard greens are susceptible to a variety of pests and diseases, including aphids, cabbage worms, flea beetles, and downy mildew. Regularly inspect your plants for signs of infestation or disease. You can control pests by handpicking them off the plants, using insecticidal soap, or introducing beneficial insects like ladybugs. Prevent diseases by ensuring good air circulation, avoiding overhead watering, and practicing crop rotation.
How do I harvest collard greens?
You can begin harvesting collard greens once the leaves are large enough to eat, typically when they are about 8-10 inches long. Harvest the outer leaves first, leaving the inner leaves to continue growing. This will allow you to harvest from the same plant multiple times throughout the growing season. Simply cut the leaves off at the base of the stem with a sharp knife or scissors.
Can I grow collard greens in containers?
Yes, you can successfully grow collard greens in containers, provided that you choose a large enough container (at least 12 inches in diameter) and use a well-draining potting mix. Container-grown collard greens may require more frequent watering and fertilization than those grown in the ground. Be sure to place the container in a location that receives plenty of sunlight.
How do I store harvested collard greens?
To store harvested collard greens, wash them thoroughly and pat them dry. Wrap them loosely in a damp paper towel and store them in a plastic bag in the refrigerator. They will typically last for about 3-5 days. You can also freeze collard greens for longer storage. To freeze them, blanch them in boiling water for 2-3 minutes, then plunge them into ice water to stop the cooking process. Drain them well and pack them into freezer bags or containers.
What are some ways to cook collard greens?
Collard greens are incredibly versatile and can be cooked in a variety of ways. They are commonly braised with ham hocks or bacon for a classic Southern-style dish. They can also be steamed, sautéed, or added to soups and stews. Young, tender collard greens can even be eaten raw in salads. Experiment with different recipes and cooking methods to find your favorite way to enjoy this nutritious vegetable.
Are collard greens healthy?
Absolutely! Collard greens are packed with vitamins, minerals, and antioxidants. They are an excellent source of vitamins A, C, and K, as well as calcium, iron, and fiber. They have been linked to a variety of health benefits, including improved heart health, reduced risk of cancer, and enhanced immune function. Adding collard greens to your diet is a delicious and nutritious way to boost your overall health and well-being.
Leave a Comment