

Malabar Spinach Growth Tips: Unlock the secrets to a thriving, vibrant garden with this often-overlooked leafy green! Have you ever dreamt of harvesting basketfuls of delicious, nutritious spinach right from your own backyard, but felt intimidated by the process? Well, dream no more! This DIY guide is your passport to cultivating lush Malabar Spinach, even if you’re a complete beginner.
Malabar Spinach, also known as Ceylon Spinach or Vine Spinach, isn’t actually a true spinach, but its flavor and versatility have made it a beloved ingredient in cuisines across Asia and Africa for centuries. Imagine the satisfaction of adding fresh, homegrown greens to your stir-fries, soups, and salads, knowing exactly where your food comes from.
Why do you need these Malabar Spinach Growth Tips? Because this vigorous vine can sometimes be a bit particular! Many gardeners struggle with getting it to thrive, often facing issues like slow growth, pest problems, or simply not knowing the best way to support its climbing habit. But fear not! I’m here to share my tried-and-true methods, simple hacks, and easy-to-follow instructions that will transform your garden into a Malabar Spinach paradise. Get ready to discover the joy of homegrown goodness and impress your friends and family with your gardening prowess!

“`html
Malabar Spinat Anbau: Dein DIY-Leitfaden für üppige Ernte
Hallo Gartenfreunde! Malabar Spinat, auch bekannt als Ceylon Spinat oder Kletterspinat, ist eine fantastische Ergänzung für jeden Garten. Er ist nicht nur lecker und nahrhaft, sondern auch unglaublich einfach anzubauen, besonders wenn du ein paar Tricks kennst. In diesem Artikel zeige ich dir, wie du deinen eigenen Malabar Spinat erfolgreich anbauen kannst, von der Aussaat bis zur Ernte. Los geht’s!
Was du für den Anbau von Malabar Spinat brauchst
Bevor wir loslegen, hier eine Liste der Dinge, die du benötigst:
* Malabar Spinat Samen oder Stecklinge: Samen sind leicht online oder in Gartencentern erhältlich. Stecklinge sind eine tolle Option, wenn du bereits eine Pflanze hast.
* Anzuchttöpfe oder -schalen: Für die Voranzucht der Samen.
* Hochwertige Anzuchterde: Sie sollte locker und gut drainierend sein.
* Gartenerde: Für das endgültige Beet oder den Topf.
* Kompost oder organischer Dünger: Um den Boden anzureichern.
* Pflanzgefäße (optional): Wenn du den Spinat in Töpfen anbauen möchtest.
* Rankhilfe: Malabar Spinat ist eine Kletterpflanze, also brauchst du etwas, woran er hochwachsen kann. Ein Spalier, ein Zaun oder ein Rankgitter sind ideal.
* Gießkanne oder Gartenschlauch: Zum Bewässern der Pflanzen.
* Gartenschere: Zum Ernten und Beschneiden.
* Geduld: Wie bei allen Gartenprojekten ist Geduld der Schlüssel!
Aussaat und Voranzucht von Malabar Spinat
Malabar Spinat ist wärmeliebend und keimt am besten bei Temperaturen zwischen 20 und 30 Grad Celsius. Daher ist es ratsam, die Samen vorzuziehen, besonders wenn du in einer Region mit kühleren Sommern lebst.
1. Samen vorbereiten: Die Samen des Malabar Spinats haben eine harte Schale, die die Keimung verzögern kann. Um den Prozess zu beschleunigen, kannst du die Samen vor der Aussaat für 24 Stunden in lauwarmem Wasser einweichen. Das hilft, die Schale aufzuweichen.
2. Aussaat in Anzuchttöpfen: Fülle deine Anzuchttöpfe mit Anzuchterde. Drücke die Erde leicht an und säe die Samen etwa 1 cm tief. Bedecke die Samen mit Erde und gieße sie vorsichtig an.
3. Standort und Pflege: Stelle die Anzuchttöpfe an einen warmen, hellen Ort. Ein Mini-Gewächshaus oder eine Fensterbank sind ideal. Halte die Erde feucht, aber nicht nass. Vermeide Staunässe, da dies zu Fäulnis führen kann.
4. Keimung abwarten: Die Keimung kann je nach Temperatur und Bedingungen 10 bis 21 Tage dauern. Hab Geduld! Sobald die Sämlinge ein paar Blätter entwickelt haben, kannst du sie pikieren, falls du mehrere Samen in einem Topf ausgesät hast.
Pflanzen von Malabar Spinat im Garten oder Topf
Sobald die Sämlinge stark genug sind und die Frostgefahr vorüber ist (normalerweise ab Mitte Mai), kannst du sie ins Freie pflanzen.
1. Standortwahl: Wähle einen sonnigen Standort für deinen Malabar Spinat. Er gedeiht am besten bei mindestens 6 Stunden direkter Sonneneinstrahlung pro Tag. Der Boden sollte gut drainierend und reich an organischen Stoffen sein.
2. Bodenvorbereitung: Lockere den Boden gründlich auf und entferne Unkraut. Arbeite Kompost oder organischen Dünger in den Boden ein, um ihn anzureichern.
3. Pflanzen im Garten: Grabe Löcher, die etwas größer sind als die Wurzelballen der Sämlinge. Setze die Sämlinge vorsichtig in die Löcher und fülle sie mit Erde auf. Drücke die Erde leicht an und gieße die Pflanzen gründlich an. Achte darauf, dass du genügend Abstand zwischen den Pflanzen lässt (ca. 30-45 cm), damit sie genügend Platz zum Wachsen haben.
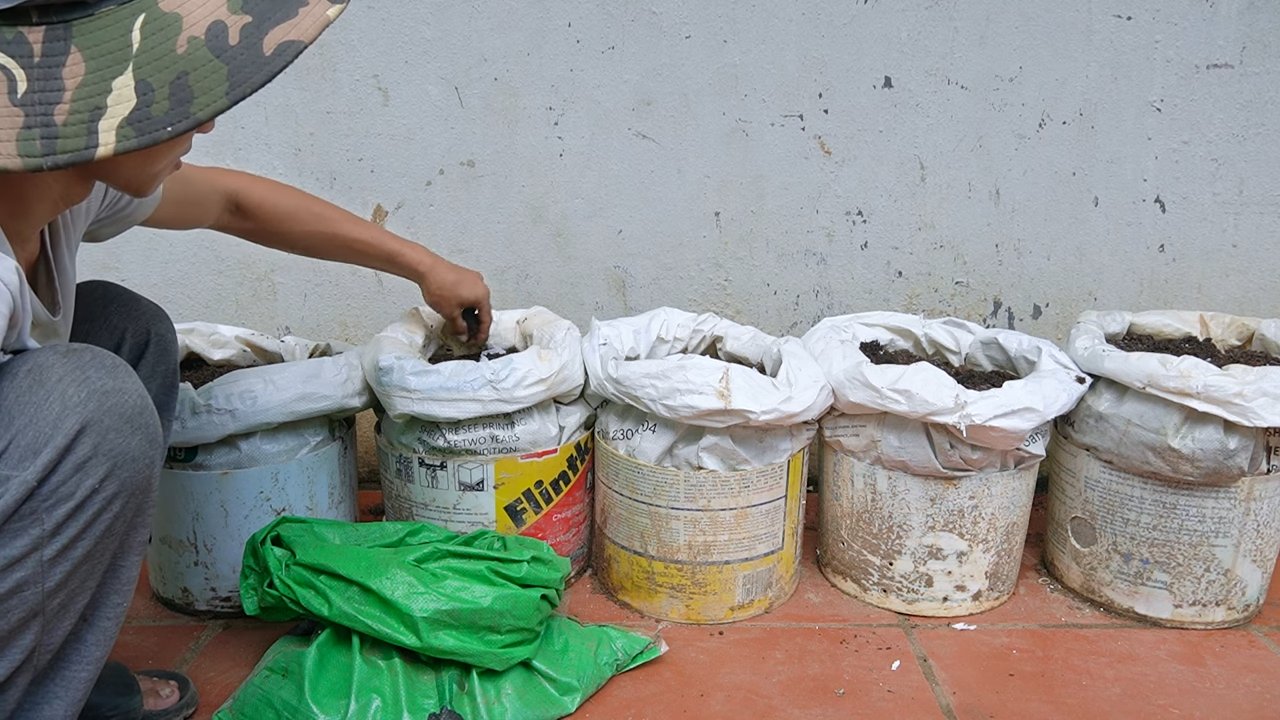
4. Pflanzen im Topf: Wenn du den Malabar Spinat in Töpfen anbauen möchtest, wähle Töpfe mit einem Durchmesser von mindestens 30 cm. Fülle die Töpfe mit einer Mischung aus Gartenerde und Kompost. Pflanze die Sämlinge wie oben beschrieben und stelle die Töpfe an einen sonnigen Ort.
5. Rankhilfe installieren: Da Malabar Spinat eine Kletterpflanze ist, benötigst du eine Rankhilfe. Installiere ein Spalier, einen Zaun oder ein Rankgitter in der Nähe der Pflanzen. Leite die Triebe des Spinats an der Rankhilfe entlang, damit er nach oben wachsen kann.
Pflege von Malabar Spinat
Die Pflege von Malabar Spinat ist relativ einfach, aber es gibt ein paar Dinge, die du beachten solltest, um eine reiche Ernte zu erzielen.
1. Bewässerung: Malabar Spinat benötigt regelmäßige Bewässerung, besonders während trockener Perioden. Halte den Boden feucht, aber nicht nass. Gieße am besten früh am Morgen, damit die Blätter Zeit haben, abzutrocknen, bevor die Sonne aufgeht.
2. Düngung: Dünge den Malabar Spinat alle paar Wochen mit einem organischen Dünger oder Komposttee. Das hilft, das Wachstum zu fördern und die Ernte zu verbessern.
3. Beschneidung: Regelmäßiges Beschneiden fördert das Wachstum und verhindert, dass die Pflanze zu lang und sparrig wird. Schneide die Triebspitzen ab, um die Verzweigung anzuregen. Du kannst die abgeschnittenen Triebe auch zum Kochen verwenden.
4. Schutz vor Schädlingen und Krankheiten: Malabar Spinat ist relativ resistent gegen Schädlinge und Krankheiten. Gelegentlich können Blattläuse oder Schnecken auftreten. Kontrolliere die Pflanzen regelmäßig und entferne Schädlinge bei Bedarf von Hand oder mit einem biologischen Schädlingsbekämpfungsmittel. Achte auf gute Belüftung, um Pilzkrankheiten vorzubeugen.
Ernte von Malabar Spinat
Du kannst mit der Ernte des Malabar Spinats beginnen, sobald die Pflanzen eine ausreichende Größe erreicht haben (normalerweise etwa 6-8 Wochen nach dem Pflanzen).
1. Erntetechnik: Ernte die Blätter und Triebe, indem du sie mit einer Gartenschere abschneidest. Du kannst entweder einzelne Blätter oder ganze Triebe ernten. Ernte regelmäßig, um das Wachstum neuer Blätter zu fördern.
2. Erntezeitpunkt: Die Blätter sind am zartesten, wenn sie jung sind. Ältere Blätter können etwas zäher sein, sind aber immer noch essbar. Ernte am besten am Morgen, wenn die Blätter noch frisch und knackig sind.
3. Lagerung: Malabar Spinat ist nicht sehr lange haltbar. Du kannst ihn im Kühlschrank in einem Plastikbeutel für ein paar Tage aufbewahren. Am besten ist es jedoch, ihn so schnell wie möglich zu verarbeiten.
Verwendung von Malabar Spinat in der Küche
Malabar Spinat ist vielseitig einsetzbar und kann in vielen verschiedenen Gerichten verwendet werden.
* Roh: Junge Blätter können roh in Salaten verwendet werden. Sie haben einen milden, leicht säuerlichen Geschmack.
* Gekocht: Malabar Spinat kann wie normaler Spinat gekocht, gedünstet oder gebraten werden. Er eignet sich gut für Suppen, Eintöpfe, Currys und Pfannengerichte.
* Als Verdickungsmittel: Die Blätter enthalten Schleimstoffe, die als natürliches Verdickungsmittel in Suppen und Saucen dienen können.
Zusätzliche Tipps für den erfolgreichen Anbau von Malabar Spinat
* Bodenverbesserung: Verbessere den Boden regelmäßig mit Kompost oder organischem Dünger, um die Nährstoffversorgung der Pflanzen sicherzustellen.
* Mulchen: Mulche den Boden um die Pflanzen herum mit Stroh oder Rasenschnitt, um die Feuchtigkeit zu speichern und Unkraut zu unterdrücken.
* Samen gewinnen: Wenn du Samen für das nächste Jahr gewinnen möchtest, lasse
Conclusion
So, there you have it! Mastering the art of growing Malabar spinach doesn’t require a green thumb blessed by the gardening gods. It’s about understanding its needs, providing the right environment, and employing a few simple, yet effective, DIY tricks. We’ve explored everything from seed germination hacks to creating the perfect support system for this vigorous vine.
Why is this a must-try? Because fresh, homegrown Malabar spinach is unlike anything you’ll find in a grocery store. The vibrant, slightly peppery flavor and the satisfying crunch of the leaves are a culinary delight. Plus, you’ll have the satisfaction of knowing you nurtured this nutritious powerhouse from seed to plate. Beyond the taste, growing your own food is empowering and connects you to the natural world in a profound way.
But the benefits don’t stop there. Malabar spinach is incredibly versatile in the kitchen. Use it in stir-fries, soups, salads, or even as a substitute for spinach in your favorite recipes. Its slightly mucilaginous texture thickens sauces beautifully, adding a unique dimension to your dishes.
Looking for variations? Consider these ideas to personalize your Malabar spinach growing experience:
* Vertical Gardening: If you’re short on space, train your Malabar spinach to grow up a trellis or even a sunny wall. This not only saves space but also creates a stunning visual display.
* Container Gardening: Malabar spinach thrives in containers, making it perfect for balconies or patios. Choose a large pot with good drainage and use a high-quality potting mix.
* Companion Planting: Plant Malabar spinach alongside other vegetables like tomatoes, peppers, or eggplants. It can provide shade and help retain moisture in the soil.
* Seed Saving: Once your Malabar spinach plants mature, you can easily save the seeds for future planting. Simply allow the berries to dry on the vine and then collect them.
We’ve armed you with the knowledge and inspiration to embark on your own Malabar spinach adventure. Now, it’s time to get your hands dirty! Don’t be afraid to experiment, adapt, and learn from your experiences. Remember, gardening is a journey, not a destination.
We are confident that with these tips, you will be able to enjoy a bountiful harvest of fresh, delicious Malabar spinach. We encourage you to try these **Malabar spinach growth tips** and share your experiences with us. Let us know what worked for you, what challenges you faced, and any other tips you discovered along the way. Your insights can help other gardeners succeed in growing this amazing vegetable. Share your photos and stories on our social media channels using #MalabarSpinachMagic. Happy gardening!
Frequently Asked Questions (FAQ)
What are the ideal growing conditions for Malabar spinach?
Malabar spinach is a tropical plant, so it thrives in warm, humid conditions. It needs at least 6-8 hours of direct sunlight per day. The ideal temperature range is between 70°F and 90°F (21°C and 32°C). The soil should be well-draining and rich in organic matter. Amend your soil with compost or aged manure before planting to provide the necessary nutrients. Consistent moisture is crucial, but avoid overwatering, which can lead to root rot. Mulching around the plants helps retain moisture and suppress weeds.
How long does it take for Malabar spinach to grow from seed?
Malabar spinach seeds can be slow to germinate, often taking 2-3 weeks. To speed up the process, scarify the seeds by gently rubbing them with sandpaper or soaking them in warm water for 24 hours before planting. Start seeds indoors 6-8 weeks before the last expected frost or direct sow them outdoors once the soil has warmed up to at least 70°F (21°C). Once the seedlings emerge, they grow relatively quickly, and you can start harvesting leaves in about 60-70 days.
What are some common pests and diseases that affect Malabar spinach?
Malabar spinach is generally resistant to pests and diseases, but it can be susceptible to aphids, spider mites, and snails. Regularly inspect your plants for any signs of infestation and take action promptly. Aphids and spider mites can be controlled with insecticidal soap or neem oil. Handpick snails and slugs or use organic snail bait. Overwatering can lead to fungal diseases like root rot, so ensure proper drainage and avoid overhead watering.
How do I harvest Malabar spinach?
Harvest Malabar spinach leaves regularly to encourage continued growth. Simply snip off the leaves and stems as needed, leaving at least a few inches of stem on the plant. You can harvest individual leaves or entire stems. The younger leaves are more tender and flavorful. Avoid harvesting more than one-third of the plant at a time to prevent stressing it. Regular harvesting will also help prevent the plant from flowering, which can make the leaves bitter.
Can I grow Malabar spinach in a container?
Yes, Malabar spinach grows very well in containers. Choose a large pot (at least 12 inches in diameter) with good drainage. Use a high-quality potting mix that is rich in organic matter. Provide a trellis or other support for the vines to climb on. Water regularly and fertilize every 2-3 weeks with a balanced liquid fertilizer. Place the container in a sunny location that receives at least 6-8 hours of direct sunlight per day.
Is Malabar spinach a perennial or an annual?
Malabar spinach is a perennial in tropical climates (USDA zones 9-11). However, it is typically grown as an annual in cooler climates because it is sensitive to frost. If you live in a colder region, you can try growing it in a container and bringing it indoors during the winter months. Alternatively, you can save seeds from your plants and replant them each spring.
How do I save seeds from Malabar spinach?
Saving seeds from Malabar spinach is relatively easy. Allow the berries to mature on the vine until they turn dark purple or black and become slightly wrinkled. Harvest the berries and remove the seeds from the pulp. Rinse the seeds thoroughly and spread them out on a paper towel to dry completely. Store the dried seeds in an airtight container in a cool, dark, and dry place. They should remain viable for several years.
What are some culinary uses for Malabar spinach?
Malabar spinach is a versatile vegetable that can be used in a variety of dishes. It can be eaten raw in salads or cooked in stir-fries, soups, stews, and curries. Its slightly mucilaginous texture thickens sauces and soups. It can also be used as a substitute for spinach in many recipes. The leaves have a mild, slightly peppery flavor that complements a wide range of ingredients. Try adding it to your favorite omelet, pasta dish, or smoothie for a nutritious boost.
How can I improve the germination rate of Malabar spinach seeds?
As mentioned earlier, scarifying the seeds and soaking them in warm water can significantly improve germination rates. Another trick is to pre-sprout the seeds indoors. Place the seeds between two damp paper towels in a plastic bag and keep them in a warm place. Check them regularly and mist the paper towels to keep them moist. Once the seeds sprout, carefully transplant them into small pots filled with potting mix.
What if my Malabar spinach isn’t growing well?
If your Malabar spinach isn’t thriving, consider these factors:
* Sunlight: Ensure it’s getting enough direct sunlight (at least 6-8 hours per day).
* Watering: Maintain consistent moisture, but avoid overwatering.
* Soil: The soil should be well-draining and rich in organic matter.
* Fertilizer: Fertilize regularly with a balanced liquid fertilizer.
* Pests and Diseases: Inspect for pests and diseases and take appropriate action.
* Temperature: Ensure the temperature is within the ideal range (70°F-90°F).
By addressing these potential issues, you can help your Malabar spinach thrive and produce a bountiful harvest. Remember to be patient and persistent, and don’t be afraid to experiment to find what works best for your specific growing conditions.
Leave a Comment