

Styrofoam box mint growing might sound unconventional, but trust me, it’s a game-changer for anyone who loves fresh mint! Are you tired of your mint taking over your entire garden, or struggling to keep it alive in pots? I know I was! Mint, with its vibrant history stretching back to ancient Egypt where it was used for medicinal purposes and in religious ceremonies, is a fantastic herb to have on hand. But its aggressive growth can be a real headache.
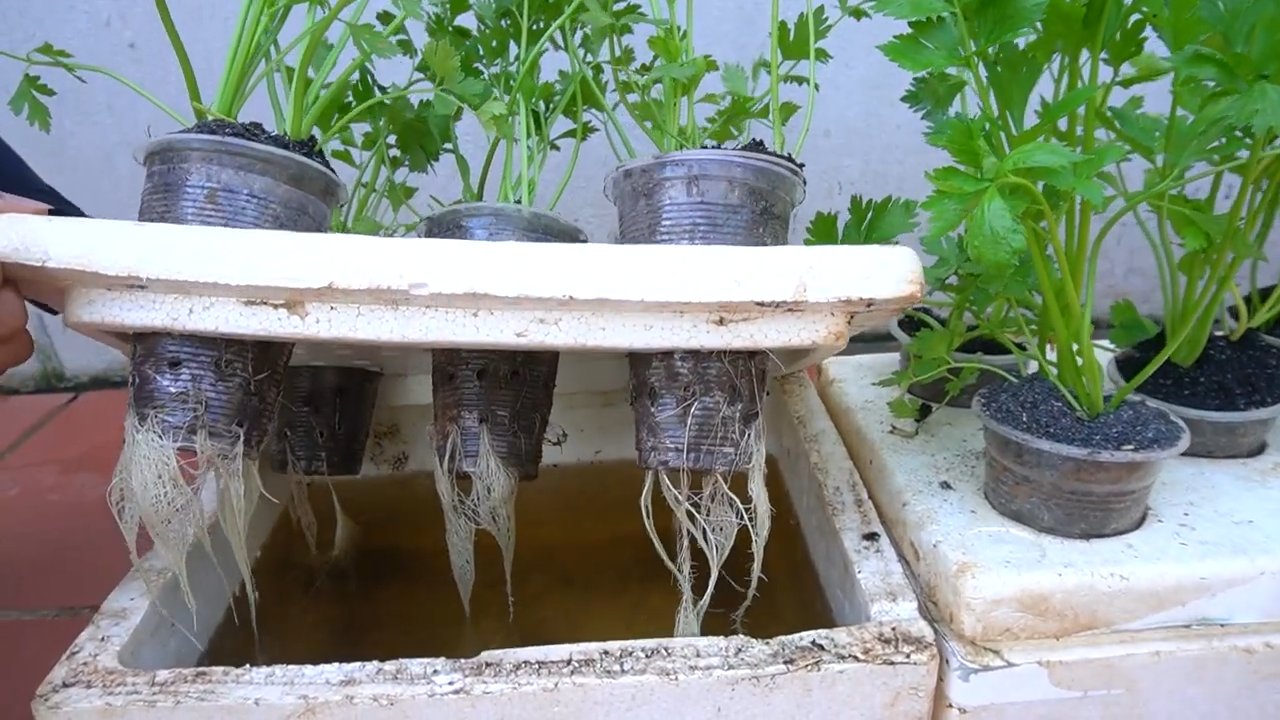
That’s where this DIY trick comes in. Using a styrofoam box for styrofoam box mint growing offers a contained, insulated environment that helps regulate soil temperature and moisture. This is especially beneficial if you live in an area with extreme weather conditions. Plus, it’s a fantastic way to repurpose those styrofoam boxes that often end up in landfills. I’ll show you how to easily create your own mini mint garden, ensuring a constant supply of fresh, fragrant mint for your mojitos, teas, and culinary creations, all without the worry of it spreading like wildfire. Get ready to unleash your inner gardener and enjoy the refreshing taste of homegrown mint!
DIY Minze Anbauen in einer Styroporbox: Ein Frische-Kick für deinen Alltag!
Hey Leute! Habt ihr auch genug von teurer, welker Minze aus dem Supermarkt? Ich zeige euch heute, wie ihr ganz einfach eure eigene, üppige Minze in einer Styroporbox anbauen könnt. Das ist nicht nur super nachhaltig, sondern auch total easy und spart Geld! Und das Beste: Ihr habt immer frische Minze für Tee, Cocktails oder zum Kochen parat. Los geht’s!
Was du brauchst:
* Eine Styroporbox (am besten mit Deckel, aber nicht zwingend notwendig)
* Ein Messer oder eine Schere
* Drainagematerial (Kies, Blähton, Tonscherben)
* Pflanzerde (am besten Kräutererde)
* Minzsetzlinge oder Minzsamen
* Gießkanne
* Optional: Sprühflasche
* Optional: Vlies oder Jute zum Auskleiden der Box
Warum eine Styroporbox?
Styroporboxen sind super für den Anbau von Pflanzen, weil sie:
* Leicht sind: Du kannst deine Minze problemlos umstellen.
* Isolierend wirken: Sie schützen die Wurzeln vor extremen Temperaturen (sowohl Hitze als auch Kälte).
* Günstig oder sogar kostenlos sind: Oft fallen sie als Verpackungsmaterial an.
* Feuchtigkeit speichern: Das ist besonders für Minze wichtig, die es gerne feucht mag.
Schritt-für-Schritt-Anleitung: Minze in der Styroporbox anbauen
1. Die Styroporbox vorbereiten
1. Reinigen: Zuerst solltest du die Styroporbox gründlich reinigen. Entferne alle Etiketten und Rückstände. Ein feuchtes Tuch reicht meistens aus.
2. Drainagelöcher bohren: Das ist super wichtig, damit das Wasser ablaufen kann und die Wurzeln nicht faulen. Nimm ein Messer oder eine Schere und steche mehrere Löcher in den Boden der Box. Ich empfehle mindestens 5-6 Löcher, je nach Größe der Box. Achte darauf, dass die Löcher nicht zu groß sind, damit die Erde nicht herausfällt.
3. Optional: Auskleiden: Wenn du möchtest, kannst du die Box mit Vlies oder Jute auskleiden. Das verhindert, dass Erde durch die Drainagelöcher gespült wird und hält die Box sauberer. Schneide das Vlies oder die Jute passend zu und lege es in die Box.
2. Drainage und Erde einfüllen
1. Drainageschicht: Fülle eine Schicht Drainagematerial (Kies, Blähton oder Tonscherben) auf den Boden der Box. Diese Schicht sollte etwa 3-5 cm hoch sein. Die Drainage sorgt dafür, dass überschüssiges Wasser abfließen kann und die Wurzeln nicht im Wasser stehen.
2. Erde einfüllen: Fülle die Box mit Pflanzerde auf. Am besten verwendest du Kräutererde, da diese speziell auf die Bedürfnisse von Kräutern abgestimmt ist. Lass oben etwa 2-3 cm Platz bis zum Rand der Box. Die Erde sollte locker und luftig sein.
3. Minze pflanzen
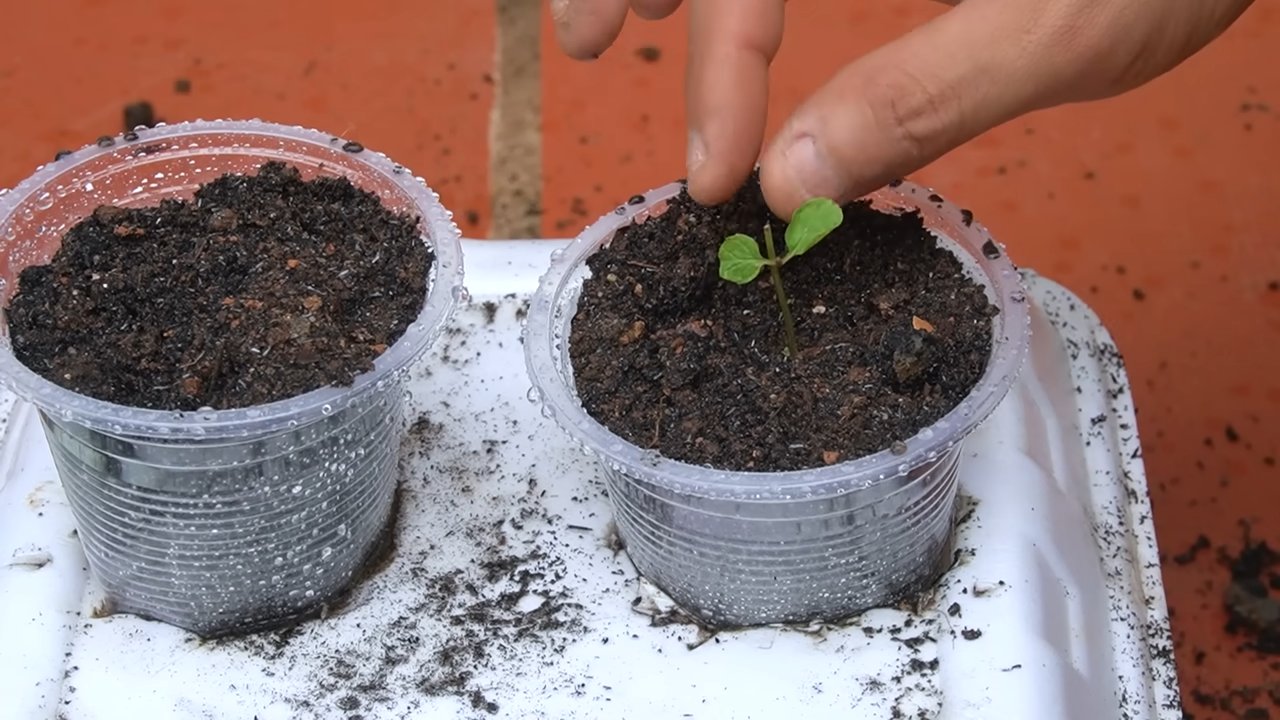
1. Setzlinge vorbereiten (falls du Setzlinge verwendest): Wenn du Minzsetzlinge hast, lockere die Wurzeln vorsichtig auf. Das hilft den Wurzeln, sich besser in der neuen Erde zu etablieren.
2. Pflanzlöcher graben: Grabe kleine Löcher in die Erde, die groß genug sind, um die Wurzelballen der Minzsetzlinge aufzunehmen. Der Abstand zwischen den Löchern sollte etwa 15-20 cm betragen.
3. Minze einsetzen: Setze die Minzsetzlinge in die Löcher ein und fülle die Löcher mit Erde auf. Drücke die Erde leicht an.
4. Samen säen (falls du Samen verwendest): Wenn du Minzsamen verwendest, verteile die Samen gleichmäßig auf der Erde. Bedecke die Samen leicht mit Erde.
4. Gießen und pflegen
1. Angießen: Gieße die Minze nach dem Pflanzen oder Säen gründlich an. Die Erde sollte gut durchfeuchtet sein.
2. Standort wählen: Stelle die Styroporbox an einen hellen Standort, aber nicht in die pralle Mittagssonne. Minze mag es gerne halbschattig.
3. Regelmäßig gießen: Gieße die Minze regelmäßig, aber vermeide Staunässe. Die Erde sollte immer leicht feucht sein. An heißen Tagen musst du möglicherweise täglich gießen.
4. Düngen (optional): Wenn du möchtest, kannst du die Minze regelmäßig düngen. Verwende dafür einen organischen Kräuterdünger.
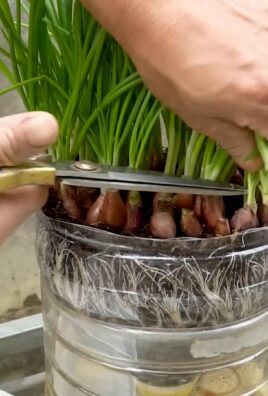
5. Schneiden: Schneide die Minze regelmäßig zurück, um das Wachstum anzuregen. Du kannst die Blätter einfach abzupfen oder die Stängel mit einer Schere abschneiden.
6. Überwintern: Minze ist winterhart, aber in der Styroporbox kann sie etwas Schutz gebrauchen. Stelle die Box an einen geschützten Ort und decke sie mit Vlies ab.
Tipps und Tricks für eine üppige Minze
* Minze ist ein Wucherer: Minze neigt dazu, sich stark auszubreiten. Wenn du sie in einem Beet anbaust, solltest du sie in einen Topf pflanzen, um zu verhindern, dass sie sich unkontrolliert ausbreitet. In der Styroporbox hast du dieses Problem nicht so stark, aber du solltest trotzdem darauf achten, dass sie nicht zu dicht wächst.
* Regelmäßig ernten: Je mehr du erntest, desto mehr wächst die Minze. Schneide die Stängel regelmäßig zurück, um das Wachstum anzuregen.
* Minze vermehren: Du kannst Minze ganz einfach durch Stecklinge vermehren. Schneide einen Stängel ab und stelle ihn in ein Glas Wasser. Nach einigen Tagen bilden sich Wurzeln und du kannst den Steckling in einen Topf pflanzen.
* Schädlinge und Krankheiten: Minze ist relativ robust, aber sie kann von Blattläusen oder Mehltau befallen werden. Kontrolliere die Pflanzen regelmäßig und behandle sie bei Bedarf mit einem geeigneten Mittel.
* Verschiedene Minzsorten: Es gibt viele verschiedene Minzsorten, wie Pfefferminze, Krauseminze, Schokoladenminze oder Zitronenminze. Probiere verschiedene Sorten aus und finde deine Lieblingsminze!
* Die richtige Erde: Verwende unbedingt Kräutererde. Normale Blumenerde ist oft zu nährstoffreich und kann dazu führen, dass die Minze zu schnell wächst und ihren Geschmack verliert.
* Sonne und Schatten: Minze mag es hell, aber nicht zu sonnig. Ein halbschattiger Standort ist ideal. Wenn die Blätter gelb werden, bekommt die Minze zu viel Sonne.
* Gießen nicht vergessen: Minze braucht regelmäßig Wasser. Die Erde sollte immer leicht feucht sein. Vermeide aber Staunässe, da dies zu Wurzelfäule führen kann.
* Düngen: Düngen ist nicht unbedingt notwendig, aber es kann das Wachstum fördern. Verwende einen organischen Kräuterdünger.
* Schneiden: Regelmäßiges Schneiden ist wichtig, damit die Minze buschig wächst und nicht zu lang und dünn wird. Schneide die Stängel einfach mit einer Schere ab.
* Überwintern: Minze ist winterhart, aber in der Styroporbox kann sie etwas Schutz gebrauchen. Stelle die Box an einen geschützten Ort und decke sie mit Vlies ab.
Minze ernten und verwenden
Du kannst die Minze ernten, sobald sie groß genug ist. Schneide die Stängel einfach mit einer Schere ab. Die Minze schmeckt am besten, wenn du sie frisch verwendest. Du kannst sie aber auch trocknen oder einfrieren.
Verwendungsmöglichkeiten:
* Tee: Frische Minze ist perfekt für einen erfrischenden Tee.
* Cocktails: Minze ist ein wichtiger Bestandteil vieler Cocktails, wie Mojito oder Minz-Julep.
* Kochen: Minze passt gut zu vielen Gerichten, wie Salaten, Suppen oder Fleischgerichten.
* Desserts: Minze ist eine tolle Zutat für Desserts, wie Eis oder Schokoladenkuchen.
* Dekoration: Minze ist eine schöne Dekoration für
Conclusion
So, there you have it! Transforming a simple styrofoam box into a thriving mint garden is not just a fun project; it’s a game-changer for anyone who loves fresh herbs. We’ve walked through the steps, highlighting the ease and affordability of this DIY trick. But why is this method a must-try?
Firstly, it’s incredibly space-efficient. Whether you have a sprawling backyard or a tiny balcony, a styrofoam box mint garden allows you to cultivate fresh mint without taking up valuable real estate. This is particularly beneficial for apartment dwellers or those with limited gardening space.
Secondly, styrofoam provides excellent insulation. This means your mint plants are better protected from extreme temperature fluctuations, leading to healthier and more robust growth. The consistent temperature helps the mint thrive, resulting in a more flavorful and abundant harvest.
Thirdly, it’s a sustainable and budget-friendly solution. Repurposing styrofoam boxes reduces waste and saves you money compared to purchasing expensive planters. It’s a win-win for your wallet and the environment.
But the benefits don’t stop there. This method also offers excellent drainage, preventing waterlogging and root rot, common issues with mint plants. The lightweight nature of styrofoam makes it easy to move your mint garden around to find the perfect spot with optimal sunlight.
Ready to take your mint growing to the next level? Consider these variations:
* Vertical Mint Garden: Stack multiple styrofoam boxes on top of each other to create a vertical mint garden. This is a fantastic way to maximize space and add a visually appealing element to your garden.
* Companion Planting: Plant other herbs like basil or parsley alongside your mint in the same styrofoam box. Just be mindful of their individual needs and ensure they have enough space to thrive.
* Mint Tea Garden: Dedicate a styrofoam box specifically to different varieties of mint, such as peppermint, spearmint, and chocolate mint, to create your own personal mint tea garden.
* Add Drainage Holes: Ensure you have adequate drainage holes in the bottom of your styrofoam box to prevent waterlogging. You can also add a layer of gravel or pebbles at the bottom to improve drainage.
We’re confident that this DIY styrofoam box mint growing trick will revolutionize your herb gardening experience. It’s simple, effective, and incredibly rewarding.
Now, it’s your turn! We encourage you to give this project a try and share your results with us. Post photos of your styrofoam box mint gardens on social media using #StyrofoamMintGarden and let us know how it goes. We can’t wait to see your thriving mint plants! Your experiences and insights will help others discover the joy of growing their own fresh mint. Happy gardening!
Frequently Asked Questions (FAQ)
What kind of styrofoam box is best for growing mint?
The ideal styrofoam box for growing mint is one that is clean, sturdy, and has not been used to store harmful chemicals. Food-grade styrofoam boxes are generally safe. Avoid boxes that have contained pesticides or other toxic substances. The size of the box will depend on how much mint you want to grow, but a box that is at least 12 inches deep is recommended to allow for adequate root growth. Make sure to thoroughly clean the box with soap and water before planting.
How do I ensure proper drainage in a styrofoam box?
Proper drainage is crucial for preventing root rot in mint plants. To ensure adequate drainage, drill several holes (at least 4-6) in the bottom of the styrofoam box. The size of the holes should be about 1/2 inch in diameter. You can also add a layer of gravel or pebbles at the bottom of the box before adding the soil. This will help to improve drainage and prevent the soil from becoming waterlogged. Consider placing the box on bricks or a raised platform to further enhance drainage.
What type of soil should I use for growing mint in a styrofoam box?
Mint thrives in well-draining, nutrient-rich soil. A good potting mix is essential. Avoid using garden soil, as it can be too heavy and may not drain well. A mixture of potting soil, compost, and perlite is ideal. The compost will provide essential nutrients, while the perlite will improve drainage and aeration. You can also add a slow-release fertilizer to the soil to provide a steady supply of nutrients to the mint plants. Aim for a slightly acidic to neutral pH level (around 6.0 to 7.0).
How much sunlight does mint need when grown in a styrofoam box?
Mint prefers partial shade to full sun. Ideally, your styrofoam box mint garden should receive at least 4-6 hours of sunlight per day. However, in hotter climates, it’s best to provide some afternoon shade to prevent the leaves from scorching. Monitor your mint plants closely and adjust their location as needed. If the leaves are pale or leggy, it may indicate that they are not getting enough sunlight. If the leaves are scorched or wilted, it may indicate that they are getting too much direct sunlight.
How often should I water mint grown in a styrofoam box?
Mint plants need consistent moisture, but they don’t like to be waterlogged. Water your mint plants when the top inch of soil feels dry to the touch. The frequency of watering will depend on the weather conditions and the type of soil you are using. In hot, dry weather, you may need to water daily. In cooler, wetter weather, you may only need to water every few days. When watering, water deeply until the water drains out of the drainage holes. Avoid overhead watering, as this can promote fungal diseases.
How do I harvest mint from a styrofoam box?
Harvesting mint is easy and can be done regularly throughout the growing season. Simply snip off the stems with scissors or pruning shears. It’s best to harvest mint in the morning, after the dew has dried. You can harvest up to one-third of the plant at a time without harming it. Regular harvesting will encourage the plant to produce more leaves. You can use the fresh mint leaves immediately or dry them for later use.
How do I prevent mint from spreading too much in a styrofoam box?
Mint is known for its aggressive growth habit, but growing it in a styrofoam box helps to contain its spread. However, it’s still important to monitor the plant and prune it regularly to prevent it from becoming too crowded. You can also remove any runners that escape from the box. If the mint becomes too dense, you can divide the plant and replant it in separate containers.
Can I grow different varieties of mint in the same styrofoam box?
While it’s possible to grow different varieties of mint in the same styrofoam box, it’s generally not recommended. Mint varieties can cross-pollinate, which can alter their flavor and characteristics. Additionally, some varieties may be more aggressive than others and outcompete the weaker varieties. If you do decide to grow different varieties together, make sure to provide them with plenty of space and monitor them closely.
How do I overwinter mint grown in a styrofoam box?
Mint is a perennial plant, meaning it will come back year after year. In colder climates, it’s important to protect your mint plants during the winter months. You can overwinter your styrofoam box mint garden by moving it to a sheltered location, such as a garage or shed. Water the plants sparingly during the winter months, only when the soil is dry to the touch. In the spring, move the box back outdoors and resume regular watering and fertilizing. You can also mulch around the base of the plants to provide extra insulation.
Leave a Comment