

Spinach Tower Garden DIY: Ready to ditch the grocery store spinach and grow your own fresh, vibrant greens right at home? I’m so excited to share this incredibly rewarding and space-saving project with you! For centuries, humans have cultivated gardens, finding not only sustenance but also a deep connection to nature. From the hanging gardens of Babylon to the meticulously planned kitchen gardens of medieval Europe, the desire to nurture and harvest our own food is deeply ingrained in our history.
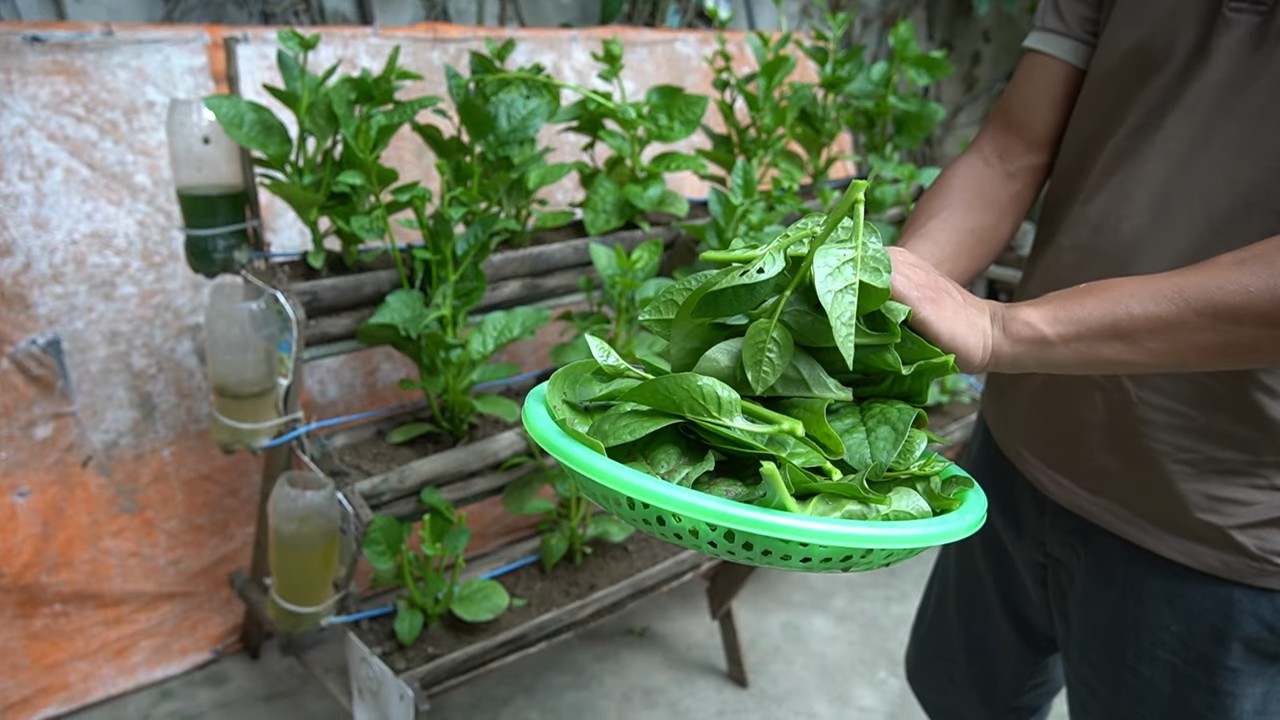
But let’s face it, not everyone has acres of land to dedicate to a sprawling garden. That’s where this DIY spinach tower garden comes in! It’s the perfect solution for apartment dwellers, balcony gardeners, or anyone looking to maximize their yield in a small space. Imagine stepping outside your door and snipping fresh spinach leaves for your salad, smoothie, or omelet. No more wilted, pre-packaged greens!
This project isn’t just about convenience; it’s about control. You’ll know exactly what’s going into your spinach – no harmful pesticides or herbicides. Plus, building your own spinach tower garden DIY is a fun and engaging activity that can be enjoyed by the whole family. So, grab your tools, and let’s get started on creating your own vertical oasis of delicious, healthy spinach!
DIY Spinat-Turmgarten: Dein eigener vertikaler Garten für frischen Spinat
Hallo Gartenfreunde! Habt ihr wenig Platz, aber Lust auf frischen Spinat direkt aus dem Garten? Dann ist ein Spinat-Turmgarten genau das Richtige für euch! Ich zeige euch, wie ihr mit einfachen Mitteln und ein bisschen handwerklichem Geschick euren eigenen vertikalen Spinatgarten bauen könnt. Das ist nicht nur platzsparend, sondern auch ein echter Hingucker auf dem Balkon, der Terrasse oder im Garten. Los geht’s!
Was du für deinen Spinat-Turmgarten brauchst:
* Rohr: Ein PVC-Rohr (ca. 150-200 cm lang, Durchmesser ca. 15-20 cm). Das ist das Herzstück unseres Turms.
* Kleineres Rohr: Ein perforiertes PVC-Rohr (ca. 150-200 cm lang, Durchmesser ca. 2-3 cm). Dieses Rohr dient zur Bewässerung.
* Bohrmaschine mit Lochsäge oder Bohraufsatz: Zum Bohren der Pflanzlöcher.
* Bohrmaschine mit kleinem Bohrer: Zum Bohren der Löcher für die Bewässerung (falls das innere Rohr nicht schon perforiert ist).
* Gartenvlies oder Unkrautvlies: Um zu verhindern, dass Erde aus den Löchern gespült wird.
* Kabelbinder oder Draht: Zum Befestigen des Gartenvlieses.
* Erde: Hochwertige Pflanzerde, idealerweise für Gemüse geeignet.
* Spinatsamen oder Jungpflanzen: Je nachdem, wie schnell du ernten möchtest.
* Schere oder Messer: Zum Zuschneiden des Gartenvlieses.
* Handschuhe: Zum Schutz deiner Hände.
* Messband oder Zollstock: Zum Abmessen der Pflanzlöcher.
* Stift oder Marker: Zum Anzeichnen der Pflanzlöcher.
* Kies oder Blähton: Für eine Drainageschicht am Boden des Turms.
* Wasserkanne oder Gartenschlauch: Zum Bewässern des Spinats.
* Optional: Eine kleine Pumpe für die Bewässerung (wenn du eine automatische Bewässerung möchtest).
* Optional: Ein Untersetzer oder eine Schale für den Turm, um überschüssiges Wasser aufzufangen.
Schritt-für-Schritt-Anleitung: So baust du deinen Spinat-Turmgarten
1. Vorbereitung des großen Rohrs
1. Reinigung: Reinige das große PVC-Rohr gründlich mit Wasser und Seife. Entferne alle Etiketten und Rückstände.
2. Anzeichnen der Pflanzlöcher:
* Messe mit dem Messband oder Zollstock den Abstand zwischen den Pflanzlöchern ab. Ich empfehle einen Abstand von ca. 15-20 cm zwischen den Löchern und versetzt angeordnet, damit die Pflanzen genügend Platz haben.
* Zeichne die Positionen der Löcher mit dem Stift oder Marker auf dem Rohr an. Achte darauf, dass die Löcher gleichmäßig verteilt sind.
* Die Größe der Löcher sollte etwa 5-7 cm im Durchmesser betragen, damit die Spinatpflanzen genügend Platz zum Wachsen haben.
3. Bohren der Pflanzlöcher:
* Setze die Lochsäge oder den Bohraufsatz auf die Bohrmaschine.
* Bohre vorsichtig die Pflanzlöcher an den markierten Stellen. Achte darauf, dass du das Rohr nicht beschädigst.
* Entferne alle scharfen Kanten und Grate mit einem Messer oder Schleifpapier.
2. Vorbereitung des Bewässerungsrohrs
1. Überprüfung: Überprüfe, ob das kleinere PVC-Rohr bereits perforiert ist. Wenn nicht, musst du die Löcher selbst bohren.
2. Bohren der Bewässerungslöcher (falls erforderlich):
* Verwende den kleinen Bohrer, um kleine Löcher (ca. 3-5 mm Durchmesser) in das Rohr zu bohren.
* Die Löcher sollten in regelmäßigen Abständen (ca. 5-10 cm) angeordnet sein und über die gesamte Länge des Rohrs verteilt sein.
* Achte darauf, dass die Löcher nicht zu groß sind, damit das Wasser nicht zu schnell abfließt.
3. Auskleiden des großen Rohrs mit Gartenvlies
1. Zuschneiden des Gartenvlieses: Schneide das Gartenvlies in Streifen, die etwas breiter sind als die Pflanzlöcher.
2. Befestigen des Gartenvlieses:
* Befestige die Streifen des Gartenvlieses an der Innenseite des großen Rohrs, so dass sie die Pflanzlöcher abdecken.
* Verwende Kabelbinder oder Draht, um das Gartenvlies an den Rändern der Löcher zu befestigen. Achte darauf, dass das Gartenvlies gut sitzt und keine Erde durch die Löcher gespült werden kann.
4. Zusammenbau des Spinat-Turmgartens
1. Drainageschicht: Fülle eine Schicht Kies oder Blähton (ca. 10-15 cm hoch) auf den Boden des großen Rohrs. Dies sorgt für eine gute Drainage und verhindert Staunässe.
2. Einsetzen des Bewässerungsrohrs: Setze das perforierte PVC-Rohr in die Mitte des großen Rohrs.
3. Befüllen mit Erde: Fülle das große Rohr mit hochwertiger Pflanzerde. Achte darauf, dass die Erde gut verdichtet ist, aber nicht zu fest.
4. Befüllen bis zum oberen Rand: Fülle die Erde bis zum oberen Rand des Rohrs auf.
5. Bepflanzen des Spinat-Turmgartens
1. Vorbereitung der Pflanzlöcher: Drücke mit den Fingern kleine Mulden in die Erde in den Pflanzlöchern.
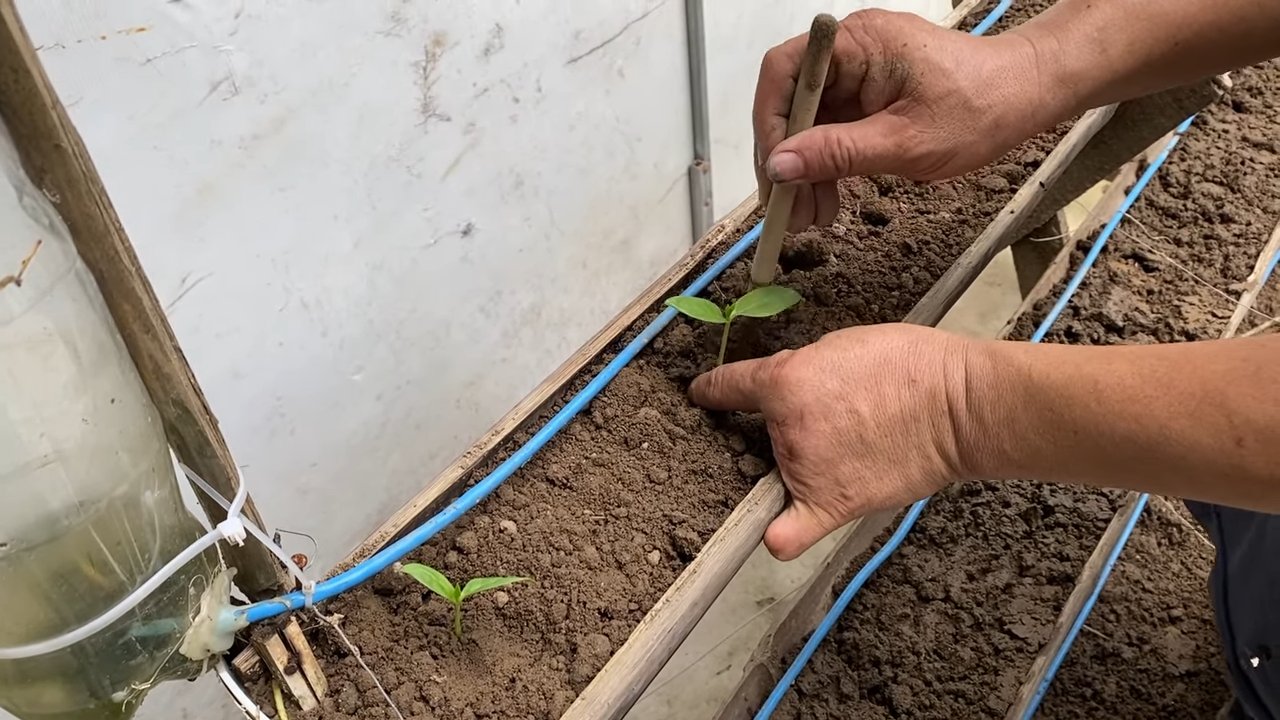
2. Einsetzen der Spinatsamen oder Jungpflanzen:
* Wenn du Spinatsamen verwendest, säe sie gemäß den Anweisungen auf der Saatguttüte in die Mulden.
* Wenn du Jungpflanzen verwendest, setze sie vorsichtig in die Mulden und bedecke die Wurzeln mit Erde.
3. Angießen: Gieße den Spinat-Turmgarten gründlich an.
6. Bewässerung und Pflege
1. Bewässerung: Bewässere den Spinat-Turmgarten regelmäßig, besonders in den Sommermonaten. Gieße das Wasser in das perforierte PVC-Rohr, so dass es gleichmäßig verteilt wird.
2. Düngung: Dünge den Spinat regelmäßig mit einem organischen Dünger.
3. Standort: Stelle den Spinat-Turmgarten an einen sonnigen oder halbschattigen Standort.
4. Ernte: Ernte den Spinat, sobald die Blätter groß genug sind. Du kannst die äußeren Blätter ernten und die inneren Blätter weiterwachsen lassen.
Zusätzliche Tipps und Tricks
* Automatische Bewässerung: Wenn du eine automatische Bewässerung möchtest, kannst du eine kleine Pumpe an das perforierte PVC-Rohr anschließen.
* Schutz vor Schädlingen: Um den Spinat vor Schädlingen zu schützen, kannst du ihn mit einem Netz abdecken.
* Verschiedene Spinatsorten: Probiere verschiedene Spinatsorten aus, um herauszufinden, welche dir am besten schmecken.
* Andere Pflanzen: Du kannst den Spinat-Turmgarten auch mit anderen Kräutern oder Salaten bepflanzen.
* Winterfest machen: In kälteren Regionen solltest du den Spinat-Turmgarten im Winter an einen geschützten Ort stellen oder mit Vlies abdecken.
Ich hoffe, diese Anleitung hilft dir dabei, deinen eigenen Spinat-Turmgarten zu bauen. Es ist ein tolles Projekt, das nicht nur Spaß macht, sondern dir auch frischen Spinat direkt vor die Haustür bringt. Viel Erfolg und viel Spaß beim Gärtnern!
Conclusion
So, there you have it! Creating your own Spinach Tower Garden DIY is not just a fun project; it’s a gateway to fresh, organic spinach right at your fingertips. We’ve walked you through the process, highlighting the simplicity and cost-effectiveness of this method. Forget those wilted, overpriced bags of spinach from the grocery store. Imagine stepping outside your door and harvesting vibrant, nutrient-packed leaves whenever you need them.
This DIY project is a must-try for several reasons. First, it’s incredibly space-efficient, making it perfect for balconies, patios, or even small yards. Second, it’s a sustainable way to grow your own food, reducing your carbon footprint and reliance on commercial agriculture. Third, it’s a fantastic learning experience, connecting you with the natural world and teaching you about plant growth. And finally, let’s be honest, there’s a certain satisfaction that comes from nurturing something from seed to harvest.
But the beauty of this Spinach Tower Garden DIY lies in its adaptability. Feel free to experiment with different materials for your tower. Instead of PVC pipes, you could repurpose plastic containers or even build a tower from stacked tires. Consider adding companion plants like marigolds or basil to deter pests and enhance the flavor of your spinach. You can also adjust the size and height of your tower to suit your specific needs and space constraints.
For those living in colder climates, consider bringing your spinach tower indoors during the winter months. With the addition of a grow light, you can enjoy fresh spinach year-round. And if you’re feeling adventurous, why not try growing other leafy greens like lettuce, kale, or chard in your tower? The possibilities are endless!
We truly believe that this Spinach Tower Garden DIY is a game-changer for anyone who wants to grow their own food, regardless of their experience level. It’s a simple, affordable, and rewarding project that will bring you joy and delicious spinach for months to come.
So, what are you waiting for? Gather your materials, follow our instructions, and get ready to embark on your own spinach-growing adventure. We’re confident that you’ll be amazed by the results.
Don’t forget to share your experiences with us! We’d love to see photos of your finished spinach towers and hear about any tips or tricks you’ve discovered along the way. Share your stories on social media using #SpinachTowerGardenDIY and inspire others to join the movement. Let’s create a community of spinach-loving gardeners and spread the joy of growing our own food!
Frequently Asked Questions (FAQ)
What type of spinach grows best in a tower garden?
The best spinach varieties for a tower garden are those that are compact and bolt-resistant. Bolt-resistant varieties are less likely to go to seed prematurely, especially in warmer weather. Some excellent choices include ‘Baby’s Leaf Hybrid,’ ‘Space,’ ‘Tyee,’ and ‘Winter Bloomsdale.’ These varieties are known for their high yields and delicious flavor. Consider your local climate when selecting your spinach variety. If you live in a warmer region, prioritize bolt-resistant options. If you live in a cooler region, you might have more flexibility in your choices.
How often should I water my spinach tower garden?
Watering frequency depends on several factors, including the weather, the type of growing medium you’re using, and the size of your spinach plants. As a general rule, you should water your spinach tower garden when the top inch of the growing medium feels dry to the touch. During hot, sunny weather, you may need to water daily, or even twice a day. In cooler, cloudier weather, you may only need to water every few days. A good way to check is to insert your finger into the growing medium near the base of the plants. If it feels dry, it’s time to water. Ensure that the water drains freely from the bottom of the tower to prevent waterlogging, which can lead to root rot.
What kind of fertilizer should I use for my spinach tower garden?
Spinach is a heavy feeder, meaning it requires a good supply of nutrients to thrive. Use a balanced, water-soluble fertilizer specifically formulated for leafy greens. Look for a fertilizer with an NPK ratio (nitrogen, phosphorus, potassium) that is relatively balanced, such as 10-10-10 or 20-20-20. Follow the instructions on the fertilizer package carefully to avoid over-fertilizing, which can burn the roots of your plants. You can also use organic fertilizers like compost tea or fish emulsion. These options are gentler on the plants and provide a slow-release source of nutrients. Apply fertilizer every 2-3 weeks, or as needed, based on the appearance of your plants. Yellowing leaves can indicate a nutrient deficiency.
How do I prevent pests and diseases in my spinach tower garden?
Prevention is key when it comes to pests and diseases. Start by using healthy, disease-free seedlings or seeds. Regularly inspect your plants for signs of pests or diseases, such as aphids, spider mites, or fungal infections. If you spot any problems, address them immediately. For aphids and spider mites, you can try spraying your plants with a strong stream of water or using insecticidal soap. For fungal infections, ensure good air circulation around your plants and avoid overwatering. You can also use organic fungicides like neem oil. Companion planting can also help deter pests. Planting marigolds or basil near your spinach can help repel aphids and other unwanted insects.
How long does it take for spinach to grow in a tower garden?
Spinach is a relatively fast-growing crop. You can typically harvest your first spinach leaves about 4-6 weeks after planting. The exact time will depend on the variety of spinach you’re growing, the weather conditions, and the overall health of your plants. Harvest the outer leaves of the plant as needed, leaving the inner leaves to continue growing. This will allow you to enjoy a continuous harvest for several weeks.
Can I grow spinach in a tower garden indoors?
Yes, you can absolutely grow spinach in a tower garden indoors! However, you’ll need to provide adequate light for your plants. Spinach requires at least 6 hours of direct sunlight per day, or 12-14 hours of artificial light. Use a grow light specifically designed for plants. LED grow lights are a good option because they are energy-efficient and produce very little heat. Place the grow light about 6-12 inches above the top of your plants. You’ll also need to ensure good air circulation around your plants to prevent fungal diseases. A small fan can help with this.
What are some other plants I can grow in my spinach tower garden?
The beauty of a tower garden is its versatility. You can grow a variety of other leafy greens and herbs alongside your spinach. Some good companion plants include lettuce, kale, chard, arugula, basil, parsley, and cilantro. Avoid planting plants that will shade out your spinach, such as tomatoes or peppers. Consider the growth habits of each plant when deciding where to place them in your tower. Taller plants should be placed at the top, while shorter plants can be placed at the bottom.
How do I harvest spinach from my tower garden?
Harvesting spinach from your tower garden is easy. Simply use a pair of scissors or garden shears to cut the outer leaves of the plant, about an inch above the base. Leave the inner leaves to continue growing. This will allow you to enjoy a continuous harvest for several weeks. Harvest your spinach in the morning, before the sun gets too hot. This will help prevent wilting. Wash your spinach leaves thoroughly before eating.
How do I clean my spinach tower garden?
Regular cleaning is important to prevent the buildup of algae and other debris. At least once a year, disassemble your spinach tower garden and thoroughly clean all of the components with soap and water. Rinse well to remove any soap residue. You can also use a diluted bleach solution to disinfect the tower. Be sure to rinse thoroughly after using bleach. This will help prevent the spread of diseases and ensure that your spinach tower garden remains healthy and productive.


Leave a Comment