

Balcony Cabbage Growing Tips: Dreaming of fresh, homegrown cabbage but short on space? You’re not alone! Many urban dwellers crave the satisfaction of cultivating their own food, and thankfully, you don’t need acres of land to do it. This DIY guide unlocks the secrets to successfully growing delicious, crisp cabbage right on your balcony.
Cabbage, a staple in cuisines worldwide, boasts a rich history dating back thousands of years. From ancient Rome to medieval Europe, cabbage has been a symbol of sustenance and resilience. Imagine carrying on that tradition, not in a sprawling field, but in your own little balcony garden!
Why should you try these balcony cabbage growing tips? Because store-bought cabbage simply can’t compare to the flavor and freshness of homegrown. Plus, gardening is a fantastic stress reliever and a rewarding hobby. We’ll walk you through choosing the right varieties, preparing the perfect container, and providing the care your cabbage needs to thrive. Say goodbye to bland supermarket produce and hello to vibrant, flavorful cabbage, grown with your own two hands. Let’s get started!
Balkonkohl: Dein eigener kleiner Gemüsegarten über den Dächern
Hey du! Hast du auch Lust, frisches Gemüse direkt vor deiner Haustür zu ernten, aber keinen Garten? Kein Problem! Mit ein paar Tricks und Kniffen kannst du auch auf deinem Balkon prächtigen Kohl anbauen. Ich zeige dir, wie’s geht!
Warum Kohl auf dem Balkon?
Kohl ist nicht nur super gesund, sondern auch überraschend einfach anzubauen, selbst auf kleinem Raum. Es gibt viele verschiedene Kohlsorten, die sich gut für den Balkon eignen, und das Beste: Du weißt genau, was drin ist! Keine Pestizide, keine langen Transportwege – nur frischer, selbst angebauter Kohl.
Welche Kohlsorten eignen sich für den Balkon?
Nicht jeder Kohl ist gleich. Für den Balkon empfehle ich dir eher kompakte Sorten, die nicht so viel Platz brauchen. Hier ein paar meiner Favoriten:
* Zwerg-Rosenkohl: Braucht wenig Platz und liefert trotzdem viele leckere Röschen.
* Mini-Blumenkohl: Ideal für kleinere Töpfe und Beete.
* Palmkohl (Cavolo Nero): Sieht super aus und ist sehr robust.
* Chinakohl: Wächst schnell und ist vielseitig verwendbar.
* Radieschen: Obwohl kein Kohl im eigentlichen Sinne, sind Radieschen tolle Begleiter und lockern den Boden auf.
Was du brauchst: Die Materialliste
Bevor wir loslegen, hier eine Liste mit allem, was du für deinen Balkonkohl brauchst:
* Pflanzgefäße: Töpfe, Kübel oder Balkonkästen mit ausreichend Volumen (mindestens 10 Liter pro Pflanze, je nach Sorte).
* Hochwertige Pflanzerde: Am besten spezielle Gemüseerde oder eine Mischung aus Blumenerde und Kompost.
* Kohlpflanzen: Jungpflanzen bekommst du im Gartencenter oder auf dem Wochenmarkt.
* Dünger: Organischer Dünger wie Hornspäne oder Gemüsedünger.
* Gießkanne oder Gartenschlauch: Zum regelmäßigen Gießen.
* Schere oder Messer: Zum Ernten.
* Eventuell: Schneckenzaun oder -korn, Schutznetz gegen Kohlweißlinge.
Schritt-für-Schritt-Anleitung: So pflanzt du deinen Balkonkohl
Jetzt geht’s ans Eingemachte! Folge diesen Schritten, um deinen Balkonkohl erfolgreich anzubauen:
1. Die Vorbereitung: Pflanzgefäße und Erde
1. Wähle die richtigen Pflanzgefäße: Achte darauf, dass die Töpfe oder Kübel ausreichend groß sind und über Abzugslöcher verfügen, damit überschüssiges Wasser ablaufen kann. Staunässe mögen Kohlpflanzen gar nicht!
2. Fülle die Pflanzgefäße mit Erde: Verwende hochwertige Pflanzerde, die locker und nährstoffreich ist. Ich mische gerne noch etwas Kompost unter, um den Kohlpflanzen einen zusätzlichen Boost zu geben. Lass oben ein paar Zentimeter Platz, damit du später noch gießen kannst, ohne dass die Erde überschwappt.
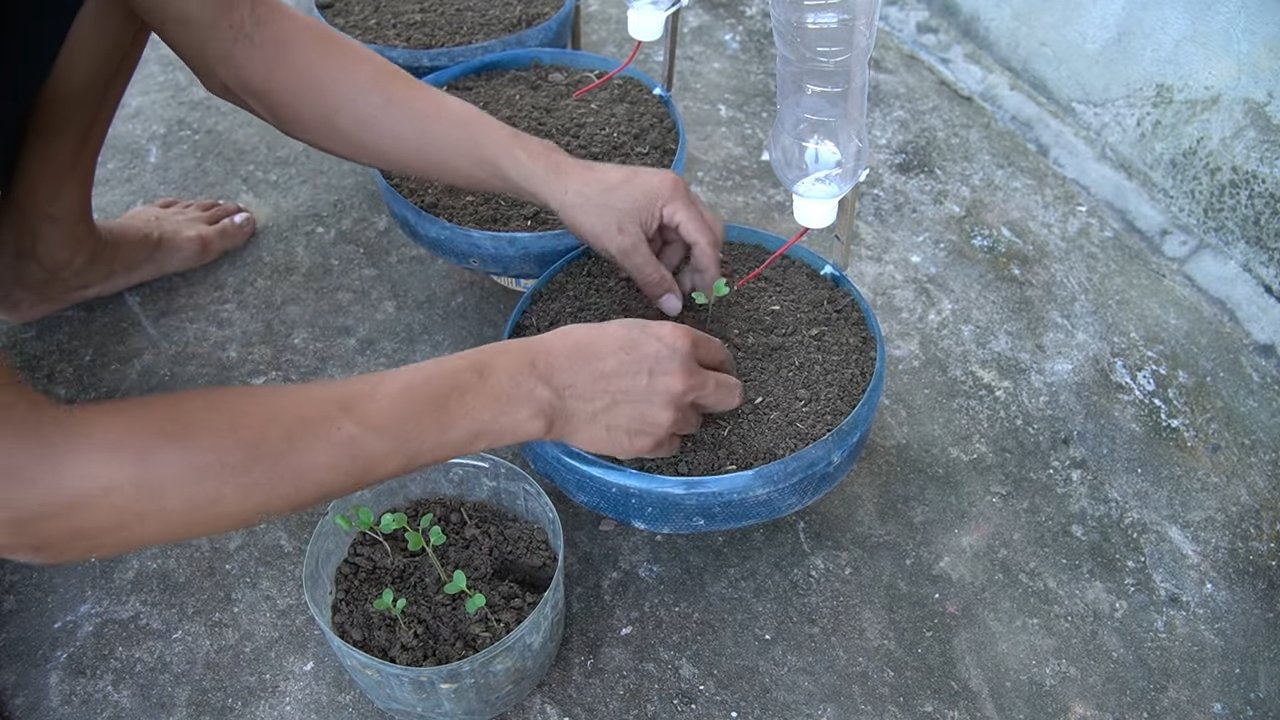
2. Das Pflanzen: Jungpflanzen einsetzen
1. Wässere die Jungpflanzen: Bevor du die Kohlpflanzen einsetzt, tauche die Töpfe, in denen sie sich befinden, kurz in Wasser, bis sie gut durchfeuchtet sind.
2. Setze die Pflanzen ein: Hebe die Jungpflanzen vorsichtig aus ihren Töpfen und setze sie in die vorbereiteten Pflanzgefäße. Achte darauf, dass der Wurzelballen vollständig mit Erde bedeckt ist. Der Abstand zwischen den Pflanzen sollte je nach Sorte etwa 30-40 cm betragen.
3. Drücke die Erde leicht an: Drücke die Erde um die Pflanzen herum leicht an, damit sie einen guten Halt haben.
4. Gieße die Pflanzen gründlich: Gieße die frisch gepflanzten Kohlpflanzen gründlich an, damit die Erde sich setzt und die Wurzeln gut mit Wasser versorgt werden.
3. Die Pflege: Gießen, Düngen und Schützen
1. Regelmäßiges Gießen: Kohlpflanzen brauchen viel Wasser, besonders während der Wachstumsphase. Gieße regelmäßig, aber vermeide Staunässe. Am besten testest du mit dem Finger, ob die Erde noch feucht genug ist.
2. Düngen nicht vergessen: Kohl ist ein Starkzehrer und braucht viele Nährstoffe. Dünge deine Kohlpflanzen regelmäßig mit organischem Dünger wie Hornspäne oder Gemüsedünger. Ich dünge alle zwei bis drei Wochen.
3. Schutz vor Schädlingen: Kohlweißlinge sind die größten Feinde des Kohls. Ihre Raupen fressen die Blätter kahl. Schütze deine Pflanzen mit einem Schutznetz oder sammle die Raupen regelmäßig ab. Auch Schnecken können ein Problem sein. Hier helfen Schneckenzäune oder -korn.
4. Unkraut entfernen: Halte die Pflanzgefäße frei von Unkraut, damit deine Kohlpflanzen genügend Platz und Nährstoffe haben.
4. Die Ernte: Wenn der Kohl reif ist
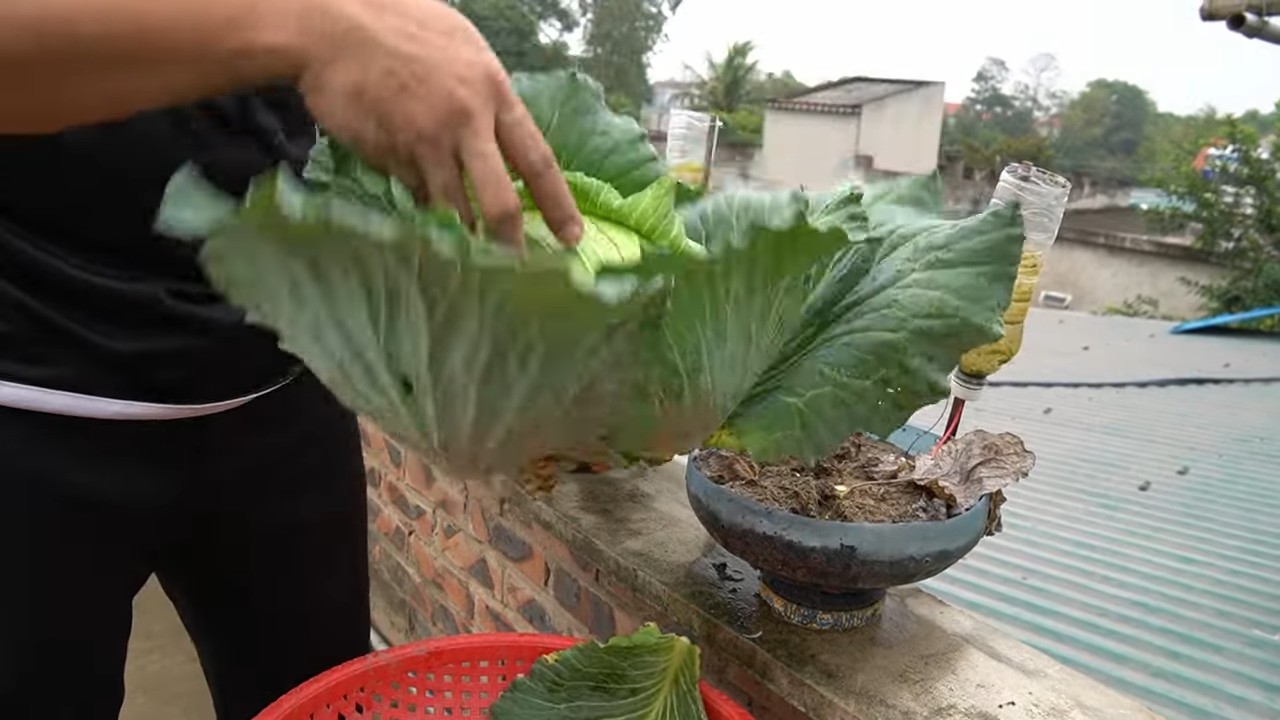
1. Der richtige Zeitpunkt: Je nach Kohlsorte ist der Erntezeitpunkt unterschiedlich. Achte auf die Reifezeichen der jeweiligen Sorte. Rosenkohl ist reif, wenn die Röschen fest und geschlossen sind. Blumenkohl ist reif, wenn der Kopf die gewünschte Größe erreicht hat. Palmkohl kannst du nach und nach ernten, indem du die unteren Blätter abschneidest.
2. Die Ernte: Ernte den Kohl vorsichtig mit einem scharfen Messer oder einer Schere. Achte darauf, die Pflanze nicht zu beschädigen.
3. Genießen: Und jetzt kommt der beste Teil: Genieße deinen selbst angebauten Balkonkohl! Er schmeckt frisch und lecker, egal ob gekocht, gebraten oder roh im Salat.
Zusätzliche Tipps für den Balkonkohl
* Der richtige Standort: Kohl braucht viel Sonne. Wähle einen sonnigen Standort auf deinem Balkon, der mindestens sechs Stunden Sonne am Tag bekommt.
* Fruchtfolge beachten: Baue Kohl nicht jedes Jahr am selben Standort an, um Krankheiten und Schädlingen vorzubeugen.
* Begleitpflanzen: Pflanze Ringelblumen oder Kapuzinerkresse neben deinen Kohl, um Schädlinge abzuhalten.
* Mulchen: Bedecke die Erde um die Kohlpflanzen mit Mulch, um die Feuchtigkeit zu halten und Unkraut zu unterdrücken.
* Kohlrabi als Vorkultur: Kohlrabi wächst schnell und kann als Vorkultur für andere Kohlsorten dienen.
Häufige Probleme und Lösungen
* Gelbe Blätter: Können ein Zeichen für Nährstoffmangel sein. Dünge deine Pflanzen mit einem geeigneten Dünger.
* Kohlhernie: Eine Pilzkrankheit, die die Wurzeln befällt. Vermeide Staunässe und baue Kohl nicht jedes Jahr am selben Standort an.
* Kohlweißlinge: Schütze deine Pflanzen mit einem Schutznetz oder sammle die Raupen regelmäßig ab.
* Schnecken: Verwende Schneckenzäune oder -korn.
Fazit: Balkonkohl ist machbar!
Mit ein bisschen Planung und Pflege kannst du auch auf deinem Balkon erfolgreich Kohl anbauen. Es ist eine tolle Möglichkeit, frisches Gemüse zu ernten und deinen Balkon in einen kleinen Gemüsegarten zu verwandeln. Also, worauf wartest du noch? Ran an die Töpfe und los geht’s! Ich wünsche dir viel Erfolg und eine reiche Ernte!
Conclusion
So, there you have it! Growing cabbage on your balcony isn’t just a whimsical dream; it’s a surprisingly achievable reality. We’ve walked through the essential steps, from selecting the right variety to warding off common pests, all tailored for the unique environment of your balcony garden. But why should you even bother with this endeavor?
The answer is multifaceted. First and foremost, the taste of homegrown cabbage is simply unparalleled. Forget the bland, mass-produced heads you find at the supermarket. Balcony-grown cabbage, nurtured with your own care and attention, boasts a sweetness and crispness that will elevate your culinary creations. Imagine the satisfaction of harvesting your own ingredients for a vibrant coleslaw, a hearty soup, or even a simple, yet delicious, sautéed side dish.
Beyond the superior flavor, growing your own cabbage offers a significant boost to your well-being. Gardening, in general, is a fantastic stress reliever. The act of tending to your plants, observing their growth, and nurturing them to fruition is incredibly therapeutic. Plus, you’ll be getting some much-needed fresh air and sunshine while you’re at it. And let’s not forget the environmental benefits. By growing your own food, you’re reducing your carbon footprint and contributing to a more sustainable lifestyle.
But the real magic lies in the adaptability of this project. Feel free to experiment with different cabbage varieties. Red cabbage adds a beautiful splash of color to your balcony and your dishes, while savoy cabbage offers a more delicate flavor and texture. Consider companion planting. Marigolds, for example, can help deter pests, while dill can attract beneficial insects. You can even try intercropping with other leafy greens like lettuce or spinach to maximize your balcony space.
Don’t be afraid to get creative with your container choices. While we’ve recommended specific sizes, you can adapt them to fit your available space and aesthetic preferences. Just ensure that your chosen container provides adequate drainage and room for the cabbage to grow.
This DIY balcony cabbage growing project is more than just a gardening endeavor; it’s an opportunity to connect with nature, enhance your culinary skills, and embrace a more sustainable lifestyle.
We understand that embarking on a new gardening project can be daunting, but we’re confident that with the tips and guidance provided, you’ll be well on your way to harvesting your own delicious cabbage. Remember to be patient, observant, and adaptable. Gardening is a learning process, and there will be challenges along the way. But the rewards – both tangible and intangible – are well worth the effort.
So, what are you waiting for? Grab your seeds, prepare your containers, and get ready to experience the joy of growing your own cabbage on your balcony. And most importantly, don’t forget to share your experiences with us! We’d love to hear about your successes, your challenges, and any tips or tricks you’ve discovered along the way. Share your photos and stories on social media using [Your Hashtag Here], and let’s inspire others to embrace the joys of balcony gardening. Happy growing!
Frequently Asked Questions (FAQ)
What is the best time of year to start growing cabbage on my balcony?
The ideal time to start growing cabbage depends on your local climate. Generally, cabbage thrives in cooler temperatures. For a spring harvest, start seeds indoors 6-8 weeks before the last expected frost. For a fall harvest, start seeds outdoors in mid-summer. Check your local planting calendar for specific dates tailored to your region. If you live in a warmer climate, you can often grow cabbage throughout the winter months.
What size container is best for growing cabbage on a balcony?
A container that is at least 12 inches in diameter and 12 inches deep is generally recommended for growing cabbage. However, larger containers (18-24 inches) are even better, as they provide more room for the roots to develop and allow the plant to access more nutrients and water. Make sure the container has adequate drainage holes to prevent waterlogging.
What type of soil should I use for growing cabbage in containers?
Use a well-draining potting mix that is rich in organic matter. Avoid using garden soil, as it can become compacted in containers and hinder drainage. You can amend your potting mix with compost or other organic materials to improve its fertility and water-holding capacity. A slightly acidic to neutral pH (around 6.0-7.0) is ideal for cabbage.
How often should I water my cabbage plants on the balcony?
Cabbage plants need consistent moisture, especially during hot weather. Water deeply whenever the top inch of soil feels dry to the touch. Avoid overwatering, as this can lead to root rot. Check the soil moisture regularly, especially during periods of heavy rain or drought. Balcony gardens tend to dry out faster than in-ground gardens, so more frequent watering may be necessary.
How much sunlight do cabbage plants need on a balcony?
Cabbage plants need at least 6 hours of direct sunlight per day to thrive. Choose a sunny spot on your balcony that receives ample sunlight throughout the day. If your balcony is shaded for part of the day, try to position your cabbage plants so that they receive morning sun, which is less intense than afternoon sun.
What are some common pests that affect cabbage plants, and how can I control them on my balcony?
Common pests that affect cabbage plants include cabbage worms, aphids, and flea beetles. To control these pests on your balcony, you can use a variety of methods, including:
* Handpicking: Regularly inspect your plants and remove any pests you find by hand.
* Insecticidal soap: Spray your plants with insecticidal soap to kill aphids and other soft-bodied insects.
* Bacillus thuringiensis (Bt): Apply Bt to control cabbage worms. This is a natural bacterium that is safe for humans and pets but deadly to caterpillars.
* Floating row covers: Cover your plants with floating row covers to prevent pests from reaching them.
* Companion planting: Plant marigolds or other pest-repelling plants near your cabbage to deter pests.
How often should I fertilize my cabbage plants on the balcony?
Cabbage plants are heavy feeders and need regular fertilization. Fertilize your plants every 2-3 weeks with a balanced fertilizer that is high in nitrogen. You can also use a liquid fertilizer or compost tea. Avoid over-fertilizing, as this can lead to excessive leaf growth and reduced head formation.
When is cabbage ready to harvest?
Cabbage is typically ready to harvest when the head is firm and solid. The exact time will depend on the variety and growing conditions. Gently squeeze the head to check for firmness. If it feels solid, it’s likely ready to harvest. Use a sharp knife to cut the head from the stem, leaving a few outer leaves intact.
Can I grow different varieties of cabbage on my balcony?
Absolutely! Experimenting with different varieties is part of the fun. Consider factors like size, color, and maturity time when selecting varieties for your balcony garden. Some popular choices for container growing include ‘Dwarf Blue Vates’, ‘Golden Acre’, and ‘Red Acre’.
What if my cabbage doesn’t form a head?
Several factors can contribute to a cabbage plant not forming a head, including insufficient sunlight, lack of nutrients, or improper watering. Ensure your plants are receiving at least 6 hours of direct sunlight per day, fertilize regularly with a balanced fertilizer, and water consistently to keep the soil moist but not waterlogged. Extreme temperatures can also affect head formation.


Leave a Comment