

Plastic Bottle Spinach Growing: Unlock a world of fresh, homegrown goodness right at your doorstep! Have you ever dreamt of plucking vibrant, vitamin-packed spinach leaves straight from your own garden, even if you’re short on space or time? Well, dream no more! This DIY guide is your passport to a thriving spinach patch, all thanks to the humble plastic bottle.
For centuries, cultivating leafy greens has been a cornerstone of healthy diets across cultures. From ancient Roman gardens to modern-day urban farms, the desire for fresh produce has driven innovation in gardening techniques. While traditional methods require ample land, we’re about to revolutionize your approach.
Let’s face it, buying spinach from the store can be expensive, and you’re never quite sure how fresh it is. Plus, there’s something incredibly satisfying about nurturing your own food from seed to table. That’s where plastic bottle spinach growing comes in! This ingenious method not only repurposes waste but also provides a controlled environment for your spinach to flourish. I’m going to show you how to create a mini-garden that’s perfect for balconies, patios, or even a sunny windowsill. Get ready to transform those discarded bottles into a thriving source of delicious, nutritious spinach!
DIY: Growing Spinach in Plastic Bottles – Your Mini Garden for the Windowsill
Hey gardening friends! Want fresh spinach, but don’t have a garden? Let me show you how to create your own small, but perfect, spinach garden using plastic bottles. It’s not only super sustainable, but also a lot of fun! Let’s get started!
What You Need:
- Plastic bottles: Ideally large PET bottles (e.g., from water or juice). The bigger, the better, but smaller bottles will work too.
- Soil: Regular potting soil or specific vegetable soil.
- Spinach seeds: Available at garden centers or online. Choose an organic variety if you want to avoid pesticides.
- Scissors or a utility knife: For cutting the bottles.
- Drill or nail: To create drainage holes.
- Watering can or spray bottle: For watering.
- Optional: Small stones or clay pebbles for drainage.
- Optional: Labels and a pen to mark your bottles.
Preparing the Plastic Bottles:
- Cleaning: First, thoroughly clean the plastic bottles. Remove all labels and rinse them with warm water and dish soap. Make sure there are no soap residues left. Let them dry completely.
- Cutting the Bottles: Now comes the fun part! There are different ways to cut the bottles. I’ll show you two options:
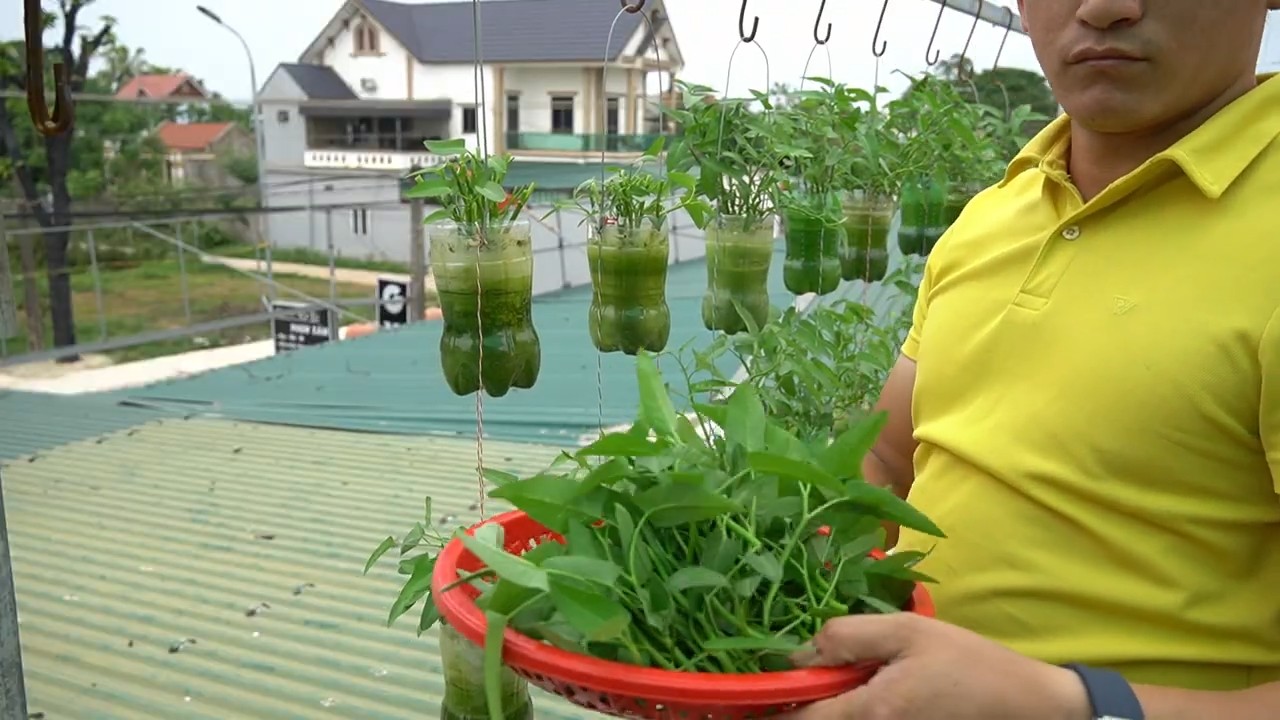
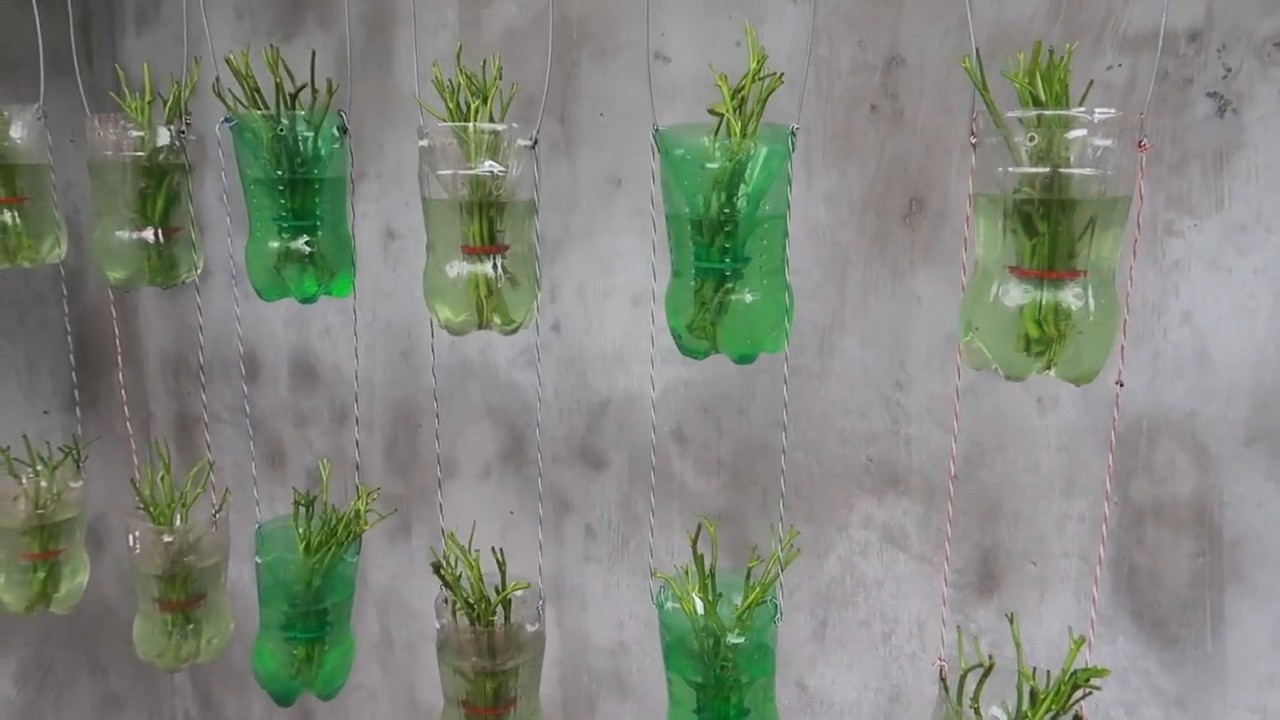
- Option 1: Horizontal Cut (Hanging Garden):
- Mark a line around the bottle about 1/3 from the top.
- Cut along this line, so you have two parts: the upper part (with the bottle neck) and the bottom part.
- Turn the upper part upside down and insert it into the bottom part. The bottle neck should face down. This will act as your self-watering system!
- Drill or hammer holes in the lid of the bottle neck. These holes will let water slowly drip into the soil.
- Drill or hammer holes at the bottom of the bottom part of the bottle for drainage.
- If you want to hang the bottles, drill additional holes at the top of the lower part for string or wire.
- Option 2: Vertical Cut (Standing Garden):
- Cut the bottle lengthwise but leave a small section at the bottom uncut so the bottle forms a “boat.”
- Drill or hammer drainage holes at the bottom of the bottle.
- Option 1: Horizontal Cut (Hanging Garden):
- Drainage (Optional): To avoid waterlogging, add a layer of small stones or clay pebbles at the bottom of the bottles.
Planting the Spinach:
- Fill with Soil: Fill the prepared bottles with potting soil. Leave about 2-3 cm from the top.
- Sow the Seeds: Evenly distribute the spinach seeds on the soil. Be sure to leave enough space between the seeds, about 1-2 cm apart.
- Cover the Seeds: Lightly cover the seeds with a thin layer of soil (around 0.5 cm).
- Watering: Gently water the soil using a watering can or spray bottle. The soil should be moist but not too wet.
- Choose a Location: Place the bottles in a bright, warm spot. A windowsill or greenhouse is ideal.
- Maintain Moisture: Keep the soil moist for the next few days. Spraying with water regularly is best.
Caring for the Spinach:
- Pikering: Once the spinach plants are about 5-7 cm tall and have several leaves, it’s time to pick them. Carefully move them to larger pots.
- Fertilizing: Spinach is a heavy feeder and needs a lot of nutrients. Fertilize the plants regularly with an organic fertilizer. Compost or a vegetable-specific fertilizer is ideal.
- Watering: Water the plants regularly, but avoid waterlogging. The soil should always be slightly moist.
- Location: Spinach needs plenty of sunlight. Place the plants in a sunny spot.
- Pests: Keep an eye out for pests like aphids or cabbage whiteflies. If you spot any, treat the plants with natural insecticides.
Harvesting the Spinach:
After a few weeks, your homegrown spinach will be ready for harvest!
- Harvesting Time: Spinach is ready to harvest when the leaves are large enough. You can harvest the outer leaves as needed, and the plant will continue to grow new leaves.
- Harvesting Method: Cut the leaves with a sharp knife or scissors. Be careful not to damage the central leaves of the plant.
- Uses: Spinach is incredibly versatile! You can cook, steam, fry, or even use it raw in salads. It’s packed with vitamins and minerals and tastes amazing!
Additional Tips and Tricks:
- Choosing Varieties: There are many varieties of spinach. Some are better suited for growing in pots than others. Check with your local garden center or online to see which varieties are best for your needs.
- Pests: Spinach can be attacked by aphids or other pests. Check the plants regularly and remove pests with natural remedies.
- Labeling: Label the bottles with the spinach variety and sowing date. This helps you keep track.
- Creativity: Get creative with your DIY garden! Paint the bottles, decorate them with stickers, or use other materials to customize them.
- Ventilation: Ensure proper ventilation, especially if you’re growing the plants indoors. This helps prevent mold growth.
- Sustainability: Use rainwater to water the plants to conserve water.
- Multiple Harvests: Spinach is a leafy vegetable that you can harvest multiple times. Simply cut off the outer leaves and leave the inner leaves to continue growing.
- Winter Growing: In mild winters, you can grow spinach indoors. Just make sure the plants get enough light.
Common Problems and Solutions:
- Yellow Leaves: This may indicate overwatering or nutrient deficiency. Reduce watering and fertilize if necessary.
- Mold: Mold can form if the humidity is too high. Ensure good ventilation and airflow.
- Slow Growth: This could be due to insufficient light or lack of nutrients. Move the plants to a brighter spot and fertilize them.
- Pests: Check your plants regularly and use natural pest control methods if needed.
Conclusion:
Growing spinach in plastic bottles is a fantastic way to enjoy fresh spinach even without a garden. It’s simple, sustainable, and fun! Give it a try and let your mini garden surprise you with delicious, homegrown spinach! 🌱
Conclusion
So, there you have it! Transforming a simple plastic bottle into a thriving spinach garden is not just a fun project; it’s a sustainable, space-saving, and incredibly rewarding way to enjoy fresh, homegrown greens. We’ve walked you through the process, highlighting the ease and accessibility of this DIY trick. But why is this method a must-try?
Firstly, it’s about reclaiming and repurposing. In a world grappling with plastic waste, finding creative ways to reuse these materials is crucial. This project gives those discarded bottles a new lease on life, turning potential pollutants into productive planters. Secondly, it’s about accessibility. Whether you live in a sprawling suburban home or a compact city apartment, space is often a premium. This vertical gardening solution allows you to cultivate fresh spinach even in the smallest of spaces – a balcony, a windowsill, or even a sunny corner indoors.
Thirdly, it’s about control. When you grow your own spinach, you have complete control over the growing environment. You know exactly what goes into your plants – no harmful pesticides, no questionable fertilizers. Just pure, organic goodness. And finally, it’s about the sheer joy of watching something grow. There’s a unique satisfaction in nurturing a plant from seed to harvest, and this project makes that experience accessible to everyone, regardless of their gardening experience.
But don’t stop at just spinach! This method is incredibly versatile. Experiment with other leafy greens like lettuce, kale, or even herbs like basil and parsley. You can also adapt the size of the bottle to suit different plants. Smaller bottles are perfect for herbs, while larger bottles can accommodate larger spinach varieties or even dwarf tomato plants. Consider adding drainage holes at different levels to create a cascading effect, turning your vertical garden into a stunning visual display. You can also paint the bottles to add a splash of color and personality to your garden. Get creative with your designs and make your vertical garden a true reflection of your style.
We encourage you to embrace this DIY trick and embark on your own plastic bottle spinach growing adventure. It’s a simple, sustainable, and incredibly rewarding way to connect with nature and enjoy fresh, homegrown produce. Don’t be afraid to experiment, adapt, and personalize the process to suit your needs and preferences.
Once you’ve tried it, we’d love to hear about your experience! Share your photos, tips, and tricks in the comments below. Let’s create a community of passionate gardeners who are committed to sustainable and innovative growing practices. Together, we can transform our spaces and our lives, one plastic bottle at a time. So, grab a bottle, some soil, and some spinach seeds, and get growing! You’ll be amazed at what you can achieve.
Frequently Asked Questions (FAQ)
What type of plastic bottle is best for growing spinach?
Ideally, you should use food-grade plastic bottles, such as those used for water, juice, or soda. These are generally considered safe for growing edible plants. Avoid bottles that have contained harsh chemicals or cleaning products, as these could contaminate your spinach. PET (Polyethylene Terephthalate) bottles, commonly marked with a “1” inside a recycling triangle, are a good choice. Make sure to thoroughly clean the bottle with soap and water before using it.
How often should I water my plastic bottle spinach garden?
The frequency of watering depends on several factors, including the climate, the type of soil you’re using, and the size of the bottle. Generally, you should water your spinach when the top inch of soil feels dry to the touch. Avoid overwatering, as this can lead to root rot. Ensure that the bottle has adequate drainage holes to prevent water from accumulating at the bottom. In hot, dry weather, you may need to water daily, while in cooler, wetter weather, you may only need to water every few days. A good rule of thumb is to check the soil moisture regularly and adjust your watering schedule accordingly.
What kind of soil should I use for growing spinach in plastic bottles?
A well-draining potting mix is essential for growing healthy spinach in plastic bottles. Avoid using garden soil, as it can be too heavy and compact, hindering drainage and root growth. A good potting mix will typically contain a blend of peat moss, perlite, and vermiculite. You can also add compost to the mix to provide additional nutrients. Look for a potting mix that is specifically formulated for vegetables or herbs.
How much sunlight does my plastic bottle spinach garden need?
Spinach thrives in full sun to partial shade. Ideally, your plastic bottle spinach garden should receive at least 4-6 hours of direct sunlight per day. If you live in a hot climate, providing some afternoon shade can help prevent the leaves from wilting. If you’re growing your spinach indoors, you may need to supplement with artificial lighting, such as a grow light. Position the grow light about 6-12 inches above the plants and keep it on for 12-16 hours per day.
How do I fertilize my plastic bottle spinach plants?
Spinach is a relatively heavy feeder, so it’s important to provide it with adequate nutrients. You can fertilize your plastic bottle spinach plants with a balanced liquid fertilizer, such as a 10-10-10 or 20-20-20 formula. Dilute the fertilizer according to the package instructions and apply it every 2-3 weeks. You can also use organic fertilizers, such as compost tea or fish emulsion. These are gentler on the plants and provide a slow-release source of nutrients. Avoid over-fertilizing, as this can burn the roots and damage the plants.
How long does it take for spinach to grow in plastic bottles?
Spinach typically takes about 4-6 weeks to mature from seed to harvest. However, the exact time frame can vary depending on the variety of spinach, the growing conditions, and the climate. You can start harvesting spinach leaves when they are about 4-6 inches long. Simply snip off the outer leaves, leaving the inner leaves to continue growing. This will allow you to harvest spinach continuously for several weeks.
How do I prevent pests and diseases in my plastic bottle spinach garden?
Regularly inspect your spinach plants for signs of pests or diseases. Common pests that can affect spinach include aphids, spider mites, and slugs. You can control these pests with insecticidal soap, neem oil, or by handpicking them off the plants. To prevent diseases, ensure that your spinach plants have good air circulation and avoid overwatering. If you notice any signs of disease, such as yellowing leaves or spots, remove the affected leaves immediately. You can also use organic fungicides to control fungal diseases.
Can I grow spinach in plastic bottles during the winter?
Yes, you can grow spinach in plastic bottles during the winter, especially if you live in a mild climate. In colder climates, you may need to provide some protection from frost and freezing temperatures. You can move your plastic bottle spinach garden indoors or cover it with a frost blanket. Spinach is a cold-hardy plant and can tolerate temperatures as low as 20°F (-7°C). However, growth will be slower during the winter months.
What are some other plants I can grow in plastic bottles using this method?
The plastic bottle gardening method is versatile and can be used to grow a variety of plants, including:
* Lettuce
* Kale
* Arugula
* Herbs (basil, parsley, mint, oregano)
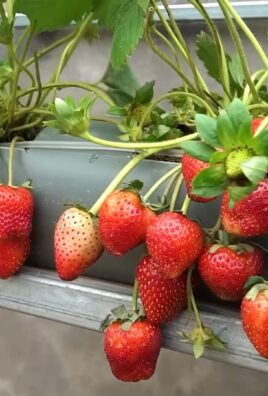
* Strawberries
* Dwarf tomatoes
* Peppers
* Radishes
Experiment with different plants and find what works best for your climate and growing conditions. Remember to adjust the size of the bottle and the type of soil to suit the specific needs of each plant.
How do I ensure proper drainage in my plastic bottle planters?
Proper drainage is crucial to prevent root rot and ensure healthy plant growth. Before planting, create drainage holes at the bottom of the plastic bottle. You can use a drill, a knife, or even a hot nail to make the holes. A good rule of thumb is to create at least 4-5 holes, each about ¼ inch in diameter. You can also add a layer of gravel or pebbles at the bottom of the bottle to further improve drainage. This will help prevent the soil from becoming waterlogged.

Leave a Comment