

Growing green onions from seed might sound intimidating, but trust me, it’s one of the most rewarding and surprisingly simple DIY projects you can undertake in your home garden! Imagine this: you’re whipping up a delicious stir-fry, and instead of running to the store, you simply snip a few fresh, vibrant green onions right from your windowsill. That’s the magic we’re unlocking today!
For centuries, cultures around the globe have cultivated green onions, also known as scallions, not just for their culinary versatility but also for their medicinal properties. In many Asian cuisines, they’re considered a staple, adding a delicate sharpness and freshness to countless dishes. Beyond the kitchen, green onions have been used in traditional medicine for their potential anti-inflammatory and antibacterial benefits.
But why should you bother growing green onions from seed? Well, for starters, it’s incredibly cost-effective. Those little bunches at the grocery store can add up! Plus, homegrown green onions taste significantly better – fresher, more flavorful, and bursting with life. More importantly, in a world increasingly concerned with sustainability and knowing where our food comes from, this DIY project empowers you to take control of your food supply, even in a small way. This article will provide you with easy-to-follow steps and tips to ensure your success, even if you’re a complete beginner. Let’s get our hands dirty and bring some green goodness into your home!
Growing Green Onions From Seed: A Comprehensive DIY Guide
Hey there, fellow gardening enthusiasts! I’m so excited to share my tried-and-true method for growing green onions from seed. It’s surprisingly easy, incredibly rewarding, and a fantastic way to have fresh, flavorful green onions right at your fingertips. Forget buying them at the store – let’s get growing!
Why Grow Green Onions From Seed?
Before we dive in, let’s talk about why growing your own green onions from seed is such a great idea:
* Cost-Effective: A packet of green onion seeds is super affordable, and you’ll get way more onions than you would buying them pre-grown.
* Freshness: Nothing beats the taste of freshly harvested green onions. The flavor is so much more vibrant!
* Continuous Harvest: You can harvest green onions as needed, snipping off the tops and letting them regrow. It’s a gift that keeps on giving!
* Variety: Growing from seed opens up a world of different green onion varieties you might not find at your local grocery store.
* It’s Fun!: Honestly, there’s something incredibly satisfying about nurturing a plant from a tiny seed to a delicious edible.
What You’ll Need
Okay, let’s gather our supplies. Here’s what you’ll need to successfully grow green onions from seed:
* Green Onion Seeds: Choose a variety that suits your taste and climate. I personally love ‘Evergreen Bunching’ for its reliability and mild flavor.
* Seed Starting Trays or Small Pots: These will be your nurseries for the baby onions.
* Seed Starting Mix: This is a light, well-draining soil mix specifically formulated for seedlings. Don’t use regular garden soil – it’s too heavy.
* Watering Can or Spray Bottle: For gentle watering.
* Grow Lights (Optional): If you don’t have a sunny windowsill, grow lights will provide the necessary light for healthy growth.
* Plant Labels: To keep track of what you’ve planted. Trust me, it’s easy to forget!
* Small Trowel or Spoon: For transplanting seedlings.
* Fertilizer (Optional): A balanced liquid fertilizer to give your onions a boost.
* Outdoor Garden Space or Pots: Where your green onions will eventually live.
Phase 1: Starting Your Seeds Indoors
Starting your seeds indoors gives them a head start, especially if you live in a colder climate. I usually start mine about 6-8 weeks before the last expected frost.
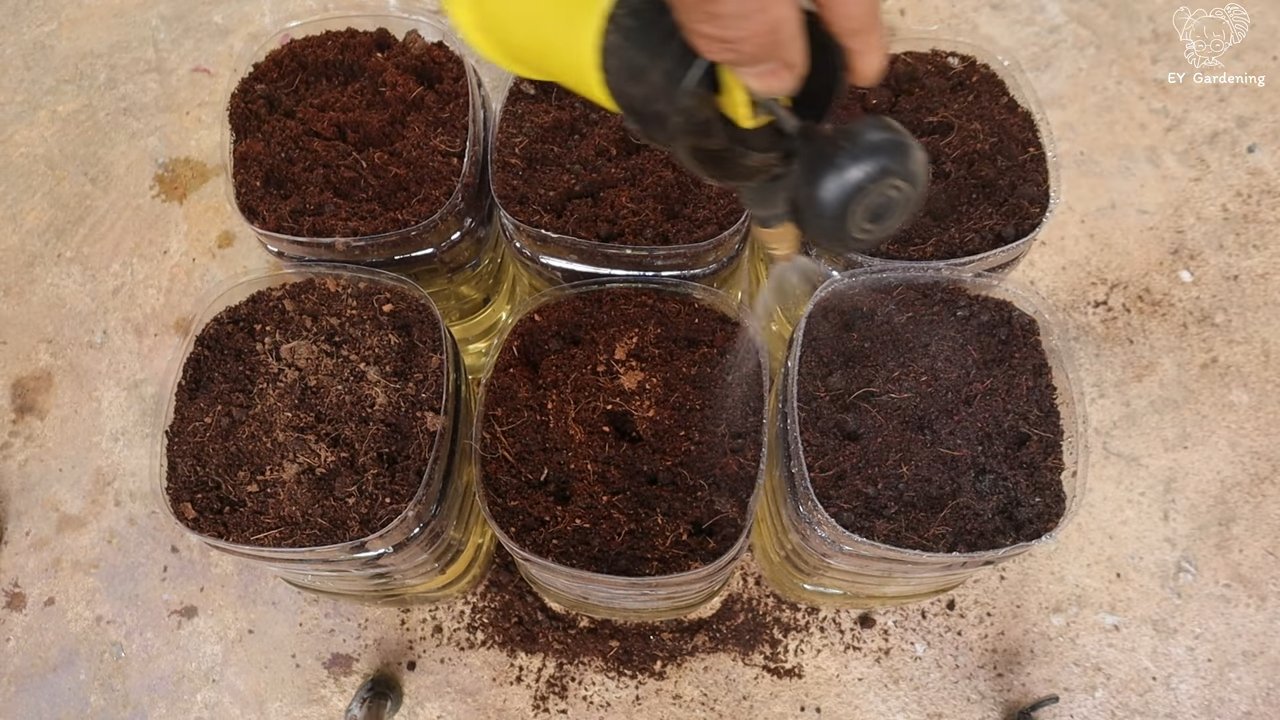
1. Prepare Your Seed Starting Trays: Fill your seed starting trays or small pots with seed starting mix. Gently press down the soil to create a firm, even surface.
2. Sow the Seeds: Green onion seeds are small, so handle them carefully. Sprinkle a few seeds (2-3) into each cell or pot. Don’t bury them too deep – about 1/4 inch is perfect.
3. Cover the Seeds: Lightly cover the seeds with more seed starting mix.
4. Water Gently: Use a watering can or spray bottle to gently moisten the soil. Avoid overwatering, which can lead to rot. The soil should be damp, not soggy.
5. Provide Light and Warmth: Place the trays in a warm location (around 70-75°F or 21-24°C). If you don’t have a sunny windowsill, use grow lights. Keep the lights on for about 14-16 hours per day.
6. Maintain Moisture: Keep the soil consistently moist, but not waterlogged. Check the soil daily and water as needed.
7. Be Patient: Germination usually takes about 7-14 days. Once the seedlings emerge, provide them with plenty of light to prevent them from becoming leggy.
Phase 2: Thinning and Hardening Off
Once your seedlings have sprouted and have a few true leaves (the first set of leaves that look like miniature green onions), it’s time to thin them out and harden them off.
1. Thinning: If you planted multiple seeds in each cell or pot, thin them out to one or two of the strongest seedlings. Use small scissors to snip off the weaker seedlings at the soil line. This gives the remaining seedlings more room to grow.
2. Hardening Off: This is the process of gradually acclimating your seedlings to outdoor conditions. Start by placing the trays outdoors in a sheltered location for a few hours each day. Gradually increase the amount of time they spend outdoors over the course of a week or two. This will help them adjust to the sun, wind, and temperature changes.
Phase 3: Transplanting Outdoors
Once the danger of frost has passed and your seedlings are hardened off, it’s time to transplant them into their permanent home in the garden or in pots.
1. Choose a Location: Green onions prefer full sun (at least 6 hours of direct sunlight per day) but can tolerate partial shade. They also need well-drained soil.
2. Prepare the Soil: Amend the soil with compost or other organic matter to improve drainage and fertility.
3. Transplant the Seedlings: Gently remove the seedlings from their trays or pots. Plant them about 2-3 inches apart in rows that are 6-8 inches apart.
4. Water Thoroughly: Water the transplanted seedlings thoroughly to help them settle in.
5. Mulch (Optional): Apply a layer of mulch around the plants to help retain moisture and suppress weeds.
Phase 4: Ongoing Care
Now that your green onions are in the ground, it’s important to provide them with ongoing care to ensure a bountiful harvest.
1. Watering: Water regularly, especially during dry periods. Green onions need consistent moisture to thrive.
2. Fertilizing (Optional): If you want to give your onions a boost, fertilize them every few weeks with a balanced liquid fertilizer. Follow the instructions on the fertilizer label.
3. Weeding: Keep the area around your green onions free of weeds. Weeds compete with the onions for nutrients and water.
4. Pest Control: Green onions are relatively pest-resistant, but keep an eye out for common garden pests like aphids. If you spot any pests, treat them with an appropriate insecticide or organic pest control method.
Phase 5: Harvesting Your Green Onions
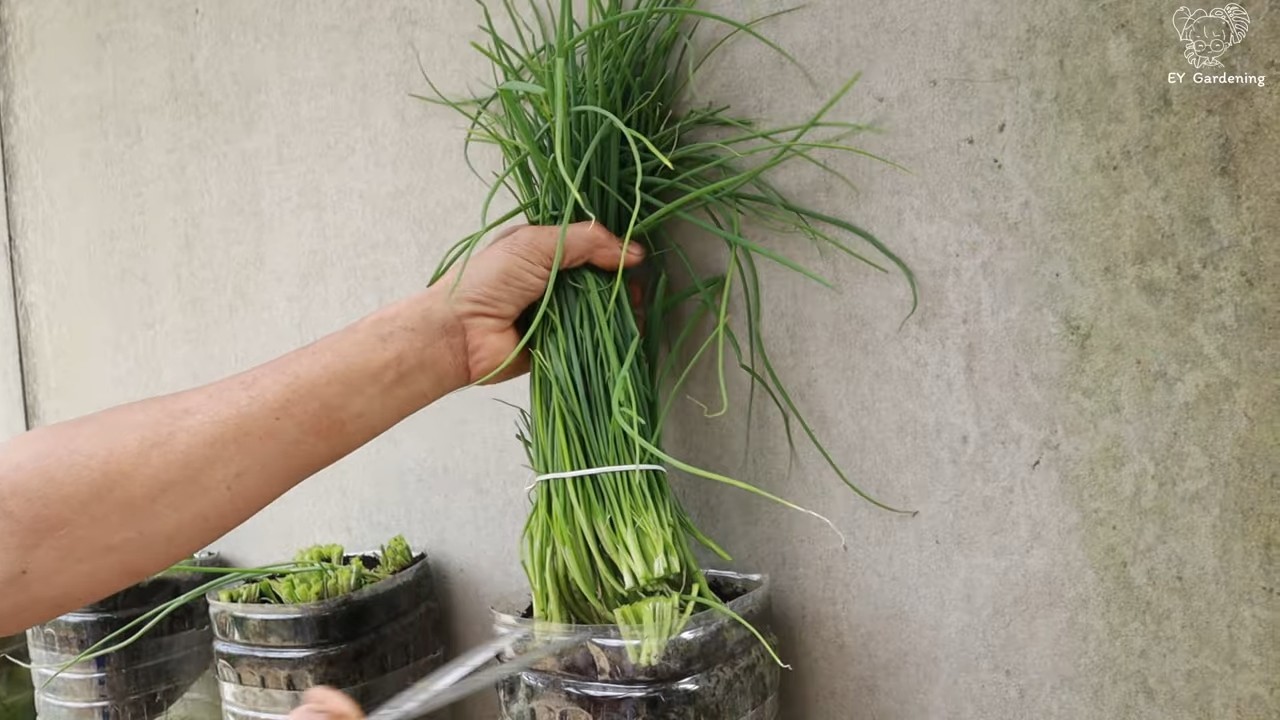
The best part! You can start harvesting your green onions as soon as they are large enough to use, usually about 60-80 days after planting.
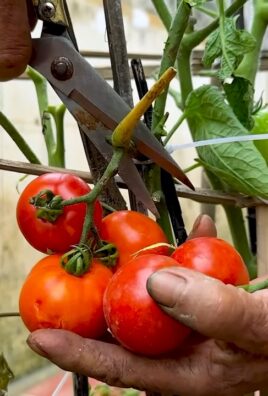
1. Harvesting Method: The easiest way to harvest green onions is to simply snip off the tops with scissors or a knife. Leave about 1-2 inches of the plant above the ground, and it will regrow.
2. Continuous Harvest: You can harvest green onions continuously throughout the growing season. Just keep snipping off the tops as needed.
3. Bulbing Onions: If you want to grow larger, bulbing onions, let some of your green onions mature without harvesting them. They will eventually form bulbs at the base of the plant.
Troubleshooting
Even with the best care, you might encounter a few challenges along the way. Here are some common problems and how to fix them:
* Leggy Seedlings: This means your seedlings aren’t getting enough light. Provide them with more light, either by moving them to a sunnier location or using grow lights.
* Yellowing Leaves: This could be a sign of overwatering, underwatering, or nutrient deficiency. Check the soil moisture and adjust your watering accordingly. If the soil is dry, water more frequently. If the soil is soggy, water less frequently. You can also try fertilizing with a balanced fertilizer.
* Slow Growth: This could be due to poor soil, lack of sunlight, or cool temperatures. Amend the soil with compost or other organic matter. Make sure your onions are getting enough sunlight. If the temperatures are cool, consider using a cold frame or row covers to protect them.
* Pests: Keep an eye out for common garden pests like aphids, onion maggots, and thrips. Treat them with an appropriate insecticide or organic pest control method.
Enjoy Your Homegrown Green Onions!
And there you have it! You’ve successfully grown green onions from seed. Now you can enjoy the delicious flavor of fresh, homegrown green onions in all your favorite dishes. Add them to salads, soups, stir-fries, dips, and more. The possibilities are endless! Happy gardening!
Conclusion
So, there you have it! Transforming kitchen scraps into a thriving supply of fresh green onions is not just a clever trick; it’s a game-changer for home cooks and gardening enthusiasts alike. This simple, sustainable method allows you to enjoy the vibrant flavor of green onions whenever you need them, without constantly running to the grocery store. It’s a cost-effective, eco-friendly way to reduce food waste and add a touch of green to your kitchen.
Why is this DIY trick a must-try? Because it’s incredibly easy, requires minimal effort, and yields impressive results. Imagine the satisfaction of snipping fresh green onions from your windowsill to garnish your favorite dishes. Think of the money you’ll save by reducing your grocery bills. Consider the positive impact you’ll have on the environment by reducing food waste. All of these benefits make this DIY green onion growing method an absolute winner.
But the fun doesn’t stop there! Feel free to experiment with different varieties of green onions. Try using different containers, from repurposed jars to dedicated planters. You can even explore different growing mediums, such as hydroponics, for a more advanced approach. Consider adding a diluted liquid fertilizer every few weeks to boost growth and ensure a continuous harvest.
Don’t be afraid to get creative and personalize your green onion growing experience. You can even try planting the regrown green onions in your garden for a more permanent and abundant supply. This will allow the bulbs to mature and produce even more flavorful green onions.
We wholeheartedly encourage you to try this DIY green onion growing trick. It’s a rewarding experience that will transform the way you think about food waste and home gardening. Once you’ve given it a try, we’d love to hear about your experience! Share your photos, tips, and variations in the comments below. Let’s create a community of green onion growers and inspire others to embrace this simple, sustainable practice. Let us know if you have any questions about growing green onions from seed.
Frequently Asked Questions (FAQ)
How long does it take to regrow green onions?
Typically, you’ll start to see new growth within a few days of placing the green onion base in water. Within a week or two, you’ll have a noticeable amount of fresh green shoots ready to harvest. The speed of growth can depend on factors like temperature, sunlight, and the initial health of the green onion base.
What part of the green onion do I need to regrow it?
You need the white part of the green onion, including the roots (if any are still attached). Cut off the green tops, leaving about 2 inches of the white base intact. This base contains the dormant buds that will sprout into new green shoots.
Can I regrow green onions in soil instead of water?
Yes, you can! While water is a great way to initiate regrowth, planting the green onion base directly in soil can lead to even more robust growth. Choose a well-draining potting mix and plant the base about an inch deep, ensuring the roots are covered. Water regularly, keeping the soil moist but not waterlogged.
How often should I change the water when regrowing in water?
It’s best to change the water every 1-2 days to prevent bacterial growth and keep the water fresh. This will help ensure the green onion base stays healthy and promotes optimal growth.
How much sunlight do regrowing green onions need?
Green onions thrive in bright, indirect sunlight. Place your container near a sunny window, such as a south-facing or east-facing window. If you don’t have access to enough natural light, you can supplement with a grow light.
Can I use any type of container to regrow green onions?
Yes, you can use a variety of containers, such as glasses, jars, small bowls, or even dedicated planters. Just make sure the container is clean and can hold water or soil. If using a container without drainage holes, be careful not to overwater.
How do I harvest the regrown green onions?
Simply snip off the green shoots with scissors when they reach your desired length. Leave about an inch of the green shoots intact to allow for continued growth. You can harvest multiple times from the same base.
Can I regrow green onions indefinitely?
While you can regrow green onions multiple times from the same base, the regrowth will eventually slow down and become less vigorous. After a few cycles, it’s best to start with a fresh green onion base for optimal results.
What if my green onions start to turn yellow or brown?
Yellowing or browning can indicate a few things. It could be due to overwatering, underwatering, lack of sunlight, or nutrient deficiency. Adjust your watering schedule, ensure the green onions are getting enough sunlight, and consider adding a diluted liquid fertilizer. If the base is rotting, it’s best to discard it and start with a fresh one.
Can I grow different varieties of green onions using this method?
Yes, you can! There are several varieties of green onions, each with its own unique flavor and characteristics. Experiment with different varieties to find your favorites.
Is it better to grow green onions from seed or regrow them from scraps?
Growing green onions from seed allows you to start with a wider variety of options and potentially produce larger, more robust plants. However, regrowing from scraps is a faster, easier, and more sustainable method for getting a continuous supply of green onions. Both methods have their advantages, so choose the one that best suits your needs and preferences.
What kind of fertilizer should I use for regrowing green onions?
A diluted liquid fertilizer, such as a balanced 10-10-10 fertilizer, is a good option for regrowing green onions. Follow the instructions on the fertilizer package and dilute it to half strength to avoid burning the roots. Fertilize every few weeks to promote healthy growth.
Can I plant the regrown green onions in my garden?
Yes, you can definitely plant the regrown green onions in your garden! Once the roots have developed well in water, you can transplant them into a sunny spot with well-draining soil. This will allow the bulbs to mature and produce even more flavorful green onions.
Are there any pests or diseases that affect regrowing green onions?
Green onions are generally resistant to pests and diseases, but they can occasionally be affected by aphids or fungal infections. If you notice any pests, you can try washing them off with water or using an insecticidal soap. To prevent fungal infections, ensure good air circulation and avoid overwatering.
How do I know when to harvest my regrown green onions?
You can harvest your regrown green onions whenever they reach your desired length. Simply snip off the green shoots with scissors, leaving about an inch of the green shoots intact to allow for continued growth. The more you harvest, the more they will grow!
Leave a Comment