

Aluminum Foil Hacks: Unleash the surprising power of this kitchen staple! I bet you’ve never imagined aluminum foil could be your secret weapon for a thriving garden. Forget expensive gadgets and complicated solutions; we’re diving into the world of DIY gardening with a roll of foil and a sprinkle of ingenuity.
For generations, gardeners have relied on resourcefulness and clever tricks to nurture their plants. While aluminum foil might not have been a tool our grandparents used in their victory gardens, the spirit of making do with what you have certainly resonates. Think of it as a modern twist on time-tested techniques!
Why do you need these aluminum foil hacks? Pests munching on your precious veggies? Sunlight scorching your delicate seedlings? Weeds stealing all the nutrients? I’ve been there, and it’s incredibly frustrating! These simple, cost-effective solutions will help you protect your plants, boost their growth, and finally enjoy the bountiful harvest you deserve. Get ready to transform your garden with these easy and effective tips!
Unlock the Magic: Amazing Aluminum Foil Hacks You Need to Know!
Hey there, fellow DIY enthusiasts! I’m so excited to share some seriously game-changing aluminum foil hacks with you. Forget just using it for leftovers – this versatile kitchen staple can do so much more! I’ve compiled a list of my favorite and most practical uses, complete with easy-to-follow instructions. Get ready to be amazed!
Sharpening Scissors with Aluminum Foil
Dull scissors driving you crazy? Don’t rush out to buy a new pair just yet! Aluminum foil can bring them back to life. This is one of my go-to tricks when my craft scissors start to feel a little sluggish.
What you’ll need:
* A pair of dull scissors
* A sheet of aluminum foil
Step-by-step instructions:
1. Prepare the Foil: Fold a sheet of aluminum foil several times to create a thicker pad. I usually aim for about 6-8 layers. The more layers, the better the sharpening effect.
2. Cut, Cut, Cut!: Take your dull scissors and start cutting through the folded aluminum foil. Make several long cuts, using the entire length of the blades. I usually do about 10-15 cuts.
3. Test the Sharpness: After cutting the foil, test your scissors on a piece of paper or fabric. You should notice a significant improvement in their sharpness. If they’re still not sharp enough, repeat the process with a fresh piece of foil.
4. Clean the Blades: Sometimes, tiny bits of aluminum can stick to the blades. Wipe them clean with a soft cloth to ensure smooth cutting.
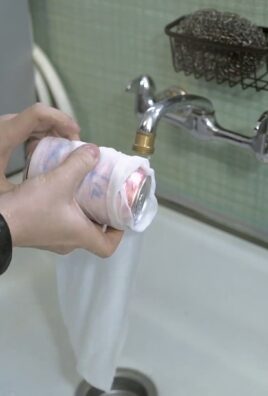
Cleaning Silverware with Aluminum Foil
Tarnished silverware can look dull and unappealing. But don’t worry, you don’t need harsh chemicals to restore its shine! This aluminum foil trick is a natural and effective way to remove tarnish.
What you’ll need:
* A glass or plastic bowl
* Aluminum foil
* 1 cup of boiling water
* 1 tablespoon of baking soda
* 1 tablespoon of salt
* Tarnished silverware
Step-by-step instructions:
1. Line the Bowl: Line the bottom of your bowl with a sheet of aluminum foil, shiny side up. Make sure the foil covers the entire bottom surface.
2. Prepare the Solution: Pour the boiling water into the bowl. Carefully add the baking soda and salt. The mixture will fizz, so be cautious.
3. Submerge the Silverware: Place your tarnished silverware in the bowl, making sure each piece is touching the aluminum foil. This is crucial for the chemical reaction to work.
4. Let it Soak: Let the silverware soak in the solution for 5-10 minutes, depending on the severity of the tarnish. You should see the tarnish transferring from the silverware to the foil.
5. Remove and Rinse: Carefully remove the silverware from the bowl using tongs or gloves (the water will still be hot). Rinse each piece thoroughly with warm water.
6. Dry and Polish: Dry the silverware with a soft cloth. If any stubborn tarnish remains, you can gently polish it with a silver polishing cloth.
Boosting Wi-Fi Signal with Aluminum Foil
Weak Wi-Fi signal getting you down? While it’s not a miracle cure, strategically using aluminum foil can help boost your signal strength in certain areas of your home. This is a fun experiment, and I’ve definitely noticed a difference in my own setup.
What you’ll need:
* Aluminum foil
* Cardboard (optional, for structure)
* Scissors
* Tape or glue
Step-by-step instructions:
1. Create a Reflector: Cut a piece of cardboard into a curved or parabolic shape. This will act as the base for your reflector. If you don’t have cardboard, you can simply shape the aluminum foil itself, but it will be less sturdy.
2. Cover with Foil: Cover the curved side of the cardboard (or the shaped aluminum foil) with aluminum foil, shiny side facing inward. Secure the foil with tape or glue. Make sure the foil is as smooth as possible for optimal reflection.
3. Position the Reflector: Place the reflector behind your Wi-Fi router, with the curved side facing the direction where you want to boost the signal. Experiment with different angles and positions to find the sweet spot.
4. Test the Signal: Use a Wi-Fi analyzer app on your phone or computer to measure the signal strength in different areas of your home. Adjust the position of the reflector until you achieve the best possible signal boost.
Important Note: This hack works by reflecting the Wi-Fi signal in a specific direction. It won’t magically create a stronger signal overall, but it can help focus the existing signal where you need it most.
Cleaning a Grill with Aluminum Foil
Cleaning a grill can be a messy and tedious task. But aluminum foil can make it much easier! This is my go-to method for quickly cleaning my grill grates after each use.
What you’ll need:
* Aluminum foil
* Grill brush (optional)
* Tongs or grill gloves
Step-by-step instructions:
1. Heat the Grill: After cooking, leave the grill on high heat for a few minutes to burn off any remaining food particles.
2. Crumple the Foil: Crumple a large sheet of aluminum foil into a ball. Make sure it’s tightly packed.
3. Scrub the Grates: Using tongs or grill gloves to protect your hands, scrub the grill grates with the crumpled aluminum foil ball. The foil will act as an abrasive cleaner, removing grease and debris. You can also use a grill brush in conjunction with the foil for extra cleaning power.
4. Dispose of the Foil: Once the grates are clean, dispose of the used aluminum foil ball.
Making a Makeshift Piping Bag with Aluminum Foil
Need to decorate a cake or cupcakes but don’t have a piping bag? No problem! Aluminum foil can come to the rescue.
What you’ll need:
* Aluminum foil
* Scissors
* Tape (optional)
Step-by-step instructions:
1. Create a Cone: Cut a square of aluminum foil. Roll it into a cone shape, making sure the point of the cone is tightly sealed.
2. Secure the Cone: Fold over the top edges of the cone to secure it and prevent it from unraveling. You can also use tape to reinforce the seams.
3. Fill the Bag: Spoon your frosting or icing into the aluminum foil cone, filling it about two-thirds full.
4. Close the Bag: Fold over the top of the cone to seal it tightly.
5. Cut the Tip: Use scissors to cut a small hole at the tip of the cone. The size of the hole will determine the thickness of the icing you pipe.
6. Start Piping: Gently squeeze the aluminum foil bag to pipe your frosting or icing onto your cake or cupcakes.
Protecting Pie Crusts from Burning with Aluminum Foil
Nobody likes a burnt pie crust! Aluminum foil can help prevent the edges of your pie crust from browning too quickly.
What you’ll need:
* Aluminum foil
* Scissors
Step-by-step instructions:
1. Cut Strips of Foil: Cut several strips of aluminum foil that are wide enough to cover the edges of your pie crust.
2. Cover the Edges: Carefully place the strips of aluminum foil around the edges of your pie crust, covering the areas that are browning too quickly. You can crimp the foil to secure it in place.
3. Bake as Usual: Bake your pie according to the recipe instructions. Remove the foil during the last 15-20 minutes of baking to allow the crust to brown evenly.
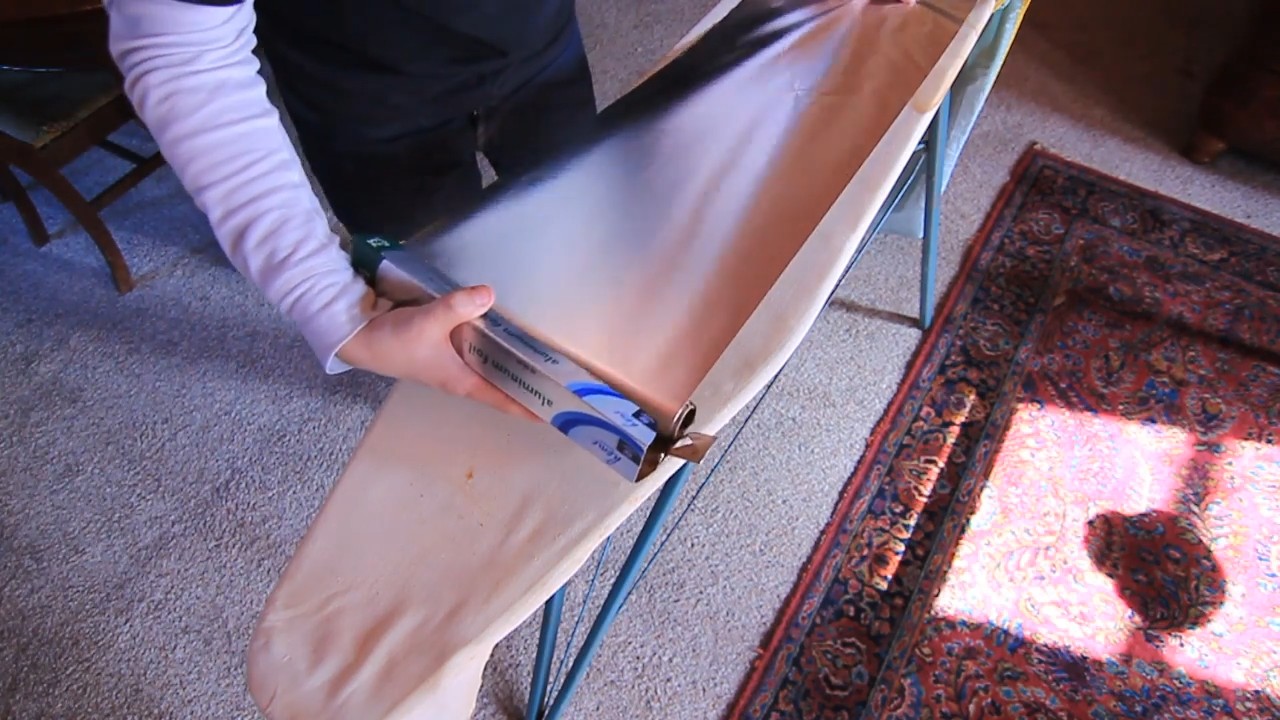
Cleaning Iron with Aluminum Foil
Is your iron leaving marks on your clothes? A quick clean with aluminum foil can help remove residue and restore its smooth surface.
What you’ll need:
* Aluminum foil
* Iron
* Clean cloth
Step-by-step instructions:
1. Prepare the Foil: Lay a sheet of aluminum foil on your ironing board.
2. Sprinkle with Salt: Sprinkle a generous amount of salt onto the aluminum foil.
3. Iron the Foil: Turn your iron to the highest setting (without steam) and iron the salt-covered foil for a few minutes. The salt will help to loosen and remove any residue from the iron’s soleplate.
4. Clean the Soleplate: Unplug the iron and let it cool slightly. Use a clean cloth to wipe away any remaining salt and residue from the soleplate.
Making Static Cling Decorations with Aluminum Foil
This is a fun and easy craft project that’
Conclusion
So, there you have it! These aluminum foil hacks aren’t just clever tricks; they’re game-changers that can simplify your life, save you money, and even elevate your cooking game. From sharpening dull scissors to creating a makeshift funnel, the versatility of this everyday household item is truly astounding. We’ve explored how aluminum foil can transform your cleaning routine, enhance your grilling experience, and even help you iron clothes more efficiently.
But the real magic lies in the simplicity and accessibility of these hacks. You likely already have a roll of aluminum foil tucked away in your kitchen drawer, making these solutions readily available whenever you need them. No need for expensive gadgets or complicated procedures – just a little bit of ingenuity and a sheet of foil can make a world of difference.
Consider these variations to further personalize your experience. For example, when using aluminum foil to clean your grill grates, try adding a bit of baking soda to the foil ball for extra scrubbing power. If you’re using foil to iron clothes, place a sheet of foil under the ironing board cover to reflect heat and speed up the process. And for those struggling with static cling, a crumpled ball of aluminum foil tossed into the dryer can work wonders.
The possibilities are truly endless, and we encourage you to experiment and discover even more innovative ways to utilize this incredible material. We’ve shown you how to make the most of your aluminum foil, now it’s your turn to get creative!
Don’t just take our word for it – try these aluminum foil hacks for yourself! We’re confident that you’ll be amazed by the results. And more importantly, we want to hear about your experiences. Share your successes, your failures, and any new hacks you discover in the comments below. Let’s build a community of aluminum foil enthusiasts and unlock the full potential of this remarkable resource together. Your insights could inspire others and help us all live a little bit easier, one sheet of foil at a time. So go ahead, grab that roll of aluminum foil and prepare to be amazed!
Frequently Asked Questions (FAQs)
Is it safe to use aluminum foil in the oven?
Yes, it is generally safe to use aluminum foil in the oven. However, there are a few precautions to keep in mind. Avoid placing aluminum foil directly on the bottom of the oven, as this can interfere with heat distribution and potentially damage the oven’s heating element. Also, be careful when using aluminum foil with acidic foods like tomatoes or citrus fruits, as the acid can react with the aluminum and potentially leach small amounts of aluminum into the food. While the amount of aluminum absorbed is typically minimal and not considered harmful, it’s best to avoid prolonged contact with highly acidic foods. When in doubt, use parchment paper as an alternative.
Can I reuse aluminum foil?
Whether or not you can reuse aluminum foil depends on how it was used and its condition. If the foil was used to line a baking sheet and is relatively clean, you can certainly reuse it. However, if the foil is heavily soiled, greasy, or has been used to cook acidic foods, it’s best to discard it. Reusing heavily soiled foil can pose a hygiene risk, and foil that has been in contact with acidic foods may have degraded and become less effective. Also, repeated use can weaken the foil, making it more prone to tearing.
Does aluminum foil have a shiny side and a dull side, and does it matter which side I use?
Yes, aluminum foil does have a shiny side and a dull side. The difference in appearance is a result of the manufacturing process. During production, the foil is rolled in layers. The side that comes into contact with the polished rollers becomes shiny, while the other side remains dull. While there’s a common belief that the shiny side reflects more heat, the difference in reflectivity is actually negligible. In most cooking applications, it doesn’t matter which side you use. However, some manufacturers recommend using the shiny side when wrapping food for storage, as it may provide a slightly better barrier against moisture and air.
How can I prevent aluminum foil from sticking to food?
Preventing aluminum foil from sticking to food is a common concern, especially when baking or grilling. To minimize sticking, try these tips:
* Grease the foil: Lightly coat the foil with cooking spray or oil before placing food on it.
* Use parchment paper: Place a sheet of parchment paper between the foil and the food.
* Avoid acidic foods: As mentioned earlier, acidic foods can react with aluminum foil and increase the likelihood of sticking.
* Use non-stick foil: Consider purchasing non-stick aluminum foil, which is specifically designed to prevent food from sticking.
Is it safe to microwave aluminum foil?
No, it is generally not safe to microwave aluminum foil. Microwaves work by emitting electromagnetic radiation that causes water molecules in food to vibrate and generate heat. Aluminum foil is a metal and reflects microwaves, which can cause arcing, sparks, and even fires inside the microwave. While small amounts of foil may be used safely in some microwave ovens under very specific circumstances (check your microwave’s manual), it’s best to avoid microwaving aluminum foil altogether to prevent damage to your appliance and potential safety hazards.
How can I sharpen scissors with aluminum foil?
Sharpening scissors with aluminum foil is a simple and effective trick. Simply fold a sheet of aluminum foil several times to create a thick pad. Then, use the scissors to cut through the foil multiple times, using long, smooth strokes. The friction between the foil and the scissor blades will help to hone the edges and restore their sharpness. Repeat the process as needed until the scissors are sharpened to your desired level.
Can aluminum foil really help with static cling in the dryer?
Yes, a crumpled ball of aluminum foil can help reduce static cling in the dryer. The aluminum foil acts as a conductor, helping to discharge the static electricity that builds up during the drying process. Simply crumple a sheet of aluminum foil into a ball (about the size of a tennis ball) and toss it into the dryer with your clothes. The foil ball can be reused for several loads before it needs to be replaced.
What are some other uses for aluminum foil that weren’t mentioned in the article?
Aluminum foil has a wide range of uses beyond those mentioned in the article. Here are a few more examples:
* Polishing silver: Line a bowl with aluminum foil, fill it with hot water, and add a tablespoon of baking soda. Submerge your silver items in the solution and let them soak for a few minutes. The tarnish will transfer to the foil, leaving your silver sparkling clean.
* Protecting pie crusts: To prevent pie crusts from burning, cover the edges with strips of aluminum foil during the last part of baking.
* Cleaning cast iron skillets: Use a crumpled ball of aluminum foil to scrub your cast iron skillet clean. The foil is abrasive enough to remove food residue without damaging the seasoning.
* Amplifying Wi-Fi signal: While not a guaranteed solution, some people have reported success in boosting their Wi-Fi signal by creating a parabolic reflector out of aluminum foil and placing it behind their router’s antenna.
* Gardening: Place strips of aluminum foil around your plants to deter pests and reflect sunlight, promoting growth.
How do I properly dispose of aluminum foil?
The best way to dispose of aluminum foil depends on your local recycling guidelines. In many areas, clean aluminum foil can be recycled. However, heavily soiled foil or foil that has been in contact with food waste may not be accepted. Check with your local recycling program to determine the specific requirements in your area. If recycling is not an option, dispose of the aluminum foil in your regular trash.
Leave a Comment