

Bean plant bloom boost – that’s what every gardener dreams of, right? Imagine your bean plants, bursting with vibrant blossoms, promising a bountiful harvest of fresh, delicious beans. But sometimes, those blooms are shy, and the bean production is… well, less than impressive. Don’t worry, I’ve been there!
For centuries, gardeners have sought ways to coax their bean plants into prolific blooming. From ancient agricultural practices to modern organic methods, the quest for the perfect bean harvest is a timeless tradition. Think about it – beans have sustained civilizations for generations! They’re a staple crop, and maximizing their yield is crucial, especially for home gardeners like us who rely on our gardens for fresh, healthy food.
That’s why I’m so excited to share these simple, yet effective, DIY tricks to give your bean plant bloom boost it needs! We’ll dive into easy-to-implement hacks that will encourage more flowers, leading to a bigger and better bean harvest. These aren’t complicated, expensive solutions – just clever ways to work with nature and give your plants a little extra love. So, get ready to transform your bean patch into a blooming paradise!
Bohnenpflanzen zum Blühen bringen: Mein ultimativer DIY-Booster-Guide
Ich liebe es, Bohnen anzubauen! Es gibt nichts Besseres als frische, knackige Bohnen direkt aus dem eigenen Garten. Aber manchmal, trotz aller Bemühungen, wollen meine Bohnenpflanzen einfach nicht so richtig blühen. Und ohne Blüten, keine Bohnen! Deshalb habe ich recherchiert, experimentiert und schließlich einen DIY-Booster entwickelt, der meine Bohnenpflanzen regelrecht zum Explodieren bringt. Hier teile ich mein Geheimnis mit dir!
Was du brauchst:
* Epsom Salz (Bittersalz): Das ist Magnesiumsulfat, ein echter Gamechanger für Pflanzen. Magnesium ist essentiell für die Photosynthese und hilft den Pflanzen, Nährstoffe besser aufzunehmen.
* Knochenmehl: Eine fantastische Phosphorquelle. Phosphor ist entscheidend für die Blütenbildung und die Wurzelentwicklung.
* Holzasche (optional, aber sehr empfehlenswert): Holzasche enthält Kalium, ein weiterer wichtiger Nährstoff für die Blütenbildung und die allgemeine Pflanzengesundheit. Achte darauf, dass die Asche von unbehandeltem Holz stammt!
* Wasser: Klares, sauberes Wasser ist natürlich unerlässlich.
* Sprühflasche: Für die Blattspritzung.
* Gießkanne: Für die Bodendüngung.
* Messlöffel oder Waage: Für genaue Dosierungen.
* Handschuhe: Zum Schutz deiner Hände.
* Eimer oder Behälter: Zum Mischen der Lösung.
Warum diese Zutaten?
Bevor wir loslegen, lass mich kurz erklären, warum genau diese Zutaten so wirkungsvoll sind:
* Epsom Salz: Bohnenpflanzen können unter Magnesiummangel leiden, was sich in gelben Blättern und verminderter Blütenbildung äußert. Epsom Salz behebt diesen Mangel schnell und effektiv.
* Knochenmehl: Phosphor ist der Schlüssel zur Blütenbildung. Knochenmehl gibt den Phosphor langsam frei und sorgt so für eine langfristige Versorgung.
* Holzasche: Kalium stärkt die Pflanzen und macht sie widerstandsfähiger gegen Krankheiten. Außerdem fördert es die Blütenbildung und die Fruchtentwicklung.
Schritt-für-Schritt-Anleitung: Mein DIY-Bohnenblüten-Booster
Hier ist die detaillierte Anleitung, wie du meinen magischen Bohnenblüten-Booster zubereitest und anwendest:
1. Vorbereitung der Zutaten
* Epsom Salz abwiegen: Du benötigst etwa 1 Esslöffel Epsom Salz pro Liter Wasser.
* Knochenmehl abwiegen: Hier reichen 1/2 Teelöffel Knochenmehl pro Liter Wasser.
* Holzasche vorbereiten (optional): Wenn du Holzasche verwendest, siebe sie, um grobe Stücke zu entfernen. Du benötigst nur eine Prise pro Liter Wasser.
2. Mischen der Lösung
* Wasser vorbereiten: Fülle einen Eimer oder Behälter mit der gewünschten Menge Wasser. Ich verwende meistens 5 Liter, da ich mehrere Bohnenpflanzen habe.
* Epsom Salz hinzufügen: Gib das abgewogene Epsom Salz in das Wasser und rühre gut um, bis es sich vollständig aufgelöst hat.
* Knochenmehl hinzufügen: Füge das Knochenmehl hinzu und rühre erneut gründlich um. Das Knochenmehl löst sich nicht vollständig auf, aber das ist kein Problem.
* Holzasche hinzufügen (optional): Wenn du Holzasche verwendest, gib eine Prise hinzu und rühre nochmals um.
3. Anwendung des Boosters
Ich wende den Booster auf zwei Arten an: als Blattspray und als Bodendüngung. Beide Methoden haben ihre Vorteile und ergänzen sich gut.
3.1 Blattspritzung
Die Blattspritzung ist eine schnelle und effektive Methode, um die Nährstoffe direkt an die Blätter der Pflanze zu bringen.
* Lösung in Sprühflasche füllen: Fülle einen Teil der vorbereiteten Lösung in eine Sprühflasche.
* Pflanzen besprühen: Besprühe die Blätter deiner Bohnenpflanzen gründlich, sowohl die Ober- als auch die Unterseite. Achte darauf, dass du nicht in der prallen Sonne sprühst, da dies zu Verbrennungen führen kann. Am besten sprühst du am frühen Morgen oder am späten Nachmittag.
* Häufigkeit: Ich sprühe meine Bohnenpflanzen alle 1-2 Wochen mit dem Booster.
3.2 Bodendüngung
Die Bodendüngung versorgt die Wurzeln der Pflanze mit den notwendigen Nährstoffen und sorgt für eine langfristige Wirkung.
* Pflanzen gießen: Gieße deine Bohnenpflanzen mit der restlichen Lösung. Achte darauf, dass der Boden gut durchfeuchtet ist.
* Dosierung: Ich gieße jede Pflanze mit etwa 500 ml der Lösung, je nach Größe der Pflanze.
* Häufigkeit: Ich dünge meine Bohnenpflanzen alle 2-3 Wochen mit dem Booster.
4. Beobachtung und Anpassung
Nach der Anwendung des Boosters ist es wichtig, deine Bohnenpflanzen genau zu beobachten. Achte auf Veränderungen im Wachstum, der Blattfarbe und der Blütenbildung.
* Blattfarbe: Wenn die Blätter gelb werden, kann dies ein Zeichen für Magnesiummangel sein. In diesem Fall kannst du die Blattspritzung mit Epsom Salz verstärken.
* Blütenbildung: Wenn die Blütenbildung nicht einsetzt oder nur langsam voranschreitet, kannst du die Bodendüngung mit Knochenmehl verstärken.
* Allgemeine Gesundheit: Wenn die Pflanzen schwach oder krank wirken, solltest du die Dosierung reduzieren und die Pflanzen genauer untersuchen.
Zusätzliche Tipps für eine reiche Bohnenernte
Neben meinem DIY-Booster gibt es noch ein paar andere Dinge, die du tun kannst, um eine reiche Bohnenernte zu erzielen:
* Sonnenschein: Bohnenpflanzen brauchen viel Sonne, mindestens 6 Stunden pro Tag.
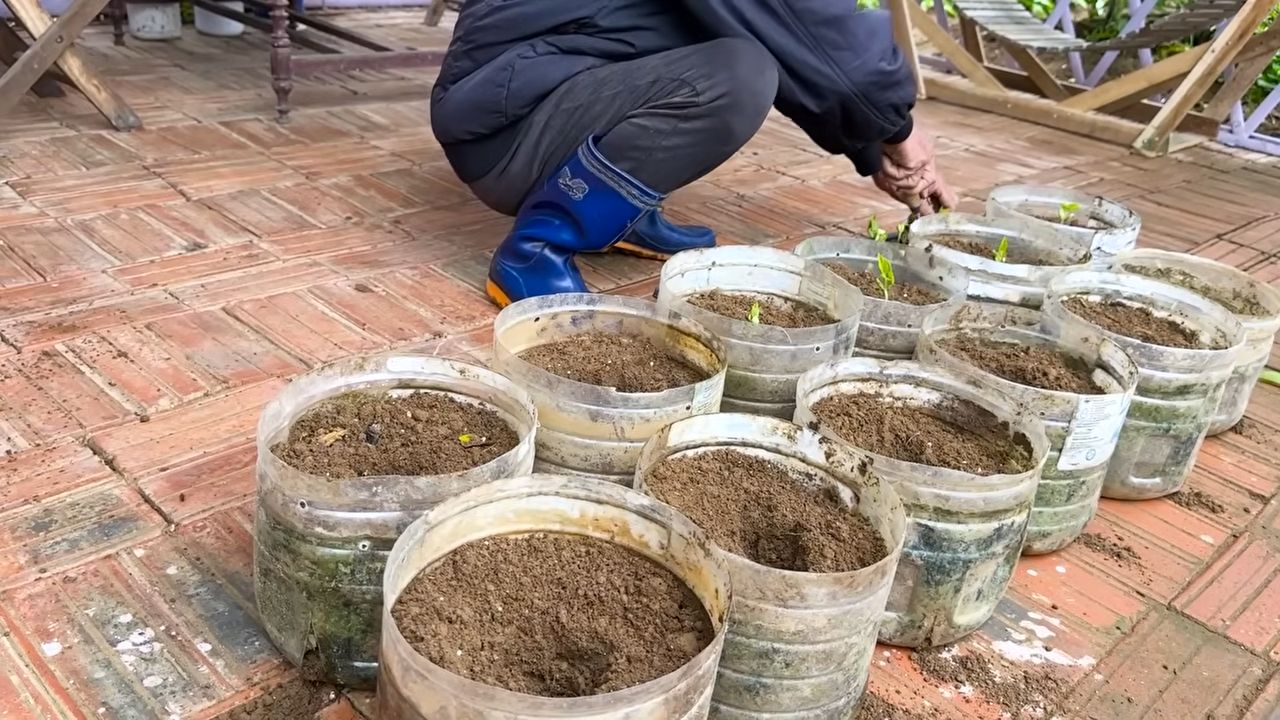
* Guter Boden: Bohnenpflanzen bevorzugen einen gut durchlässigen Boden, der reich an organischen Stoffen ist.
* Regelmäßiges Gießen: Bohnenpflanzen brauchen regelmäßige Bewässerung, besonders während der Blütezeit und der Fruchtbildung.
* Rankhilfe: Viele Bohnensorten sind Kletterpflanzen und benötigen eine Rankhilfe.
* Schutz vor Schädlingen: Achte auf Schädlinge wie Blattläuse und Schnecken und bekämpfe sie bei Bedarf.
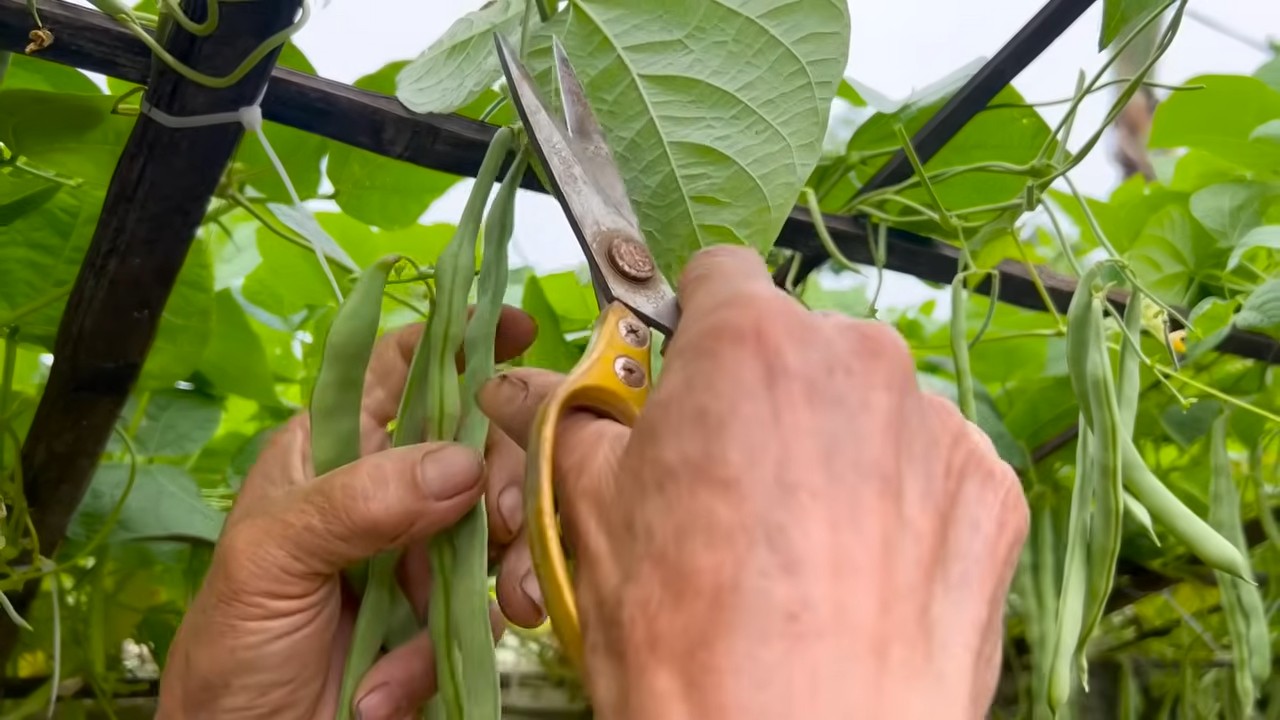
* Regelmäßiges Ernten: Ernte die Bohnen regelmäßig, um die Pflanze zur weiteren Blütenbildung anzuregen.
Häufige Fehler vermeiden
Hier sind ein paar häufige Fehler, die du bei der Anwendung meines DIY-Boosters vermeiden solltest:
* Überdosierung: Eine zu hohe Dosierung kann die Pflanzen schädigen. Halte dich an die empfohlenen Mengen.
* Anwendung in der prallen Sonne: Das Besprühen der Blätter in der prallen Sonne kann zu Verbrennungen führen.
* Verwendung von unbehandelter Holzasche: Verwende nur Holzasche von unbehandeltem Holz. Asche von behandeltem Holz kann schädliche Chemikalien enthalten.
* Ignorieren der Pflanzen: Beobachte deine Pflanzen regelmäßig und passe die Düngung bei Bedarf an.
Mein Fazit
Mit meinem DIY-Bohnenblüten-Booster und den zusätzlichen Tipps kannst du deine Bohnenpflanzen zu Höchstleistungen anspornen und eine reiche Ernte erzielen. Es ist ein einfacher, kostengünstiger und effektiver Weg, um deine Bohnenpflanzen mit den notwendigen Nährstoffen zu versorgen und die Blütenbildung anzuregen. Probiere es aus und lass mich wissen, wie es funktioniert hat! Ich bin gespannt auf deine Ergebnisse! Viel Erfolg beim Gärtnern!
Conclusion
So, there you have it! This simple, yet incredibly effective DIY trick for a bean plant bloom boost is a game-changer for any gardener, whether you’re a seasoned pro or just starting out. We’ve walked you through the process, highlighting the benefits of using readily available ingredients to create a potent bloom booster that will have your bean plants bursting with blossoms and, ultimately, a bountiful harvest.
Why is this a must-try? Because it’s cost-effective, environmentally friendly, and, most importantly, it works! Forget expensive, store-bought fertilizers packed with synthetic chemicals. This homemade solution harnesses the power of natural ingredients to provide your bean plants with the specific nutrients they need to thrive and produce an abundance of flowers. You’ll be amazed at the difference it makes in the overall health and productivity of your plants.
But don’t just take our word for it! We encourage you to experiment and adapt this recipe to suit your specific needs and preferences. For example, if you’re growing organic beans, ensure all your ingredients are certified organic. You could also try adding a small amount of Epsom salts (magnesium sulfate) to the mixture, as magnesium is known to promote flowering. Another variation could involve using different types of compost tea, such as worm casting tea, which is rich in beneficial microbes and nutrients. Remember to always dilute the mixture appropriately to avoid burning your plants.
Consider the specific variety of bean you are growing. Some bean varieties are naturally heavier bloomers than others. This DIY bloom booster will help *all* varieties, but you might see a more dramatic difference with varieties that are known for their prolific flowering. Also, remember that proper watering and sunlight are crucial for healthy bean plant growth and flowering, regardless of any bloom booster you use. This DIY solution is a supplement, not a replacement, for good overall plant care.
We’re confident that this DIY bean plant bloom boost will become a staple in your gardening routine. It’s a simple, sustainable, and effective way to maximize your bean harvest and enjoy the satisfaction of growing your own food.
Now it’s your turn! Give this DIY trick a try and see the amazing results for yourself. We’re eager to hear about your experiences. Share your photos, tips, and variations in the comments below. Let’s build a community of gardeners who are passionate about growing healthy, productive bean plants using natural and sustainable methods. Happy gardening!
Frequently Asked Questions (FAQ)
What exactly does this DIY bloom booster do for my bean plants?
This DIY bloom booster provides your bean plants with a concentrated dose of essential nutrients, particularly phosphorus and potassium, which are crucial for flower development. Phosphorus promotes root growth and flower formation, while potassium enhances overall plant health and helps with nutrient uptake. By providing these nutrients in an easily accessible form, the bloom booster encourages your bean plants to produce more flowers, leading to a larger and more abundant harvest. It also strengthens the plant’s overall resilience, making it more resistant to diseases and pests.
How often should I apply this DIY bloom booster to my bean plants?
We recommend applying the bloom booster every 2-3 weeks during the flowering stage of your bean plants. Avoid over-fertilizing, as this can lead to nutrient imbalances and potentially harm your plants. Observe your plants closely for any signs of nutrient deficiencies or excesses, and adjust the frequency of application accordingly. If your plants are already thriving and producing plenty of flowers, you may not need to apply the bloom booster as frequently. Remember that less is often more when it comes to fertilizing.
Can I use this DIY bloom booster on other plants besides bean plants?
While this bloom booster is specifically formulated for bean plants, it can also be beneficial for other flowering plants that require phosphorus and potassium. However, it’s important to consider the specific nutrient needs of each plant species. Some plants may require different ratios of nutrients or have sensitivities to certain ingredients. Before applying this bloom booster to other plants, research their specific nutrient requirements and adjust the recipe accordingly. Always test the solution on a small area of the plant first to ensure it doesn’t cause any adverse reactions.
What if I don’t have all the ingredients listed in the recipe? Can I substitute anything?
While using all the recommended ingredients will provide the best results, you can make some substitutions if necessary. For example, if you don’t have bone meal, you can use rock phosphate as an alternative source of phosphorus. If you don’t have wood ash, you can use potassium sulfate, but be careful not to overdo it, as it can be quite potent. Compost tea is a key ingredient, but you can experiment with different types of compost tea, such as worm casting tea or composted manure tea. The most important thing is to ensure that you’re providing your plants with a balanced source of phosphorus and potassium.
My bean plants are not flowering, even after applying the bloom booster. What could be the problem?
There could be several reasons why your bean plants are not flowering, even after using the bloom booster. First, ensure that your plants are receiving adequate sunlight (at least 6-8 hours per day). Insufficient sunlight can inhibit flowering. Second, check the soil pH. Bean plants prefer a slightly acidic to neutral pH (around 6.0-7.0). If the soil pH is too high or too low, it can affect nutrient uptake. Third, make sure your plants are not stressed by pests, diseases, or waterlogged soil. Address any underlying issues that may be hindering their growth. Finally, remember that some bean varieties are naturally slower to flower than others. Be patient and continue to provide your plants with proper care, and they should eventually start to bloom.
Is this DIY bloom booster safe for pets and children?
While the ingredients in this DIY bloom booster are generally considered safe, it’s always best to exercise caution when using any gardening product around pets and children. Keep the mixture out of their reach and avoid applying it in areas where they frequently play. If your pets or children ingest the mixture, monitor them for any adverse reactions and consult a veterinarian or doctor if necessary. As a general rule, it’s always a good idea to wash your hands thoroughly after handling any gardening materials.
How should I store the leftover DIY bloom booster?
Store any leftover DIY bloom booster in a tightly sealed container in a cool, dark place. Avoid storing it in direct sunlight or extreme temperatures, as this can degrade the ingredients and reduce its effectiveness. Properly stored, the bloom booster should remain effective for several weeks. However, it’s best to use it as soon as possible for optimal results. If you notice any changes in color, odor, or consistency, it’s best to discard the mixture and make a fresh batch.
Can I use this bloom booster in hydroponic systems?
This DIY bloom booster is primarily designed for soil-based gardening. Using it in hydroponic systems may not be as effective, as hydroponic systems require a specific balance of nutrients in a readily available form. The ingredients in this bloom booster may not dissolve properly in water or provide the necessary nutrients in the correct ratios for hydroponic plants. If you’re growing beans hydroponically, it’s best to use a commercially available hydroponic nutrient solution specifically formulated for flowering plants.

Leave a Comment