

Bottle garden chilies: Imagine plucking fiery, fresh chilies right from your windowsill, even if you don’t have a sprawling garden! Sounds like a dream, right? Well, get ready to turn that dream into reality with this super fun and surprisingly easy DIY project. For centuries, resourceful gardeners have sought innovative ways to cultivate their favorite plants in limited spaces. From ancient hanging gardens to modern-day vertical farms, the desire to connect with nature and grow our own food has always been a part of us.
But why bottle garden chilies, you ask? Well, let’s face it, not everyone has the luxury of a large garden. Apartment living, busy schedules, or even just a lack of green space can make traditional gardening a challenge. That’s where this clever hack comes in! Growing chilies in bottles is not only a fantastic way to recycle and reduce waste, but it also allows you to control the growing environment, protect your plants from pests, and enjoy a bountiful harvest of spicy goodness, no matter where you live. Plus, it’s a super rewarding project that’s perfect for beginners and experienced gardeners alike. So, grab your empty bottles, some soil, and let’s get started on creating your very own miniature chili paradise!
DIY Bottle Garden: Growing Chilies Indoors
Hey there, fellow gardening enthusiasts! Ever dreamed of having fresh, spicy chilies right at your fingertips, even if you don’t have a sprawling garden? Well, I’m here to tell you it’s totally possible with a simple DIY bottle garden! This project is perfect for apartment dwellers, balcony gardeners, or anyone who wants a fun and sustainable way to grow their own food. Plus, it’s a great conversation starter!
This guide will walk you through creating your own self-watering chili garden using recycled plastic bottles. Get ready to spice up your life!
What You’ll Need
Before we dive in, let’s gather our supplies. Don’t worry, most of these are things you probably already have around the house!
* **Plastic Bottles:** Two clear plastic bottles of the same size (2-liter soda bottles work great). Make sure they’re clean and dry.
* **Chili Seeds:** Choose your favorite chili variety! I personally love jalapeños for their versatility.
* **Potting Mix:** A good quality potting mix is essential for healthy chili plants.
* **Wicking Material:** This will draw water up to the soil. Cotton rope, strips of old t-shirt, or felt work well.
* **Scissors or Utility Knife:** For cutting the plastic bottles. Be careful!
* **Awl or Nail:** To create drainage holes.
* **Water:** Of course!
* **Optional: Decorative Gravel or Pebbles:** To add a touch of style to your bottle garden.
* **Optional: Plant Food:** A balanced liquid fertilizer to give your chilies a boost.
Preparing the Bottles
This is where we transform those ordinary plastic bottles into our mini-garden containers.
1. **Cutting the Bottles:** Take one of your plastic bottles and carefully cut it in half. You’ll want to cut it about a third of the way down from the top, creating a shorter top section and a taller bottom section. I find using a utility knife to start the cut and then switching to scissors makes it easier.
2. **Creating the Wicking System:** Now, take the top section of the bottle (the one with the bottle neck). This will be our planting container. Thread your wicking material through the bottle neck, leaving a good length of wick dangling down. The length will depend on the height of the bottom section, but make sure it’s long enough to reach the bottom of the water reservoir. I usually aim for about 6-8 inches of wick extending below the bottle neck.
3. **Adding Drainage Holes:** Using your awl or nail, carefully poke a few small drainage holes in the bottom of the top section (the planting container). This will prevent the soil from becoming waterlogged. I usually make about 3-4 holes.
4. **Optional: Decorating the Bottles:** If you’re feeling creative, you can decorate your bottles with paint, markers, or even wrapping paper. Just make sure to avoid covering the clear part of the bottom section, as you’ll need to see the water level.
Planting Your Chili Seeds
Now for the fun part – planting our chili seeds!
1. **Filling the Planting Container:** Fill the top section of the bottle (the planting container) with potting mix, leaving about an inch of space at the top. Gently pat down the soil.
2. **Sowing the Seeds:** Sprinkle your chili seeds evenly over the surface of the soil. I usually plant 2-3 seeds per bottle to increase my chances of success.
3. **Covering the Seeds:** Lightly cover the seeds with a thin layer of potting mix.
4. **Watering the Soil:** Gently water the soil until it’s moist but not soggy. I use a spray bottle to avoid disturbing the seeds.
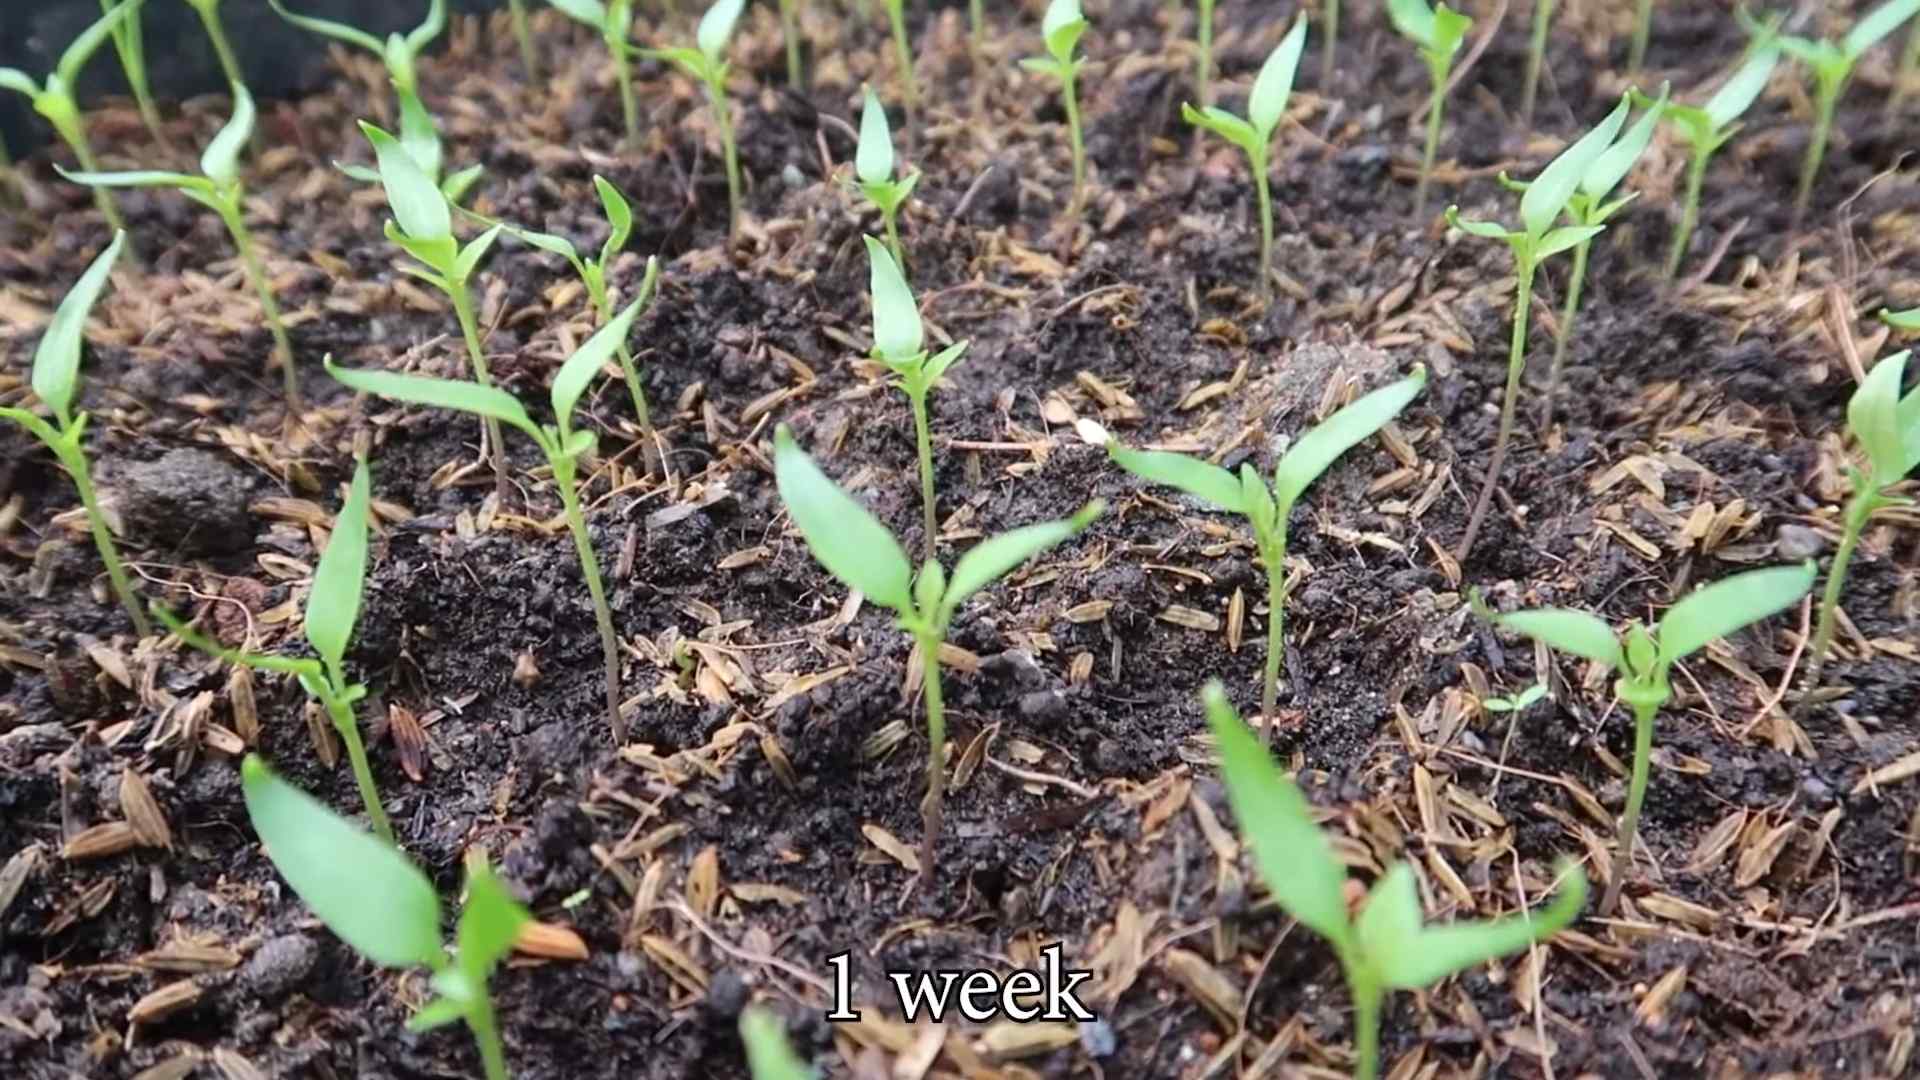
5. **Creating a Mini Greenhouse (Optional):** To help with germination, you can create a mini greenhouse by covering the top section of the bottle with a plastic bag or cling film. This will help to retain moisture and warmth. Just make sure to remove the cover once the seedlings emerge.
Assembling Your Bottle Garden
Almost there! Let’s put everything together.
1. **Placing the Planting Container:** Carefully place the top section of the bottle (the planting container) inside the bottom section. Make sure the wicking material is dangling down into the bottom section.
2. **Adding Water to the Reservoir:** Fill the bottom section of the bottle with water, making sure the wicking material is submerged. This will act as your water reservoir.
3. **Optional: Adding Decorative Gravel:** If you want to add a touch of style, you can add a layer of decorative gravel or pebbles to the top of the soil. This will also help to prevent the soil from drying out too quickly.
Caring for Your Chili Plants
Now that your bottle garden is complete, it’s time to care for your chili plants and watch them grow!
1. **Location:** Place your bottle garden in a sunny location that receives at least 6-8 hours of direct sunlight per day. A south-facing windowsill is ideal.
2. **Watering:** The beauty of this self-watering system is that you don’t have to water your plants as often. Simply check the water level in the bottom section of the bottle regularly and refill it when it gets low. The wicking material will draw water up to the soil as needed.
3. **Fertilizing:** To give your chili plants a boost, you can fertilize them every 2-3 weeks with a balanced liquid fertilizer. Follow the instructions on the fertilizer packaging.
4. **Pruning:** As your chili plants grow, you may need to prune them to encourage bushier growth and more fruit production. Simply pinch off the tips of the stems to encourage branching.
5. **Pest Control:** Keep an eye out for pests such as aphids or spider mites. If you spot any, you can treat them with insecticidal soap or neem oil.
6. **Pollination:** Chili plants are self-pollinating, but you can help them along by gently shaking the plants or using a small brush to transfer pollen from one flower to another. This is especially important if you’re growing your plants indoors, where there are no bees or other pollinators.
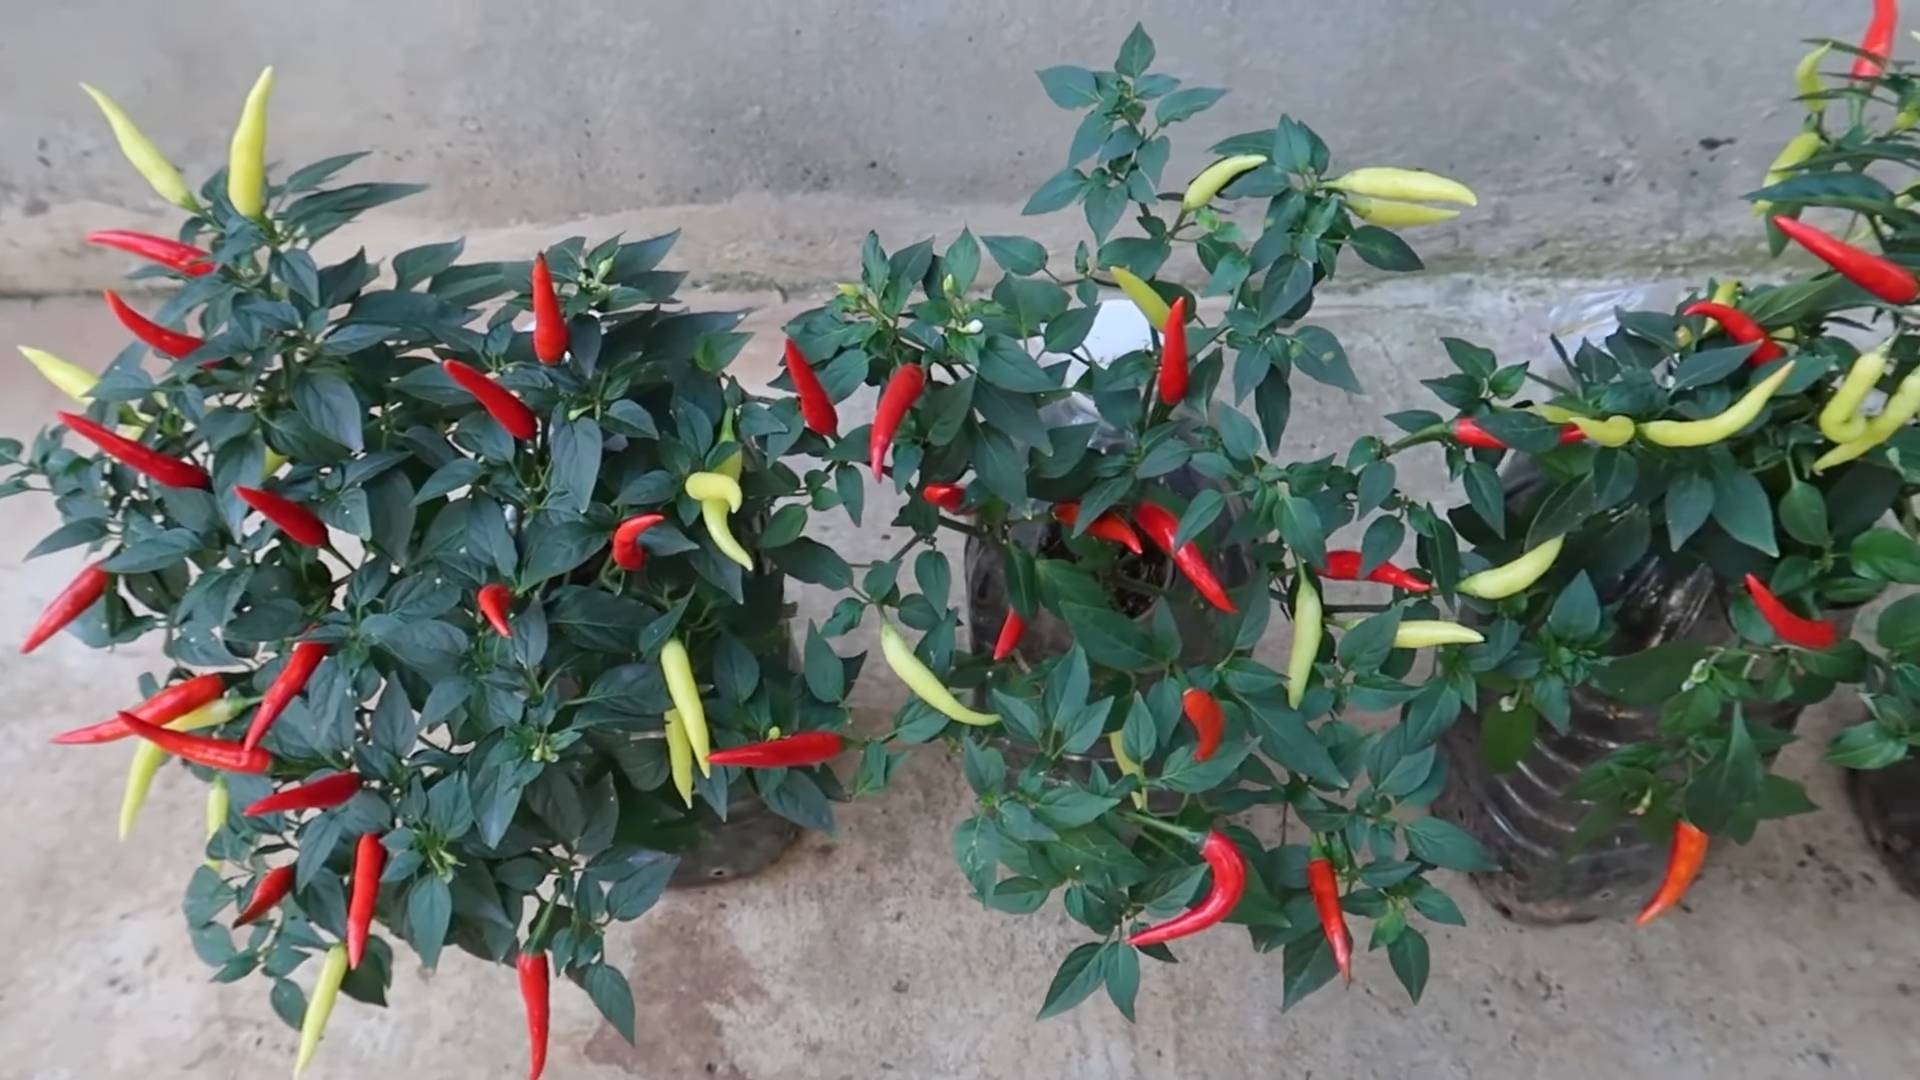
7. **Harvesting:** Your chili plants will typically start producing fruit within a few months of planting. You can harvest the chilies when they reach their desired size and color. I usually wait until they turn a vibrant red or green, depending on the variety.
Troubleshooting
Even with the best care, you might encounter a few challenges along the way. Here are some common issues and how to address them:
* **Yellowing Leaves:** This could be a sign of overwatering, underwatering, or nutrient deficiency. Check the water level in the reservoir and adjust your watering schedule accordingly. You may also need to fertilize your plants.
* **Leggy Growth:** This is usually caused by insufficient light. Move your bottle garden to a sunnier location or supplement with a grow light.
* **Lack of Fruit Production:** This could be due to a lack of pollination or nutrient deficiency. Try hand-pollinating your plants and fertilizing them with a fertilizer that’s high in phosphorus.
* **Mold Growth:** If you notice mold growing on the surface of the soil, it’s usually a sign of overwatering. Allow the soil to dry out slightly before watering again. You can also sprinkle cinnamon on the soil, as it has antifungal properties.
Extra Tips and Tricks
* Choosing the Right Chili Variety: Consider the size of your bottle garden when choosing your chili variety. Smaller varieties like Thai chilies or bird’s eye chilies are well-suited for container gardening.
* Starting with Seedlings: If you’re new to gardening, you might find it easier to start with chili seedlings instead of seeds. You can purchase seedlings from your local garden center.
* Repotting: As your chili plants grow, they may outgrow their bottle garden. If this happens, you can repot them into a larger container.
* Experimenting with Different Bottle Sizes: Don’t be afraid to experiment with different bottle sizes to see what works best for you. You can even create a vertical bottle garden by stacking multiple bottles on top of each other.
* Recycling and Sustainability: This project is a great way to recycle plastic bottles and reduce your environmental impact. You can also compost your kitchen scraps to create your own potting mix.
Enjoying Your Harvest
The best part of growing your own chilies is, of course, enjoying the fruits (or should I say, chilies!) of your labor. Use your homegrown chilies to add a spicy kick to your favorite dishes, make your own hot sauce, or even dry them for later use.
I hope this guide has inspired you to create your own DIY bottle garden and grow your own chilies indoors. It’s a fun, rewarding, and sustainable way to add a little spice to your life! Happy gardening!
Conclusion
So, there you have it! Transforming ordinary plastic bottles into thriving homes for your chili plants is not just a fun project; it’s a sustainable, space-saving, and surprisingly effective way to cultivate your own fiery harvest. We’ve walked you through the simple steps, highlighting the benefits of this ingenious DIY trick. From reducing plastic waste to enjoying fresh, homegrown chilies right at your fingertips, the advantages are undeniable.
But why is this method a must-try? Beyond the eco-friendly aspect, bottle gardening offers unparalleled control over your plants’ environment. The enclosed space helps retain moisture, minimizing the need for frequent watering, which is especially beneficial in hotter climates. It also provides a degree of protection from pests and diseases, giving your chili plants a head start. Plus, the portability of bottle gardens means you can easily move your plants to chase the sun or shelter them from harsh weather.
Don’t be afraid to experiment with variations! Try using different sizes of bottles to accommodate various chili varieties. Consider painting the bottles to add a splash of color to your garden or to reflect sunlight and regulate temperature. You can even create a vertical garden by hanging multiple bottle planters from a wall or fence, maximizing your growing space. For those with limited sunlight, consider supplementing with grow lights to ensure your chilies receive the necessary energy.
Remember, the key to success lies in proper drainage and nutrient-rich soil. Ensure your bottles have adequate drainage holes to prevent waterlogging, and use a high-quality potting mix specifically formulated for vegetables. Regular fertilization will also keep your chili plants healthy and productive.
We wholeheartedly encourage you to give this DIY bottle garden chili project a try. It’s a rewarding experience that connects you with nature, reduces your environmental footprint, and provides you with a delicious supply of fresh chilies. Once you’ve created your own bottle garden, we’d love to hear about your experience! Share your photos, tips, and any variations you’ve tried in the comments below. Let’s build a community of bottle garden enthusiasts and inspire others to embrace sustainable gardening practices. Happy growing!
Frequently Asked Questions (FAQ)
What types of chili plants are best suited for bottle gardens?
Most chili varieties can thrive in bottle gardens, but smaller to medium-sized plants tend to do best. Consider varieties like Thai chilies, bird’s eye chilies, or jalapeños. These varieties don’t require as much space as larger chili plants like habaneros or bell peppers, making them ideal for the limited space of a bottle garden. Research the specific needs of your chosen chili variety to ensure it’s a good fit for container gardening.
How often should I water my bottle garden chili plants?
Watering frequency depends on several factors, including the climate, the size of the bottle, and the type of soil you’re using. As a general rule, check the soil moisture level regularly by sticking your finger about an inch into the soil. If the soil feels dry to the touch, it’s time to water. Avoid overwatering, as this can lead to root rot. In hotter climates, you may need to water daily, while in cooler climates, watering every few days may suffice. Remember that bottle gardens tend to retain moisture better than traditional pots, so be mindful of this when watering.
What type of soil should I use for my bottle garden chili plants?
Use a high-quality potting mix specifically formulated for vegetables. Avoid using garden soil, as it can be too dense and may not provide adequate drainage. A good potting mix will be lightweight, well-draining, and rich in nutrients. You can also amend your potting mix with compost or other organic matter to further improve its fertility. Look for potting mixes that contain ingredients like peat moss, perlite, and vermiculite.
How much sunlight do bottle garden chili plants need?
Chili plants need at least 6-8 hours of direct sunlight per day to thrive. Choose a location for your bottle garden that receives plenty of sunlight. If you don’t have a sunny spot, you can supplement with grow lights. Place the grow lights a few inches above the plants and keep them on for 12-14 hours per day. Rotate your bottle gardens regularly to ensure that all sides of the plants receive adequate sunlight.
How do I fertilize my bottle garden chili plants?
Chili plants are heavy feeders and require regular fertilization to produce a bountiful harvest. Use a balanced fertilizer specifically formulated for vegetables. Follow the instructions on the fertilizer packaging for application rates and frequency. You can also use organic fertilizers like compost tea or fish emulsion. Fertilize your chili plants every 2-3 weeks during the growing season.
How do I protect my bottle garden chili plants from pests and diseases?
Bottle gardens offer some protection from pests and diseases, but it’s still important to monitor your plants regularly. Check for signs of pests like aphids, spider mites, or whiteflies. If you find any pests, you can treat them with insecticidal soap or neem oil. To prevent diseases, ensure good air circulation around your plants and avoid overwatering. Remove any dead or diseased leaves promptly.
Can I grow chili plants indoors in bottle gardens?
Yes, you can grow chili plants indoors in bottle gardens, but you’ll need to provide them with adequate light. Place your bottle gardens near a sunny window or use grow lights. Indoor chili plants may also require more frequent watering and fertilization than outdoor plants.
How do I transplant chili seedlings into bottle gardens?
When transplanting chili seedlings into bottle gardens, be gentle to avoid damaging the roots. Carefully remove the seedlings from their original containers and loosen the roots slightly. Dig a hole in the potting mix in the bottle garden and place the seedling in the hole. Gently backfill the hole with potting mix and water thoroughly.
What do I do if my chili plants outgrow their bottle gardens?
If your chili plants outgrow their bottle gardens, you can transplant them into larger containers or into the ground. Choose a container that is at least twice the size of the bottle garden. When transplanting, be careful not to damage the roots.
How do I know when my chilies are ripe?
The color of ripe chilies varies depending on the variety. Some chilies turn red when ripe, while others turn yellow, orange, or brown. The best way to tell if a chili is ripe is to check its color and firmness. Ripe chilies will be firm and have a vibrant color. You can also give the chili a gentle squeeze. If it feels slightly soft, it’s likely ripe.
Leave a Comment