

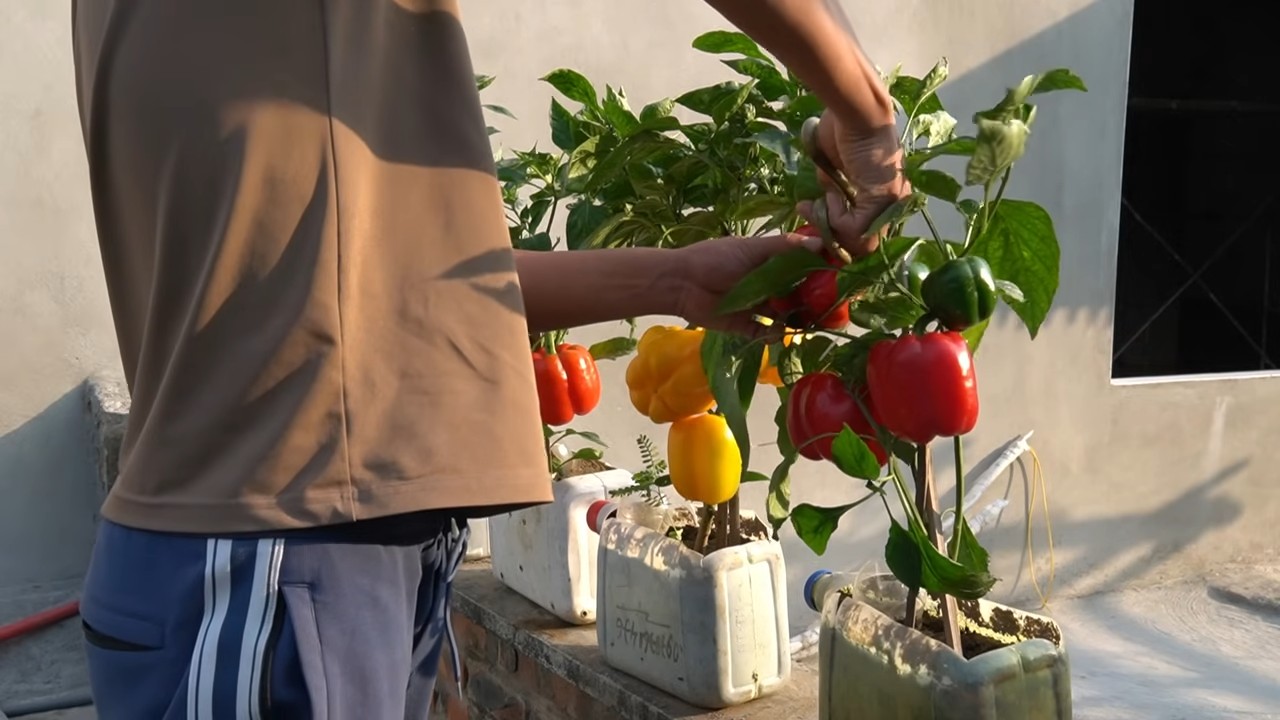
Bottle gardening bell peppers: sounds a little crazy, right? But trust me, it’s a game-changer for anyone who dreams of fresh, vibrant bell peppers without a sprawling garden! I’m so excited to share this ingenious DIY trick that’s not only budget-friendly but also incredibly space-saving.
For centuries, humans have cultivated peppers, with evidence suggesting their domestication dates back over 6,000 years in South America. From ancient civilizations using them for culinary and medicinal purposes to modern-day chefs incorporating them into countless dishes, bell peppers have a rich and fascinating history. But what if you could tap into that history and grow your own, even if you live in an apartment or have limited outdoor space?
That’s where this DIY bottle gardening method comes in. Let’s face it, traditional gardening can be intimidating. It requires space, specialized tools, and a whole lot of know-how. But with this simple hack, you can bypass all those hurdles and enjoy the satisfaction of harvesting your own delicious bell peppers. Imagine adding fresh, homegrown peppers to your salads, stir-fries, or even just snacking on them straight from your makeshift bottle garden. It’s not just about the peppers; it’s about the joy of connecting with nature and creating something beautiful and edible with your own two hands. So, if you’re ready to ditch the store-bought peppers and embark on a fun and rewarding gardening adventure, keep reading! I’ll show you exactly how to get started with bottle gardening bell peppers and transform ordinary plastic bottles into thriving pepper plants.
DIY Bottle Gardening: Grow Bell Peppers Like a Pro!
Hey there, fellow gardening enthusiasts! I’m super excited to share one of my favorite DIY gardening hacks with you: growing bell peppers in plastic bottles! It’s a fantastic way to recycle, save space, and enjoy fresh, homegrown peppers, even if you don’t have a huge garden. Trust me, it’s easier than you think, and the results are incredibly rewarding. Let’s dive in!
What You’ll Need
Before we get started, let’s gather all the necessary materials. This will make the whole process smoother and more enjoyable.
* Plastic Bottles: You’ll need large plastic bottles, like the ones that hold soda or water (2-liter bottles work great). The number of bottles depends on how many pepper plants you want to grow. Make sure they’re clean and free of any residue.
* Bell Pepper Seeds or Seedlings: You can start from seeds or buy small seedlings from a nursery. Starting from seeds takes longer but is more budget-friendly. Seedlings will give you a head start.
* Potting Soil: Use a high-quality potting mix that’s well-draining. This is crucial for healthy pepper growth. Avoid using garden soil, as it can compact and hinder drainage.
* Scissors or a Utility Knife: For cutting the plastic bottles. Be careful when using these tools!
* Drill or Nail: To create drainage holes in the bottom of the bottles.
* Watering Can or Spray Bottle: For watering your pepper plants.
* Optional:
* Gloves: To protect your hands.
* Small Stones or Gravel: To improve drainage at the bottom of the bottles.
* Plant Labels: To keep track of different pepper varieties.
* Liquid Fertilizer: To provide extra nutrients to your plants.
Preparing the Bottles
This is a crucial step to ensure your bottles are ready to become cozy homes for your bell pepper plants.
1. Clean the Bottles: Thoroughly wash the plastic bottles with soap and water to remove any dirt or residue. Rinse them well and let them dry completely. This will prevent any unwanted mold or bacteria from affecting your plants.
2. Cut the Bottles: There are a couple of ways you can cut the bottles, depending on your preference:
* Option 1: Single Container: Cut the bottle in half horizontally. You’ll use the bottom half as the container for your pepper plant. Discard or recycle the top half.
* Option 2: Self-Watering Container (My Favorite!): Cut the bottle about 2/3 of the way down. Invert the top portion and nest it inside the bottom portion. This creates a self-watering system. You’ll need to drill a hole in the bottle cap to allow the water to wick up to the soil.
3. Create Drainage Holes: Using a drill or nail, carefully create several drainage holes in the bottom of the bottle (or the bottom half if you’re using the single container method). This is essential to prevent waterlogging, which can lead to root rot.
4. Optional: Add Gravel: Place a layer of small stones or gravel at the bottom of the bottle. This will further improve drainage and prevent the soil from becoming waterlogged.
Planting Your Bell Peppers
Now for the fun part – planting your bell peppers!
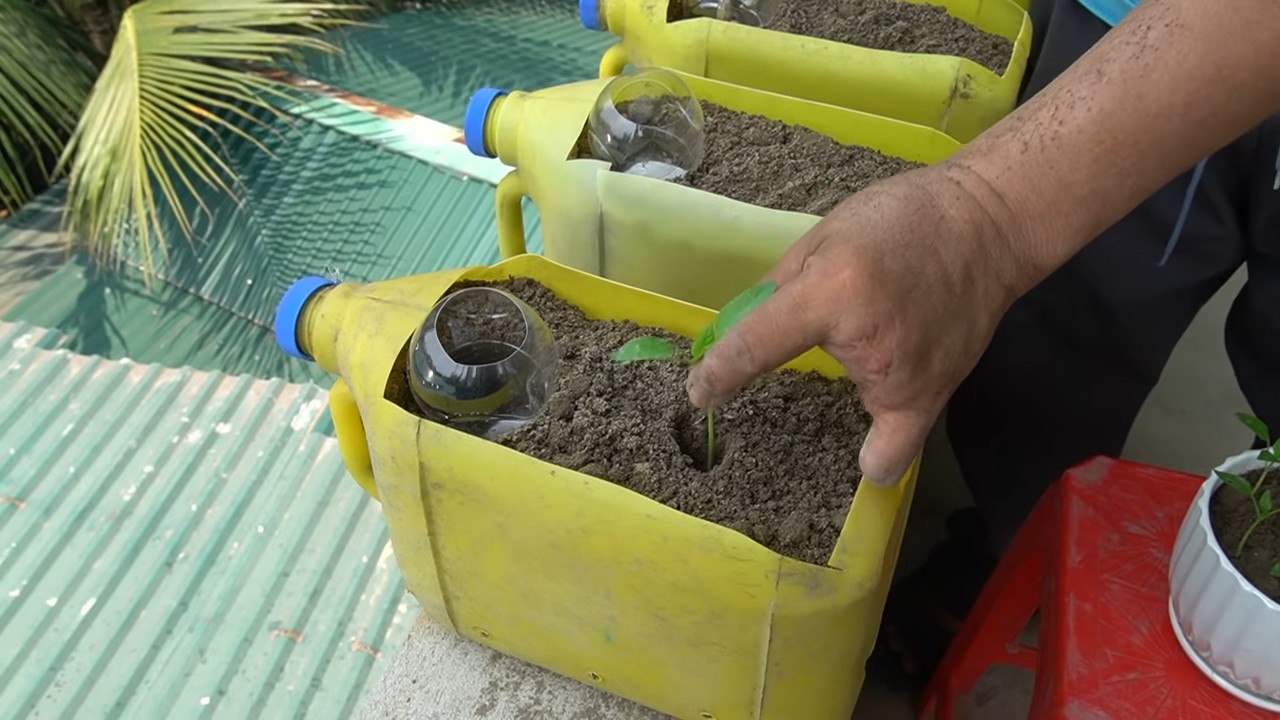
1. Fill the Bottle with Potting Soil: Fill the prepared bottle with high-quality potting soil, leaving about an inch of space at the top. If you’re using the self-watering method, fill the top portion with soil.
2. Plant the Seeds or Seedlings:
* From Seeds: Make a small indentation in the soil (about 1/4 inch deep). Place 2-3 bell pepper seeds in the indentation and gently cover them with soil. Water lightly.
* From Seedlings: Gently remove the seedling from its container. Loosen the roots slightly. Dig a hole in the soil large enough to accommodate the root ball. Place the seedling in the hole and cover the roots with soil. Gently pat the soil around the base of the plant.
3. Water Thoroughly: After planting, water the soil thoroughly until water drains out of the drainage holes. This will help settle the soil and ensure the roots are properly hydrated.
4. Label Your Plants (Optional): If you’re growing different varieties of bell peppers, label each bottle so you can keep track of them.
Caring for Your Bell Pepper Plants
Proper care is essential for healthy growth and a bountiful harvest.
1. Sunlight: Bell peppers need at least 6-8 hours of sunlight per day. Place your bottle gardens in a sunny location, such as a windowsill, balcony, or patio. If you don’t have enough natural sunlight, you can supplement with grow lights.
2. Watering: Water your bell pepper plants regularly, especially during hot weather. Check the soil moisture by sticking your finger into the soil. If the top inch of soil feels dry, it’s time to water. Avoid overwatering, as this can lead to root rot. If you’re using the self-watering method, refill the bottom reservoir when it’s empty.
3. Fertilizing: Bell peppers are heavy feeders, so they need regular fertilization. Use a liquid fertilizer specifically formulated for vegetables. Follow the instructions on the fertilizer label. Fertilize every 2-3 weeks during the growing season.
4. Pruning: Pruning can help improve air circulation and encourage fruit production. Remove any yellowing or dead leaves. You can also pinch off the suckers (small shoots that grow between the main stem and the branches) to encourage the plant to focus its energy on fruit production.
5. Support: As your bell pepper plants grow, they may need support to prevent them from falling over. You can use stakes or tomato cages to provide support.
6. Pest Control: Keep an eye out for pests, such as aphids, whiteflies, and spider mites. If you notice any pests, treat them with an insecticidal soap or neem oil.
7. Pollination: Bell peppers are self-pollinating, but you can help them along by gently shaking the plants or using a small brush to transfer pollen from one flower to another. This is especially important if you’re growing your plants indoors.
Harvesting Your Bell Peppers
The moment you’ve been waiting for!
1. Harvest Time: Bell peppers are typically ready to harvest 60-90 days after planting, depending on the variety. The peppers should be firm, glossy, and have reached their mature color (green, red, yellow, or orange).
2. Harvesting Technique: Use a sharp knife or scissors to cut the pepper from the plant, leaving a small stem attached.
3. Enjoy Your Harvest: Enjoy your fresh, homegrown bell peppers in salads, stir-fries, sauces, or any other dish you like!
Troubleshooting
Even with the best care, you might encounter some challenges. Here are a few common problems and how to address them:
* Yellowing Leaves: This could be a sign of overwatering, underwatering, nutrient deficiency, or pest infestation. Check the soil moisture, fertilize your plants, and inspect them for pests.
* Blossom End Rot: This is a condition where the bottom of the pepper develops a dark, sunken spot. It’s usually caused by a calcium deficiency. Add calcium to the soil or use a calcium-rich fertilizer.
Hey there, fellow gardening enthusiasts! I’m super excited to share one of my favorite DIY gardening hacks with you: growing bell peppers in plastic bottles! It’s a fantastic way to recycle, save space, and enjoy fresh, homegrown peppers, even if you don’t have a huge garden. Trust me, it’s easier than you think, and the results are incredibly rewarding. Let’s dive in!
What You’ll Need
Before we get started, let’s gather all the necessary materials. This will make the whole process smoother and more enjoyable.
* Plastic Bottles: You’ll need large plastic bottles, like the ones that hold soda or water (2-liter bottles work great). The number of bottles depends on how many pepper plants you want to grow. Make sure they’re clean and free of any residue.
* Bell Pepper Seeds or Seedlings: You can start from seeds or buy small seedlings from a nursery. Starting from seeds takes longer but is more budget-friendly. Seedlings will give you a head start.
* Potting Soil: Use a high-quality potting mix that’s well-draining. This is crucial for healthy pepper growth. Avoid using garden soil, as it can compact and hinder drainage.
* Scissors or a Utility Knife: For cutting the plastic bottles. Be careful when using these tools!
* Drill or Nail: To create drainage holes in the bottom of the bottles.
* Watering Can or Spray Bottle: For watering your pepper plants.
* Optional:
* Gloves: To protect your hands.
* Small Stones or Gravel: To improve drainage at the bottom of the bottles.
* Plant Labels: To keep track of different pepper varieties.
* Liquid Fertilizer: To provide extra nutrients to your plants.
Preparing the Bottles
This is a crucial step to ensure your bottles are ready to become cozy homes for your bell pepper plants.
1. Clean the Bottles: Thoroughly wash the plastic bottles with soap and water to remove any dirt or residue. Rinse them well and let them dry completely. This will prevent any unwanted mold or bacteria from affecting your plants.
2. Cut the Bottles: There are a couple of ways you can cut the bottles, depending on your preference:
* Option 1: Single Container: Cut the bottle in half horizontally. You’ll use the bottom half as the container for your pepper plant. Discard or recycle the top half.
* Option 2: Self-Watering Container (My Favorite!): Cut the bottle about 2/3 of the way down. Invert the top portion and nest it inside the bottom portion. This creates a self-watering system. You’ll need to drill a hole in the bottle cap to allow the water to wick up to the soil.
3. Create Drainage Holes: Using a drill or nail, carefully create several drainage holes in the bottom of the bottle (or the bottom half if you’re using the single container method). This is essential to prevent waterlogging, which can lead to root rot.
4. Optional: Add Gravel: Place a layer of small stones or gravel at the bottom of the bottle. This will further improve drainage and prevent the soil from becoming waterlogged.
Planting Your Bell Peppers
Now for the fun part – planting your bell peppers!
1. Fill the Bottle with Potting Soil: Fill the prepared bottle with high-quality potting soil, leaving about an inch of space at the top. If you’re using the self-watering method, fill the top portion with soil.
2. Plant the Seeds or Seedlings:
* From Seeds: Make a small indentation in the soil (about 1/4 inch deep). Place 2-3 bell pepper seeds in the indentation and gently cover them with soil. Water lightly.
* From Seedlings: Gently remove the seedling from its container. Loosen the roots slightly. Dig a hole in the soil large enough to accommodate the root ball. Place the seedling in the hole and cover the roots with soil. Gently pat the soil around the base of the plant.
3. Water Thoroughly: After planting, water the soil thoroughly until water drains out of the drainage holes. This will help settle the soil and ensure the roots are properly hydrated.
4. Label Your Plants (Optional): If you’re growing different varieties of bell peppers, label each bottle so you can keep track of them.
Caring for Your Bell Pepper Plants
Proper care is essential for healthy growth and a bountiful harvest.
1. Sunlight: Bell peppers need at least 6-8 hours of sunlight per day. Place your bottle gardens in a sunny location, such as a windowsill, balcony, or patio. If you don’t have enough natural sunlight, you can supplement with grow lights.
2. Watering: Water your bell pepper plants regularly, especially during hot weather. Check the soil moisture by sticking your finger into the soil. If the top inch of soil feels dry, it’s time to water. Avoid overwatering, as this can lead to root rot. If you’re using the self-watering method, refill the bottom reservoir when it’s empty.
3. Fertilizing: Bell peppers are heavy feeders, so they need regular fertilization. Use a liquid fertilizer specifically formulated for vegetables. Follow the instructions on the fertilizer label. Fertilize every 2-3 weeks during the growing season.
4. Pruning: Pruning can help improve air circulation and encourage fruit production. Remove any yellowing or dead leaves. You can also pinch off the suckers (small shoots that grow between the main stem and the branches) to encourage the plant to focus its energy on fruit production.
5. Support: As your bell pepper plants grow, they may need support to prevent them from falling over. You can use stakes or tomato cages to provide support.
6. Pest Control: Keep an eye out for pests, such as aphids, whiteflies, and spider mites. If you notice any pests, treat them with an insecticidal soap or neem oil.
7. Pollination: Bell peppers are self-pollinating, but you can help them along by gently shaking the plants or using a small brush to transfer pollen from one flower to another. This is especially important if you’re growing your plants indoors.
Harvesting Your Bell Peppers
The moment you’ve been waiting for!
1. Harvest Time: Bell peppers are typically ready to harvest 60-90 days after planting, depending on the variety. The peppers should be firm, glossy, and have reached their mature color (green, red, yellow, or orange).
2. Harvesting Technique: Use a sharp knife or scissors to cut the pepper from the plant, leaving a small stem attached.
3. Enjoy Your Harvest: Enjoy your fresh, homegrown bell peppers in salads, stir-fries, sauces, or any other dish you like!
Troubleshooting
Even with the best care, you might encounter some challenges. Here are a few common problems and how to address them:
* Yellowing Leaves: This could be a sign of overwatering, underwatering, nutrient deficiency, or pest infestation. Check the soil moisture, fertilize your plants, and inspect them for pests.
* Blossom End Rot: This is a condition where the bottom of the pepper develops a dark, sunken spot. It’s usually caused by a calcium deficiency. Add calcium to the soil or use a calcium-rich fertilizer.
* Lack of Fruit Production: This could be due to insufficient sunlight, poor pollination, or nutrient deficiency. Make sure your plants are getting enough sunlight, hand-pollinate them if necessary, and fertilize them regularly.
* Pest Infestation: Treat pests with insecticidal soap or neem oil. You can also try introducing beneficial insects, such as ladybugs, to your garden.
Tips for Success
Here are a few extra tips to help you succeed with your bottle gardening project:
* Choose the Right Variety: Some bell pepper varieties are better suited for container gardening than others. Look for compact or dwarf varieties.
* Use High-Quality Potting Soil: Don’t skimp on the potting soil. Use a high-quality mix that’s well-draining and contains plenty of nutrients.
* Provide Adequate Drainage: Drainage is crucial for preventing root rot. Make sure your bottles have plenty of drainage holes and consider adding a layer of gravel to the bottom.
* Water Regularly: Bell peppers need consistent moisture, but avoid overwatering. Check the soil moisture regularly and water when the top inch of soil feels dry.
* Fertilize Regularly: Bell peppers are heavy feeders, so they need regular fertilization. Use a liquid fertilizer specifically formulated for vegetables.
* Protect from Extreme Weather: If you live in an area with extreme weather conditions, protect your plants from frost, heat,
Conclusion
So, there you have it! Transforming discarded bottles into thriving bell pepper havens is not just a quirky gardening experiment; it’s a sustainable, space-saving, and surprisingly effective way to cultivate your own delicious peppers. We’ve explored the simple steps, from preparing your bottles to nurturing your growing plants, and hopefully, you’re now brimming with inspiration to embark on your own bottle gardening adventure.
But why is this DIY trick a must-try? Beyond the obvious environmental benefits of repurposing plastic, bottle gardening offers several compelling advantages. Firstly, it’s incredibly accessible. Whether you have a sprawling garden or a tiny balcony, bottle gardening allows you to grow bell peppers virtually anywhere. The controlled environment within the bottle can also lead to healthier plants, protecting them from certain pests and diseases. Plus, let’s be honest, there’s a certain satisfaction in watching something beautiful and edible emerge from what was once considered waste.
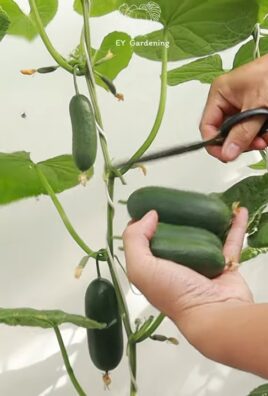
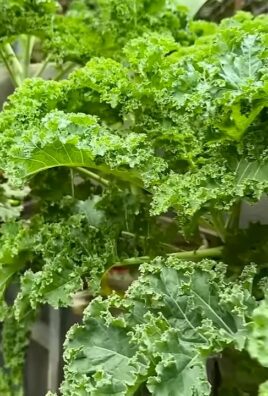
Don’t be afraid to experiment with variations! While we’ve focused on bell peppers, this method can be adapted for other small vegetables and herbs. Consider trying cherry tomatoes, chili peppers, or even leafy greens like lettuce or spinach. You can also play around with different bottle sizes and configurations. Larger bottles can accommodate larger plants, while smaller bottles are perfect for starting seedlings. Get creative with your bottle designs too! Paint them, decorate them, or even create vertical gardens by hanging them from walls or fences.
Remember to pay close attention to your plants’ needs. Regular watering, proper drainage, and adequate sunlight are crucial for success. Don’t be discouraged if your first attempt isn’t perfect. Gardening is a learning process, and every mistake is an opportunity to improve.
We wholeheartedly encourage you to give this DIY bottle gardening trick a try. It’s a rewarding experience that connects you with nature, promotes sustainability, and provides you with fresh, homegrown bell peppers. And most importantly, we want to hear about your journey! Share your photos, tips, and experiences in the comments below. Let’s build a community of bottle gardeners and inspire others to embrace this eco-friendly and fruitful practice. Your success stories and innovative ideas will undoubtedly help others discover the joy of growing their own food, one bottle at a time. So, grab those bottles, get your hands dirty, and let’s start growing!
Frequently Asked Questions (FAQ)
What kind of bottles are best for bottle gardening bell peppers?
Ideally, you want to use clear or translucent plastic bottles that are at least 2 liters in size. Larger bottles (like those from water coolers) can accommodate larger bell pepper varieties. Avoid bottles that have held harsh chemicals, and make sure to thoroughly clean and rinse any bottle before using it for gardening. The clarity of the bottle allows sunlight to reach the soil and roots, which is essential for plant growth. Darker bottles can overheat and potentially damage the roots.
How often should I water my bell pepper plants in bottles?
Watering frequency depends on several factors, including the size of the bottle, the type of soil, the weather conditions, and the size of the plant. As a general rule, check the soil moisture level daily. If the top inch of soil feels dry to the touch, it’s time to water. Water thoroughly until excess water drains out of the drainage holes you created. Avoid overwatering, as this can lead to root rot. During hot and sunny weather, you may need to water more frequently.
What type of soil should I use for bottle gardening bell peppers?
A well-draining potting mix is essential for bottle gardening. Avoid using garden soil, as it can become compacted in containers and hinder drainage. A good potting mix will typically contain a blend of peat moss, perlite, and vermiculite. You can also add compost to enrich the soil with nutrients. Look for a potting mix specifically formulated for vegetables or containers.
How much sunlight do bell pepper plants need in bottle gardens?
Bell peppers thrive in full sun, meaning they need at least 6-8 hours of direct sunlight per day. Choose a location for your bottle garden that receives ample sunlight. If you don’t have a sunny spot, you may need to supplement with grow lights. Rotate the bottles regularly to ensure that all sides of the plant receive equal sunlight.
How do I fertilize bell pepper plants in bottle gardens?
Bell peppers are heavy feeders and require regular fertilization. Start fertilizing your plants a few weeks after transplanting them into the bottles. Use a balanced fertilizer specifically formulated for vegetables. Follow the instructions on the fertilizer package for application rates. You can also use organic fertilizers like compost tea or fish emulsion. Fertilize every 2-3 weeks during the growing season.
How do I prevent pests and diseases in my bottle garden?
While bottle gardening can help reduce the risk of pests and diseases, it’s still important to take preventative measures. Regularly inspect your plants for signs of pests or diseases. Common pests that affect bell peppers include aphids, spider mites, and whiteflies. You can control these pests with insecticidal soap or neem oil. To prevent fungal diseases, ensure good air circulation around your plants and avoid overwatering. Remove any diseased leaves or stems promptly.
Can I grow bell peppers indoors in bottles?
Yes, you can grow bell peppers indoors in bottles, but you’ll need to provide them with adequate light. A sunny windowsill may not be enough, so you’ll likely need to supplement with grow lights. Choose a grow light that emits a full spectrum of light. Keep the grow light on for 12-16 hours per day. Also, ensure good air circulation around your plants to prevent fungal diseases.
How long does it take to grow bell peppers in bottles?
The time it takes to grow bell peppers from seed to harvest varies depending on the variety, growing conditions, and climate. Generally, it takes about 60-80 days from transplanting seedlings to harvesting mature peppers. Start your seeds indoors 6-8 weeks before the last expected frost.
What are some common problems with bottle gardening bell peppers and how can I fix them?
Some common problems include:
* **Yellowing leaves:** This can be caused by overwatering, underwatering, nutrient deficiencies, or pests. Adjust your watering schedule, fertilize your plants, and inspect them for pests.
* **Blossom end rot:** This is caused by a calcium deficiency. Add calcium to the soil or use a calcium-rich fertilizer.
* **Stunted growth:** This can be caused by insufficient sunlight, poor soil, or pests. Move your plants to a sunnier location, amend the soil, and control pests.
Can I reuse the bottles for future plantings?
Yes, you can reuse the bottles for future plantings. However, it’s important to thoroughly clean and disinfect them before reusing them. Wash the bottles with soap and water, and then rinse them with a solution of 1 part bleach to 9 parts water. This will help prevent the spread of diseases.
Leave a Comment