

Bottle gardening peppers: Ever dreamt of harvesting a vibrant crop of peppers right from your windowsill, even if you’re short on space or lack a traditional garden? I’m here to tell you, it’s absolutely possible, and surprisingly easy! Forget sprawling gardens and back-breaking labor; we’re diving into the world of upcycled, space-saving pepper power!
For centuries, resourceful gardeners have found innovative ways to cultivate food in limited environments. From ancient rooftop gardens to modern-day urban farms, the spirit of ingenuity thrives. Bottle gardening, in particular, taps into this rich history of making the most of what you have. It’s a sustainable and creative way to connect with nature, even in the heart of the city.
Why should you try bottle gardening peppers? Well, imagine the satisfaction of snipping fresh, homegrown peppers to spice up your meals. Beyond the delicious reward, it’s a fantastic way to reduce waste, learn about plant life, and add a touch of green to your living space. Plus, it’s incredibly budget-friendly! This DIY guide will walk you through every step, from choosing the right bottle to nurturing your pepper plants to a bountiful harvest. Let’s get started and transform those empty bottles into miniature pepper paradises!
DIY Bottle Gardening: Grow Peppers Like a Pro!
Hey there, fellow gardening enthusiasts! I’m so excited to share one of my favorite DIY gardening hacks with you: growing peppers in plastic bottles! It’s a fantastic way to recycle, save space, and enjoy fresh, homegrown peppers, even if you don’t have a huge garden. Trust me, it’s easier than you think, and the results are incredibly rewarding. Let’s dive in!
Why Bottle Gardening for Peppers?
Before we get started, let’s quickly chat about why this method is so awesome:
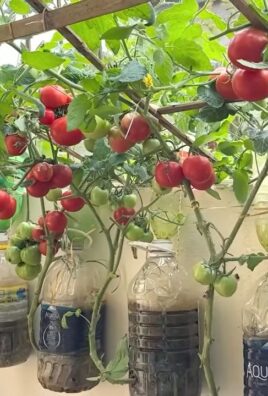
* Space-Saving: Perfect for balconies, patios, or small yards. You can hang them, stack them, or simply place them on a sunny surface.
* Recycling: Give those plastic bottles a new life instead of sending them to the landfill.
* Cost-Effective: Minimal investment required. You probably already have most of the materials you need.
* Easy to Monitor: You can easily keep an eye on the soil moisture and plant health.
* Fun Project: A great activity for kids and adults alike!
Materials You’ll Need
Okay, let’s gather our supplies. Here’s what you’ll need to get started:
* Plastic Bottles: 2-liter soda bottles or similar sizes work best. Make sure they’re clean and clear.
* Pepper Seeds or Seedlings: Choose your favorite pepper variety! Bell peppers, jalapenos, chili peppers 鈥?the choice is yours.
* Potting Soil: A good quality potting mix is crucial for healthy pepper plants.
* Scissors or Utility Knife: For cutting the plastic bottles. Be careful!
* Drill or Nail: To create drainage holes.
* Water: For watering your pepper plants.
* Optional: Twine or rope for hanging the bottles.
* Optional: Gloves to keep your hands clean.
Preparing the Bottles
This is where we transform those ordinary plastic bottles into mini pepper paradises!
1. Clean the Bottles: Thoroughly wash the plastic bottles with soap and water to remove any residue. Rinse them well and let them dry completely. This is important to prevent any contamination that could harm your plants.
2. Cut the Bottles: There are a couple of ways to cut the bottles, depending on how you want to use them.
* Option 1: Hanging Planters: Cut the bottle in half horizontally. You’ll be using the top half (the part with the bottle neck) as the planter. The bottom half can be discarded or used as a water reservoir (more on that later).
* Option 2: Self-Watering Planters: Cut the bottle about two-thirds of the way up from the bottom. Invert the top portion (the part with the bottle neck) and nestle it inside the bottom portion. This creates a self-watering system.
3. Create Drainage Holes: This is super important! Peppers don’t like soggy roots. Use a drill or a nail (heated with a lighter for easier piercing) to create several drainage holes in the bottom of the top portion of the bottle (the part that will hold the soil). I usually make about 5-6 holes, spaced evenly.
4. (Optional) Prepare for Hanging: If you’re planning to hang your bottle planters, now’s the time to make the holes for the twine or rope. Use the drill or nail to create two holes on opposite sides of the bottle, near the cut edge.
Planting Your Peppers
Now for the fun part 鈥?getting those pepper plants into their new homes!
1. Add Potting Soil: Fill the top portion of the bottle (the planter) with potting soil, leaving about an inch of space at the top. Gently pat down the soil to remove any air pockets.
2. Plant the Seeds or Seedlings:
* From Seeds: Make a small indentation in the soil (about 1/4 inch deep). Place 2-3 pepper seeds in the indentation and cover them with soil. Gently water the soil.
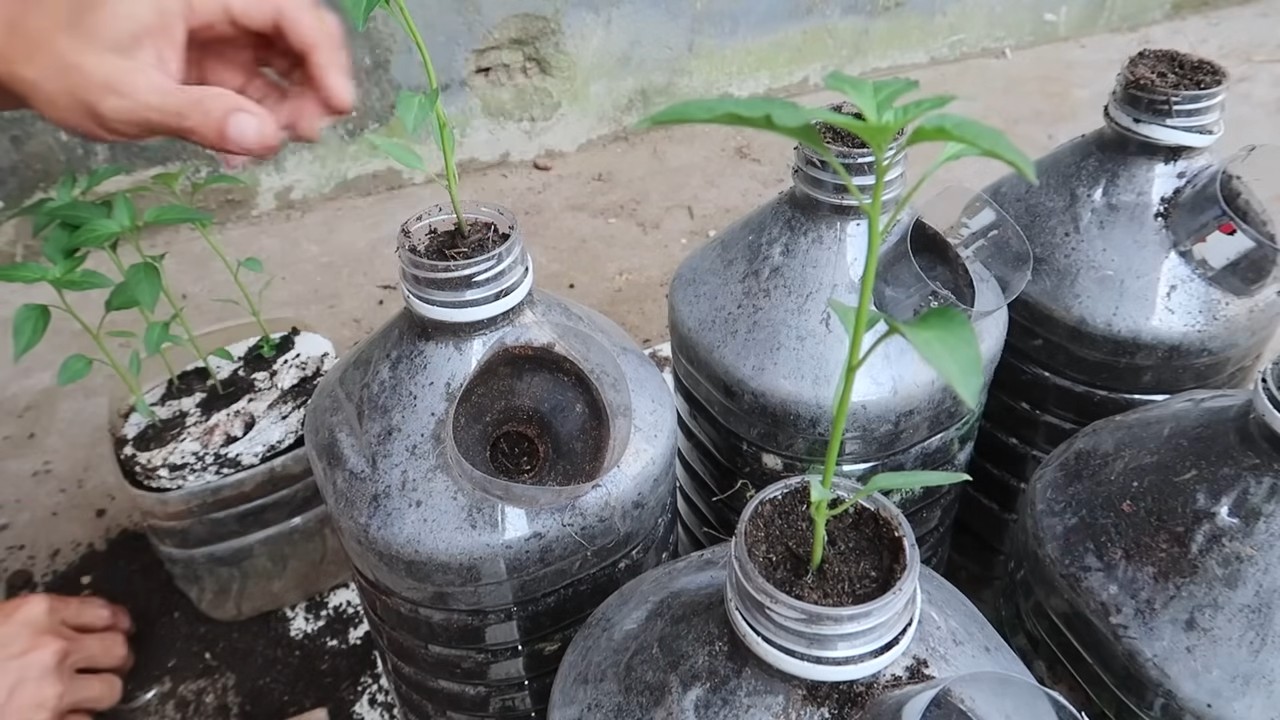
* From Seedlings: Carefully remove the pepper seedling from its original container. Gently loosen the roots. Dig a small hole in the soil in the bottle planter, large enough to accommodate the seedling’s root ball. Place the seedling in the hole and cover the roots with soil. Gently pat down the soil.
3. Water Thoroughly: Water the soil thoroughly until water drains out of the drainage holes. This helps to settle the soil and ensures that the roots are well-hydrated.
4. (Optional) Set Up Self-Watering System: If you’re using the self-watering method, fill the bottom portion of the bottle with water. Then, carefully nestle the top portion (the planter) inside the bottom portion, making sure the bottle neck is submerged in the water. The soil will draw water up from the bottom, keeping your pepper plant consistently moist.
5. (Optional) Hang Your Planters: If you’ve prepared your bottles for hanging, thread twine or rope through the holes and tie a secure knot. Hang your planters in a sunny location.
Caring for Your Bottle Pepper Plants
Okay, you’ve planted your peppers! Now, let’s make sure they thrive.
1. Sunlight: Peppers need plenty of sunlight 鈥?at least 6-8 hours per day. Place your bottle planters in a sunny location, such as a south-facing balcony or patio. If you don’t have enough natural sunlight, you can supplement with a grow light.
2. Watering: Water your pepper plants regularly, especially during hot weather. Check the soil moisture by sticking your finger into the soil. If the top inch of soil feels dry, it’s time to water. Avoid overwatering, as this can lead to root rot. If you’re using the self-watering system, simply refill the bottom reservoir when the water level gets low.
3. Fertilizing: Peppers are heavy feeders, so they need regular fertilization. Use a balanced liquid fertilizer, diluted according to the package instructions. Fertilize your pepper plants every 2-3 weeks.
4. Pruning: Pruning can help to encourage bushier growth and more pepper production. Remove any suckers (small shoots that grow from the base of the plant) and any yellowing or dead leaves.
5. Pest Control: Keep an eye out for pests, such as aphids, whiteflies, and spider mites. If you notice any pests, you can try spraying your plants with insecticidal soap or neem oil.
6. Support: As your pepper plants grow, they may need some support to prevent them from toppling over. You can use small stakes or bamboo skewers to support the stems.
Troubleshooting
Even with the best care, you might encounter a few challenges. Here are some common issues and how to address them:
* Yellowing Leaves: Could be a sign of overwatering, underwatering, nutrient deficiency, or pest infestation. Check the soil moisture, fertilize your plants, and inspect for pests.
* Blossom Drop: This is when the pepper flowers fall off before producing fruit. It can be caused by temperature stress (too hot or too cold), inconsistent watering, or lack of pollination. Ensure consistent watering, protect your plants from extreme temperatures, and gently shake the plants to encourage pollination.
* Small Peppers: Could be due to insufficient sunlight, lack of nutrients, or overcrowding. Ensure your plants are getting enough sunlight, fertilize regularly, and thin out the plants if they are too crowded.
Harvesting Your Peppers
The moment you’ve been waiting for! Harvesting your homegrown peppers is incredibly satisfying.
1. When to Harvest: The timing of the harvest depends on the pepper variety. Bell peppers are typically harvested when they are fully colored and firm. Jalapenos are usually harvested when they are green and about 3-4 inches long. Chili peppers can be harvested when they are red and fully mature.
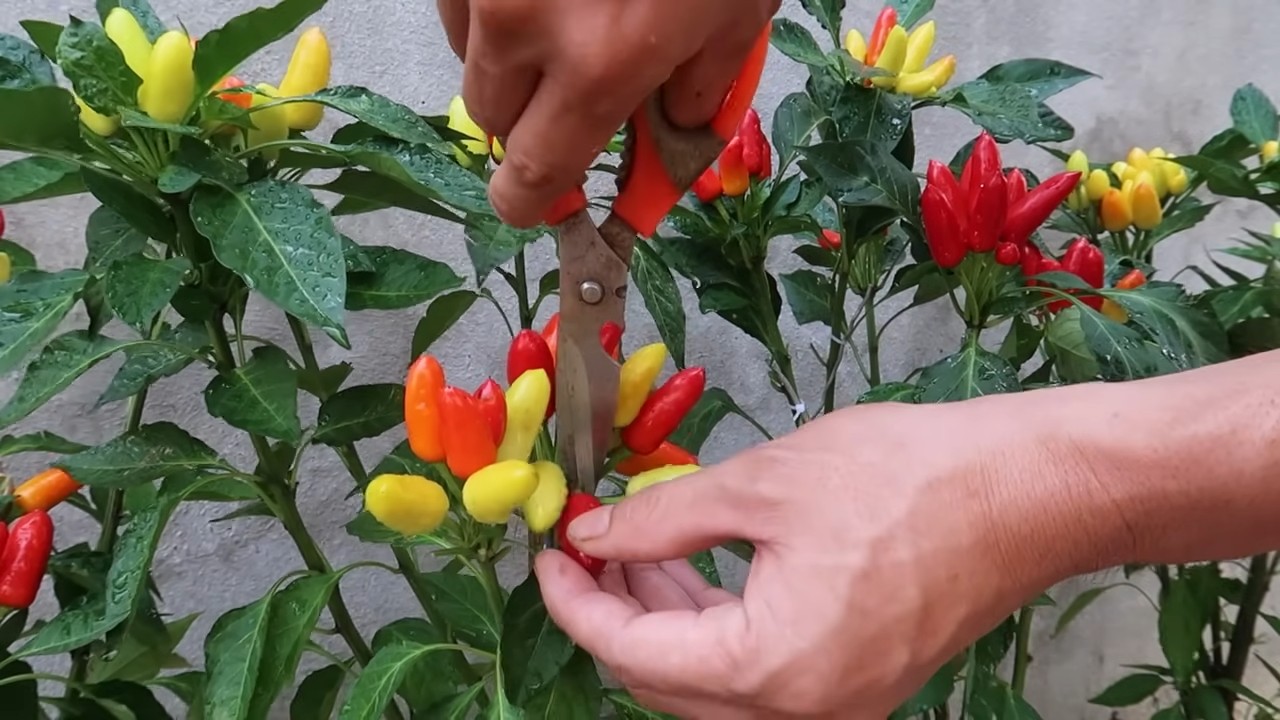
2. How to Harvest: Use scissors or pruning shears to cut the peppers from the plant, leaving a small stem attached.
3. Enjoy! Now you can enjoy your fresh, homegrown peppers in your favorite recipes! Add them to salads, salsas, stir-fries, or simply eat them raw.
Tips for Success
Here are a few extra tips to help you succeed with bottle gardening peppers:
* Choose the Right Pepper Variety: Some pepper varieties are better suited for container gardening than others. Look for compact or dwarf varieties.
* Use High-Quality Potting Soil: Don’t skimp on the potting soil! A good quality potting mix will provide your pepper plants with the nutrients they need to thrive.
* Provide Adequate Drainage: Drainage is crucial for preventing root rot. Make sure your bottle planters have plenty of drainage holes.
* Water Consistently: Consistent watering is key to healthy pepper plants. Check the soil moisture regularly and water when needed
Conclusion
So, there you have it! Transforming ordinary plastic bottles into thriving pepper gardens is not just a fun project; it’s a sustainable, space-saving, and incredibly rewarding way to enjoy fresh, homegrown peppers. We’ve walked you through the simple steps, highlighting the benefits of this ingenious DIY trick, and hopefully, inspired you to give it a try.
Why is this a must-try? Because it’s accessible to everyone, regardless of gardening experience or available space. Whether you live in a sprawling suburban home or a compact city apartment, bottle gardening peppers allows you to cultivate your own little pepper patch. It’s also a fantastic way to recycle plastic, reducing waste and contributing to a more eco-friendly lifestyle. Plus, the satisfaction of harvesting peppers you’ve grown yourself is simply unmatched.
But the beauty of this method lies in its adaptability. Feel free to experiment with different types of peppers. From the fiery heat of habaneros to the sweet crunch of bell peppers, the possibilities are endless. You can also explore different soil mixes to find what works best for your local climate and pepper variety. Consider adding companion plants like basil or marigolds to your bottle gardens to deter pests and enhance growth.
Don’t be afraid to get creative with your bottle designs! Paint them, decorate them, or even create vertical gardens by hanging them from a balcony or fence. The only limit is your imagination.
We are confident that once you experience the joy of bottle gardening peppers, you’ll be hooked. It’s a simple, effective, and incredibly satisfying way to connect with nature and enjoy the fruits (or rather, vegetables) of your labor.
We encourage you to embark on this exciting gardening adventure. Share your experiences, successes, and even your challenges with us. Post pictures of your bottle pepper gardens on social media using #BottlePepperGarden and let’s create a community of bottle gardening enthusiasts. We can all learn from each other and inspire others to embrace this sustainable and rewarding practice. Happy gardening!
Frequently Asked Questions (FAQs)
What type of plastic bottles are best for bottle gardening peppers?
The ideal plastic bottles for bottle gardening peppers are those that are sturdy and can hold a decent amount of soil. Two-liter soda bottles or larger water bottles work exceptionally well. Ensure the bottles are clean and free of any residue before you start. Avoid using bottles that have contained harmful chemicals, as these could leach into the soil and affect your plants. Also, consider the color of the bottle. Clear bottles can allow more sunlight to reach the roots, which isn’t always ideal, so you might want to paint them or use colored bottles to protect the roots from excessive heat and light.
How often should I water my bottle pepper plants?
Watering frequency depends on several factors, including the climate, the type of soil you’re using, and the size of the bottle. Generally, you should water your bottle pepper plants when the top inch of soil feels dry to the touch. Overwatering can lead to root rot, so it’s crucial to ensure proper drainage. Check the drainage holes at the bottom of the bottle to make sure they’re not clogged. During hot weather, you may need to water more frequently, perhaps even daily. In cooler weather, you can reduce the watering frequency. A good rule of thumb is to water deeply but infrequently, allowing the soil to dry out slightly between waterings.
What kind of soil should I use for bottle gardening peppers?
The best soil for bottle gardening peppers is a well-draining potting mix that is rich in nutrients. Avoid using garden soil, as it can be too heavy and compact, hindering root growth. A good potting mix will retain moisture while still allowing excess water to drain away. You can also amend your potting mix with compost or other organic matter to provide additional nutrients. Consider adding perlite or vermiculite to improve drainage and aeration. A slightly acidic to neutral pH is ideal for peppers.
How much sunlight do bottle pepper plants need?
Pepper plants thrive in full sun, meaning they need at least 6-8 hours of direct sunlight per day. If you’re growing your bottle pepper plants indoors, you may need to supplement with grow lights to ensure they receive enough light. Place your bottle gardens in a sunny location, such as a south-facing window or balcony. If you live in a particularly hot climate, you may need to provide some afternoon shade to prevent the plants from overheating. Observe your plants closely and adjust their location as needed to ensure they’re getting the right amount of sunlight.
How do I fertilize my bottle pepper plants?
Pepper plants are heavy feeders and require regular fertilization to produce abundant fruit. Start fertilizing your bottle pepper plants a few weeks after transplanting them into the bottles. Use a balanced fertilizer, such as a 10-10-10 or a fertilizer specifically formulated for vegetables. Follow the instructions on the fertilizer package carefully to avoid over-fertilizing, which can damage your plants. You can also use organic fertilizers, such as compost tea or fish emulsion. Fertilize every 2-4 weeks during the growing season.
How do I protect my bottle pepper plants from pests and diseases?
Bottle pepper plants can be susceptible to various pests and diseases, such as aphids, spider mites, and fungal infections. Regularly inspect your plants for signs of infestation or disease. If you spot any pests, you can try spraying them with insecticidal soap or neem oil. For fungal diseases, ensure good air circulation and avoid overwatering. You can also use a fungicide if necessary. Companion planting with herbs like basil or marigolds can help deter pests. Keeping your plants healthy and well-nourished will also make them more resistant to pests and diseases.
Can I grow different varieties of peppers in bottles?
Absolutely! One of the great things about bottle gardening is that you can easily grow different varieties of peppers in separate bottles. This allows you to experiment with different flavors and heat levels. Just be sure to label each bottle clearly so you know which variety you’re growing. Consider the size of the pepper plant when choosing a bottle size. Larger pepper varieties may require larger bottles to accommodate their root systems.
What do I do with my bottle pepper plants in the winter?
If you live in a climate with cold winters, you’ll need to take steps to protect your bottle pepper plants from frost. You can either bring them indoors or provide them with some form of protection outdoors. If you bring them indoors, place them in a sunny location and reduce watering. You may also need to supplement with grow lights. If you leave them outdoors, you can cover them with frost blankets or move them to a sheltered location. Keep in mind that pepper plants are perennials in warm climates, but they are typically grown as annuals in colder climates.
How long does it take for bottle pepper plants to produce fruit?
The time it takes for bottle pepper plants to produce fruit depends on the variety of pepper, the growing conditions, and the climate. Generally, it takes about 60-90 days from transplanting for peppers to start producing fruit. Some varieties may take longer, while others may mature more quickly. Be patient and continue to provide your plants with the care they need, and you’ll be rewarded with a bountiful harvest of fresh, homegrown peppers.
Leave a Comment