

Bucket Grown Peanuts: Imagine harvesting a bounty of fresh, homegrown peanuts right from your own backyard, or even your balcony! It sounds like a dream, right? Well, it doesn’t have to be! This DIY guide will unlock the secrets to successfully cultivating peanuts in buckets, transforming even the smallest spaces into a thriving peanut patch.
The history of peanut cultivation stretches back thousands of years, with evidence suggesting their origins in South America. From ancient civilizations to modern-day snacks, peanuts have held a significant place in cultures worldwide. But did you know you don’t need acres of farmland to enjoy the fruits (or rather, the nuts!) of your labor?
In today’s fast-paced world, reconnecting with nature and growing your own food is more important than ever. Bucket Grown Peanuts offer a fantastic way to do just that, even if you’re short on space or time. This DIY project is perfect for beginners and experienced gardeners alike. I’ll walk you through every step, from selecting the right bucket and soil to harvesting your delicious peanut crop. Say goodbye to store-bought peanuts and hello to the satisfaction of growing your own! Plus, it’s a fun and educational activity for the whole family. Let’s get started!
Growing Peanuts in Buckets: A Fun and Easy DIY Project!
Hey there, fellow gardening enthusiasts! Ever thought about growing your own peanuts? It’s surprisingly easy, even if you don’t have a sprawling garden. I’m going to walk you through how to grow peanuts in buckets – a perfect project for small spaces, balconies, or even just a fun experiment. Trust me, the taste of homegrown peanuts is unbeatable!
What You’ll Need
Before we dive in, let’s gather our supplies. This is a pretty straightforward project, so you probably have a lot of this stuff lying around already.
* Peanut Seeds (Raw, Unshelled): This is the most important part! Make sure you get raw, unshelled peanuts. Roasted peanuts won’t sprout. You can usually find these at health food stores or online. Look for varieties specifically labeled for planting, like Virginia or Spanish peanuts.
* Buckets (5-Gallon or Larger): The bigger, the better! Five-gallon buckets are a good starting point, but larger ones will give your peanuts more room to grow. Make sure they have drainage holes.
* Potting Mix: Use a high-quality potting mix that drains well. Avoid using garden soil, as it can compact and hinder root growth. I like to use a mix of potting soil, compost, and perlite for extra drainage.
* Water: Essential for keeping your peanut plants hydrated.
* Optional:
* Peanut Inoculant: This helps the peanut plants fix nitrogen in the soil, leading to better growth. You can find this online or at some garden centers.
* Fertilizer: A balanced fertilizer (like 10-10-10) can help boost growth, but it’s not strictly necessary.
* Mulch: Straw or wood chips can help retain moisture and suppress weeds.
Preparing Your Buckets
This step is crucial for ensuring proper drainage and a healthy growing environment for your peanuts.
1. Drill Drainage Holes: If your buckets don’t already have them, drill several drainage holes in the bottom. I usually go for about 4-5 holes, each about half an inch in diameter. This will prevent water from logging in the bucket and rotting the roots.
2. Add a Layer of Gravel (Optional): Some people like to add a layer of gravel or small stones at the bottom of the bucket to further improve drainage. This is optional, but it can’t hurt.
3. Fill with Potting Mix: Fill the buckets with your potting mix, leaving about an inch or two of space at the top. Gently pat down the soil to remove any air pockets.
Planting Your Peanut Seeds
Now for the fun part – planting those peanut seeds!
1. Soak the Seeds (Optional): Soaking the peanut seeds in water for a few hours before planting can help speed up germination. I usually soak them overnight.
2. Plant the Seeds: Make small holes about 1-2 inches deep in the potting mix. Space the holes about 4-6 inches apart. Plant 2-3 peanut seeds in each hole. This increases the chances of at least one seed germinating.
3. Cover the Seeds: Gently cover the seeds with potting mix and lightly water the soil.
4. Label Your Buckets: It’s always a good idea to label your buckets with the date you planted the seeds. This will help you keep track of their progress.
Caring for Your Peanut Plants
This is where the patience comes in. Peanut plants need consistent care to thrive.
1. Watering: Keep the soil consistently moist, but not waterlogged. Water deeply whenever the top inch of soil feels dry to the touch. Avoid overhead watering, as this can promote fungal diseases.
2. Sunlight: Peanut plants need at least 6-8 hours of sunlight per day. Place your buckets in a sunny location.
3. Fertilizing (Optional): If you choose to fertilize, use a balanced fertilizer (like 10-10-10) every few weeks. Follow the instructions on the fertilizer package.
4. Weeding: Keep the buckets free of weeds. Weeds can compete with your peanut plants for nutrients and water.
5. Hilling: As your peanut plants grow, you’ll need to “hill” them. This means mounding soil around the base of the plants. This encourages the pegs (the stems that produce the peanuts) to enter the soil. Start hilling when the plants are about 6 inches tall and repeat every few weeks.
6. Pest Control: Keep an eye out for pests like aphids or spider mites. If you spot any, treat them with an insecticidal soap or neem oil.
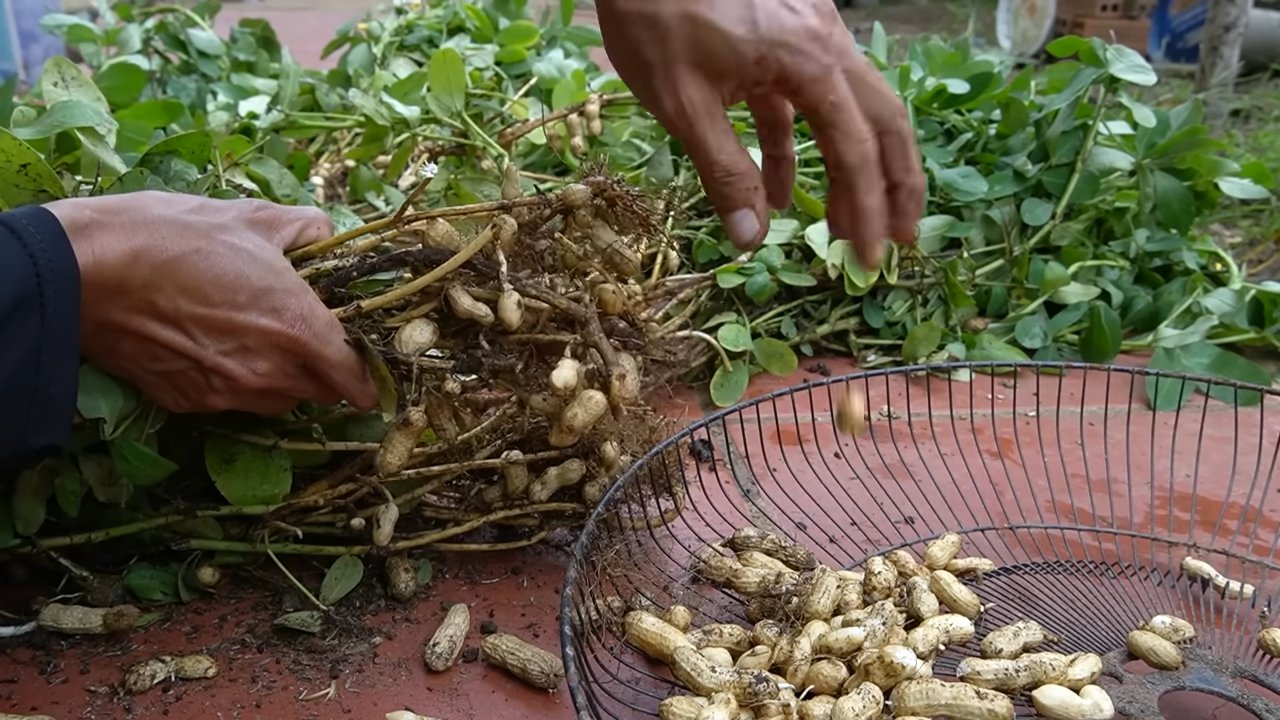
Harvesting Your Peanuts
The moment we’ve all been waiting for! Harvesting your homegrown peanuts is incredibly satisfying.
1. Timing: Peanuts are typically ready to harvest about 120-150 days after planting. A good indicator is when the leaves start to turn yellow and the plant begins to die back.
2. Harvesting: Gently dig up the entire plant, being careful not to damage the peanuts. You can use a garden fork or trowel to loosen the soil around the plant.
3. Cleaning: Shake off as much soil as possible from the peanuts.
4. Curing: This is a crucial step for developing the flavor of your peanuts. Hang the entire plant upside down in a well-ventilated area for about 2-4 weeks. This allows the peanuts to dry and cure properly.
5. Separating the Peanuts: Once the plants are cured, you can separate the peanuts from the vines.
6. Roasting (Optional): You can roast your peanuts in the oven for a delicious snack. Spread them out on a baking sheet and roast at 350°F (175°C) for about 20-30 minutes, or until they are golden brown.
Troubleshooting
Even with the best care, you might encounter a few challenges along the way. Here are some common problems and how to address them:
* Poor Germination: If your peanut seeds don’t germinate, make sure they are raw and unshelled. Also, ensure the soil is warm enough (at least 65°F). You can also try soaking the seeds before planting.
* Yellowing Leaves: Yellowing leaves can be a sign of nutrient deficiency. Try fertilizing with a balanced fertilizer. It could also be a sign of overwatering, so check the soil moisture.
* Lack of Peanuts: If your plants are growing well but not producing peanuts, it could be due to poor pollination. Peanut plants are self-pollinating, but sometimes they need a little help. Gently shake the plants to help distribute the pollen. Also, make sure you are hilling the plants regularly to encourage pegging.
* Pests: Keep an eye out for pests like aphids, spider mites, or leafhoppers. Treat them with an insecticidal soap or neem oil.
Tips for Success
Here are a few extra tips to help you grow the best peanuts possible:
* Choose the Right Variety: Different peanut varieties have different growing requirements. Choose a variety that is well-suited to your climate.
* Use Peanut Inoculant: Peanut inoculant helps the peanut plants fix nitrogen in the soil, leading to better growth.
* Don’t Overwater: Overwatering can lead to root rot. Make sure the soil is well-draining and water only when the top inch of soil feels dry.
* Be Patient: Peanut plants take time to mature. Don’t get discouraged if you don’t see peanuts right away.
* Enjoy the Process: Growing peanuts is a fun and rewarding experience. Enjoy watching your plants grow and harvesting your own homegrown peanuts!
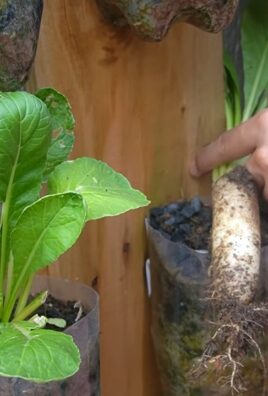
Section: Enhancing Growth with Companion Planting
Companion planting is a fantastic way to naturally boost the health and yield of your peanut plants. By strategically planting certain herbs and vegetables alongside your peanuts, you can deter pests, attract beneficial insects, and even improve soil quality.
1. Marigolds: These cheerful flowers are a powerhouse when it comes to pest control. Marigolds release a compound into the soil that repels nematodes, tiny worms that can damage peanut roots. Plant marigolds around the perimeter of your buckets to create a protective barrier.
2. Nasturtiums: Another edible flower, nasturtiums act as a trap crop for aphids. Aphids are more attracted to nasturtiums than peanut plants, so they’ll leave your peanuts alone. Plus, nasturtium flowers and leaves are delicious in salads!
3. Basil: This fragrant herb not only adds flavor to your cooking but also repels several common peanut pests, including thrips and whiteflies. Plant basil in the same bucket as your peanuts, or in nearby containers.
4. Garlic and On

Conclusion
So, there you have it! Growing your own peanuts in buckets is not only possible, it’s surprisingly rewarding and accessible, even if you don’t have a sprawling garden. This DIY trick transforms the humble peanut from a grocery store staple into a fascinating home gardening project. Forget the image of vast peanut farms; with a few buckets, some quality soil, and a little patience, you can cultivate your own supply of fresh, homegrown peanuts right on your patio, balcony, or even indoors with sufficient sunlight.
Why is this a must-try? Firstly, the taste difference is remarkable. Freshly harvested peanuts boast a sweetness and nutty flavor that you simply can’t find in commercially processed varieties. Secondly, it’s an incredibly educational and engaging activity, especially for families. Watching the plants grow, flower, and then bury their pegs into the soil to produce peanuts is a truly captivating process. It’s a fantastic way to connect with nature and understand where your food comes from. Thirdly, it’s a cost-effective way to enjoy fresh peanuts. While there’s an initial investment in buckets and soil, the yield from even a few plants can be substantial, saving you money in the long run.
But the best part? The possibilities are endless! Experiment with different peanut varieties to discover your favorite flavor profile. Try Valencia peanuts for their sweetness, Virginia peanuts for their large size, or Spanish peanuts for their intense nutty flavor. You can also explore different roasting methods after harvesting. From simple oven roasting to more elaborate spice blends, the options are limited only by your imagination. Consider adding companion plants like marigolds or basil to your peanut buckets to deter pests and enhance growth.
Don’t be intimidated by the prospect of growing your own peanuts. This DIY trick is designed to be simple and straightforward, even for beginner gardeners. The key is to provide your plants with plenty of sunlight, well-draining soil, and consistent watering. With a little care and attention, you’ll be rewarded with a bountiful harvest of delicious, homegrown peanuts.
We wholeheartedly encourage you to give this DIY trick a try. It’s a fun, educational, and rewarding experience that will transform the way you think about peanuts. And most importantly, we want to hear about your experiences! Share your photos, tips, and stories with us in the comments below. Let us know what peanut varieties you tried, what challenges you faced, and what successes you celebrated. Together, we can build a community of bucket-grown peanut enthusiasts and share the joy of homegrown goodness. So, grab your buckets, get your hands dirty, and start growing your own peanuts today! You won’t regret it.
Frequently Asked Questions (FAQ)
What kind of bucket should I use for growing peanuts?
The ideal bucket size is at least 5 gallons, but 10-gallon buckets are even better as they provide more room for the roots to develop and the peanuts to form. Ensure the bucket has drainage holes at the bottom to prevent waterlogging, which can lead to root rot. You can use plastic or terracotta buckets, but avoid metal buckets as they can overheat in direct sunlight. Dark-colored buckets can also absorb more heat, so opt for lighter colors if possible. Before planting, thoroughly clean the bucket to remove any residue or contaminants.
What type of soil is best for bucket-grown peanuts?
Peanuts thrive in well-draining, sandy loam soil. Avoid heavy clay soils, as they can become compacted and hinder the development of the peanut pegs. You can purchase a pre-mixed potting mix specifically formulated for vegetables, or you can create your own mix by combining equal parts of garden soil, compost, and sand. The soil should be slightly acidic to neutral, with a pH between 6.0 and 7.0. Before planting, amend the soil with organic matter, such as compost or well-rotted manure, to improve drainage and fertility.
How often should I water my peanut plants in buckets?
Peanut plants need consistent moisture, especially during flowering and pegging. Water deeply whenever the top inch of soil feels dry to the touch. Avoid overwatering, as this can lead to root rot. The frequency of watering will depend on the weather conditions and the type of soil you’re using. In hot, dry weather, you may need to water daily, while in cooler, wetter weather, you may only need to water every few days. Check the soil moisture regularly and adjust your watering schedule accordingly.
How much sunlight do peanut plants need?
Peanut plants require at least 6-8 hours of direct sunlight per day to thrive. Choose a location that receives full sun throughout the day. If you’re growing peanuts indoors, place them near a sunny window or use grow lights to supplement natural sunlight. Insufficient sunlight can lead to stunted growth and reduced peanut production. Rotate the buckets regularly to ensure that all sides of the plants receive adequate sunlight.
When is the best time to plant peanuts in buckets?
The best time to plant peanuts is after the last frost, when the soil has warmed up to at least 65°F (18°C). Peanuts are warm-season crops and are sensitive to frost. In most regions, this is typically in late spring or early summer. You can start peanut seeds indoors 4-6 weeks before the last frost and transplant them into buckets once the weather warms up. Alternatively, you can directly sow peanut seeds into buckets after the last frost.
How long does it take for peanuts to mature in buckets?
Peanuts typically take 120-150 days to mature, depending on the variety and growing conditions. You’ll know the peanuts are ready to harvest when the foliage starts to turn yellow and the pods feel plump and full. To check for maturity, dig up a few plants and examine the pods. The inside of the pods should be dark and the peanuts should be well-formed.
How do I harvest peanuts from buckets?
To harvest peanuts, carefully pull the entire plant out of the bucket. Gently shake off any excess soil and then hang the plants upside down in a warm, dry, and well-ventilated area for 2-3 weeks to cure. Curing allows the peanuts to dry properly and develop their flavor. Once the peanuts are cured, you can remove them from the plants and store them in a cool, dry place.
What are some common pests and diseases that affect peanut plants?
Common pests that can affect peanut plants include aphids, spider mites, and leafhoppers. These pests can be controlled with insecticidal soap or neem oil. Common diseases include leaf spot and root rot. Leaf spot can be prevented by ensuring good air circulation and avoiding overhead watering. Root rot can be prevented by using well-draining soil and avoiding overwatering.
Can I grow different varieties of peanuts in the same bucket?
It’s generally not recommended to grow different varieties of peanuts in the same bucket, as they may compete for resources and affect each other’s growth. It’s best to grow each variety in its own separate bucket to ensure optimal growth and yield.
How do I store my harvested peanuts?
After curing, store your peanuts in a cool, dry, and airtight container. You can store them in the refrigerator for several months or in the freezer for up to a year. Roasted peanuts can be stored in an airtight container at room temperature for several weeks.
Leave a Comment