

Chili pepper growing system: Ever dreamt of adding a fiery kick to your meals with homegrown chilies, but thought it was too complicated? Well, get ready to ditch that notion! This article is your ultimate guide to creating a thriving chili pepper growing system, right in the comfort of your own home. We’re diving deep into easy DIY tricks and hacks that will have you harvesting a bumper crop of vibrant, flavorful peppers in no time.
For centuries, chili peppers have been more than just a spice; they’ve been woven into the fabric of cultures worldwide. From ancient Mesoamerica, where they were first cultivated, to the fiery cuisines of Asia and beyond, chilies have added zest and vitality to countless dishes. But you don’t need to be a seasoned gardener to tap into this rich history and enjoy the fruits (or should we say, peppers!) of your labor.
Let’s face it, store-bought chilies can sometimes lack that fresh, vibrant flavor. Plus, knowing exactly where your food comes from is incredibly rewarding. That’s where our DIY chili pepper growing system comes in. I’m going to show you simple, cost-effective methods to cultivate your own chili peppers, regardless of your gardening experience or space constraints. Whether you have a sprawling backyard or just a sunny windowsill, you can create a thriving chili pepper growing system and enjoy the satisfaction of harvesting your own spicy bounty. So, grab your gardening gloves, and let’s get started!
DIY Self-Watering Chili Pepper Planter: From Seed to Spice!
Hey fellow chili enthusiasts! Are you ready to embark on a fiery adventure and grow your own delicious chili peppers right at home? I’m going to walk you through building a super easy and effective self-watering planter that will keep your chili plants happy and thriving, even if you’re a bit forgetful about watering (like me!). This project is perfect for beginners and seasoned gardeners alike. Let’s get started!
What You’ll Need: The Supply List
Before we dive in, let’s gather all the necessary materials. Don’t worry, most of these are readily available at your local hardware store or even lying around your house.
* Two Plastic Buckets (or Containers): One larger (approx. 5-gallon) and one smaller (approx. 2-gallon) that can fit inside the larger one. Make sure they’re food-grade plastic if you’re concerned about chemicals leaching into your soil.
* Drill with Various Drill Bits: We’ll need to drill holes for drainage, aeration, and the watering system.
* PVC Pipe (approx. 12-18 inches long, 1-2 inch diameter): This will act as our watering reservoir access point.
* PVC End Cap: To seal the bottom of the PVC pipe.
* Landscape Fabric or Weed Barrier: To prevent soil from clogging the watering reservoir.
* Potting Mix: A well-draining potting mix is crucial for healthy chili pepper growth.
* Chili Pepper Seeds or Seedlings: Choose your favorite varieties! I personally love jalapeños and habaneros.
* Water: Obviously!
* Optional:
* Gloves (to protect your hands)
* Measuring tape or ruler
* Permanent marker
* Clay pebbles or gravel (for added drainage)
* Fertilizer (for boosting growth)
Building the Self-Watering System: Step-by-Step
Okay, now for the fun part! We’re going to transform these buckets into a self-watering paradise for your chili peppers.
1. Prepare the Inner Bucket (The Planting Container):
* First, take the smaller bucket (the one that will sit inside the larger one).
* Using your drill, create several drainage holes in the bottom of the bucket. I recommend using a drill bit that’s about 1/4 inch in diameter. Space the holes evenly apart. Think of it like a showerhead – you want even distribution.
* Next, drill a few aeration holes around the sides of the bucket, near the bottom. These holes will allow air to circulate around the roots, preventing them from becoming waterlogged. Again, use a 1/4 inch drill bit.
* Line the bottom of the bucket with landscape fabric. This will prevent the potting mix from falling into the water reservoir below. Cut a piece of fabric slightly larger than the bottom of the bucket and press it down. You can secure it with a bit of tape if needed. Alternatively, you can use a layer of clay pebbles or gravel for drainage before adding the fabric.
2. Prepare the Outer Bucket (The Water Reservoir):
* Now, grab the larger bucket. This will be our water reservoir.
* We need to create a platform for the inner bucket to sit on, allowing space for the water. You can achieve this in a couple of ways:
* Option 1 (Using the Smaller Bucket): Place the smaller bucket inside the larger bucket. Mark the height where the top rim of the smaller bucket sits on the inside of the larger bucket. Remove the smaller bucket. Now, drill several holes around the inside of the larger bucket, just below the marked line. These holes will act as supports for the smaller bucket to rest on. Make sure the holes are large enough to support the weight of the soil and plants.
* Option 2 (Using Bricks or Rocks): Place a few bricks or large rocks in the bottom of the larger bucket. These will elevate the inner bucket and create the water reservoir. Make sure the bricks or rocks are stable and won’t tip over.
* Drill a small overflow hole near the top of the larger bucket. This will prevent the reservoir from overfilling during heavy rain or when you’re watering.
3. Install the Watering Tube:
* Take your PVC pipe and attach the end cap to one end. This will seal the bottom of the pipe.
* Drill several small holes along the bottom portion of the PVC pipe (the part that will be submerged in the water reservoir). These holes will allow water to seep into the soil.
* Place the PVC pipe in the larger bucket, standing upright. Position it near the edge of the bucket for easy access. You can secure it in place with some duct tape or zip ties if needed.
4. Assemble the Planter:
* Place the smaller bucket (the planting container) inside the larger bucket, resting on the supports you created (either the holes or the bricks/rocks).
* Make sure the bottom of the smaller bucket is elevated above the bottom of the larger bucket, creating a water reservoir.
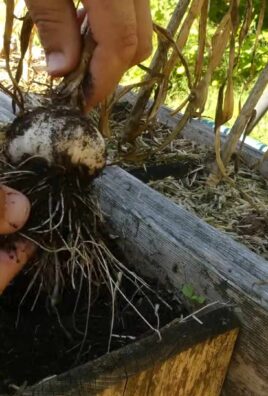
Planting Your Chili Peppers: Getting Started
Now that our self-watering planter is built, it’s time to plant our chili peppers!
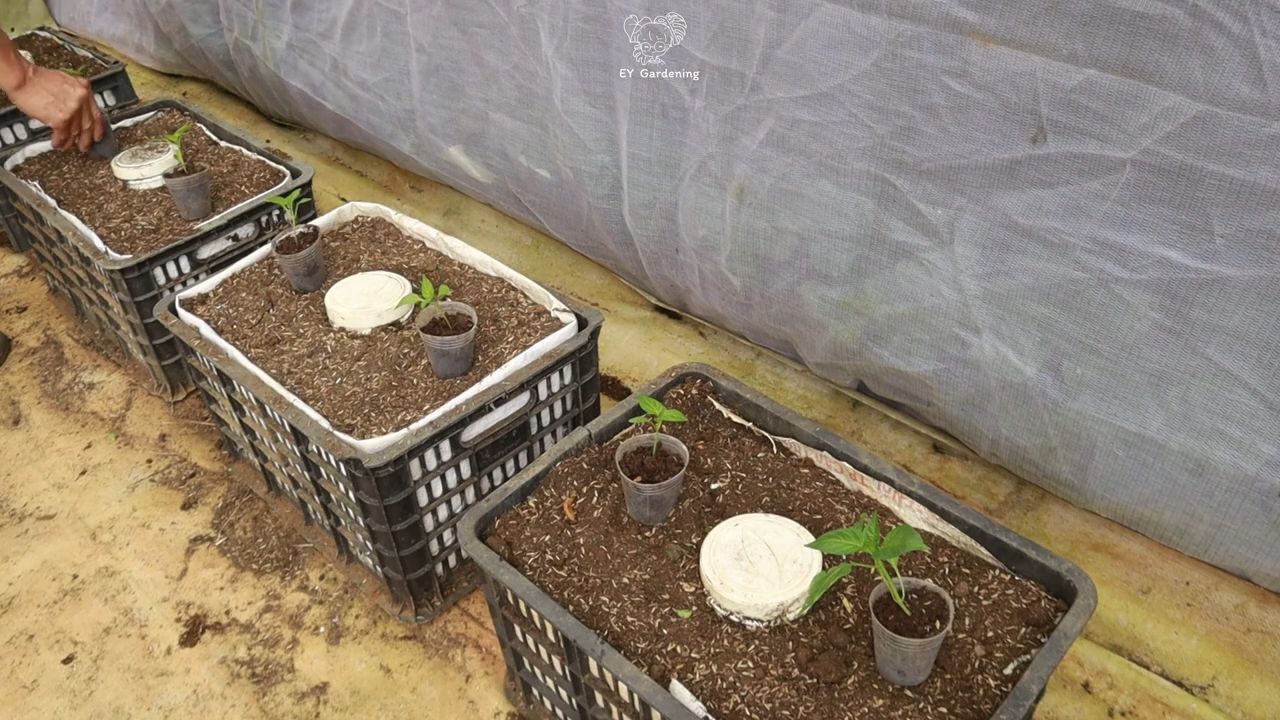
1. Fill the Planting Container:
* Fill the smaller bucket with your well-draining potting mix. Leave a few inches of space at the top.
* Gently pat down the soil to remove any air pockets.
2. Plant Your Seeds or Seedlings:
* If planting seeds: Follow the instructions on your seed packet for planting depth and spacing. Generally, chili pepper seeds should be planted about 1/4 inch deep.
* If planting seedlings: Dig a hole in the soil large enough to accommodate the root ball of the seedling. Gently remove the seedling from its container and place it in the hole. Backfill with soil and gently pat it down.
3. Water Thoroughly:
* Water the soil thoroughly until water drains out of the drainage holes in the bottom of the smaller bucket. This will help settle the soil and ensure that the roots are well-hydrated.
4. Fill the Water Reservoir:
* Pour water into the PVC pipe until the water level reaches the overflow hole in the larger bucket. This will fill the water reservoir.
Caring for Your Chili Peppers: Tips and Tricks
Now that your chili peppers are planted, here are some tips to keep them happy and productive:
* Sunlight: Chili peppers need plenty of sunlight to thrive. Aim for at least 6-8 hours of direct sunlight per day. If you don’t have enough sunlight, you can supplement with grow lights.
* Watering: The beauty of this self-watering system is that it takes care of most of the watering for you! Simply check the water level in the PVC pipe every few days and refill as needed. Avoid overwatering, as this can lead to root rot.
* Fertilizing: Chili peppers are heavy feeders, so they need regular fertilization. Use a balanced fertilizer or a fertilizer specifically formulated for peppers. Follow the instructions on the fertilizer label.
* Pruning: Pruning can help encourage bushier growth and more fruit production. Remove any dead or yellowing leaves. You can also pinch off the tips of the branches to encourage branching.
* Pest Control: Keep an eye out for pests such as aphids, spider mites, and whiteflies. If you spot any pests, treat them with an appropriate insecticide or insecticidal soap.
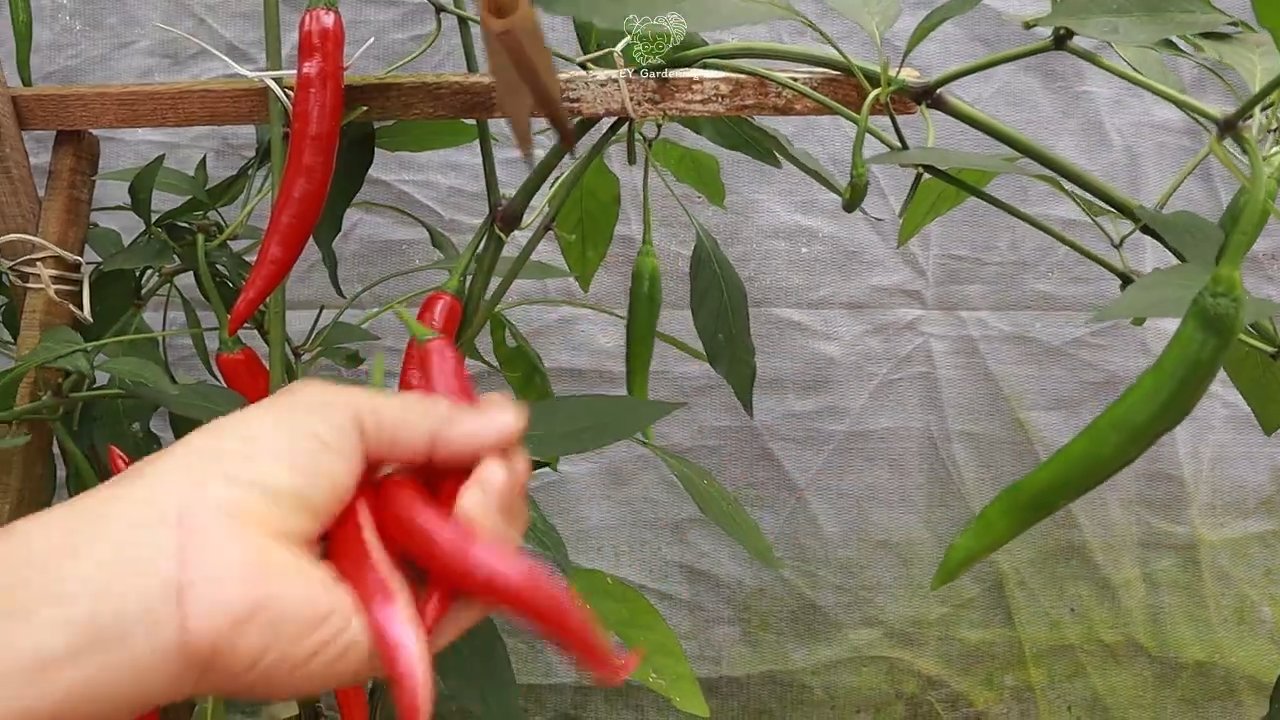
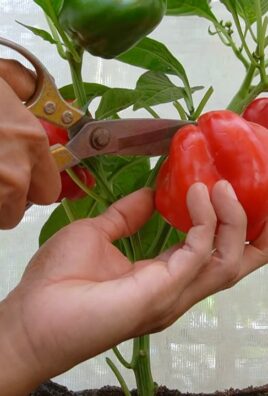
* Harvesting: Chili peppers are typically ready to harvest when they reach their mature color and size. Use scissors or pruning shears to cut the peppers from the plant.
Troubleshooting: Common Issues and Solutions
Even with the best care, you might encounter some issues while growing your chili peppers. Here are some common problems and how to fix them:
* Yellowing Leaves: This can be caused by a variety of factors, including overwatering, underwatering, nutrient deficiencies, or pests. Check the soil moisture and adjust your watering accordingly. Fertilize your plants regularly. Inspect the leaves for pests.
* Blossom Drop: This is when the flowers fall off the plant without producing fruit. It can be caused by temperature stress, lack of pollination, or nutrient deficiencies. Ensure your plants are getting enough sunlight and water. Hand-pollinate the flowers if necessary. Fertilize your plants with a fertilizer high in phosphorus.
* Stunted Growth: This can be caused by a variety of factors, including poor soil, lack of sunlight, or pests. Ensure your plants are planted in well-draining soil. Provide them with plenty of sunlight. Inspect the plants for pests.
* Root Rot: This is caused by overwatering and poor drainage. Ensure your plants are planted in well-draining soil. Avoid overwatering.
Enjoying Your Harvest: From
Conclusion
So, there you have it! Mastering the art of a DIY chili pepper growing system is not just a fun project; it’s a gateway to a world of fresh, flavorful, and fiery possibilities right in your own home. Forget those bland, store-bought peppers that lack the vibrant kick you crave. With a little ingenuity and our simple guide, you can cultivate a thriving chili pepper garden, tailored to your exact spice preferences.
Why is this DIY trick a must-try? Because it empowers you to control every aspect of your chili pepper’s journey, from seed to table. You’ll know exactly what goes into your plants – no mystery chemicals or questionable growing practices. Plus, it’s incredibly rewarding to nurture something from a tiny seed into a bountiful harvest. Imagine the satisfaction of adding your own homegrown habaneros to your salsa or crafting a signature hot sauce with peppers you nurtured yourself.
But the benefits extend beyond just flavor and control. A DIY chili pepper growing system is also a sustainable and cost-effective solution. You’ll reduce your reliance on commercially grown peppers, minimizing your environmental impact and saving money in the long run. And let’s not forget the sheer joy of gardening! It’s a therapeutic activity that connects you with nature and provides a welcome escape from the stresses of daily life.
Ready to take your chili pepper game to the next level? Here are a few suggestions and variations to get you started:
* Experiment with different containers: While we’ve focused on basic pots, consider exploring hydroponic systems or vertical gardens for a more advanced setup.
* Explore a variety of chili peppers: Don’t limit yourself to just one type! Grow a diverse range of peppers, from mild jalapeños to scorching ghost peppers, to create a truly unique flavor profile.
* Consider companion planting: Basil, tomatoes, and carrots are excellent companions for chili peppers, helping to deter pests and improve growth.
* Adjust your lighting: If you’re growing indoors, experiment with different types of grow lights to find the optimal spectrum for your chili peppers.
* Get creative with your fertilizer: Compost tea, fish emulsion, and bone meal are all excellent organic fertilizers that can boost your chili pepper’s growth and flavor.
This DIY chili pepper growing system is more than just a project; it’s an investment in flavor, sustainability, and personal satisfaction. It’s a chance to connect with nature, learn new skills, and create something truly special.
So, what are you waiting for? Gather your supplies, follow our guide, and embark on your chili pepper growing adventure today! We’re confident that you’ll be amazed by the results.
And most importantly, we want to hear about your experience! Share your photos, tips, and stories in the comments below. Let’s build a community of chili pepper enthusiasts and inspire others to embrace the joy of DIY gardening. What unique chili pepper growing system did you create? What challenges did you face, and how did you overcome them? Your insights could be invaluable to fellow growers. Let’s get growing!
Frequently Asked Questions (FAQ)
What are the best chili pepper varieties to grow for beginners?
For beginners, starting with easier-to-grow varieties like jalapeños, bell peppers (if you want no heat), Anaheim peppers, or poblano peppers is highly recommended. These peppers are relatively forgiving and produce reliably, even with less-than-perfect conditions. They also have a shorter growing season compared to some of the hotter varieties, allowing you to see results more quickly. Once you’ve mastered the basics with these peppers, you can then venture into more challenging varieties like habaneros, Scotch bonnets, or ghost peppers. Remember to always handle hot peppers with care and wear gloves when harvesting or preparing them.
How much sunlight do chili peppers need?
Chili peppers thrive in full sunlight, requiring at least 6-8 hours of direct sunlight per day. If you’re growing your chili peppers indoors, you’ll need to supplement natural sunlight with grow lights. LED grow lights are a great option as they are energy-efficient and provide the necessary spectrum of light for healthy growth. Position your grow lights close enough to the plants to provide adequate light intensity, but not so close that they burn the leaves. Rotate your plants regularly to ensure that all sides receive equal exposure to light.
What type of soil is best for chili peppers?
Chili peppers prefer well-draining soil that is rich in organic matter. A good potting mix for chili peppers should consist of a blend of peat moss, perlite, and vermiculite. You can also amend your soil with compost or aged manure to improve its fertility and drainage. Avoid using heavy clay soils, as they can become waterlogged and lead to root rot. The ideal pH level for chili pepper soil is between 6.0 and 7.0. You can test your soil’s pH using a soil testing kit and adjust it accordingly with lime or sulfur.
How often should I water my chili peppers?
Water your chili peppers regularly, especially during hot and dry weather. The frequency of watering will depend on the type of soil you’re using, the size of your container, and the weather conditions. As a general rule, water your chili peppers when the top inch of soil feels dry to the touch. Avoid overwatering, as this can lead to root rot. When watering, water deeply and thoroughly, ensuring that the entire root ball is moistened. It’s best to water in the morning to allow the foliage to dry before nightfall, which can help prevent fungal diseases.
What are some common pests and diseases that affect chili peppers?
Chili peppers are susceptible to a variety of pests and diseases, including aphids, spider mites, whiteflies, blossom-end rot, and fungal diseases. To prevent pest and disease problems, it’s important to maintain good garden hygiene, provide adequate air circulation, and avoid overwatering. Inspect your plants regularly for signs of pests or diseases and take action promptly if you notice any problems. Organic pest control methods, such as insecticidal soap or neem oil, can be effective for controlling aphids, spider mites, and whiteflies. Blossom-end rot is caused by a calcium deficiency and can be prevented by adding calcium to the soil or using a calcium-rich fertilizer. Fungal diseases can be prevented by avoiding overwatering and providing good air circulation.
How do I harvest chili peppers?
Harvest your chili peppers when they have reached their mature color and size. The color will vary depending on the variety of pepper you’re growing. Use a sharp knife or scissors to cut the peppers from the plant, leaving a small stem attached. Handle the peppers carefully to avoid bruising or damaging them. Wear gloves when harvesting hot peppers to protect your skin from the capsaicin, the compound that makes them spicy. Store your harvested chili peppers in a cool, dry place. You can also dry, freeze, or pickle your chili peppers for long-term storage.
Can I grow chili peppers indoors year-round?
Yes, you can grow chili peppers indoors year-round with the help of grow lights. Choose a sunny location for your indoor garden and supplement natural sunlight with LED grow lights. Provide your plants with well-draining soil, regular watering, and adequate fertilization. Monitor your plants for pests and diseases and take action promptly if you notice any problems. With proper care, you can enjoy a continuous harvest of fresh chili peppers throughout the year.
How do I make my chili peppers hotter?
Several factors can influence the heat level of your chili peppers. Stressing the plants slightly by withholding water or fertilizer can sometimes increase capsaicin production. However, be careful not to overstress the plants, as this can negatively impact their overall health and yield. The variety of pepper you’re growing is the most significant factor in determining its heat level. Some varieties, like habaneros and ghost peppers, are naturally much hotter than others.
Leave a Comment