

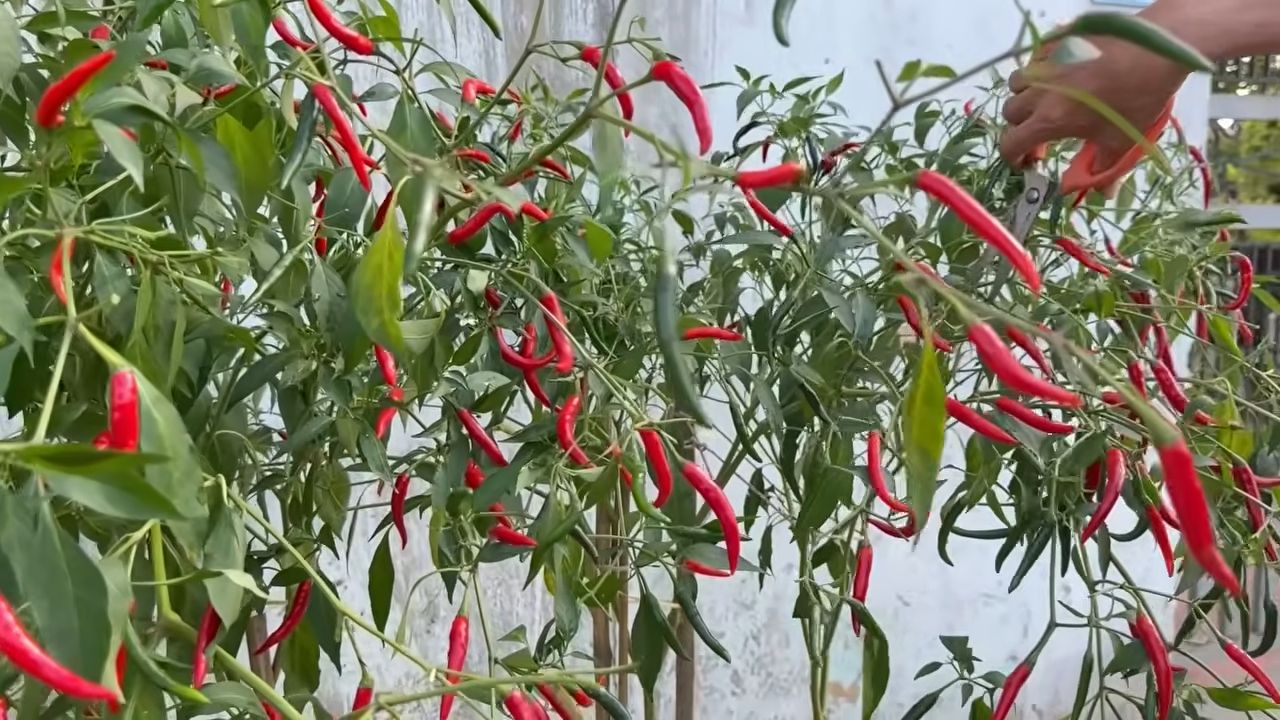
Chili plant propagation from stem is a fantastic way to expand your garden and enjoy even more of those fiery peppers you love! Have you ever admired a friend’s chili plant, overflowing with vibrant chilies, and wished you could have one just like it? Well, now you can, without spending a dime on new seeds or seedlings! This DIY guide will walk you through the simple steps of propagating chili plants from stem cuttings, a technique that’s been used by gardeners for generations.
The practice of propagating plants through cuttings dates back centuries, with evidence suggesting its use in ancient civilizations for cultivating various crops. It’s a testament to the ingenuity of gardeners who sought to multiply their yields and preserve desirable traits in their plants. Today, this method remains a valuable tool for home gardeners, offering a cost-effective and rewarding way to expand their gardens.
Why should you learn chili plant propagation from stem? Because it’s easier than you think! Instead of relying solely on seeds, which can sometimes be unpredictable, stem propagation allows you to create clones of your favorite chili plants, ensuring you get the same delicious peppers year after year. Plus, it’s a great way to rescue a damaged plant or share your prized varieties with friends and family. Let’s dive in and unlock the secrets to successful chili plant propagation!
Chili Pflanzen Vermehren: Einsteigerfreundliche Anleitung zur Stecklingsvermehrung
Hallo liebe Chili-Enthusiasten! Habt ihr euch jemals gefragt, wie ihr eure Lieblings-Chilisorten vervielfältigen könnt, ohne jedes Mal neue Samen kaufen zu müssen? Die Antwort ist einfacher als ihr denkt: Stecklingsvermehrung! Ich zeige euch heute, wie ihr mit ein paar einfachen Schritten und Materialien eure eigenen Chili-Klone ziehen könnt. Es ist nicht nur kostengünstig, sondern auch eine tolle Möglichkeit, die genetischen Eigenschaften eurer besten Pflanzen zu erhalten. Los geht’s!
Was ihr für die Chili-Stecklingsvermehrung benötigt
Bevor wir loslegen, hier eine Liste der Dinge, die ihr bereithalten solltet:
* Eine gesunde Chili-Mutterpflanze: Wählt eine Pflanze, die kräftig wächst und keine Anzeichen von Krankheiten oder Schädlingen aufweist.
* Ein scharfes, sauberes Messer oder eine Gartenschere: Hygiene ist das A und O, um Infektionen zu vermeiden. Desinfiziert euer Werkzeug vor Gebrauch mit Alkohol.
* Bewurzelungspulver oder -gel (optional): Fördert die Wurzelbildung, ist aber nicht zwingend erforderlich.
* Kleine Töpfe oder Anzuchtschalen: Für die Stecklinge.
* Anzuchterde oder Kokosfasersubstrat: Ein lockeres, nährstoffarmes Substrat ist ideal.
* Eine Sprühflasche mit Wasser: Um die Stecklinge feucht zu halten.
* Eine durchsichtige Plastiktüte oder ein Mini-Gewächshaus: Um eine hohe Luftfeuchtigkeit zu gewährleisten.
* Ein warmer, heller Standort ohne direkte Sonneneinstrahlung: Ein Ost- oder Westfenster ist perfekt.
* Geduld: Die Wurzelbildung kann einige Wochen dauern.
Der richtige Zeitpunkt für die Stecklingsvermehrung
Der beste Zeitpunkt für die Stecklingsvermehrung ist im Frühjahr oder Sommer, wenn die Chili-Pflanzen aktiv wachsen. Aber auch im Herbst könnt ihr es versuchen, solange die Pflanze noch vital ist. Vermeidet es, Stecklinge von Pflanzen zu nehmen, die bereits Früchte tragen oder kurz vor der Blüte stehen, da diese ihre Energie in die Fruchtbildung stecken und weniger in die Wurzelbildung.
Schritt-für-Schritt-Anleitung zur Chili-Stecklingsvermehrung
Jetzt geht’s ans Eingemachte! Folgt diesen Schritten, um eure eigenen Chili-Stecklinge zu ziehen:
1. Die Vorbereitung:
* Füllt eure Töpfe oder Anzuchtschalen mit Anzuchterde oder Kokosfasersubstrat. Befeuchtet das Substrat leicht, sodass es feucht, aber nicht nass ist.
* Desinfiziert euer Messer oder eure Gartenschere gründlich.
* Bereitet euren Arbeitsbereich vor, sodass ihr alles griffbereit habt.
2. Den Steckling schneiden:
* Wählt einen gesunden Trieb an eurer Chili-Mutterpflanze aus. Der Trieb sollte etwa 10-15 cm lang sein und mindestens 2-3 Blattknoten (die Stellen, an denen Blätter wachsen) haben.
* Schneidet den Trieb mit einem sauberen, schrägen Schnitt direkt unterhalb eines Blattknotens ab. Ein schräger Schnitt vergrößert die Oberfläche, was die Wurzelbildung fördert.
* Entfernt die unteren Blätter des Stecklings, sodass nur noch die oberen 2-3 Blätter übrig bleiben. Dies reduziert die Verdunstung und verhindert, dass die Blätter im Substrat faulen.
3. Bewurzelung fördern (optional):
* Wenn ihr Bewurzelungspulver oder -gel verwendet, taucht das untere Ende des Stecklings (dort, wo ihr ihn abgeschnitten habt) in das Pulver oder Gel. Schüttelt überschüssiges Pulver ab. Das Bewurzelungshormon stimuliert die Wurzelbildung und schützt den Steckling vor Pilzbefall.
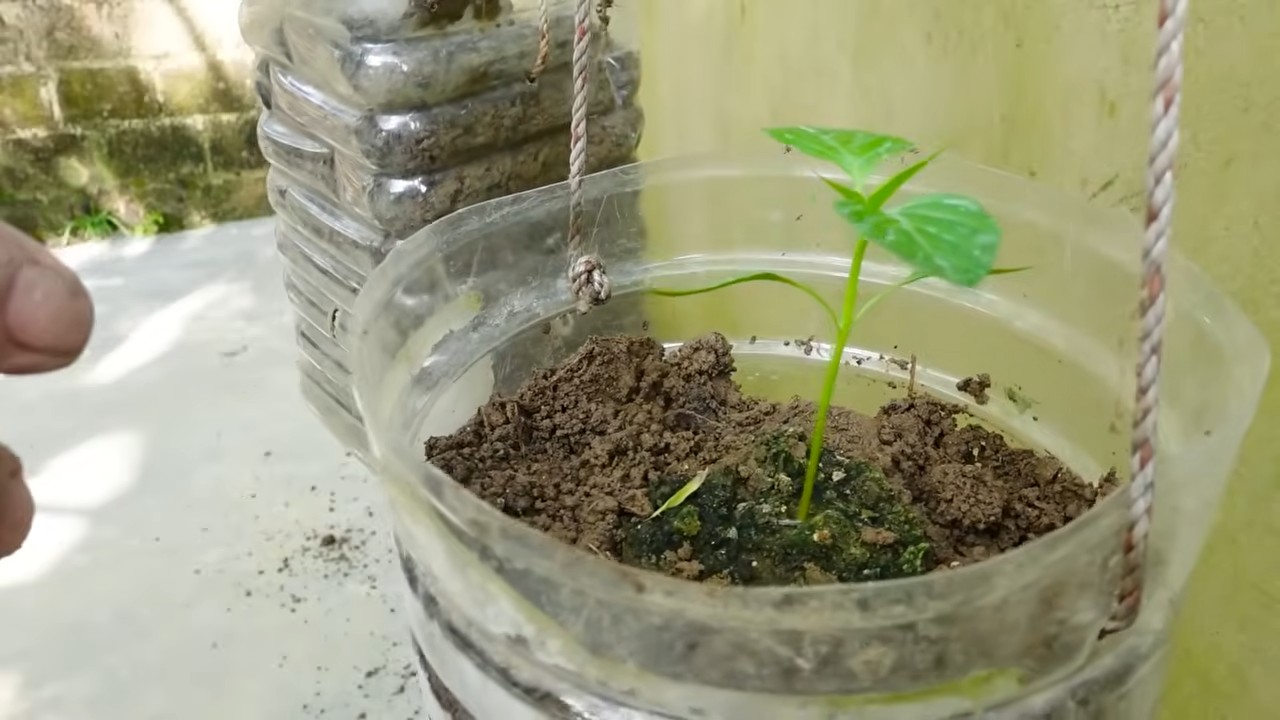
4. Den Steckling einpflanzen:
* Macht mit einem Stift oder Finger ein Loch in das vorbereitete Substrat. Das Loch sollte tief genug sein, um den Steckling bis zu den unteren Blattknoten einzusetzen.
* Setzt den Steckling vorsichtig in das Loch und drückt die Erde leicht an, um ihn zu stabilisieren.
5. Für hohe Luftfeuchtigkeit sorgen:
* Besprüht den Steckling mit Wasser, um ihn feucht zu halten.
* Stülpt eine durchsichtige Plastiktüte über den Topf oder stellt den Topf in ein Mini-Gewächshaus. Dies erhöht die Luftfeuchtigkeit und schafft ein ideales Klima für die Wurzelbildung. Achtet darauf, dass die Blätter des Stecklings die Plastiktüte nicht berühren, da dies zu Fäulnis führen kann.
6. Der richtige Standort:
* Stellt den Topf mit dem Steckling an einen warmen, hellen Ort ohne direkte Sonneneinstrahlung. Direkte Sonne kann die Blätter verbrennen und den Steckling austrocknen. Ein Ost- oder Westfenster ist ideal.
7. Pflege und Geduld:
* Überprüft den Steckling regelmäßig und besprüht ihn bei Bedarf mit Wasser, um die Luftfeuchtigkeit hoch zu halten. Achtet darauf, dass das Substrat feucht, aber nicht nass ist.
* Lüftet die Plastiktüte oder das Mini-Gewächshaus regelmäßig, um Schimmelbildung zu vermeiden.
* Nach etwa 2-4 Wochen sollten sich die ersten Wurzeln bilden. Ihr könnt dies überprüfen, indem ihr vorsichtig am Steckling zieht. Wenn er Widerstand leistet, hat er Wurzeln gebildet.
Nach der Wurzelbildung: Die Umgewöhnung
Sobald die Stecklinge Wurzeln gebildet haben, ist es wichtig, sie langsam an die normale Umgebungsluft zu gewöhnen. Diesen Prozess nennt man “Abhärten”.
1. Langsame Anpassung:
* Beginnt damit, die Plastiktüte oder das Mini-Gewächshaus für ein paar Stunden am Tag zu entfernen. Steigert die Zeit, in der der Steckling der normalen Luft ausgesetzt ist, allmählich über mehrere Tage.
* Beobachtet den Steckling genau. Wenn er Anzeichen von Stress zeigt (z. B. welkende Blätter), reduziert die Zeit, in der er der normalen Luft ausgesetzt ist, wieder.
2. Umtopfen:
* Sobald der Steckling gut an die normale Luft gewöhnt ist, könnt ihr ihn in einen größeren Topf mit normaler Blumenerde umtopfen.
* Gießt den Steckling nach dem Umtopfen gründlich.
3. Weiterpflege:
* Pflegt den Steckling wie eine normale Chili-Pflanze. Gießt ihn regelmäßig, düngt ihn bei Bedarf und stellt ihn an einen sonnigen Standort.
Häufige Fehler und wie man sie vermeidet
Auch bei der Stecklingsvermehrung können Fehler passieren. Hier sind einige häufige Fehler und Tipps, wie ihr sie vermeiden könnt:
* Falsche Schnitttechnik: Ein unsauberer oder gequetschter Schnitt kann die Wurzelbildung behindern. Verwendet immer ein scharfes, desinfiziertes Messer oder eine Gartenschere und macht einen sauberen, schrägen Schnitt.
* Zu wenig oder zu viel Feuchtigkeit: Stecklinge brauchen eine hohe Luftfeuchtigkeit, um nicht auszutrocknen. Aber zu viel Feuchtigkeit kann zu Fäulnis führen. Besprüht die Stecklinge regelmäßig mit Wasser und lüftet die Plastiktüte oder das Mini-Gewächshaus regelmäßig.
* Direkte Sonneneinstrahlung: Direkte Sonne kann die Blätter verbrennen und den Steckling austrocknen. Stellt die Stecklinge an einen hellen Ort ohne direkte Sonneneinstrahlung.
* Ungeduld: Die Wurzelbildung kann einige Wochen dauern. Seid geduldig und gebt den Stecklingen Zeit, sich zu entwickeln.
* Verwendung von kranken oder geschwächten Mutterpflanzen: Stecklinge von kranken oder geschwächten Pflanzen haben eine geringere Chance, Wurzeln zu bilden. Wählt immer eine gesunde, kräftige Mutterpflanze aus.
Zusätzliche Tipps für eine erfolgreiche Stecklingsvermehrung
Hier sind noch ein paar zusätzliche Tipps, die euch bei der Stecklingsvermehrung helfen können:
* Verwendet Regenwasser oder destilliertes Wasser: Leitungswasser kann Chlor und andere Chemikalien enthalten, die die Wurzelbildung beeinträ
Conclusion
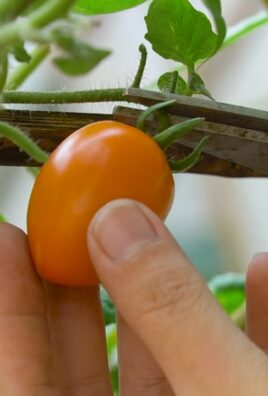
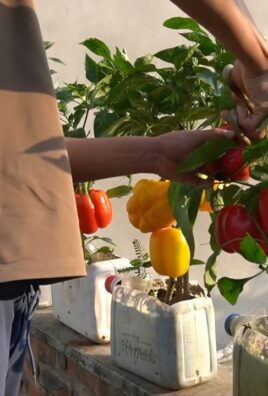
So, there you have it! Propagating chili plants from stem cuttings is not just a cost-effective way to expand your garden; it’s a deeply rewarding experience that connects you more intimately with the growing process. Forget shelling out money for new seedlings every season. This simple, yet effective, DIY trick empowers you to clone your favorite chili varieties, ensuring a continuous supply of spicy goodness for your culinary adventures.
Why is this a must-try? Because it’s incredibly easy, even for beginners. You don’t need fancy equipment or specialized knowledge. With just a few basic tools and a little patience, you can transform a seemingly discarded stem into a thriving new chili plant. Imagine the satisfaction of harvesting peppers from a plant you personally brought to life from a single cutting!
Beyond the cost savings and the personal fulfillment, propagating from stem cuttings allows you to preserve specific traits of your favorite chili plants. Did you discover a particularly prolific producer or a plant with exceptionally flavorful peppers? Cloning it through stem propagation ensures that those desirable characteristics are passed on to the next generation. This is particularly valuable for heirloom varieties or plants that have adapted well to your local climate.
Looking for variations? Experiment with different rooting mediums. While water propagation is a popular and straightforward method, you can also try rooting your cuttings directly in a well-draining potting mix or using specialized rooting hormones to accelerate the process. Some gardeners have even had success with aeroponic systems. Consider the type of chili you are propagating. Some varieties root more easily than others. For more challenging varieties, providing extra humidity by covering the cuttings with a plastic bag or using a humidity dome can significantly improve your success rate.
Another exciting variation is to experiment with grafting. Once your stem cuttings have developed a strong root system, you can graft them onto a more robust rootstock to create a super-charged chili plant. This technique can improve disease resistance, increase yields, and even allow you to grow multiple varieties on a single plant.
We wholeheartedly encourage you to give this DIY trick a try. It’s a fantastic way to learn more about plant propagation, expand your garden, and enjoy a continuous supply of fresh, homegrown chilies. Don’t be afraid to experiment and adapt the technique to suit your specific needs and preferences.
Most importantly, we want to hear about your experiences! Share your successes, your challenges, and any tips or tricks you discover along the way. Post photos of your propagated chili plants on social media using relevant hashtags like #ChiliPropagation, #DIYGardening, and #GrowYourOwn. Let’s build a community of chili enthusiasts who are passionate about sharing their knowledge and inspiring others to get their hands dirty. Your insights could be invaluable to someone just starting out on their chili propagation journey. So, grab your clippers, get propagating, and let the chili growing adventures begin! Remember, mastering **chili plant propagation from stem** is a game changer for any chili lover.
FAQ
What is the best time of year to propagate chili plants from stem cuttings?
The ideal time to propagate chili plants from stem cuttings is during the active growing season, typically in spring or early summer. This is when the plants are actively producing new growth and have the most energy to dedicate to root development. However, with proper care and environmental control, you can successfully propagate chili plants from stem cuttings at other times of the year as well. If you are propagating during the cooler months, ensure that the cuttings receive adequate warmth and light. Using a heat mat and grow lights can significantly improve your success rate.
How long does it take for chili plant stem cuttings to root?
The time it takes for chili plant stem cuttings to root can vary depending on several factors, including the variety of chili, the environmental conditions, and the propagation method used. Generally, you can expect to see roots developing within 2 to 4 weeks. However, some varieties may root faster than others. Providing optimal conditions, such as warm temperatures, high humidity, and adequate light, can help to accelerate the rooting process. Be patient and avoid disturbing the cuttings too frequently, as this can hinder root development.
What type of stem cuttings should I use for propagation?
The best type of stem cuttings to use for propagation are semi-hardwood cuttings, which are taken from the current season’s growth that has started to mature. These cuttings should be about 4 to 6 inches long and have several leaves. Remove the lower leaves to prevent them from rotting and to encourage root development. Avoid using cuttings that are too young and succulent or too old and woody, as these are less likely to root successfully. Select healthy, disease-free stems from vigorous plants for the best results.
Can I propagate chili plants from stem cuttings in water?
Yes, propagating chili plants from stem cuttings in water is a popular and effective method. Simply place the cuttings in a jar or glass of water, ensuring that the lower nodes (where the leaves were removed) are submerged. Change the water every few days to prevent the growth of bacteria and to provide fresh oxygen to the developing roots. Once the roots are about an inch long, you can transplant the cuttings into a well-draining potting mix. Water propagation is a great way to visually monitor root development and is particularly well-suited for beginners.
What type of potting mix should I use for transplanting rooted chili plant cuttings?
When transplanting rooted chili plant cuttings, it is important to use a well-draining potting mix that is rich in organic matter. A mixture of peat moss, perlite, and vermiculite is a good option. You can also add some compost or aged manure to provide additional nutrients. Avoid using heavy garden soil, as this can become compacted and hinder root growth. Ensure that the potting mix is moist but not waterlogged. After transplanting, water the cuttings thoroughly and provide them with adequate light and warmth.
How do I care for chili plant stem cuttings after they have rooted?
After your chili plant stem cuttings have rooted and been transplanted into potting mix, it’s crucial to provide them with proper care to ensure their continued growth and development. Water them regularly, keeping the soil consistently moist but not soggy. Provide them with plenty of sunlight, ideally at least 6 hours per day. Fertilize them with a balanced fertilizer every few weeks to provide them with the nutrients they need to thrive. Protect them from pests and diseases by regularly inspecting them and taking appropriate action if any problems arise. As the plants grow, you may need to repot them into larger containers to accommodate their expanding root systems.
What if my chili plant stem cuttings don’t root?
If your chili plant stem cuttings don’t root, don’t be discouraged! Propagation isn’t always successful on the first try. There are several reasons why cuttings may fail to root, including poor cutting selection, inadequate environmental conditions, or disease. Review your propagation technique and make sure you are following the recommended steps. Try using fresh cuttings from a different part of the plant. Ensure that the cuttings are receiving adequate warmth, humidity, and light. If you suspect disease, treat the cuttings with a fungicide. With a little patience and persistence, you can eventually master the art of chili plant propagation from stem cuttings.

Leave a Comment