

Cleaning Hacks You Need in your life? Absolutely! Let’s face it, nobody *loves* cleaning, but a sparkling home is a happy home. I’m here to share some game-changing DIY cleaning tricks that will not only save you time and money but also make the whole process a little less… dreadful.
Throughout history, humans have strived for cleanliness, from ancient Roman bathhouses to the meticulous cleaning rituals of various cultures. While our methods have evolved, the desire for a tidy and hygienic living space remains constant. But in today’s busy world, who has time to spend hours scrubbing? That’s where these clever cleaning hacks come in!
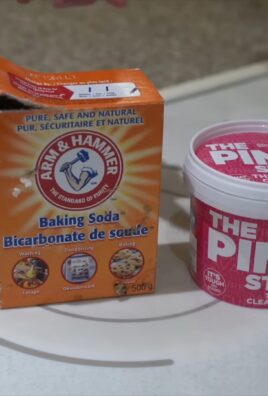
These aren’t your grandma’s old-fashioned cleaning tips (though some of those are pretty great too!). I’m talking about innovative, easy-to-implement solutions using everyday items you probably already have in your pantry. Think vinegar, baking soda, and lemon – these are your new best friends! From banishing stubborn stains to making your stainless steel shine like new, these cleaning hacks you need will transform your cleaning routine. Get ready to say goodbye to endless scrubbing and hello to a cleaner, brighter, and more enjoyable living space. Let’s dive in!
DIY Cleaning Hacks You Need to Know!
Okay, friends, let’s talk cleaning! I know, I know, it’s not the most glamorous topic, but trust me, these DIY cleaning hacks will make your life so much easier and your home so much fresher. I’ve tried and tested all of these myself, and they’ve become absolute game-changers in my cleaning routine. Get ready to ditch those harsh chemicals and embrace some simple, effective, and budget-friendly solutions!
Cleaning Your Microwave Like a Pro
Microwaves. They’re lifesavers for reheating leftovers, but they can quickly become a splattered, sticky mess. Forget scrubbing for hours! This hack uses the power of steam and lemon (or vinegar) to loosen all that grime.
What You’ll Need:
* A microwave-safe bowl
* 1 cup of water
* 1 lemon (cut in half) or 2 tablespoons of white vinegar
* A clean sponge or cloth
Step-by-Step Instructions:
1. Prepare the Solution: Fill the microwave-safe bowl with 1 cup of water. Squeeze the juice from both halves of the lemon into the water. Then, drop the lemon halves into the bowl as well. If you’re using vinegar, simply add 2 tablespoons of white vinegar to the water.
2. Microwave Magic: Place the bowl in the microwave and heat on high for 3-5 minutes. You want the water to boil and create steam.
3. Let it Steam: Once the timer goes off, don’t open the microwave door immediately! Let the steam work its magic for another 5-10 minutes. This will loosen all the stuck-on food particles.
4. Wipe it Clean: Carefully remove the bowl (it will be hot!). Use a clean sponge or cloth to wipe down the inside of the microwave. The grime should come off easily. For stubborn spots, you might need to apply a little extra pressure.
5. Final Touches: Wipe the turntable and the outside of the microwave. And voila! A sparkling clean microwave with minimal effort.
Unclogging Drains the Natural Way
Clogged drains are a common household problem, and those chemical drain cleaners can be harsh and expensive. This DIY method uses baking soda and vinegar – a powerful combination that’s safe for your pipes and the environment.
What You’ll Need:
* 1 cup of baking soda
* 2 cups of white vinegar
* Hot water
Step-by-Step Instructions:
1. Pour in the Baking Soda: Carefully pour 1 cup of baking soda down the clogged drain. Try to get as much of it down the drain as possible.
2. Add the Vinegar: Next, slowly pour 2 cups of white vinegar down the drain. You’ll hear a fizzing sound – that’s the chemical reaction working to break down the clog.
3. Let it Fizz: Let the mixture fizz and bubble for at least 30 minutes, or even better, overnight. This gives the baking soda and vinegar enough time to dissolve the clog.
4. Flush with Hot Water: After the waiting period, flush the drain with hot water for several minutes. The hot water will help to wash away the dissolved clog.
5. Repeat if Necessary: If the drain is still clogged, repeat the process. For particularly stubborn clogs, you might need to use a plunger after the baking soda and vinegar treatment.
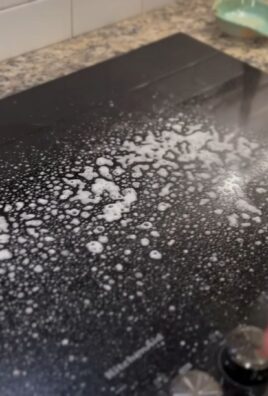
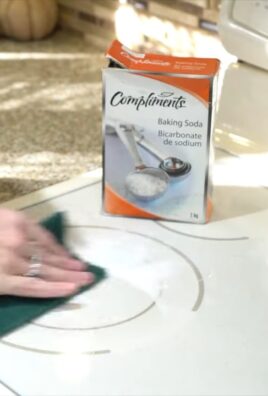
Making Your Own All-Purpose Cleaner
Why spend a fortune on store-bought cleaners when you can easily make your own all-purpose cleaner with just a few simple ingredients? This recipe is effective, eco-friendly, and smells amazing!
What You’ll Need:
* A spray bottle
* 1/4 cup of white vinegar
* 1 tablespoon of baking soda
* Water
* 10-15 drops of your favorite essential oil (optional, but recommended!)
Step-by-Step Instructions:
1. Combine Ingredients: In the spray bottle, combine the white vinegar and baking soda. Be careful, as the mixture will fizz up.
2. Add Water: Slowly add water to the spray bottle, leaving a little space at the top.
3. Add Essential Oils (Optional): If you’re using essential oils, add 10-15 drops of your favorite scent. Lemon, lavender, tea tree, and eucalyptus are all great choices.
4. Shake Well: Secure the spray nozzle and shake the bottle well to combine all the ingredients.
5. Use and Enjoy: Your all-purpose cleaner is ready to use! Spray it on surfaces and wipe clean with a cloth or sponge. It’s perfect for cleaning countertops, sinks, appliances, and more.
Cleaning Grout Like a Boss
Grungy grout can make your entire bathroom or kitchen look dirty, even if everything else is spotless. This DIY grout cleaner is a powerful and effective way to restore your grout to its former glory.
What You’ll Need:
* Baking soda
* Hydrogen peroxide
* An old toothbrush or grout brush
* Water (optional)
Step-by-Step Instructions:
1. Make a Paste: In a small bowl, mix baking soda and hydrogen peroxide to form a thick paste. The consistency should be similar to toothpaste. If the paste is too thick, add a little water.
2. Apply the Paste: Apply the paste to the grout lines, making sure to cover them completely.
3. Let it Sit: Let the paste sit on the grout for at least 5-10 minutes. For heavily stained grout, you can let it sit for up to 30 minutes.
4. Scrub the Grout: Use an old toothbrush or grout brush to scrub the grout lines. Apply firm pressure and scrub in a back-and-forth motion.
5. Rinse and Repeat: Rinse the grout with water. If necessary, repeat the process for stubborn stains.
6. Dry the Area: Once the grout is clean, dry the area with a clean cloth or towel.
Freshening Up Your Mattress
We spend a lot of time on our mattresses, so it’s important to keep them clean and fresh. This DIY mattress freshener uses baking soda and essential oils to absorb odors and leave your mattress smelling amazing.
What You’ll Need:
* Baking soda
* 10-15 drops of your favorite essential oil (lavender, chamomile, or eucalyptus are great for relaxation)
* A sieve or strainer
* A vacuum cleaner
Step-by-Step Instructions:
1. Mix the Ingredients: In a bowl, combine the baking soda and essential oils. Mix well to distribute the oils evenly throughout the baking soda.
2. Sprinkle on the Mattress: Use a sieve or strainer to sprinkle the baking soda mixture evenly over the entire surface of your mattress.
3. Let it Sit: Let the baking soda sit on the mattress for at least 30 minutes, or even better, for a few hours. This allows the baking soda to absorb odors and moisture.
4. Vacuum Thoroughly: Use a vacuum cleaner to thoroughly vacuum the entire surface of the mattress, removing all of the baking soda.
5. Flip and Repeat: Flip the mattress over and repeat the process on the other side.
Cleaning Your Oven Without Harsh Chemicals
Oven cleaning is one of those chores that everyone dreads. But with this DIY method, you can clean your oven without using harsh chemicals.
What You’ll Need:
* Baking soda
* Water
* A spray bottle
* A spatula or scraper
* A sponge or cloth
Step-by-Step Instructions:
1. Remove Oven Racks: Remove the oven racks and set them aside. You can clean them separately in the sink with soapy water.
2. Make a Baking Soda Paste: In a bowl, mix baking soda and water to form a thick paste. The consistency should be similar to frosting.
3. Coat the Oven: Spread the baking soda paste evenly over the entire inside of the oven, avoiding the heating elements.
4. Let it Sit Overnight: Let the baking soda paste sit in the oven overnight, or for at least 12 hours. This allows the baking soda to loosen the baked-on grease and grime.
5. Scrub and Wipe: The next day, use a spatula or scraper to scrape off the baking soda paste. Then, use a sponge or cloth to wipe down the inside of the oven.
6. Rinse and Dry: Rinse the oven with water to remove any remaining baking soda residue. Dry the oven with a clean cloth or towel.
7. Replace Oven Racks: Replace the oven racks and you’re done!
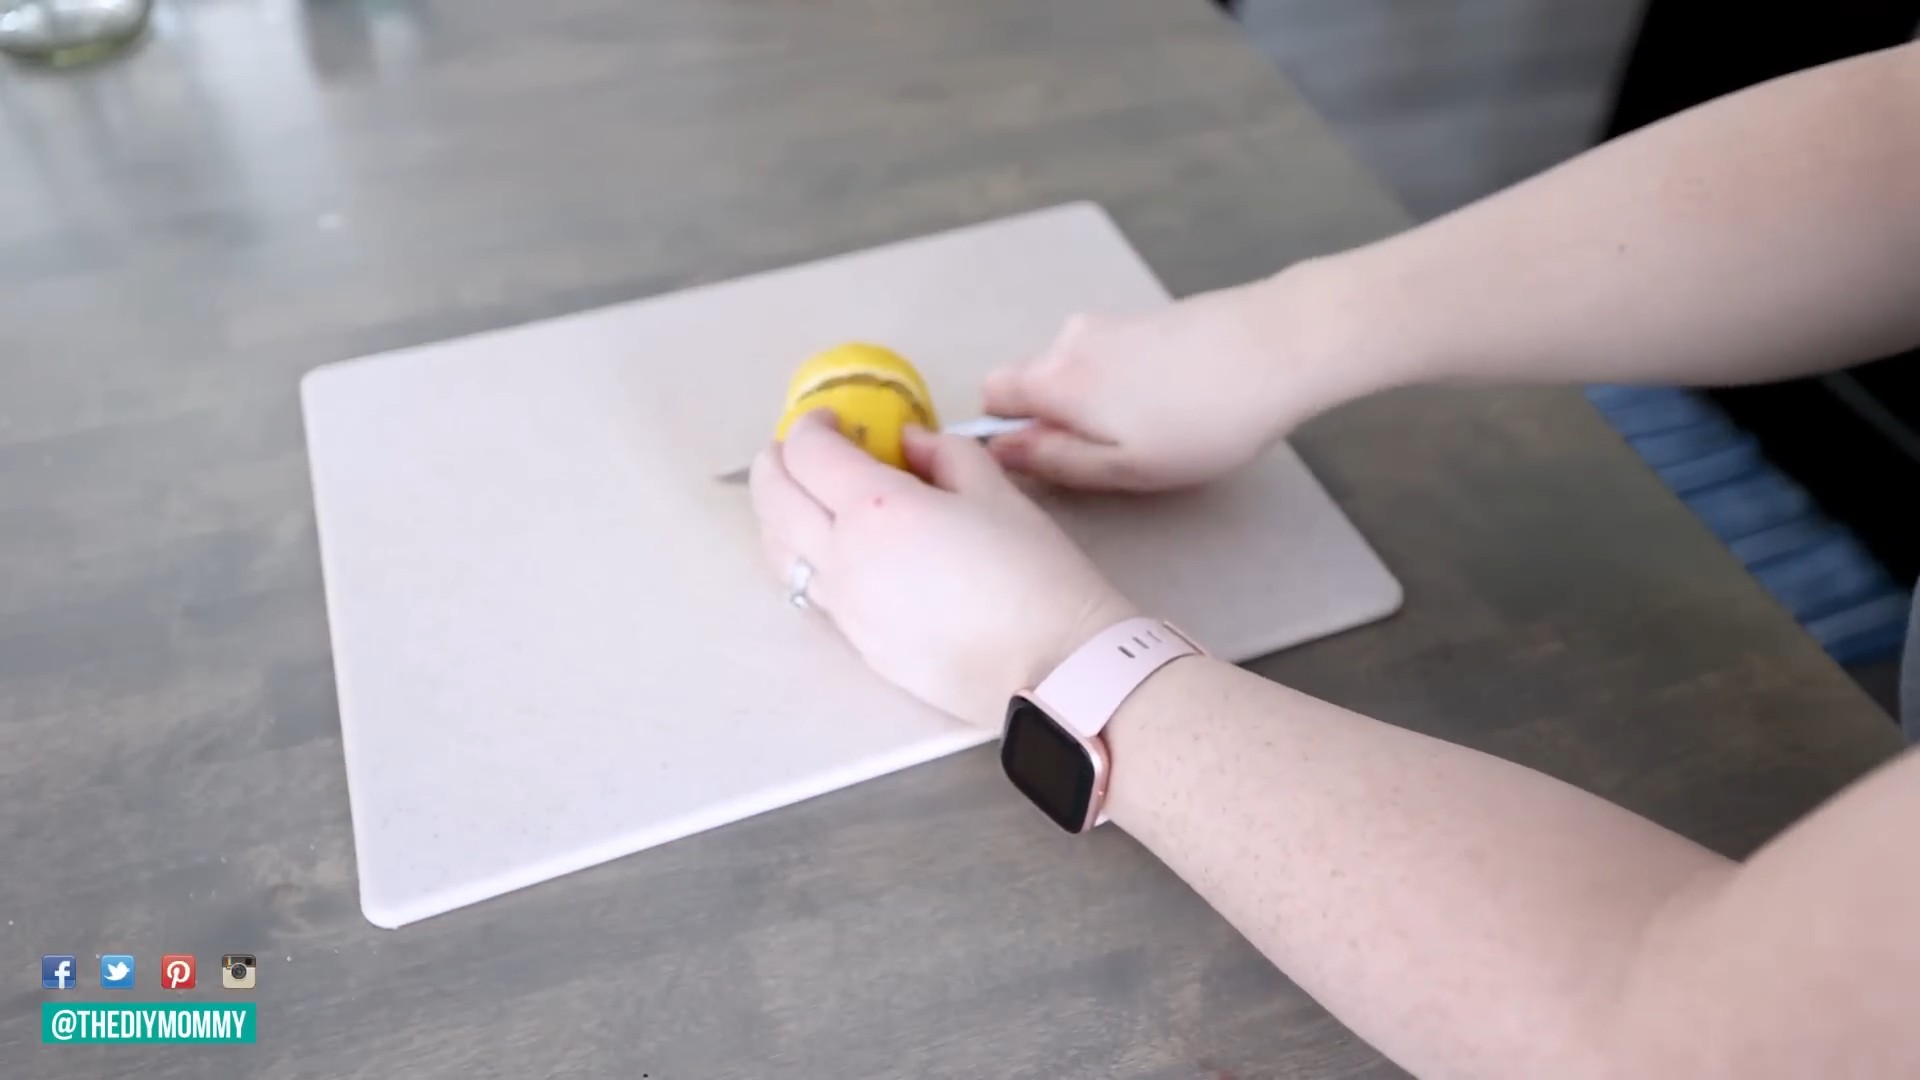
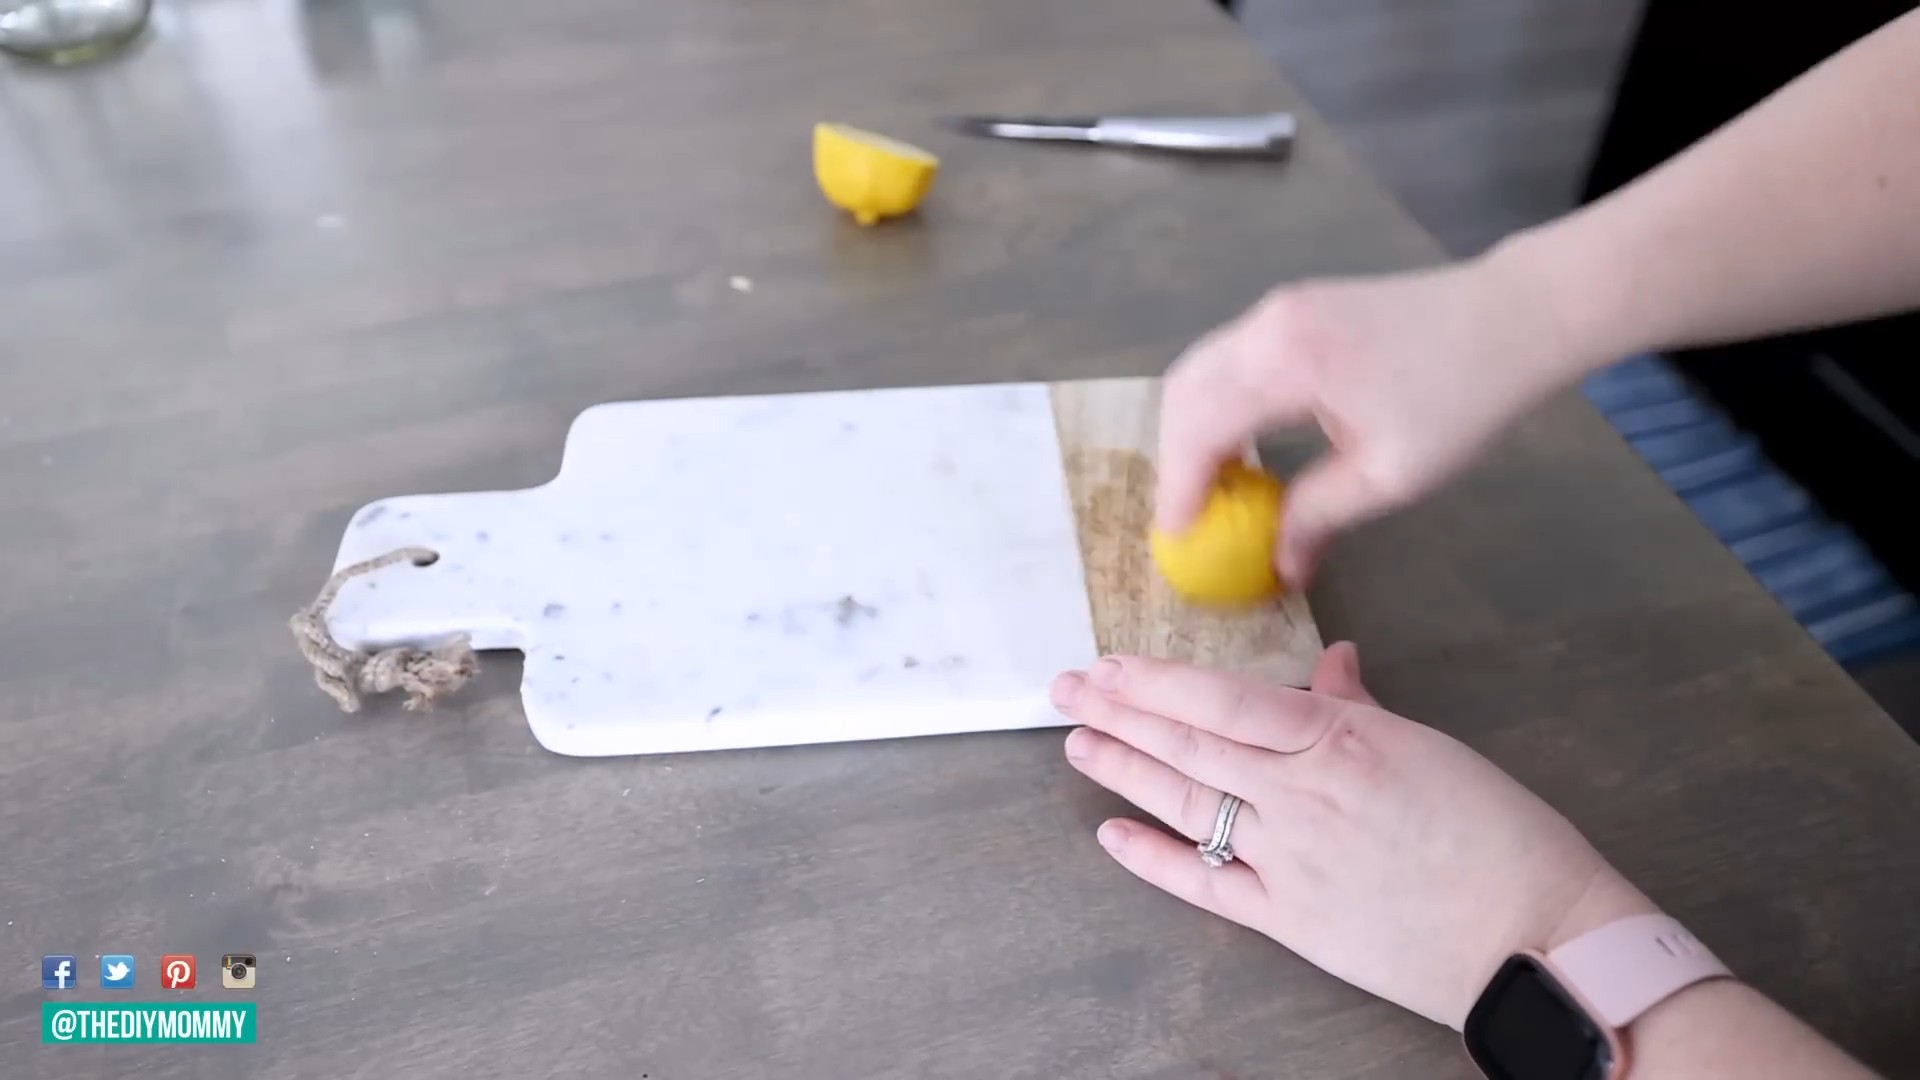
Polishing Furniture with Olive Oil and Lemon Juice
Give your wooden furniture a natural
Conclusion
So, there you have it! This simple yet incredibly effective cleaning hack is a game-changer for anyone looking to streamline their cleaning routine and achieve sparkling results without breaking the bank. We’ve shown you how to create a powerful, all-purpose cleaner using readily available ingredients, saving you money and reducing your reliance on harsh chemicals. This isn’t just about cleaning; it’s about creating a healthier and more sustainable home environment.
The beauty of this DIY cleaning solution lies in its versatility. Feel free to experiment with different essential oils to personalize the scent and add extra cleaning power. For example, a few drops of tea tree oil can boost its antibacterial properties, while lemon oil adds a refreshing citrusy aroma and helps cut through grease. Lavender oil not only smells wonderful but also has calming properties, making your cleaning experience more enjoyable.
Don’t be afraid to adjust the ratios slightly to suit your specific needs. If you’re tackling particularly stubborn grime, you might want to increase the concentration of vinegar or baking soda. Remember to always test the solution on an inconspicuous area first, especially when cleaning delicate surfaces.
We understand that trying new things can sometimes feel daunting, but we wholeheartedly encourage you to give this cleaning hack a try. The process is quick, easy, and the results are truly remarkable. Imagine the satisfaction of knowing you’re cleaning your home with a safe, effective, and budget-friendly solution that you made yourself!
But the real magic happens when you share your experiences. We’d love to hear how this DIY cleaner worked for you! Did you try any variations? Did you discover any new uses for it? Share your tips, tricks, and feedback in the comments below. Let’s build a community of savvy cleaners who are passionate about creating healthy and happy homes.
This DIY cleaning hack is more than just a recipe; it’s a gateway to a more sustainable and empowered approach to cleaning. It’s about taking control of the products you use in your home and making informed choices that benefit both your health and the environment. So, ditch the expensive store-bought cleaners and embrace the power of DIY. You won’t regret it!
Now, go forth and conquer those cleaning challenges with your newfound knowledge and this amazing DIY cleaning solution. We can’t wait to hear about your success stories! Remember to always prioritize safety and follow the instructions carefully. Happy cleaning!
Frequently Asked Questions (FAQs)
What exactly are the benefits of using a DIY cleaning solution compared to store-bought cleaners?
DIY cleaning solutions offer a multitude of benefits. Firstly, they are significantly more cost-effective. You’re using common household ingredients that are often much cheaper than specialized cleaning products. Secondly, you have complete control over the ingredients, allowing you to avoid harsh chemicals, artificial fragrances, and other potentially harmful substances. This is especially important for individuals with allergies, sensitivities, or young children. Thirdly, DIY cleaning promotes sustainability by reducing plastic waste from disposable bottles and minimizing your environmental footprint. Finally, it’s empowering! You’re taking control of your cleaning routine and creating a healthier home environment.
Is this DIY cleaning hack safe to use on all surfaces?
While this DIY cleaning solution is generally safe and effective, it’s crucial to exercise caution and test it on an inconspicuous area before applying it to the entire surface. Avoid using it on porous surfaces like unsealed granite or marble, as the vinegar can etch the stone. Similarly, be careful when using it on wood, especially if it’s unfinished or has a delicate finish. Always dilute the solution appropriately and wipe it off promptly to prevent any potential damage. For delicate surfaces, consider using a milder solution or consulting the manufacturer’s instructions.
Can I use different types of vinegar for this cleaning solution?
White distilled vinegar is the most commonly recommended type of vinegar for cleaning due to its acidity and lack of color, which minimizes the risk of staining. However, you can experiment with other types of vinegar, such as apple cider vinegar, but be mindful of its color and potential scent. Avoid using balsamic vinegar, as its dark color can stain surfaces. Regardless of the type of vinegar you choose, always dilute it with water to prevent damage to sensitive materials.
How long can I store this DIY cleaning solution?
This DIY cleaning solution can be stored for several months in an airtight container. However, it’s best to use it within a few weeks to ensure optimal effectiveness. Over time, the essential oils may lose their potency, and the solution may become less effective. Store the solution in a cool, dark place to prolong its shelf life. Label the container clearly with the date it was made to keep track of its freshness.
Can I add other ingredients to this DIY cleaning solution to enhance its cleaning power?
Absolutely! One of the great things about DIY cleaning is the ability to customize the solution to your specific needs. You can add a few drops of tea tree oil for its antibacterial properties, lemon juice for its degreasing power and refreshing scent, or baking soda for its abrasive cleaning action. However, be cautious when mixing different ingredients, as some combinations may not be effective or could even be harmful. Always research the compatibility of ingredients before adding them to your cleaning solution.
What are some specific cleaning tasks that this DIY solution is particularly well-suited for?
This DIY cleaning solution is incredibly versatile and can be used for a wide range of cleaning tasks. It’s excellent for cleaning countertops, sinks, toilets, showers, and floors (except for those mentioned above). It can also be used to remove soap scum, hard water stains, and mildew. Additionally, it’s effective for cleaning appliances like refrigerators, microwaves, and ovens. The solution can also be used as a general-purpose cleaner for wiping down surfaces and removing dirt and grime.
What if I don’t have essential oils? Can I still make this cleaning solution?
Yes, you can definitely still make this cleaning solution without essential oils. The vinegar and baking soda provide the primary cleaning power. Essential oils are added primarily for their fragrance and additional cleaning properties, but they are not essential for the solution to be effective. If you don’t have essential oils, you can simply omit them or add a few drops of lemon juice for a fresh scent.
Is it safe to mix vinegar and baking soda? I’ve heard that it can create a dangerous reaction.
While vinegar and baking soda do react when mixed, producing carbon dioxide gas, the reaction is generally safe when used in a diluted cleaning solution. The amount of gas produced is minimal and poses no significant risk. However, it’s important to avoid mixing large quantities of vinegar and baking soda in a closed container, as the pressure from the gas could cause the container to explode. When making the cleaning solution, add the baking soda slowly to the vinegar and water mixture to control the reaction.
What should I do if I accidentally get this cleaning solution in my eyes?
If you accidentally get this cleaning solution in your eyes, immediately rinse them thoroughly with cool water for at least 15 minutes. If irritation persists, seek medical attention. While the solution is generally safe, it can cause discomfort and irritation if it comes into contact with sensitive areas like the eyes.
How can I make this cleaning solution more environmentally friendly?
To make this cleaning solution even more environmentally friendly, consider using organic vinegar and sourcing your essential oils from sustainable sources. You can also reuse old spray bottles or purchase refillable bottles to reduce plastic waste. When cleaning, use reusable cloths or sponges instead of disposable paper towels. By making these small changes, you can minimize your environmental impact and create a more sustainable cleaning routine.
Leave a Comment