

Dish Soap and Alcohol Cleaner: Your Secret Weapon for a Thriving Garden!
Ever dream of a lush, vibrant garden bursting with healthy plants, but dread the thought of harsh chemicals and complicated solutions? I get it! For centuries, gardeners have sought natural ways to protect their precious plants, and guess what? The answer might be sitting right under your kitchen sink! We’re diving into the amazing world of dish soap and alcohol cleaner as a powerful, DIY solution for common garden pests and plant ailments.
Think of it as a gentle, yet effective, shield for your green babies. This simple concoction has roots in old-fashioned gardening wisdom, passed down through generations who understood the power of natural remedies. But why is this DIY trick so essential today? Well, many of us are looking for eco-friendly alternatives to commercial pesticides, and this dish soap and alcohol cleaner spray offers a safe and affordable way to combat aphids, mealybugs, and other pesky critters that can wreak havoc on your plants. Plus, it’s incredibly easy to make! So, let’s unlock the secrets to a healthier, happier garden, one spray at a time!
DIY Streak-Free Glass Cleaner: Dish Soap and Alcohol Magic!
Okay, friends, let’s ditch those expensive store-bought glass cleaners and whip up our own super-effective, streak-free solution using just two simple ingredients: dish soap and rubbing alcohol! I’ve been using this recipe for years, and I swear, my windows, mirrors, and even my car windshield have never looked better. Plus, it’s incredibly budget-friendly. So, grab your supplies, and let’s get cleaning!
What You’ll Need
Before we dive in, let’s gather everything we need. This will make the whole process smoother and more enjoyable. Trust me, being prepared is half the battle!
* Rubbing Alcohol (Isopropyl Alcohol): 70% or 91% works great. I usually opt for 70% because it’s readily available and does the job perfectly.
* Dish Soap: A small amount is all you need. I recommend using a clear, non-concentrated dish soap. Avoid anything with added moisturizers or dyes, as these can leave streaks. Dawn is a popular choice, but any similar clear dish soap will work.
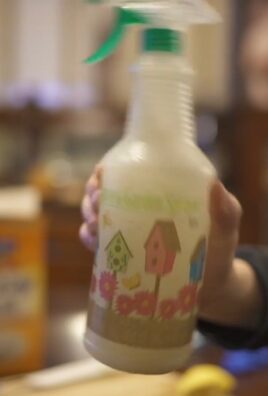
* Spray Bottle: A clean, empty spray bottle is essential. Make sure it’s thoroughly rinsed out to avoid contaminating your cleaner with any residue.
* Distilled Water (Optional): While not strictly necessary, distilled water can help prevent mineral buildup, especially if you have hard water.
* Measuring Spoons or Cups: For accurate measurements.
* Microfiber Cloths: These are your best friends for streak-free cleaning. Avoid paper towels, as they can leave lint behind.
* Funnel (Optional): Makes pouring liquids into the spray bottle easier and less messy.
The Magic Ratio: Getting the Proportions Right
The key to a truly effective glass cleaner is getting the proportions of alcohol and dish soap just right. Too much soap, and you’ll end up with streaks. Too little, and it won’t clean effectively. I’ve experimented with different ratios, and this is what I’ve found works best:
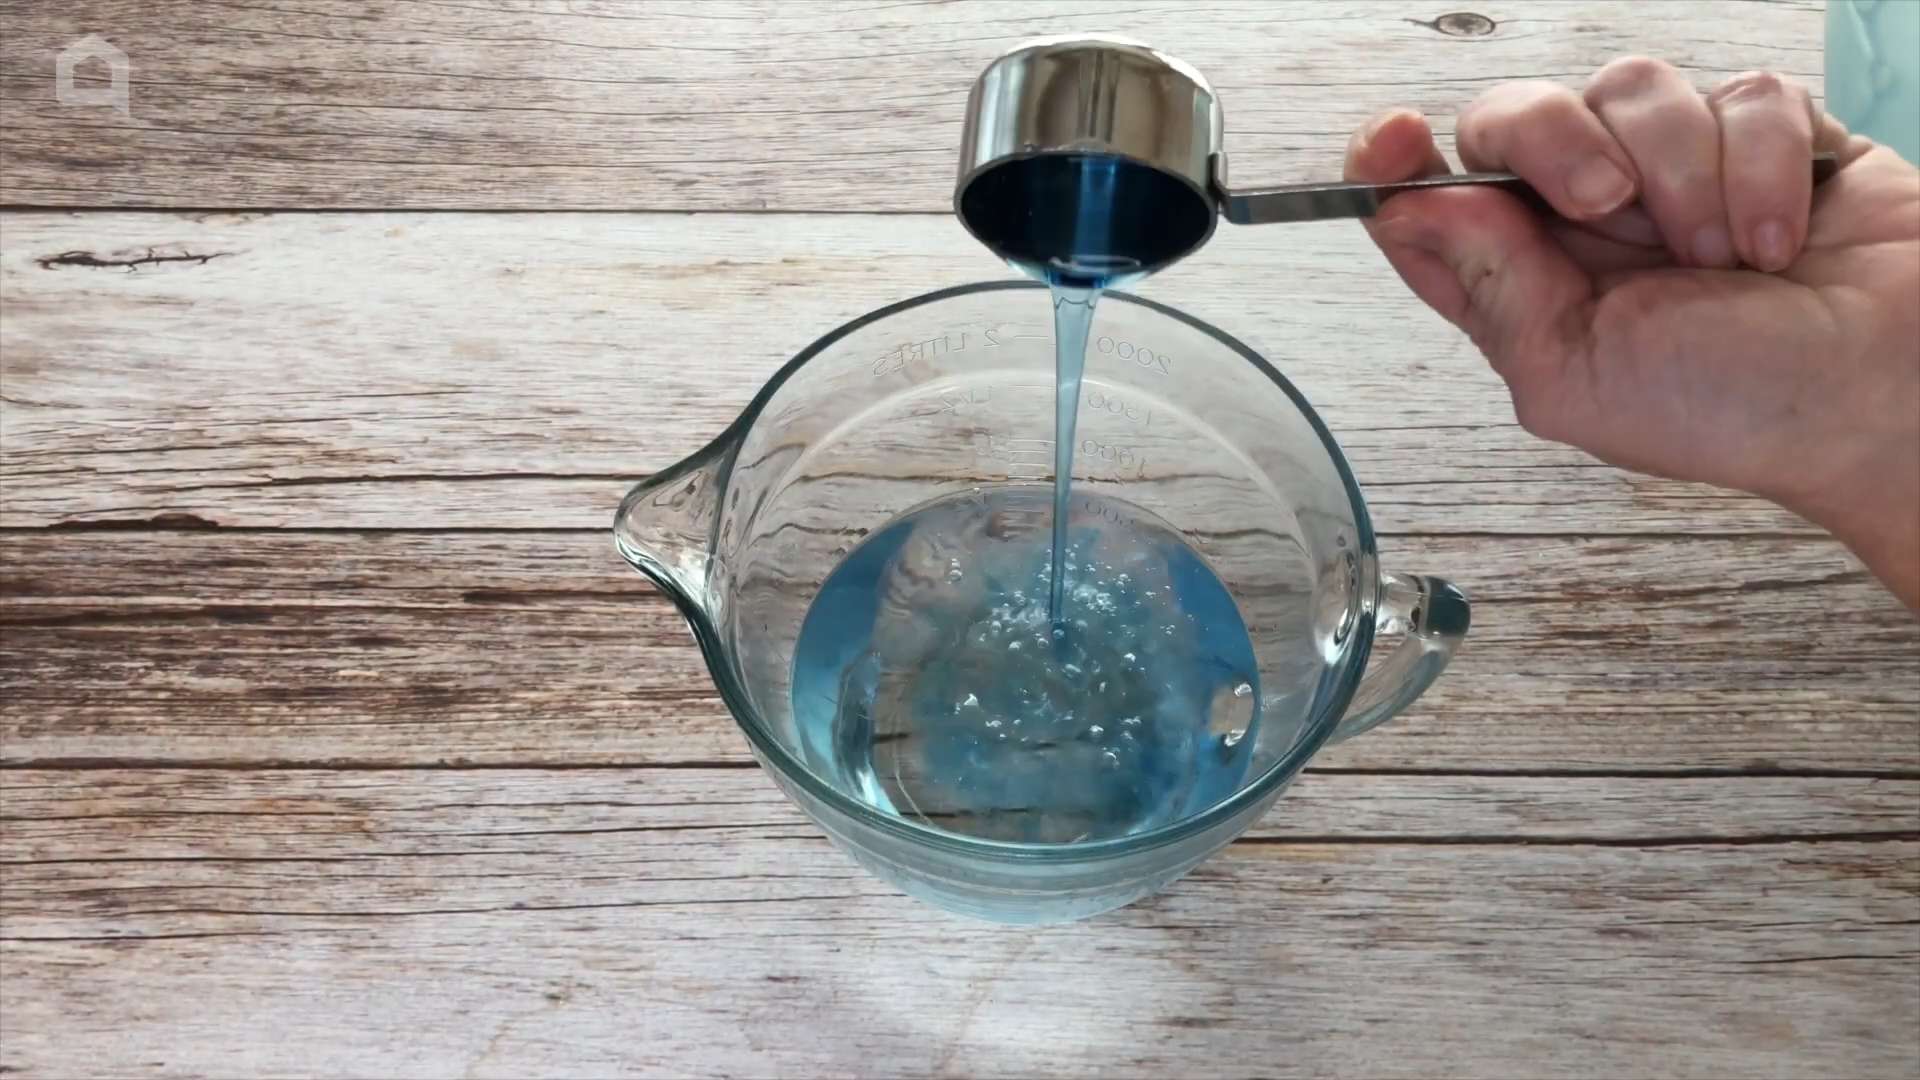
* Rubbing Alcohol: 2 cups
* Dish Soap: 1/4 teaspoon (yes, just a tiny bit!)
* Distilled Water (Optional): 1 cup (if using)
Step-by-Step Instructions: Mixing Your Streak-Free Cleaner
Now for the fun part! Let’s mix up our amazing glass cleaner.
1. Prepare Your Spray Bottle: Ensure your spray bottle is clean and dry. This is crucial to avoid any unwanted contaminants in your cleaner.
2. Add the Rubbing Alcohol: Using your measuring cup (or a funnel, if you’re using one), carefully pour 2 cups of rubbing alcohol into the spray bottle.
3. Add the Dish Soap: This is where precision is key! Measure out exactly 1/4 teaspoon of dish soap. I like to use a measuring spoon and level it off carefully. Add it to the spray bottle. Remember, less is more!
4. Add Distilled Water (Optional): If you’re using distilled water, add 1 cup to the spray bottle.
5. Close and Shake Gently: Secure the spray nozzle tightly onto the bottle. Gently shake the bottle to combine the ingredients. Avoid shaking too vigorously, as this can create excessive bubbles.
6. Label Your Bottle: This is important! Label your spray bottle clearly as “Glass Cleaner” or something similar. This will prevent accidental misuse.
Cleaning Like a Pro: Application Tips and Tricks
Okay, your cleaner is ready. Now, let’s talk about how to use it to achieve those sparkling, streak-free results.
1. Prepare the Surface: Before spraying, wipe down the surface with a dry microfiber cloth to remove any loose dust or debris. This will prevent you from just smearing the dirt around.
2. Spray Sparingly: Lightly mist the surface with your glass cleaner. Avoid over-saturating the area. A little goes a long way!
3. Wipe with a Clean Microfiber Cloth: Immediately wipe the surface with a clean, dry microfiber cloth. Use a circular motion to loosen any remaining dirt or grime.
4. Buff to a Shine: Flip the microfiber cloth to a clean, dry section and buff the surface until it’s completely dry and streak-free. This is the key to that sparkling finish!
5. Tackle Stubborn Spots: For stubborn spots or streaks, repeat the process. You may need to apply a little more cleaner and use a bit more elbow grease.
Where to Use Your Homemade Glass Cleaner
The beauty of this DIY glass cleaner is its versatility. You can use it on a variety of surfaces, including:
* Windows: Inside and out!
* Mirrors: Bathroom mirrors, vanity mirrors, full-length mirrors – you name it!
* Glass Shower Doors: Helps prevent soap scum buildup.
* Car Windows: Inside and out (avoid spraying directly onto the dashboard).
* Glass Tabletops: Keeps them looking pristine.
* Stainless Steel Appliances: Works wonders on fingerprints and smudges (test in an inconspicuous area first).
Troubleshooting: Addressing Common Issues
Even with the best recipe, you might encounter a few minor issues. Here’s how to troubleshoot them:
* Streaks: If you’re getting streaks, it’s likely due to too much dish soap. Try diluting your cleaner with a little more rubbing alcohol or distilled water. Also, make sure you’re using a clean microfiber cloth.
* Hazy Film: A hazy film can be caused by hard water or residue from previous cleaners. Try using distilled water in your cleaner and thoroughly cleaning the surface before applying your homemade solution.
* Smell: The rubbing alcohol smell can be a bit strong. Make sure you’re working in a well-ventilated area. The smell will dissipate quickly.
Safety First: Important Precautions
While this DIY glass cleaner is relatively safe, it’s always important to take precautions:
* Keep Out of Reach of Children and Pets: Store your cleaner in a safe place where children and pets cannot access it.
* Avoid Contact with Eyes: If the cleaner gets in your eyes, rinse immediately with plenty of water.
* Ventilation: Use the cleaner in a well-ventilated area.
* Test on an Inconspicuous Area: Before using the cleaner on a new surface, test it in an inconspicuous area to ensure it doesn’t cause any damage or discoloration.
Why This Works: The Science Behind the Sparkle
You might be wondering why this simple combination of dish soap and rubbing alcohol works so well. Here’s a quick explanation:
* Rubbing Alcohol: Acts as a solvent, dissolving dirt, grime, and grease. It also evaporates quickly, which helps prevent streaks.
* Dish Soap: Helps to break down surface tension, allowing the cleaner to spread evenly and lift away dirt. The tiny amount used prevents excessive suds and streaks.
* Distilled Water: Prevents mineral buildup, which can cause streaks and cloudiness.
Extra Tips for Sparkling Results
Here are a few extra tips to help you achieve the best possible results:
* Wash Your Microfiber Cloths Regularly: Dirty microfiber cloths can actually spread dirt and grime. Wash them regularly in hot water with a mild detergent. Avoid using fabric softener, as it can reduce their absorbency.
* Clean on a Cloudy Day: Cleaning windows in direct sunlight can cause the cleaner to dry too quickly, leading to streaks. Cloudy days are ideal for window cleaning.
* Use a Squeegee for Large Windows: For large windows, a squeegee can help you achieve a streak-free finish. Overlap each stroke slightly and wipe the blade clean after each pass.
* Don’t Forget the Edges: Use a clean microfiber cloth to wipe down the edges of windows and mirrors to remove any lingering dirt or grime.
I hope you enjoy using this DIY glass cleaner as much as I do! It’s a simple, effective, and budget-friendly way to keep your windows and mirrors sparkling clean. Happy cleaning!

Conclusion
So, there you have it! This simple yet incredibly effective DIY dish soap and alcohol cleaner is a game-changer for anyone looking to streamline their cleaning routine and achieve sparkling results without harsh chemicals or breaking the bank. We’ve walked you through the easy steps, highlighting the cost-effectiveness and the eco-friendly nature of this powerful solution.
Why is this a must-try? Because it’s more than just a cleaner; it’s a testament to the power of simple ingredients working together. The dish soap cuts through grease and grime with ease, while the alcohol disinfects and helps the solution evaporate quickly, leaving behind a streak-free shine. This combination is particularly effective on surfaces like glass, mirrors, stainless steel, and even sealed granite countertops. Forget about spending a fortune on specialized cleaners when you can create a superior product right in your own kitchen.
But the beauty of this DIY cleaner lies not only in its effectiveness but also in its versatility. Feel free to experiment with different variations to suit your specific needs and preferences. For a refreshing scent, add a few drops of your favorite essential oil, such as lemon, lavender, or eucalyptus. Just be sure to use pure essential oils and add them sparingly, as some oils can leave a residue. If you’re dealing with particularly stubborn grime, consider increasing the concentration of dish soap slightly, but remember that too much soap can leave a film.
Another variation to consider is the type of alcohol you use. While isopropyl alcohol (rubbing alcohol) is the most common and readily available option, you can also use denatured alcohol or even vodka in a pinch. Just be sure to use alcohol with a high proof (at least 70%) to ensure effective disinfection.
This DIY dish soap and alcohol cleaner is truly a versatile and effective solution for a wide range of cleaning tasks.
We are confident that once you try this DIY dish soap and alcohol cleaner, you’ll be amazed by its cleaning power and simplicity. It’s a cost-effective, eco-friendly, and customizable solution that will quickly become a staple in your cleaning arsenal.
So, what are you waiting for? Gather your ingredients, mix up a batch, and experience the difference for yourself! We encourage you to try this DIY trick and share your experiences with us in the comments below. Let us know what surfaces you’ve cleaned, what variations you’ve tried, and any tips or tricks you’ve discovered along the way. We can’t wait to hear from you! Let’s revolutionize our cleaning routines together, one DIY solution at a time.
Frequently Asked Questions (FAQ)
What type of dish soap is best to use for this DIY cleaner?
The best type of dish soap to use is a clear, non-lotion dish soap. Avoid dish soaps that contain moisturizers or added fragrances, as these can leave a residue on surfaces. A basic, concentrated dish soap will work perfectly. Dawn dish soap is a popular and effective choice, but any similar brand will do. The key is to ensure it’s a grease-cutting formula.
Can I use this cleaner on all surfaces?
While this DIY cleaner is generally safe for most surfaces, it’s always a good idea to test it in an inconspicuous area first, especially on delicate or painted surfaces. It’s excellent for glass, mirrors, stainless steel, sealed granite, tile, and plastic. Avoid using it on unfinished wood, porous stone (like marble), or electronics screens, as the alcohol can damage these materials.
What is the ideal ratio of dish soap to alcohol?
The recommended ratio is typically 1 part dish soap to 2 parts alcohol. This provides a good balance of cleaning power and quick evaporation. However, you can adjust the ratio slightly depending on your needs. For heavier grime, you can increase the dish soap slightly, but be careful not to use too much, as it can leave a film.
How long will the DIY cleaner last?
This DIY cleaner doesn’t have a specific expiration date, but it’s best to use it within a few months for optimal effectiveness. Store it in a cool, dark place to prevent the alcohol from evaporating. Over time, the dish soap may separate slightly, but simply shake the bottle before each use to re-emulsify the mixture.
Can I add essential oils to this cleaner?
Yes, you can add essential oils to this cleaner for a pleasant scent and added cleaning benefits. Lemon, lavender, tea tree, and eucalyptus are popular choices. Add a few drops of your favorite essential oil to the mixture, but be sure to use pure essential oils and add them sparingly, as some oils can leave a residue. Start with 5-10 drops per bottle and adjust to your preference.
Is this cleaner safe to use around pets and children?
While this cleaner is made with relatively safe ingredients, it’s still important to exercise caution when using it around pets and children. Keep the cleaner out of their reach and avoid spraying it directly on them. Ensure proper ventilation when using the cleaner and avoid contact with eyes and skin. If ingested, contact a poison control center immediately.
Why is alcohol used in this cleaner?
Alcohol serves several important purposes in this cleaner. It acts as a disinfectant, killing germs and bacteria on surfaces. It also helps the cleaner evaporate quickly, leaving behind a streak-free shine. Additionally, alcohol helps to dissolve grease and grime, making the cleaner more effective.
Can I use this cleaner to clean my windows?
Yes, this DIY cleaner is excellent for cleaning windows. The alcohol helps to prevent streaks, leaving your windows sparkling clean. Simply spray the cleaner onto the window and wipe it down with a clean microfiber cloth. For best results, clean windows on a cloudy day to prevent the cleaner from drying too quickly.
What if the cleaner leaves streaks on my surfaces?
If the cleaner leaves streaks, it could be due to a few reasons. You may be using too much dish soap, or the surface may not be completely clean before applying the cleaner. Try reducing the amount of dish soap in your next batch or wiping the surface with a damp cloth before spraying the cleaner. Using a clean microfiber cloth is also essential for streak-free results.
Can I use this cleaner in a spray bottle?
Yes, this cleaner is perfect for use in a spray bottle. A spray bottle allows you to easily apply the cleaner to surfaces and control the amount of product you use. Be sure to use a clean spray bottle and label it clearly to avoid confusion.
Is this DIY cleaner environmentally friendly?
Compared to many commercial cleaners, this DIY cleaner is more environmentally friendly. It uses simple, readily available ingredients and reduces the need for single-use plastic bottles. By making your own cleaner, you can reduce your carbon footprint and contribute to a more sustainable lifestyle.
Leave a Comment