

DIY bell pepper bottle garden: Ever dreamed of harvesting vibrant, juicy bell peppers right from your windowsill, even if you don’t have a sprawling backyard? I know I have! Forget expensive gardening equipment and endless weeding. This ingenious DIY project transforms ordinary plastic bottles into thriving mini-gardens, bringing the joy of fresh produce directly to your kitchen.
The concept of container gardening, a close relative to our bottle garden, has roots stretching back centuries. From the Hanging Gardens of Babylon to the humble window boxes of Victorian England, people have always found creative ways to cultivate plants in limited spaces. But what makes this bell pepper bottle garden so special? It’s all about accessibility and sustainability. We’re repurposing materials, reducing waste, and empowering ourselves to grow our own food, regardless of our living situation.
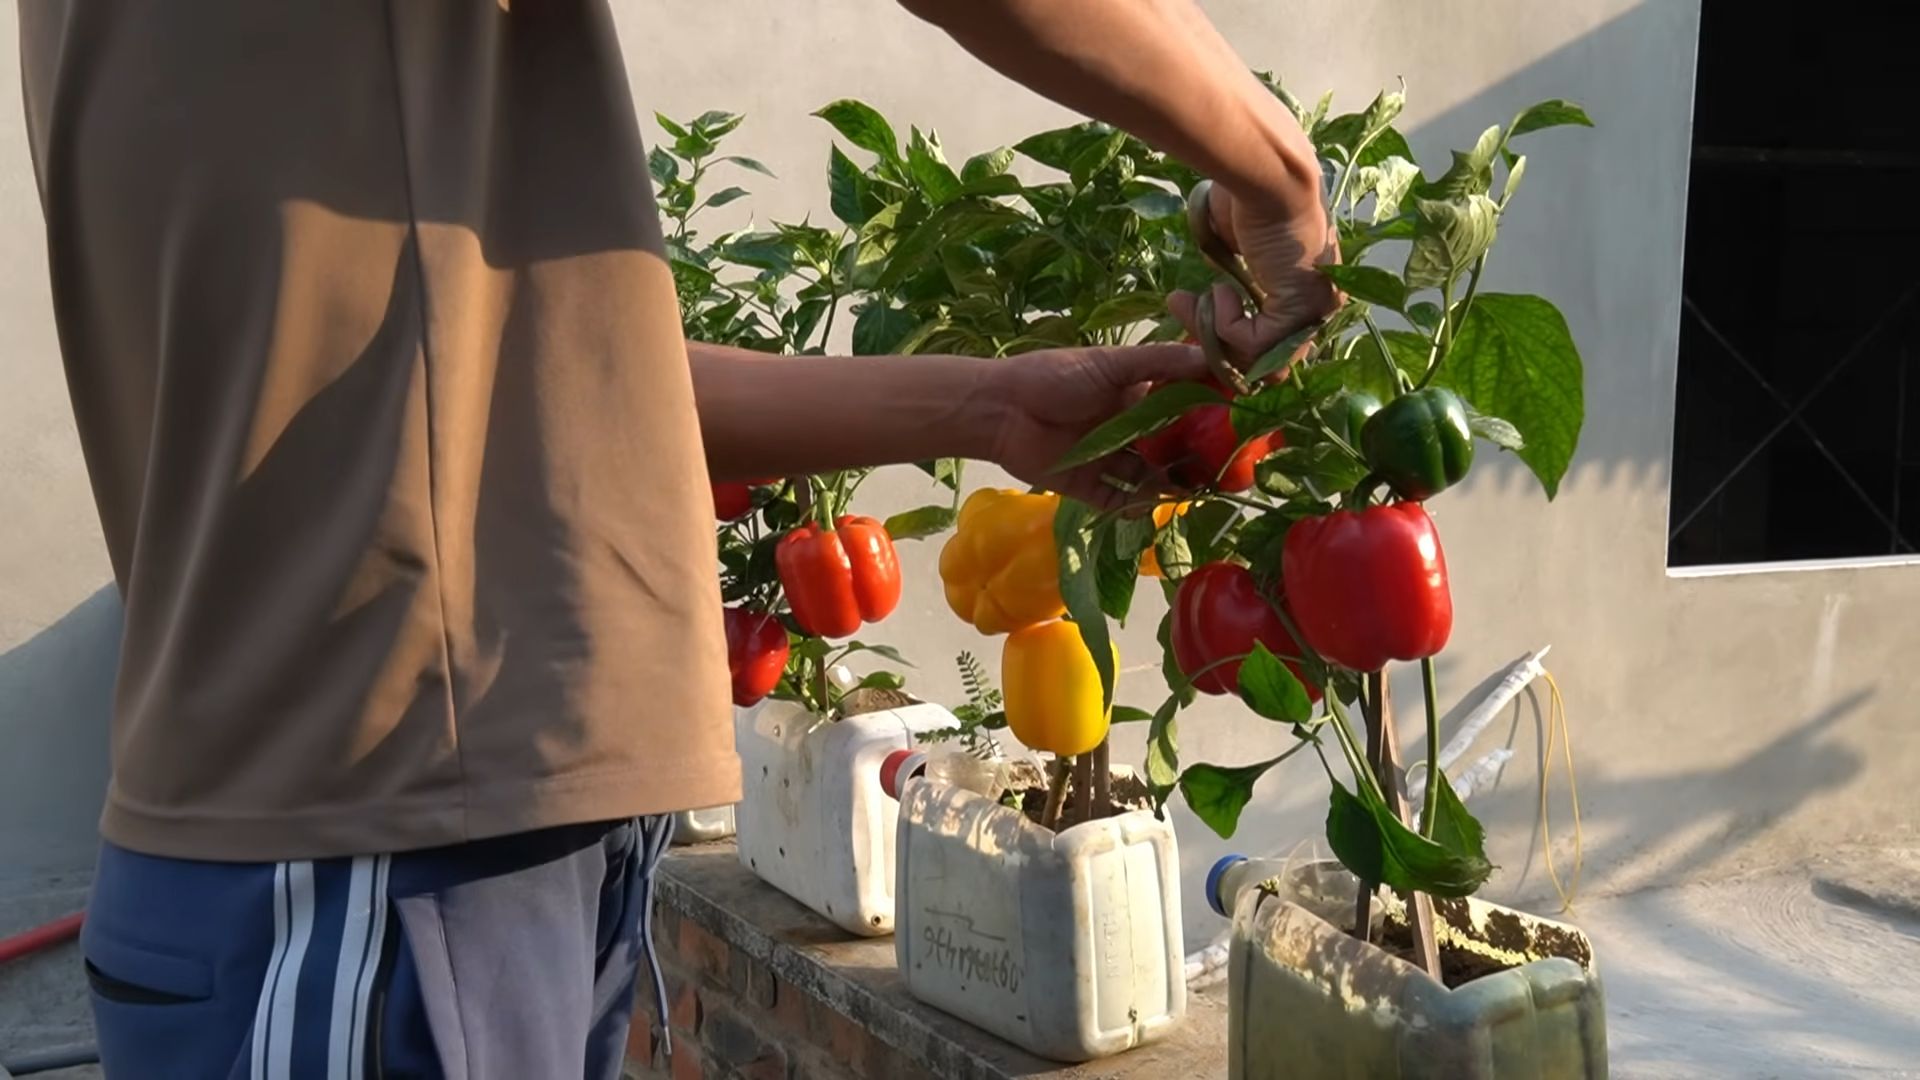
Let’s be honest, buying bell peppers from the store can be a gamble. Sometimes they’re bland, sometimes they’re bruised, and they always come with a hefty price tag. With this DIY bell pepper bottle garden, you’re in control. You choose the variety, nurture the plant, and enjoy the unparalleled flavor of homegrown peppers. Plus, it’s incredibly rewarding to watch your little seedlings transform into a bountiful harvest. So, grab those empty bottles, and let’s get growing! I’m excited to share this simple, yet effective, method with you.
DIY Upside-Down Bell Pepper Bottle Garden: A Beginner’s Guide
Hey there, fellow gardening enthusiasts! Ever dreamed of a bountiful bell pepper harvest without taking up precious garden space? Well, you’re in the right place! I’m going to walk you through creating your very own upside-down bell pepper bottle garden. It’s a fun, budget-friendly project that’s perfect for balconies, patios, or even small yards. Trust me, it’s easier than you think, and the results are incredibly rewarding.
What You’ll Need
Before we dive in, let’s gather our supplies. This is a pretty low-cost project, so you probably have some of these items lying around already.
* A Large Plastic Bottle: Think 2-liter soda bottles or even larger water bottles. The sturdier, the better! Make sure it’s clean and clear.
* Bell Pepper Seedling: Choose a healthy, vibrant seedling from your local nursery or garden center. Opt for a variety you enjoy eating!
* Potting Soil: A good quality potting mix is crucial for healthy growth. Avoid using garden soil, as it can compact and hinder drainage.
* Scissors or Utility Knife: For cutting the plastic bottle. Be careful!
* Measuring Tape or Ruler: To ensure accurate cuts.
* Permanent Marker: For marking cut lines.
* Landscape Fabric or Burlap: To prevent soil from falling out of the bottle’s opening.
* Twine or Strong String: For hanging your bottle garden.
* Watering Can: For, well, watering!
* Gloves (Optional): To keep your hands clean.
* Safety Glasses (Optional): For eye protection when cutting the plastic.
Preparing the Bottle
This is where we transform our humble plastic bottle into a hanging haven for our bell pepper plant.
1. Clean the Bottle: Start by thoroughly cleaning the plastic bottle with soap and water. Remove any labels and residue. This ensures a clean environment for your plant.
2. Cut the Bottle: Using your measuring tape and marker, measure and mark a line about 4-6 inches from the bottom of the bottle. This will be our cutting line. Carefully cut along the marked line with your scissors or utility knife. You should now have two separate pieces: the top portion (with the bottle neck) and the bottom portion.
3. Prepare the Top Portion: This is the trickiest part, so take your time. We need to create a hole in the bottle cap large enough for the bell pepper seedling to fit through, but not so large that the soil will fall out. I usually start by drilling a small hole in the center of the cap. Then, I gradually enlarge the hole using a utility knife or small scissors, checking the size frequently against the seedling’s stem. You want a snug fit.
4. Reinforce the Cap (Optional): For added security, especially if you’ve enlarged the hole quite a bit, you can use hot glue or waterproof sealant to secure the seedling’s stem to the cap once it’s in place. This will help prevent the plant from slipping out.
Planting the Bell Pepper Seedling
Now for the fun part – bringing our bell pepper to its new upside-down home!
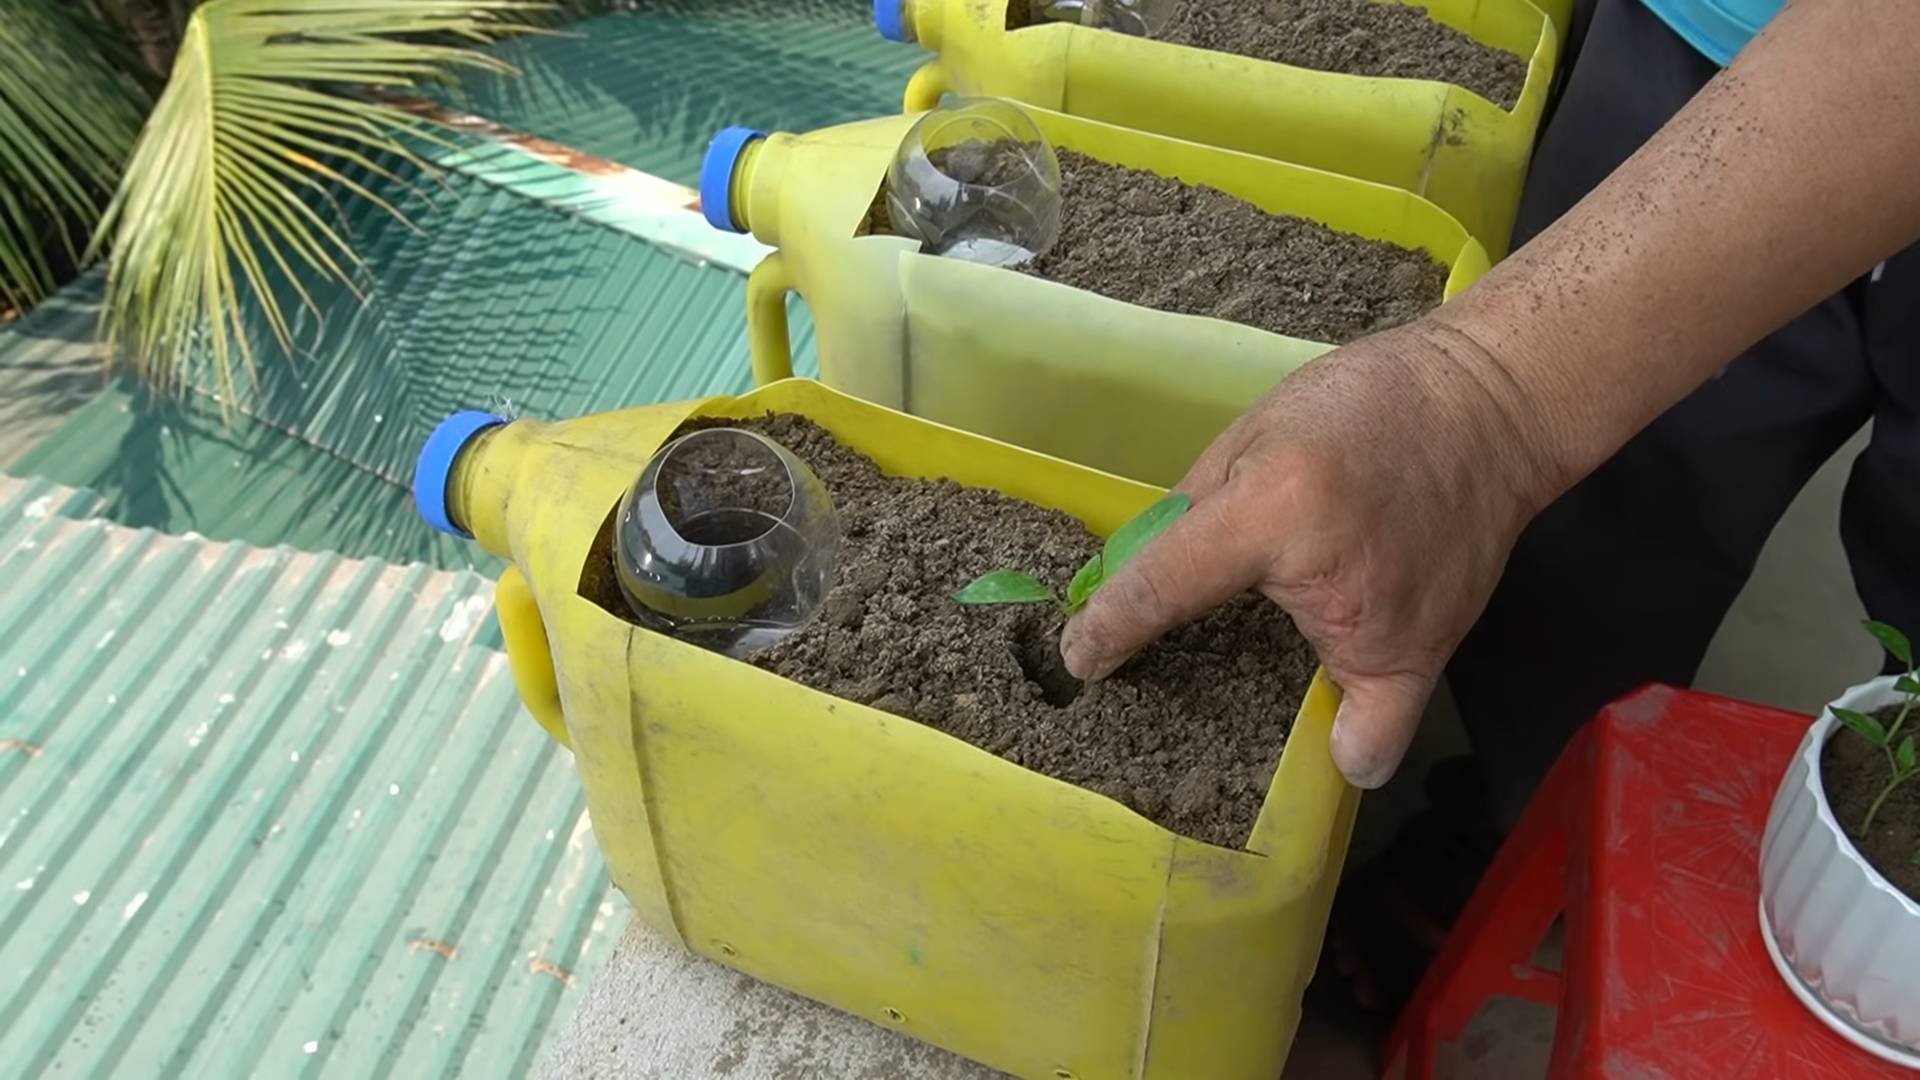
1. Insert the Seedling: Gently turn the top portion of the bottle upside down. Carefully feed the bell pepper seedling through the hole in the bottle cap, ensuring the roots are facing upwards inside the bottle. Be gentle to avoid damaging the plant.
2. Secure the Seedling: Once the seedling is in place, gently pack some potting soil around the stem and roots inside the bottle. This will help secure the plant and prevent it from moving around.
3. Add Landscape Fabric: Cut a circle of landscape fabric or burlap that’s slightly larger than the opening of the bottle. This will act as a barrier to prevent soil from falling out.
4. Attach the Bottom Portion: Carefully invert the bottom portion of the bottle and slide it over the top portion, creating a “sleeve” around the plant. This will act as a reservoir for water and help keep the soil moist.
5. Secure the Two Halves: You can secure the two halves of the bottle together using duct tape or zip ties. This will prevent them from separating, especially when the bottle is hanging.
Hanging Your Bottle Garden
Almost there! Now we just need to find the perfect spot for our upside-down bell pepper garden.
1. Create Hanging Loops: Cut two or three lengths of twine or strong string. Attach them to the bottle by threading them through holes you create near the top of the bottom portion of the bottle. Make sure the loops are evenly spaced to distribute the weight evenly.
2. Find a Suitable Location: Choose a location that receives at least 6-8 hours of sunlight per day. A sunny balcony, patio, or even a sturdy tree branch will work. Make sure the location is protected from strong winds, which could damage the plant.
3. Hang the Bottle: Carefully hang the bottle garden from your chosen location, ensuring it’s securely attached. Double-check the twine or string to make sure it can support the weight of the bottle, soil, and plant.
Caring for Your Upside-Down Bell Pepper Plant
Now that your upside-down bell pepper garden is hanging proudly, it’s time to learn how to care for it.
1. Watering: Water your plant regularly, especially during hot weather. The frequency will depend on the climate and the size of the bottle. A good rule of thumb is to water when the top inch of soil feels dry to the touch. Water slowly and thoroughly, allowing the water to drain through the bottom of the bottle.
2. Fertilizing: Bell peppers are heavy feeders, so you’ll need to fertilize them regularly. Use a balanced liquid fertilizer, following the instructions on the label. Fertilize every 2-3 weeks during the growing season.
3. Sunlight: Ensure your plant receives at least 6-8 hours of sunlight per day. If you live in a particularly hot climate, you may need to provide some afternoon shade to prevent the plant from scorching.
4. Pest Control: Keep an eye out for common pests like aphids, whiteflies, and spider mites. If you notice any pests, treat them with an organic insecticide or insecticidal soap.
5. Pruning: Prune your bell pepper plant regularly to encourage bushier growth and more fruit production. Remove any yellowing or dead leaves, and pinch off any suckers (small shoots that grow from the base of the plant).
6. Harvesting: Your bell peppers will be ready to harvest when they reach their mature size and color. Use a sharp knife or scissors to cut the peppers from the plant, leaving a small stem attached.
Troubleshooting
Even with the best care, you might encounter a few challenges along the way. Here are some common problems and how to fix them:
* Plant Wilting: This could be due to underwatering, overwatering, or too much sun. Check the soil moisture and adjust your watering schedule accordingly. If the plant is getting too much sun, move it to a shadier location.
* Yellowing Leaves: This could be due to nutrient deficiency. Fertilize your plant with a balanced liquid fertilizer.
* Lack of Fruit Production: This could be due to insufficient sunlight, poor pollination, or nutrient deficiency. Ensure your plant is getting enough sunlight, and consider hand-pollinating the flowers by gently shaking the plant. Fertilize your plant with a balanced liquid fertilizer.
* Soil Falling Out: Make sure your landscape fabric or burlap is securely in place. You may need to add more fabric or use a tighter weave.
Extra Tips and Tricks
* Choose the Right Variety: Some bell pepper varieties are better suited for container gardening than others. Look for compact or dwarf varieties.
* Use a Dark-Colored Bottle: A dark-colored bottle will help retain heat and keep the soil warmer, which can be beneficial in cooler climates.
* Add Drainage Holes: If you’re concerned about overwatering, you can add a few small drainage holes to the bottom of the bottle.
* Rotate the Bottle: Rotate the bottle regularly to ensure all sides of the plant receive equal sunlight.
* Get Creative with Decoration: Decorate your bottle garden with paint, stickers, or other embellishments to add a personal touch.
And there you have it! Your very own upside-down bell pepper bottle garden. With a little care and attention, you’ll be enjoying fresh, homegrown bell peppers in no time. Happy gardening!
Conclusion
So, there you have it! Transforming discarded plastic bottles into thriving bell pepper planters is not just a clever recycling project; it’s a rewarding journey into sustainable gardening. This DIY bell pepper bottle garden method offers a multitude of benefits, from reducing waste and saving money to providing you with fresh, homegrown produce right at your fingertips.
Why is this a must-try? Because it’s accessible to everyone, regardless of gardening experience or space constraints. Whether you live in a sprawling suburban home or a cozy city apartment, you can create a miniature bell pepper oasis. It’s also incredibly satisfying to witness the entire life cycle of your plants, from tiny seedlings to vibrant, fruit-bearing beauties, all nurtured within a repurposed bottle.
But the beauty of this project lies in its adaptability. Feel free to experiment with different types of bell peppers. Try growing colorful varieties like yellow, orange, or even purple bell peppers for a visually stunning garden. You can also explore companion planting by adding herbs like basil or oregano to your bottle garden. These herbs not only enhance the flavor of your bell peppers but also help deter pests naturally.
Consider the type of soil you use. While a standard potting mix works well, you can enrich it with compost or worm castings for added nutrients. Ensure proper drainage by adding a layer of gravel or pebbles at the bottom of the bottle before adding the soil. This will prevent waterlogging and promote healthy root growth.
Furthermore, think about the placement of your bottle garden. Bell peppers thrive in sunlight, so choose a location that receives at least six to eight hours of direct sunlight each day. If you live in a particularly hot climate, provide some afternoon shade to prevent the plants from scorching.
Don’t be afraid to get creative with the aesthetics of your bottle garden. Decorate the bottles with paint, markers, or even decoupage to add a personal touch. You can also arrange the bottles in various configurations to create a visually appealing display.
The environmental impact of this project is significant. By repurposing plastic bottles, you’re reducing the amount of waste that ends up in landfills and oceans. You’re also minimizing your carbon footprint by growing your own food locally, reducing the need for transportation and packaging.
This DIY project is more than just a gardening hack; it’s a step towards a more sustainable lifestyle. It’s a way to connect with nature, learn about the growing process, and enjoy the delicious rewards of your labor.
So, what are you waiting for? Gather your empty plastic bottles, grab some soil and seeds, and embark on your own DIY bell pepper bottle garden adventure. We’re confident that you’ll be amazed by the results.
We encourage you to share your experiences with us! Post photos of your bottle gardens on social media using the hashtag #BellPepperBottleGarden and let us know what you’ve learned along the way. We’re eager to see your creations and hear your tips and tricks. Let’s inspire others to embrace sustainable gardening and create a greener future, one bottle at a time. Happy gardening!
FAQ
Frequently Asked Questions About Your DIY Bell Pepper Bottle Garden
1. What kind of plastic bottles are best for this project?
The ideal plastic bottles are those that are sturdy and relatively clear. Two-liter soda bottles or larger juice bottles work well. Avoid using bottles that are too thin or flimsy, as they may not be able to support the weight of the soil and plants. Make sure to thoroughly clean the bottles before using them to remove any residue. You can use soap and water, or even a diluted bleach solution, followed by a thorough rinsing.
2. How do I ensure proper drainage in my bottle garden?
Proper drainage is crucial to prevent root rot and ensure the health of your bell pepper plants. Before adding soil, create a drainage layer at the bottom of the bottle. You can use gravel, pebbles, or even broken pieces of terracotta pots. This layer will allow excess water to drain away from the roots. Additionally, make sure to create drainage holes in the bottom of the bottle. You can use a drill, a hot nail, or a sharp knife to create these holes. Start with a few holes and add more if needed.
3. What type of soil should I use for my bell pepper plants?
A well-draining potting mix is essential for growing healthy bell pepper plants in your bottle garden. Avoid using garden soil, as it can be too heavy and compact, leading to poor drainage. A good potting mix will contain a blend of peat moss, perlite, and vermiculite. You can also amend the potting mix with compost or worm castings to provide additional nutrients. Consider adding a slow-release fertilizer to the soil to provide a steady supply of nutrients throughout the growing season.
4. How much sunlight do bell pepper plants need?
Bell pepper plants thrive in sunlight and require at least six to eight hours of direct sunlight each day. Choose a location for your bottle garden that receives ample sunlight. If you’re growing your plants indoors, you may need to supplement with artificial lighting, such as grow lights. Rotate the bottles regularly to ensure that all sides of the plants receive adequate sunlight. If you live in a hot climate, provide some afternoon shade to prevent the plants from scorching.
5. How often should I water my bell pepper plants in a bottle garden?
The watering frequency will depend on several factors, including the weather, the size of the bottle, and the type of soil. Generally, you should water your bell pepper plants when the top inch of soil feels dry to the touch. Avoid overwatering, as this can lead to root rot. When watering, water thoroughly until water drains out of the drainage holes. Check the soil moisture regularly and adjust the watering frequency as needed.
6. How do I fertilize my bell pepper plants in a bottle garden?
Bell pepper plants are heavy feeders and require regular fertilization to produce abundant fruit. You can use a balanced liquid fertilizer, such as a 10-10-10 or 20-20-20 formula, diluted according to the package instructions. Fertilize your plants every two to three weeks during the growing season. You can also use organic fertilizers, such as compost tea or fish emulsion. Avoid over-fertilizing, as this can burn the roots of the plants.
7. How do I protect my bell pepper plants from pests and diseases?
Regularly inspect your bell pepper plants for signs of pests and diseases. Common pests include aphids, whiteflies, and spider mites. You can control these pests with insecticidal soap or neem oil. Diseases such as powdery mildew and blossom end rot can also affect bell pepper plants. Ensure good air circulation around the plants to prevent powdery mildew. Blossom end rot is caused by a calcium deficiency, so you can add calcium to the soil or use a calcium-rich fertilizer.
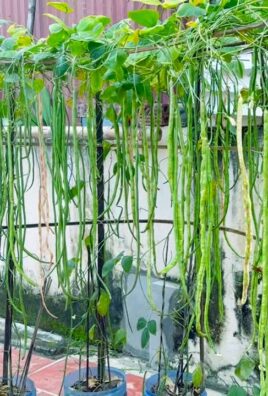
8. Can I grow other vegetables or herbs in a bottle garden?
Yes, you can grow a variety of other vegetables and herbs in a bottle garden. Some good options include tomatoes, lettuce, spinach, basil, oregano, and thyme. Choose plants that have similar growing requirements to bell peppers, such as sunlight and watering needs. Companion planting can also be beneficial, as certain plants can help deter pests or improve the growth of other plants.
9. How long does it take for bell pepper plants to produce fruit?
Bell pepper plants typically take 60 to 90 days to produce fruit, depending on the variety and growing conditions. Be patient and provide your plants with the care they need, and you’ll be rewarded with a bountiful harvest of delicious bell peppers.
10. What do I do with my bell pepper plants at the end of the growing season?
Bell pepper plants are perennials in warm climates, but they are typically grown as annuals in colder climates. At the end of the growing season, you can either compost the plants or try to overwinter them indoors. To overwinter your plants, prune them back and bring them indoors to a sunny location. Water them sparingly and fertilize them occasionally. With proper care, your bell pepper plants may survive the winter and produce fruit again the following year.
Leave a Comment