

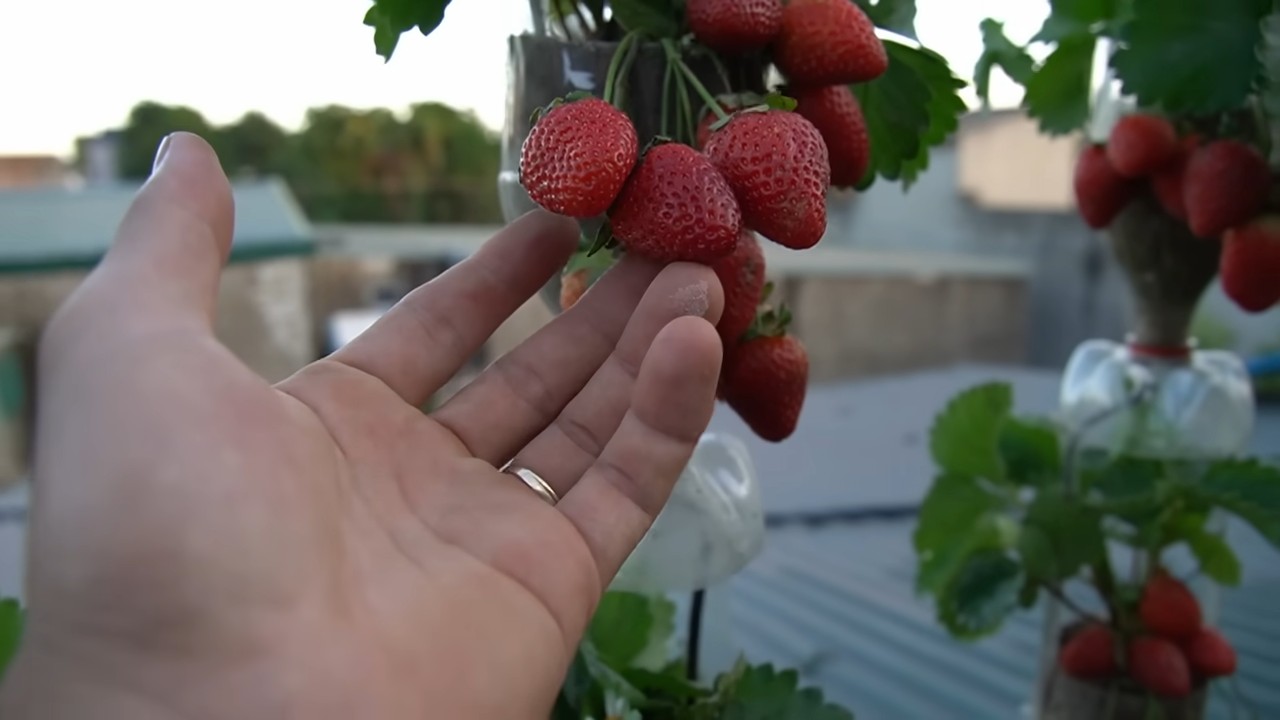
DIY Strawberry Tower: Imagine plucking juicy, sun-ripened strawberries right from your own backyard, even if you only have a tiny patio or balcony! Sounds dreamy, right? Well, it doesn’t have to be just a dream. I’m here to show you how to create your very own DIY strawberry tower, a vertical gardening solution that’s both beautiful and incredibly productive.
Vertical gardening, in general, has a rich history, dating back to the Hanging Gardens of Babylon, one of the Seven Wonders of the Ancient World. While we’re not quite building anything that grand, the principle remains the same: maximizing space and bringing nature closer to home. Strawberries, in particular, have been cultivated for centuries, enjoyed for their sweet taste and vibrant color. They’ve even been symbols of love and perfection in various cultures!
But why do you need a DIY strawberry tower? Well, let’s face it, traditional strawberry patches can be a pain. They take up a lot of ground space, are prone to pests and diseases, and can be difficult to harvest from without bending over and straining your back. A DIY strawberry tower solves all of these problems! It’s a compact, elevated growing system that keeps your strawberries off the ground, making them less susceptible to slugs and other critters. Plus, it’s a fantastic way to add a touch of green to any small space. I’m excited to guide you through the process, making it easy and fun to grow your own delicious strawberries!
Erdbeerturm selber bauen: Eine Schritt-für-Schritt-Anleitung
Hallo liebe Gartenfreunde! Ich zeige euch heute, wie ihr einen fantastischen Erdbeerturm selber bauen könnt. Das ist nicht nur eine tolle Möglichkeit, um auf kleinem Raum viele Erdbeeren anzubauen, sondern auch ein echter Hingucker in eurem Garten oder auf dem Balkon. Keine Sorge, es ist einfacher als es aussieht! Lasst uns loslegen!
Was du für deinen Erdbeerturm brauchst:
* Ein großes Pflanzgefäß (Durchmesser ca. 40-50 cm, Höhe ca. 30-40 cm) – das wird die Basis unseres Turms.
* Einen oder mehrere größere Kunststoffrohre (PVC-Rohr, KG-Rohr, etc.) – Durchmesser ca. 10-15 cm, Länge je nach gewünschter Turmhöhe (ca. 1,50 – 2 Meter).
* Bohrmaschine mit Lochsäge oder Bohraufsatz (Durchmesser ca. 5-8 cm, je nach Größe der Erdbeerpflanzen).
* Gartenvlies oder Unkrautvlies.
* Pflanzerde (am besten spezielle Erdbeer- oder Gemüseerde).
* Kies oder Blähton zur Drainage.
* Erdbeerpflanzen (am besten immertragende Sorten, damit ihr den ganzen Sommer über ernten könnt).
* Messer oder Schere.
* Maßband oder Zollstock.
* Handschuhe (optional, aber empfehlenswert).
* Gießkanne oder Gartenschlauch.
Vorbereitung ist alles: Die Planung und Vorbereitung des Materials
Bevor wir mit dem eigentlichen Bau beginnen, ist es wichtig, alles gut vorzubereiten. Das spart Zeit und Nerven!
1. Rohr zuschneiden: Wenn dein Kunststoffrohr zu lang ist, kürze es mit einer Säge auf die gewünschte Länge. Denk daran, dass ein Teil des Rohrs im unteren Pflanzgefäß verschwindet.
2. Löcher bohren: Jetzt kommt der wichtigste Teil: das Bohren der Löcher für die Erdbeerpflanzen.
* Abstand: Markiere die Stellen, an denen du die Löcher bohren möchtest. Ein Abstand von ca. 15-20 cm zwischen den Löchern ist ideal. Achte darauf, dass die Löcher versetzt angeordnet sind, damit die Pflanzen genügend Platz haben.
* Größe: Die Löcher sollten groß genug sein, damit die Wurzelballen der Erdbeerpflanzen hindurchpassen. Ein Durchmesser von 5-8 cm ist meist ausreichend.
* Bohren: Bohre die Löcher vorsichtig mit der Lochsäge oder dem Bohraufsatz. Arbeite langsam und gleichmäßig, um ein sauberes Ergebnis zu erzielen.
3. Rohr vorbereiten: Schneide das Gartenvlies in Streifen, die etwas breiter sind als der Durchmesser des Rohrs. Wickle das Vlies um das Rohr und fixiere es mit Klebeband oder Kabelbindern. Das Vlies verhindert, dass die Erde durch die Löcher ausgespült wird. Alternativ kannst du auch ein Stück Unkrautvlies in das Rohr legen, um den gleichen Effekt zu erzielen.
Der Aufbau des Erdbeerturms: Schritt für Schritt
Jetzt geht es ans Eingemachte! Wir bauen unseren Erdbeerturm zusammen.
1. Drainage legen: Fülle das große Pflanzgefäß mit einer Schicht Kies oder Blähton (ca. 5-10 cm). Das sorgt für eine gute Drainage und verhindert Staunässe.
2. Rohr platzieren: Stelle das vorbereitete Kunststoffrohr mittig in das Pflanzgefäß. Achte darauf, dass es stabil steht.
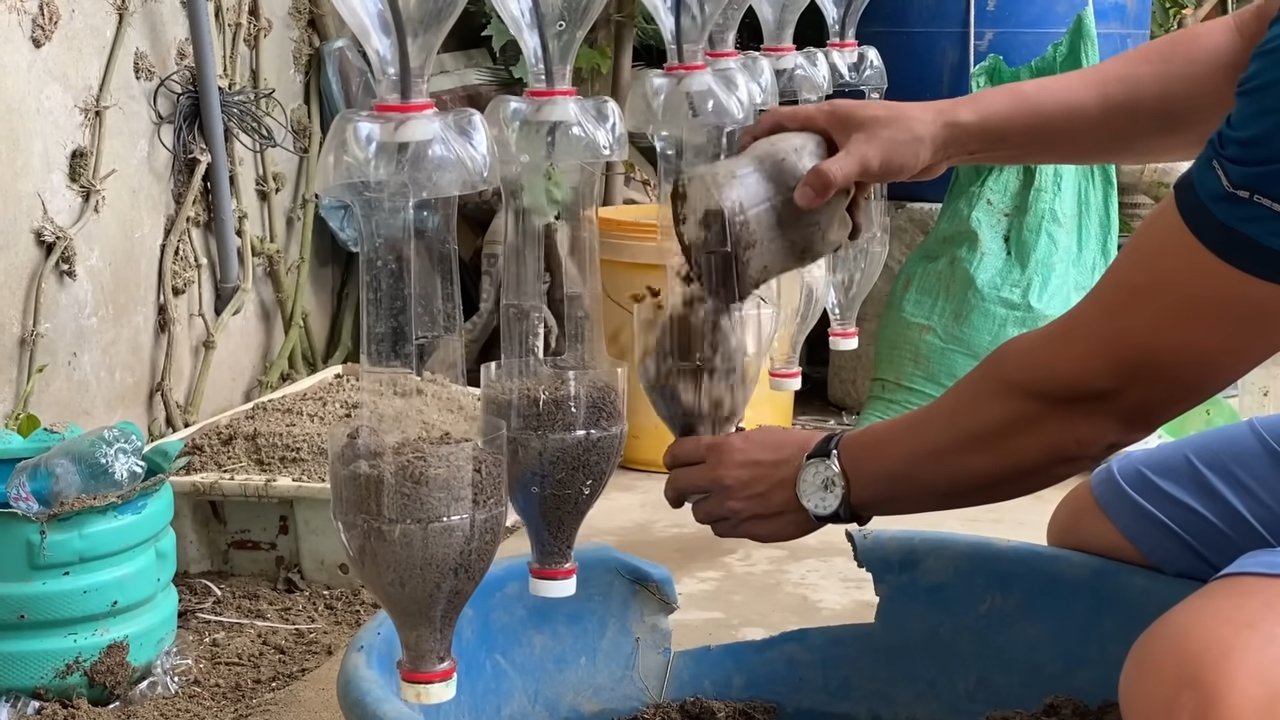
3. Erde einfüllen: Fülle das Pflanzgefäß und das Kunststoffrohr mit Pflanzerde. Achte darauf, dass die Erde gut verdichtet ist, damit sie nicht zusammensackt. Fülle das Rohr schichtweise und drücke die Erde immer wieder fest.
4. Pflanzen einsetzen: Jetzt kommen die Erdbeerpflanzen ins Spiel!
* Löcher vorbereiten: Drücke die Erde in den vorgebohrten Löchern etwas nach außen, um Platz für die Pflanzen zu schaffen.
* Pflanzen einsetzen: Nimm die Erdbeerpflanzen vorsichtig aus ihren Töpfen und lockere den Wurzelballen etwas auf. Setze die Pflanzen in die Löcher ein und drücke die Erde um die Wurzeln herum fest.
* Oben bepflanzen: Bepflanze auch die Oberseite des Pflanzgefäßes mit Erdbeerpflanzen. Hier kannst du auch andere Kräuter oder Blumen pflanzen, die gut zu Erdbeeren passen, wie zum Beispiel Ringelblumen oder Basilikum.
5. Gießen: Gieße den Erdbeerturm gründlich, damit die Erde gut durchfeuchtet ist. Achte darauf, dass das Wasser bis in die unteren Schichten gelangt.
Die Pflege deines Erdbeerturms: Tipps und Tricks
Damit dein Erdbeerturm lange Freude bereitet und viele leckere Erdbeeren liefert, ist die richtige Pflege wichtig.
1. Gießen: Erdbeeren brauchen regelmäßig Wasser, besonders während der Blütezeit und der Fruchtreife. Gieße den Erdbeerturm am besten morgens oder abends, wenn die Sonne nicht so stark scheint. Vermeide Staunässe, da dies zu Wurzelfäule führen kann.
2. Düngen: Erdbeeren sind Starkzehrer und brauchen ausreichend Nährstoffe. Dünge den Erdbeerturm regelmäßig mit einem speziellen Erdbeerdünger oder einem organischen Dünger. Beachte dabei die Dosierungsanleitung des Herstellers.
3. Sonneneinstrahlung: Erdbeeren lieben die Sonne! Stelle den Erdbeerturm an einen sonnigen Standort, damit die Pflanzen optimal wachsen und viele Früchte tragen.
4. Schutz vor Schädlingen: Erdbeeren können von verschiedenen Schädlingen befallen werden, wie zum Beispiel Schnecken, Blattläusen oder Erdbeermilben. Kontrolliere die Pflanzen regelmäßig und bekämpfe Schädlinge bei Bedarf mit geeigneten Mitteln.
5. Ausgeizen: Entferne regelmäßig abgestorbene Blätter und Triebe, um die Pflanzen gesund zu halten und die Fruchtbildung zu fördern.
6. Ernte: Ernte die Erdbeeren, sobald sie reif sind. Reife Erdbeeren sind leuchtend rot und lassen sich leicht vom Stiel lösen. Pflücke die Erdbeeren vorsichtig, um die Pflanzen nicht zu beschädigen.
Variationen und Erweiterungen: Mach deinen Erdbeerturm noch besser!
Du kannst deinen Erdbeerturm noch weiter individualisieren und verbessern. Hier sind ein paar Ideen:
* Bewässerungssystem: Installiere ein automatisches Bewässerungssystem, um die Pflanzen gleichmäßig mit Wasser zu versorgen. Du kannst zum Beispiel einen Tropfschlauch im Inneren des Rohrs verlegen.
* Verschiedene Pflanzen: Pflanze nicht nur Erdbeeren, sondern auch andere Kräuter oder Blumen in den Erdbeerturm. Das sorgt für eine bunte Vielfalt und lockt nützliche Insekten an.
* Vertikaler Garten: Baue mehrere Erdbeertürme und stelle sie nebeneinander, um einen vertikalen Garten zu schaffen. Das ist ein echter Hingucker und bietet noch mehr Platz für Pflanzen.
* Materialien: Verwende andere Materialien für den Bau des Erdbeerturms, wie zum Beispiel Holzpaletten oder alte Reifen. Sei kreativ und recycle Materialien, die du bereits zu Hause hast.
* Beleuchtung: Installiere eine Beleuchtung am Erdbeerturm, um ihn auch nachts in Szene zu setzen. Das ist besonders schön auf dem Balkon oder der Terrasse.
Ich hoffe, diese Anleitung hat dir geholfen, deinen eigenen Erdbeerturm zu bauen. Viel Spaß beim Gärtnern und Naschen! Und denk daran: Gärtnern ist wie eine Therapie – es entspannt, macht Freude und am Ende gibt es leckere Erdbeeren!
Conclusion
Creating your own DIY strawberry tower is more than just a gardening project; it’s an investment in fresh, delicious strawberries right at your fingertips. It’s a testament to resourcefulness, a celebration of homegrown goodness, and a visually stunning addition to any garden, balcony, or patio. Forget those expensive, store-bought berries that often lack the vibrant flavor of their freshly picked counterparts. With a little effort and creativity, you can cultivate a thriving strawberry patch in a compact, vertical space, maximizing your yield and minimizing the hassle.
This DIY project isn’t just about saving money; it’s about experiencing the joy of nurturing your own food from seedling to harvest. Imagine the satisfaction of plucking sun-ripened strawberries, still warm from the sun, and enjoying them in your morning yogurt, a refreshing smoothie, or a decadent dessert. The taste difference is undeniable, and the pride you’ll feel is immeasurable.
But the benefits extend beyond the delicious fruit. A strawberry tower is a space-saving marvel, perfect for urban gardeners or anyone with limited outdoor space. It’s also an excellent way to deter pests and diseases that can plague traditional strawberry patches. By elevating the plants, you reduce their contact with soil-borne pathogens and make them less accessible to slugs and other ground-dwelling critters.
Ready to take your strawberry growing to new heights?
Don’t be afraid to experiment with different materials and designs. While we’ve focused on using readily available materials like plastic containers or repurposed pallets, you can adapt the concept to suit your own aesthetic and resources. Consider using terracotta pots for a rustic look, or explore different planting patterns to create a unique visual display. You can even incorporate companion plants like basil or marigolds to further enhance the health and productivity of your strawberry tower.
For those looking to add a touch of whimsy, consider painting your tower in vibrant colors or adding decorative elements like fairy lights or small sculptures. The possibilities are endless, and the only limit is your imagination.
And remember, the key to a successful strawberry tower is proper care and maintenance. Ensure your plants receive adequate sunlight, water, and nutrients. Regularly check for pests and diseases, and take prompt action to address any issues. With a little attention, your strawberry tower will reward you with a bountiful harvest for years to come.
We encourage you to embark on this rewarding DIY adventure and experience the joy of growing your own strawberries. Share your creations with us! We’d love to see your unique designs and hear about your experiences. Post photos of your strawberry towers on social media using #DIYStrawberryTower and inspire others to join the fun. Let’s create a community of strawberry enthusiasts and celebrate the magic of homegrown goodness. This DIY strawberry tower is a game changer.
Frequently Asked Questions (FAQ)
What type of strawberries are best for a strawberry tower?
Day-neutral and everbearing strawberry varieties are generally recommended for strawberry towers. Day-neutral varieties produce fruit throughout the growing season, while everbearing varieties produce two or three crops per year. These types tend to be smaller and more compact, making them well-suited for the confined space of a tower. Some popular choices include Albion, Seascape, and Tristar. Avoid June-bearing varieties, as they produce a single, large crop in the spring and may not be as productive in a tower setting. Consider your local climate and choose varieties that are known to thrive in your region.
How much sunlight does a strawberry tower need?
Strawberries thrive in full sun, requiring at least 6-8 hours of direct sunlight per day. Insufficient sunlight can lead to reduced fruit production and smaller, less flavorful berries. Position your strawberry tower in a location that receives ample sunlight throughout the day. If you live in a particularly hot climate, consider providing some afternoon shade to prevent the plants from overheating. You may need to rotate the tower periodically to ensure that all sides receive adequate sunlight.
What type of soil should I use for my strawberry tower?
Use a well-draining potting mix that is rich in organic matter. Avoid using garden soil, as it can be too heavy and compact, leading to poor drainage and root rot. A good potting mix will provide the necessary nutrients and aeration for healthy strawberry growth. You can also amend the potting mix with compost or other organic materials to further improve its fertility and drainage. Consider adding a slow-release fertilizer to provide a steady supply of nutrients throughout the growing season.
How often should I water my strawberry tower?
Water your strawberry tower regularly, especially during hot, dry weather. The frequency of watering will depend on the climate, the type of container you’re using, and the size of the plants. Check the soil moisture regularly by sticking your finger into the soil. If the top inch of soil feels dry, it’s time to water. Water deeply, ensuring that the water reaches the roots of the plants. Avoid overwatering, as this can lead to root rot. A drip irrigation system can be a convenient way to water your strawberry tower evenly and efficiently.
How do I fertilize my strawberry tower?
Strawberries are heavy feeders and require regular fertilization to produce a bountiful harvest. Use a balanced fertilizer that is specifically formulated for strawberries or other fruiting plants. Follow the instructions on the fertilizer package for application rates and frequency. You can also supplement with organic fertilizers such as compost tea or fish emulsion. Avoid over-fertilizing, as this can lead to excessive vegetative growth and reduced fruit production.
How do I protect my strawberry tower from pests and diseases?
Regularly inspect your strawberry tower for pests and diseases. Common pests that can affect strawberries include aphids, spider mites, and slugs. Diseases such as powdery mildew and gray mold can also be a problem. Take prompt action to address any issues. You can use organic pest control methods such as insecticidal soap or neem oil to control pests. Ensure good air circulation around the plants to prevent fungal diseases. Remove any dead or diseased leaves to prevent the spread of disease. Consider using netting to protect your strawberries from birds.
How do I overwinter my strawberry tower?
In colder climates, you’ll need to protect your strawberry tower from freezing temperatures. Move the tower to a sheltered location, such as a garage or shed. You can also wrap the tower in burlap or other insulating material. Water the plants sparingly during the winter months, allowing the soil to dry out slightly between waterings. In the spring, gradually acclimate the plants to outdoor conditions before moving them back to their permanent location.
Can I grow other plants in my strawberry tower?
Yes, you can grow other plants in your strawberry tower, but it’s important to choose companion plants that are compatible with strawberries. Some good companion plants for strawberries include basil, marigolds, and thyme. These plants can help to deter pests and diseases and improve the overall health of your strawberry tower. Avoid planting aggressive or invasive plants that could compete with the strawberries for resources.
How long will my strawberry tower last?
The lifespan of your strawberry tower will depend on the materials you use and the care you provide. With proper maintenance, a well-constructed strawberry tower can last for several years. You may need to replace the soil or plants periodically as they become depleted or overgrown. Regularly inspect the tower for any signs of damage or wear and tear, and make repairs as needed.


Leave a Comment