

Double Pumpkin Harvest Technique: Imagine doubling your pumpkin yield this fall, impressing your neighbors with a bountiful display, and having enough pumpkins for pies, decorations, and maybe even a jack-o’-lantern carving contest! Sounds good, right? Well, you’re in the right place!
For centuries, pumpkins have held a special place in our hearts and cultures. From their humble beginnings in Central America to their starring role in Halloween celebrations worldwide, these vibrant gourds symbolize abundance and the changing seasons. But what if you could maximize that abundance? That’s where the “Double Pumpkin Harvest Technique” comes in.
Let’s be honest, gardening can be tricky. We pour our time, effort, and love into our plants, and sometimes, the results are… underwhelming. Maybe you’re short on space, or perhaps your pumpkin patch just isn’t producing as much as you’d hoped. That’s why I’m so excited to share this simple yet effective DIY trick with you. This technique isn’t just about getting more pumpkins; it’s about optimizing your garden’s potential and enjoying the fruits (or rather, vegetables!) of your labor to the fullest. I’m going to show you how to use the Double Pumpkin Harvest Technique to get the most out of your pumpkin patch this year. Get ready to impress!
Doppelte Kürbisernte: So maximierst du deine Ausbeute!
Hallo liebe Gartenfreunde! Habt ihr euch jemals gefragt, wie ihr noch mehr Kürbisse aus euren Pflanzen herausholen könnt? Ich habe da einen Trick für euch, der mir in den letzten Jahren geholfen hat, meine Kürbisernte zu verdoppeln (manchmal sogar zu verdreifachen!). Es geht darum, die Pflanze strategisch zu beschneiden und zu lenken, um ihre Energie auf die Entwicklung weniger, aber dafür größerer und gesünderer Früchte zu konzentrieren. Klingt gut, oder? Lasst uns loslegen!
Was du brauchst:
* Eine gesunde Kürbispflanze (egal welche Sorte, aber am besten eine, die zum Ranken neigt)
* Eine scharfe Gartenschere oder ein Messer (desinfiziert!)
* Gartenhandschuhe (zum Schutz deiner Hände)
* Mulch (optional, aber empfehlenswert)
* Pflanzstäbe oder Rankgitter (optional, zur Unterstützung der Ranken)
* Geduld und ein wenig Liebe zum Detail!
Die Grundlagen verstehen: Kürbiswachstum und Beschneidung
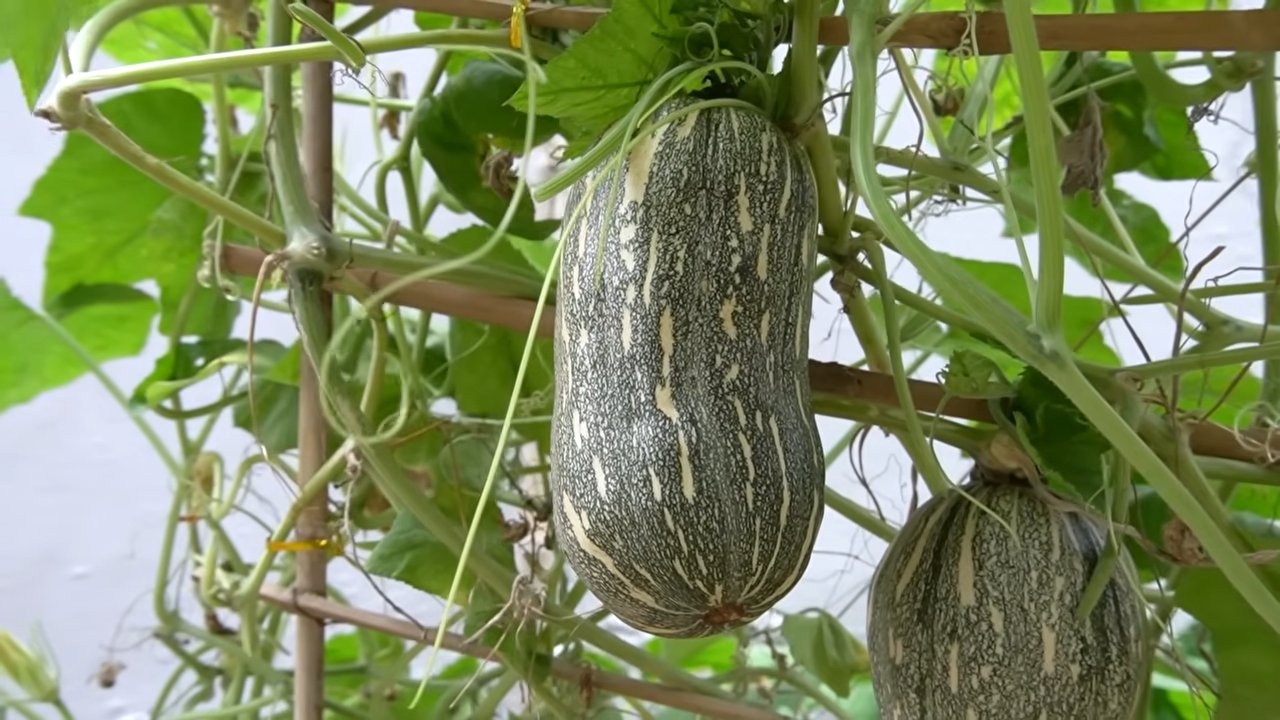
Bevor wir ins Detail gehen, ist es wichtig zu verstehen, wie Kürbispflanzen wachsen und warum Beschneidung so effektiv sein kann. Kürbispflanzen sind Rankgewächse, die lange Triebe (Ranken) bilden. An diesen Ranken wachsen Blätter, Blüten und schließlich die Kürbisse. Die Pflanze investiert ihre Energie in all diese Bereiche. Durch das Beschneiden lenken wir die Energie der Pflanze auf die Entwicklung der Früchte, die wir ernten wollen.
* Hauptranke: Das ist der Haupttrieb, der aus dem Samen wächst.
* Seitentriebe: Diese Triebe wachsen aus der Hauptranke.
* Blüten: Kürbispflanzen haben männliche und weibliche Blüten. Nur die weiblichen Blüten entwickeln sich zu Kürbissen. Du erkennst sie an dem kleinen Fruchtansatz direkt hinter der Blüte.
* Blätter: Die Blätter sind wichtig für die Photosynthese, aber zu viele Blätter können die Luftzirkulation behindern und Krankheiten fördern.
Schritt-für-Schritt-Anleitung zur doppelten Kürbisernte
Hier ist meine bewährte Methode, um die Kürbisernte zu maximieren. Ich habe sie über die Jahre verfeinert, also keine Angst, ein wenig zu experimentieren, um herauszufinden, was für deine Pflanzen am besten funktioniert.
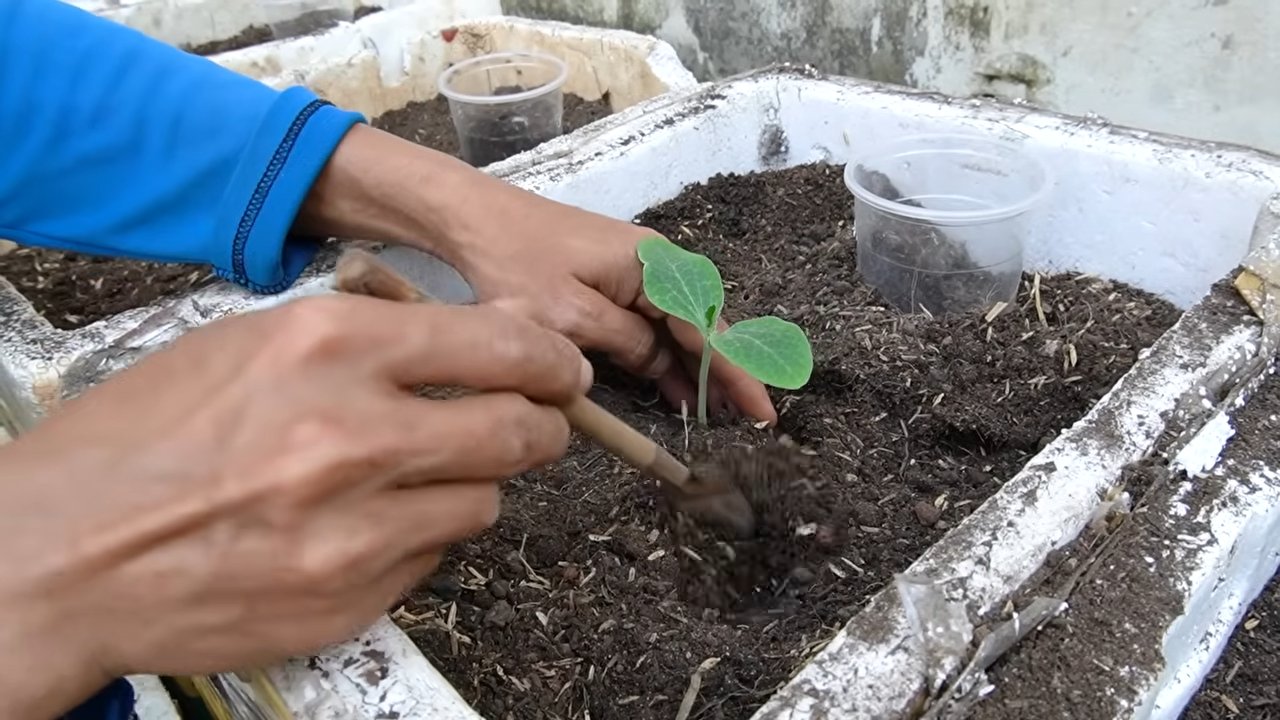
Phase 1: Vorbereitung und frühe Beschneidung
1. Wähle deine Kürbispflanze aus: Beginne mit einer gesunden, kräftigen Kürbispflanze. Achte darauf, dass sie ausreichend Platz zum Ranken hat. Wenn du wenig Platz hast, kannst du die Ranken an einem Rankgitter oder Pflanzstäben hochleiten.
2. Entferne die ersten Seitentriebe: Sobald die Pflanze etwa 60-90 cm lang ist, entferne die ersten Seitentriebe, die sich in den Blattachseln der Hauptranke bilden. Das hilft der Pflanze, ihre Energie auf das Wachstum der Hauptranke zu konzentrieren. Schneide die Triebe direkt am Hauptstamm ab.
3. Mulche den Boden: Eine Schicht Mulch um die Pflanze herum hilft, Feuchtigkeit zu speichern, Unkraut zu unterdrücken und die Früchte sauber zu halten, wenn sie auf dem Boden liegen. Ich verwende gerne Stroh oder Holzhackschnitzel.
Phase 2: Blütenauswahl und Beschneidung während der Fruchtbildung
1. Identifiziere die weiblichen Blüten: Beobachte deine Pflanze genau und identifiziere die weiblichen Blüten. Wie bereits erwähnt, erkennst du sie an dem kleinen Fruchtansatz direkt hinter der Blüte.
2. Wähle die besten Früchte aus: Wenn die Pflanze mehrere weibliche Blüten hat, wähle die 2-3 vielversprechendsten Früchte aus, die du entwickeln möchtest. Achte auf Früchte, die gesund aussehen, gut geformt sind und sich an einem sonnigen Standort befinden.
3. Entferne alle anderen weiblichen Blüten und kleinen Früchte: Das mag hart klingen, aber es ist entscheidend für den Erfolg. Durch das Entfernen der zusätzlichen Früchte lenkst du die gesamte Energie der Pflanze auf die verbleibenden Kürbisse. Schneide die Blüten oder kleinen Früchte vorsichtig mit einer scharfen Schere ab.
4. Beschneide die Ranken hinter den ausgewählten Früchten: Schneide die Ranken etwa 5-6 Blätter hinter den ausgewählten Früchten ab. Das hilft, die Energie der Pflanze auf die Entwicklung der Früchte zu konzentrieren und verhindert, dass die Ranken zu lang und unübersichtlich werden.
5. Entferne überflüssige Blätter: Entferne Blätter, die beschädigt, vergilbt oder von Mehltau befallen sind. Entferne auch Blätter, die die Früchte beschatten. Eine gute Luftzirkulation ist wichtig, um Krankheiten vorzubeugen.
Phase 3: Pflege und Unterstützung der wachsenden Kürbisse
1. Gieße regelmäßig: Kürbispflanzen brauchen viel Wasser, besonders während der Fruchtbildung. Gieße tief und regelmäßig, besonders bei trockenem Wetter. Vermeide es, die Blätter zu benetzen, um Krankheiten vorzubeugen.
2. Dünge sparsam: Dünge die Pflanze alle paar Wochen mit einem ausgewogenen Dünger. Vermeide es, zu viel Stickstoff zu geben, da dies zu viel Blattwachstum und weniger Früchten führen kann.
3. Unterstütze die Früchte: Wenn die Kürbisse größer werden, kann es notwendig sein, sie zu unterstützen, besonders wenn sie auf dem Boden liegen. Du kannst sie auf Strohballen, Holzbretter oder sogar alte Handtücher legen, um zu verhindern, dass sie faulen.
4. Kontrolliere auf Schädlinge und Krankheiten: Überprüfe deine Pflanzen regelmäßig auf Schädlinge wie Kürbiswanzen oder Mehltau. Behandle Probleme frühzeitig, um Schäden zu minimieren. Ich verwende gerne natürliche Schädlingsbekämpfungsmittel wie Neemöl oder Insektizidseife.
5. Drehe die Kürbisse: Drehe die Kürbisse vorsichtig alle paar Tage, um sicherzustellen, dass sie gleichmäßig reifen und keine flachen Stellen entwickeln.
Zusätzliche Tipps für eine erfolgreiche Kürbisernte
* Bestäubung: Wenn du Probleme mit der Bestäubung hast, kannst du die weiblichen Blüten von Hand bestäuben. Sammle dazu den Pollen von einer männlichen Blüte mit einem Pinsel und trage ihn auf die Narbe der weiblichen Blüte auf.
* Sortenwahl: Einige Kürbissorten sind besser für die Beschneidung geeignet als andere. Informiere dich vor dem Pflanzen über die spezifischen Bedürfnisse deiner Sorte.
* Beobachtung: Beobachte deine Pflanzen genau und passe deine Beschneidungstechnik entsprechend an. Jede Pflanze ist anders und reagiert unterschiedlich auf die Beschneidung.
* Geduld: Hab Geduld! Es dauert einige Zeit, bis die Kürbisse reif sind. Lass sie so lange wie möglich an der Pflanze, um den besten Geschmack und die beste Haltbarkeit zu erzielen.
Wann ist der richtige Zeitpunkt für die Ernte?
Der richtige Zeitpunkt für die Ernte hängt von der Kürbissorte ab. Im Allgemeinen sind Kürbisse reif, wenn die Schale hart ist und sich nicht mehr leicht mit dem Fingernagel eindrücken lässt. Der Stiel sollte ebenfalls trocken und hart sein. Schneide den Kürbis mit einem scharfen Messer oder einer Gartenschere ab und lasse etwa 5-10 cm Stiel am Kürbis.
Fazit
Mit dieser Technik der strategischen Beschneidung und Pflege kannst du deine Kürbisernte deutlich steigern. Es erfordert zwar etwas mehr Aufwand, aber die Belohnung sind größere, gesündere und schmackhaftere Kürbisse. Probiere es aus und lass mich wissen, wie es bei dir funktioniert hat! Viel Spaß beim Gärtnern!
Conclusion
So, there you have it! The Double Pumpkin Harvest Technique isn’t just a gardening fad; it’s a game-changer for maximizing your pumpkin yield and enjoying a truly bountiful autumn. We’ve walked you through the process, highlighting the key steps and offering insights into why this method works so effectively.
Why is this a must-try? Because it addresses the fundamental challenge of pumpkin growing: limited space and the plant’s natural tendency to focus energy on a select few fruits. By strategically pruning and encouraging secondary vine growth, you’re essentially doubling your chances of a successful harvest. Imagine the satisfaction of seeing your garden overflowing with plump, vibrant pumpkins, ready for carving, baking, or simply adding a touch of autumnal charm to your home.
But the benefits extend beyond just quantity. The Double Pumpkin Harvest Technique can also lead to healthier, more robust pumpkins. By distributing the plant’s resources more evenly, you’re reducing the strain on the primary vine and allowing each pumpkin to receive the nutrients and sunlight it needs to thrive. This can result in larger, more uniformly shaped pumpkins with richer color and improved flavor.
Don’t be afraid to experiment with variations! For example, if you’re growing smaller pumpkin varieties like pie pumpkins or sugar pumpkins, you might find that the Double Pumpkin Harvest Technique allows you to grow even more pumpkins per plant. You can also adjust the timing of your pruning based on your local climate and growing season. In warmer climates, you might be able to start the process earlier, while in cooler climates, you might need to wait a bit longer to ensure that the secondary vines have enough time to mature.
Consider companion planting to further enhance your pumpkin patch. Marigolds can deter pests, while beans can help fix nitrogen in the soil, providing your pumpkins with an extra boost of nutrients.
We understand that trying a new gardening technique can be a bit daunting, but we encourage you to take the plunge and give the Double Pumpkin Harvest Technique a try. The results are well worth the effort, and you might just be surprised at how much you can improve your pumpkin yield.
More than just a gardening technique, the Double Pumpkin Harvest Technique is about connecting with nature, understanding the growth patterns of your plants, and taking an active role in creating a thriving garden. It’s about the joy of nurturing something from seed to harvest and the satisfaction of sharing the fruits (or in this case, the pumpkins) of your labor with family and friends.
So, grab your gardening gloves, head out to your pumpkin patch, and get ready to experience the magic of the Double Pumpkin Harvest Technique. We’re confident that you’ll be amazed by the results.
We’d love to hear about your experiences! Share your photos, tips, and stories with us in the comments below. Let’s create a community of pumpkin-growing enthusiasts and learn from each other’s successes and challenges. Happy harvesting!
Frequently Asked Questions (FAQ)
What exactly is the Double Pumpkin Harvest Technique?
The Double Pumpkin Harvest Technique is a method of pruning and training pumpkin vines to encourage the growth of secondary vines, effectively doubling the potential for pumpkin production from a single plant. It involves strategically cutting back the primary vine after it has set a few pumpkins, which stimulates the growth of new vines that can then produce additional pumpkins. This technique is particularly useful for gardeners with limited space or those who want to maximize their pumpkin yield.
When is the best time to start the Double Pumpkin Harvest Technique?
The ideal time to begin the Double Pumpkin Harvest Technique is when your pumpkin plant has already set one or two pumpkins on the primary vine. This usually occurs about halfway through the growing season. You want to ensure that the plant has enough energy to support the initial pumpkins and then redirect its resources to the secondary vines. Avoid pruning too early, as this can weaken the plant and reduce overall yield.
How do I prune the primary vine?
Once your pumpkin plant has set one or two pumpkins on the primary vine, locate a point on the vine a few feet beyond the last pumpkin. Using clean, sharp pruning shears, cut the vine at a 45-degree angle. This will encourage the plant to send out new shoots from the cut end. Be sure to disinfect your pruning shears before and after use to prevent the spread of disease.
What happens after I prune the primary vine?
After pruning, the plant will begin to send out new shoots, which will become your secondary vines. These vines will also produce flowers and eventually pumpkins. It’s important to provide these secondary vines with adequate support and nutrients to ensure they can thrive. You may need to train the vines to grow in a specific direction to prevent them from overcrowding your garden.
Do I need to fertilize the secondary vines differently?
Yes, it’s a good idea to provide the secondary vines with additional nutrients to support their growth and pumpkin production. You can use a balanced fertilizer or a fertilizer specifically formulated for pumpkins. Apply the fertilizer according to the package instructions, being careful not to over-fertilize, which can damage the plants. Consider using compost tea or other organic fertilizers to provide a slow-release source of nutrients.
How many pumpkins can I expect to get from each vine after using this technique?
The number of pumpkins you can expect to harvest from each vine will vary depending on the variety of pumpkin, the growing conditions, and your overall gardening skills. However, with the Double Pumpkin Harvest Technique, you can typically expect to double your pumpkin yield compared to traditional growing methods. Some gardeners have even reported getting three or four times as many pumpkins per plant.
What if the secondary vines don’t produce pumpkins?
If the secondary vines don’t produce pumpkins, there could be several reasons why. First, ensure that the vines are receiving enough sunlight and water. Pumpkins need at least six hours of direct sunlight per day and consistent watering, especially during dry periods. Second, check for pests or diseases that may be affecting the plant’s ability to produce fruit. Third, consider hand-pollinating the female flowers to ensure that they are properly fertilized.
Can I use this technique on all types of pumpkins?
The Double Pumpkin Harvest Technique can be used on most types of pumpkins, but it’s particularly effective on larger varieties like Jack O’ Lantern pumpkins and pie pumpkins. Smaller varieties may not benefit as much from the technique, as they tend to produce more pumpkins naturally. Experiment with different varieties to see what works best in your garden.
What are some common mistakes to avoid when using the Double Pumpkin Harvest Technique?
Some common mistakes to avoid include pruning the primary vine too early, over-fertilizing the plants, neglecting to provide adequate support for the vines, and failing to protect the pumpkins from pests and diseases. Be sure to monitor your plants closely and address any issues promptly to ensure a successful harvest.
How do I know when my pumpkins are ready to harvest?
Pumpkins are typically ready to harvest when their skin is hard and resistant to scratching, and the stem is dry and brown. You can also tap the pumpkin; a ripe pumpkin will sound hollow. Use pruning shears to cut the pumpkin from the vine, leaving a few inches of stem attached. Handle the pumpkins carefully to avoid bruising them, and store them in a cool, dry place.
Does the Double Pumpkin Harvest Technique affect the size or quality of the pumpkins?
While the goal is to increase the quantity of pumpkins, the Double Pumpkin Harvest Technique can also positively impact the size and quality. By distributing the plant’s resources across more pumpkins, you might see slightly smaller individual pumpkins compared to a single-vine plant. However, the overall health and vigor of the plant are often improved, leading to better-shaped, more uniformly colored pumpkins with potentially richer flavor. It’s a trade-off between individual size and overall yield, but many gardeners find the increased quantity and improved plant health to be well worth it.
Can I use this technique in a container garden?
While pumpkins are generally best grown in the ground due to their sprawling nature, you can attempt the Double Pumpkin Harvest Technique in a very large container (at least 20 gallons) with proper support. Choose a smaller pumpkin variety and ensure the container has excellent drainage. The success rate might be lower compared to in-ground planting, but with careful management of water, nutrients, and vine support, it’s possible to achieve a decent harvest.
What if I live in a region with a short growing season?
If you live in a region with a short growing season, start your pumpkin seeds indoors a few weeks before the last expected frost. This will give your plants a head start and allow them to mature more quickly. Choose early-maturing pumpkin varieties and consider using row covers to protect the plants from cold weather. You may also need to adjust the timing of your pruning to ensure that the secondary vines have enough time to produce pumpkins before the first frost. The Double Pumpkin Harvest Technique can still be beneficial, but careful planning and execution are essential.
Leave a Comment