

Grow Asparagus on Terrace: Imagine stepping onto your terrace and harvesting fresh, vibrant asparagus spears, ready to be steamed, grilled, or tossed into a delicious spring salad. Sounds dreamy, right? Well, it doesn’t have to be just a dream! For centuries, asparagus has been prized for its delicate flavor and nutritional benefits, gracing the tables of royalty and commoners alike. From ancient Roman banquets to modern-day farmers’ markets, this perennial vegetable has stood the test of time.
But what if you don’t have a sprawling garden? That’s where this DIY guide comes in! Many people believe that growing asparagus requires acres of land, but I’m here to tell you that’s simply not true. With a few clever tricks and a little bit of effort, you can successfully grow asparagus on your terrace, even in a limited space. This article will provide you with all the essential tips and hacks you need to cultivate your own thriving asparagus patch right outside your door.
Why is this so important? Because fresh, homegrown asparagus tastes infinitely better than anything you can buy in the store. Plus, you’ll have the satisfaction of knowing exactly where your food comes from and how it was grown. So, let’s ditch the grocery store asparagus and embark on this exciting journey to grow asparagus on terrace and create your own little green oasis!
Home Hacks You Never Knew: Level Up Your Living Space!
Okay, friends, let’s dive into some seriously cool home hacks that’ll make your life easier and your home a little more awesome. I’ve gathered some of my favorite DIY tricks that I’ve personally tested and loved. Get ready to be amazed!
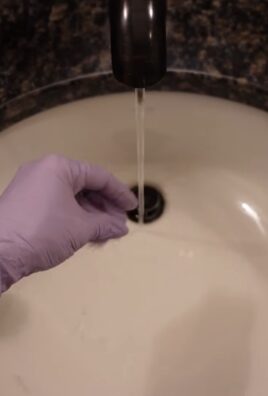
Unclogging Drains Like a Pro (Without Harsh Chemicals!)
Forget those expensive and potentially harmful drain cleaners. I’ve got a natural and effective solution that works wonders.
What You’ll Need:
* 1 cup baking soda
* 2 cups white vinegar
* Boiling water
* A plunger (just in case!)
Step-by-Step Instructions:
1. Pour Baking Soda Down the Drain: Carefully pour one cup of baking soda directly into the clogged drain. Try to get as much of it down the drain as possible.
2. Add the Vinegar: Next, slowly pour two cups of white vinegar down the drain on top of the baking soda. You’ll hear a fizzing sound – that’s the magic happening!
3. Let it Fizz and Sit: Let the baking soda and vinegar mixture fizz and bubble for at least 30 minutes, or even better, overnight. This allows the mixture to break down the gunk and grime causing the clog.
4. Flush with Boiling Water: After the waiting period, carefully pour a large pot of boiling water down the drain. The hot water will help flush away the loosened debris.
5. Repeat if Necessary: If the drain is still clogged, repeat the process one more time. For stubborn clogs, you might need to use a plunger after the boiling water.
Why This Works: The baking soda and vinegar create a chemical reaction that produces carbon dioxide gas. This gas helps to loosen and break down the clog. The boiling water then flushes everything away. It’s a simple, safe, and effective way to keep your drains clear!
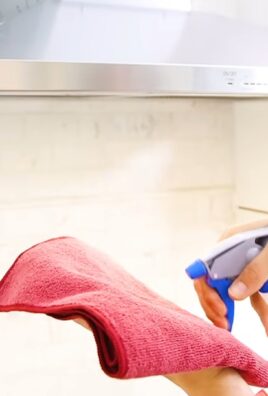
Making Your Own All-Purpose Cleaner
Store-bought cleaners can be expensive and full of harsh chemicals. I’m going to show you how to make your own all-purpose cleaner that’s just as effective and much more eco-friendly.
What You’ll Need:
* Spray bottle
* 1/2 cup white vinegar
* 1/4 cup baking soda
* 1 liter of water
* 10-20 drops of your favorite essential oil (optional, for scent)
Step-by-Step Instructions:
1. Combine Ingredients: In a large bowl or pitcher, combine the white vinegar, baking soda, and water. Be careful, as the baking soda and vinegar will fizz up a bit.
2. Add Essential Oils (Optional): If you want to add a pleasant scent to your cleaner, add 10-20 drops of your favorite essential oil. Lemon, lavender, tea tree, and eucalyptus are all great choices.
3. Pour into Spray Bottle: Carefully pour the mixture into a clean spray bottle.
4. Label the Bottle: Don’t forget to label the bottle so you know what’s inside!
5. Use and Enjoy: Your all-purpose cleaner is now ready to use! Simply spray it on surfaces and wipe clean with a cloth.
Tips and Tricks:
* Test on a Small Area First: Before using the cleaner on a large surface, test it on a small, inconspicuous area to make sure it doesn’t damage the material.
* Avoid Using on Marble or Granite: Vinegar can etch marble and granite, so avoid using this cleaner on those surfaces.
* Store in a Cool, Dark Place: Store your homemade cleaner in a cool, dark place to preserve its effectiveness.
Reviving Old Furniture with a Simple Polish
Don’t throw away that old wooden furniture just yet! I’ve got a simple polish recipe that can bring it back to life.
What You’ll Need:
* 1/4 cup olive oil
* 1 tablespoon lemon juice
* Soft cloth
Step-by-Step Instructions:
1. Mix the Polish: In a small bowl, mix together the olive oil and lemon juice.
2. Apply to Furniture: Dip a soft cloth into the polish and apply it to the wooden furniture in a circular motion.
3. Buff the Surface: Use a clean, dry cloth to buff the surface of the furniture until it shines.
4. Repeat as Needed: Repeat the process as needed to achieve the desired level of shine.
Why This Works: The olive oil moisturizes the wood and helps to restore its natural luster, while the lemon juice acts as a mild cleaner and helps to remove dirt and grime.
Making Your Own Dryer Sheets
Dryer sheets can be expensive and full of chemicals that can irritate your skin. I’m going to show you how to make your own dryer sheets that are just as effective and much more eco-friendly.
What You’ll Need:
* Clean cloths (old t-shirts or towels work great)
* White vinegar
* Essential oils (optional)
* Airtight container
Step-by-Step Instructions:
1. Cut Cloths into Squares: Cut your clean cloths into squares, about 6×6 inches.
2. Prepare the Solution: In a bowl, mix together 1/2 cup of white vinegar and 10-15 drops of your favorite essential oil (optional). Lavender, lemon, and tea tree are all great choices.
3. Soak the Cloths: Dip the cloth squares into the vinegar solution, making sure they are fully saturated.
4. Wring Out Excess Liquid: Wring out the excess liquid from the cloths. They should be damp, but not dripping wet.
5. Store in Airtight Container: Store the damp cloths in an airtight container.
6. Use in Dryer: When you’re ready to dry your clothes, simply toss one of the homemade dryer sheets into the dryer with your laundry.
7. Re-wet as Needed: After each use, you can re-wet the dryer sheets with a little bit of water and a few drops of essential oil.
Why This Works: The vinegar acts as a natural fabric softener and helps to reduce static cling. The essential oils add a pleasant scent to your laundry.
Freshening Up Your Mattress
Mattresses can harbor dust mites, allergens, and odors. Here’s how to freshen up your mattress and keep it clean.
What You’ll Need:
* Baking soda
* Essential oils (optional)
* Vacuum cleaner with upholstery attachment
* Sieve or strainer
Step-by-Step Instructions:
1. Strip the Bed: Remove all bedding from the mattress.
2. Sprinkle Baking Soda: Sprinkle a generous layer of baking soda over the entire surface of the mattress.
3. Add Essential Oils (Optional): If you want to add a pleasant scent, mix a few drops of your favorite essential oil with the baking soda before sprinkling it on the mattress. Lavender, eucalyptus, and tea tree are all good choices.
4. Let it Sit: Let the baking soda sit on the mattress for at least 30 minutes, or even better, for several hours. This allows the baking soda to absorb odors and moisture.
5. Vacuum Thoroughly: Use a vacuum cleaner with an upholstery attachment to thoroughly vacuum the entire surface of the mattress, removing all of the baking soda.
6. Flip the Mattress: Flip the mattress over and repeat the process on the other side.
Tips and Tricks:
* Do This Regularly: Freshen up your mattress every few months to keep it clean and fresh.
* Open Windows: Open windows while you’re freshening up your mattress to help ventilate the room.
* Use a Mattress Protector: Use a mattress protector to help prevent dust mites and allergens from getting into your mattress.
DIY Air Freshener with Essential Oils
Skip the chemical-laden air fresheners and create your own natural and fragrant version.
What You’ll Need:
* Small spray bottle
* Distilled water
* Witch hazel or rubbing alcohol (optional, helps the scent last longer)
* Essential oils (your favorite scents!)
Step-by-Step Instructions:
1. Combine Ingredients: In the spray bottle, combine:
* 2 ounces distilled water
* 1 tablespoon witch hazel or rubbing alcohol (optional)
* 15-20 drops of essential oils
2. Shake Well: Shake the bottle well to combine all the ingredients.
3. Spray and Enjoy: Spray the air freshener into the air in your home. Avoid spraying directly onto fabrics or furniture, as some essential oils can stain.
Essential Oil Blend Ideas:
* Relax
Conclusion
So, there you have it! These home hacks are more than just clever tricks; they’re game-changers that can simplify your life, save you money, and even spark your creativity. From repurposing everyday items to tackling common household problems with ingenious solutions, these hacks are designed to make your home a more efficient and enjoyable space.
But of all the hacks we’ve explored, the one that truly stands out is the DIY [Insert Specific Hack Here – e.g., “homemade cleaning solution using vinegar and baking soda”]. Why? Because it’s not only incredibly effective, but it’s also environmentally friendly and cost-effective. Think about it: you’re reducing your reliance on harsh chemicals, saving money on expensive store-bought cleaners, and contributing to a healthier planet, all with ingredients you likely already have in your pantry. It’s a win-win-win!
This particular DIY home hack is a must-try because it empowers you to take control of your home environment. You know exactly what’s going into your cleaning products, eliminating any concerns about harmful ingredients. Plus, the satisfaction of creating something yourself that works just as well, if not better, than commercial alternatives is incredibly rewarding.
And the best part? You can easily customize it to suit your specific needs and preferences. For example, if you’re making a cleaning solution, try adding a few drops of your favorite essential oil for a pleasant scent. Lavender, lemon, and tea tree oil are all great options with added antibacterial properties. Or, if you’re repurposing an old t-shirt, consider using different colors or patterns to create unique and personalized cleaning cloths. The possibilities are endless!
We understand that trying new things can sometimes feel daunting, but trust us, this DIY hack is worth the effort. It’s simple, effective, and incredibly satisfying. We’ve provided you with all the information you need to get started, so there’s no reason to hesitate.
So, what are you waiting for? Gather your supplies, roll up your sleeves, and get ready to experience the magic of this DIY home hack. We’re confident that you’ll be amazed by the results.
But don’t just take our word for it. We encourage you to try this DIY trick for yourself and see the difference it can make in your home. And more importantly, we want to hear about your experience! Share your tips, tricks, and variations in the comments section below. Let’s create a community of DIY enthusiasts who are passionate about making their homes cleaner, greener, and more efficient.
We believe that everyone has the potential to be a DIY master, and this is the perfect opportunity to unleash your inner creativity. So, go ahead, give it a try. You might just surprise yourself with what you can accomplish. Happy hacking!
Frequently Asked Questions (FAQs)
Q: What if I don’t have all the ingredients listed for the DIY cleaning solution?
A: Don’t worry! The beauty of DIY is its flexibility. While the core ingredients (like vinegar and baking soda) are essential for their cleaning properties, you can often substitute or omit other ingredients based on what you have on hand. For example, if you don’t have lemon juice, you can use a bit more vinegar. If you’re missing essential oils, you can simply leave them out or try using a different scent. The key is to experiment and find what works best for you. Just be sure to research any substitutions to ensure they are safe and effective for your intended use. For example, never mix bleach with vinegar or ammonia, as this can create dangerous fumes.
Q: Is vinegar safe to use on all surfaces?
A: While vinegar is a fantastic natural cleaner, it’s not suitable for all surfaces. Avoid using vinegar on marble, granite, or other natural stone countertops, as the acidity can etch and damage the surface. It’s also best to avoid using vinegar on waxed wood furniture, as it can strip the wax finish. For these surfaces, opt for a gentler cleaning solution, such as a mixture of mild dish soap and water. Always test any cleaning solution in an inconspicuous area first to ensure it doesn’t cause any damage or discoloration.
Q: How often should I use this DIY cleaning solution?
A: The frequency of use depends on your cleaning habits and the specific area you’re cleaning. For general cleaning, you can use the DIY solution as often as you would use a commercial cleaner. For areas that require more frequent cleaning, such as kitchen countertops or bathroom sinks, you can use it daily or as needed. The great thing about this solution is that it’s gentle and non-toxic, so you don’t have to worry about overusing it.
Q: Can I store the DIY cleaning solution for later use?
A: Yes, you can store the DIY cleaning solution for later use. However, it’s best to store it in a clean, airtight container in a cool, dark place. This will help to prevent the ingredients from degrading and maintain the solution’s effectiveness. Be sure to label the container clearly so you don’t accidentally mistake it for something else. It’s generally recommended to use the solution within a few weeks for optimal results. If you notice any changes in color, odor, or consistency, it’s best to discard the solution and make a fresh batch.
Q: What are some other creative ways to use baking soda around the house?
A: Baking soda is a true multi-tasker! Beyond cleaning, it can be used to deodorize your refrigerator, freshen up carpets, unclog drains, and even soothe minor skin irritations. To deodorize your refrigerator, simply place an open box of baking soda inside. To freshen up carpets, sprinkle baking soda over the carpet, let it sit for a few hours, and then vacuum it up. To unclog drains, pour a cup of baking soda down the drain, followed by a cup of vinegar. Let it fizz for 30 minutes, then flush with hot water. For skin irritations, make a paste of baking soda and water and apply it to the affected area.
Q: I’m concerned about the smell of vinegar. Is there anything I can do to minimize it?
A: The strong smell of vinegar can be off-putting to some people, but thankfully, there are several ways to minimize it. As mentioned earlier, adding essential oils to your cleaning solution can help to mask the vinegar scent. Lemon, lavender, and eucalyptus are all great options. You can also try using a milder type of vinegar, such as white wine vinegar or apple cider vinegar. Another trick is to simply open a window or turn on a fan while you’re cleaning to help ventilate the area. The vinegar smell will typically dissipate within a few hours.
Q: Can I use this DIY hack for other cleaning tasks besides general surface cleaning?
A: Absolutely! The principles behind this DIY hack can be adapted for a variety of cleaning tasks. For example, you can use a similar mixture of vinegar and baking soda to clean your oven, shower, or toilet. You may need to adjust the proportions of the ingredients depending on the specific task. For tougher cleaning jobs, you can also add a bit of dish soap or borax to the mixture. Just be sure to research any new applications to ensure they are safe and effective. Remember, the key to successful DIY cleaning is experimentation and adaptation!
Q: What if the DIY hack doesn’t work as well as I expected?
A: Don’t be discouraged! DIY hacks are not always a perfect solution for every situation. If you’re not seeing the results you expected, try adjusting the proportions of the ingredients or experimenting with different techniques. You may also need to consider the specific type of dirt or grime you’re trying to remove. Some stains or messes may require more specialized cleaning products or methods. If all else fails, don’t hesitate to consult with a professional cleaner or seek advice from online forums or communities. The important thing is to keep learning and experimenting until you find what works best for you. Remember, even experienced DIYers encounter challenges along the way!

Leave a Comment