

Grape harvesting tips are essential for any home gardener dreaming of turning their backyard vines into delicious jams, juices, or even a small batch of homemade wine. Imagine the satisfaction of plucking plump, sun-ripened grapes, knowing you nurtured them from tiny buds to juicy perfection. But before you grab your basket and clippers, knowing the right techniques can make all the difference between a bountiful harvest and a disappointing yield.
Grape cultivation boasts a rich history, dating back thousands of years to ancient civilizations like the Egyptians and Romans, who revered grapes not only for their culinary uses but also for their symbolic significance. Today, the tradition continues, and you too can partake in this age-old practice, right in your own backyard!
Why are grape harvesting tips so crucial? Well, harvesting at the wrong time can result in grapes that are either too tart or overly ripe and prone to spoilage. This DIY guide will equip you with the knowledge to identify the perfect moment for harvest, ensuring your grapes are bursting with flavor and ready for your favorite recipes. I’ll share simple, effective techniques and hacks that will help you maximize your harvest and minimize waste. Let’s get started and turn your grape-growing dreams into a delicious reality!
DIY Grape Harvesting and Preservation: From Vine to Wine (Almost!)
Okay, grape lovers! So you’ve nurtured your grapevines, watched them flourish, and now they’re bursting with juicy goodness. Harvesting and preserving your grapes can seem daunting, but trust me, it’s a rewarding experience. I’m going to walk you through the whole process, from knowing when to pick to turning those grapes into delicious jams, juices, or even preparing them for winemaking (though that’s a whole other level of DIY!).
Knowing When to Harvest: The Sweet Spot
This is arguably the most crucial part. Picking too early and you’ll have sour grapes (literally!). Picking too late and they might be overripe and attract unwanted critters. Here’s what I look for:
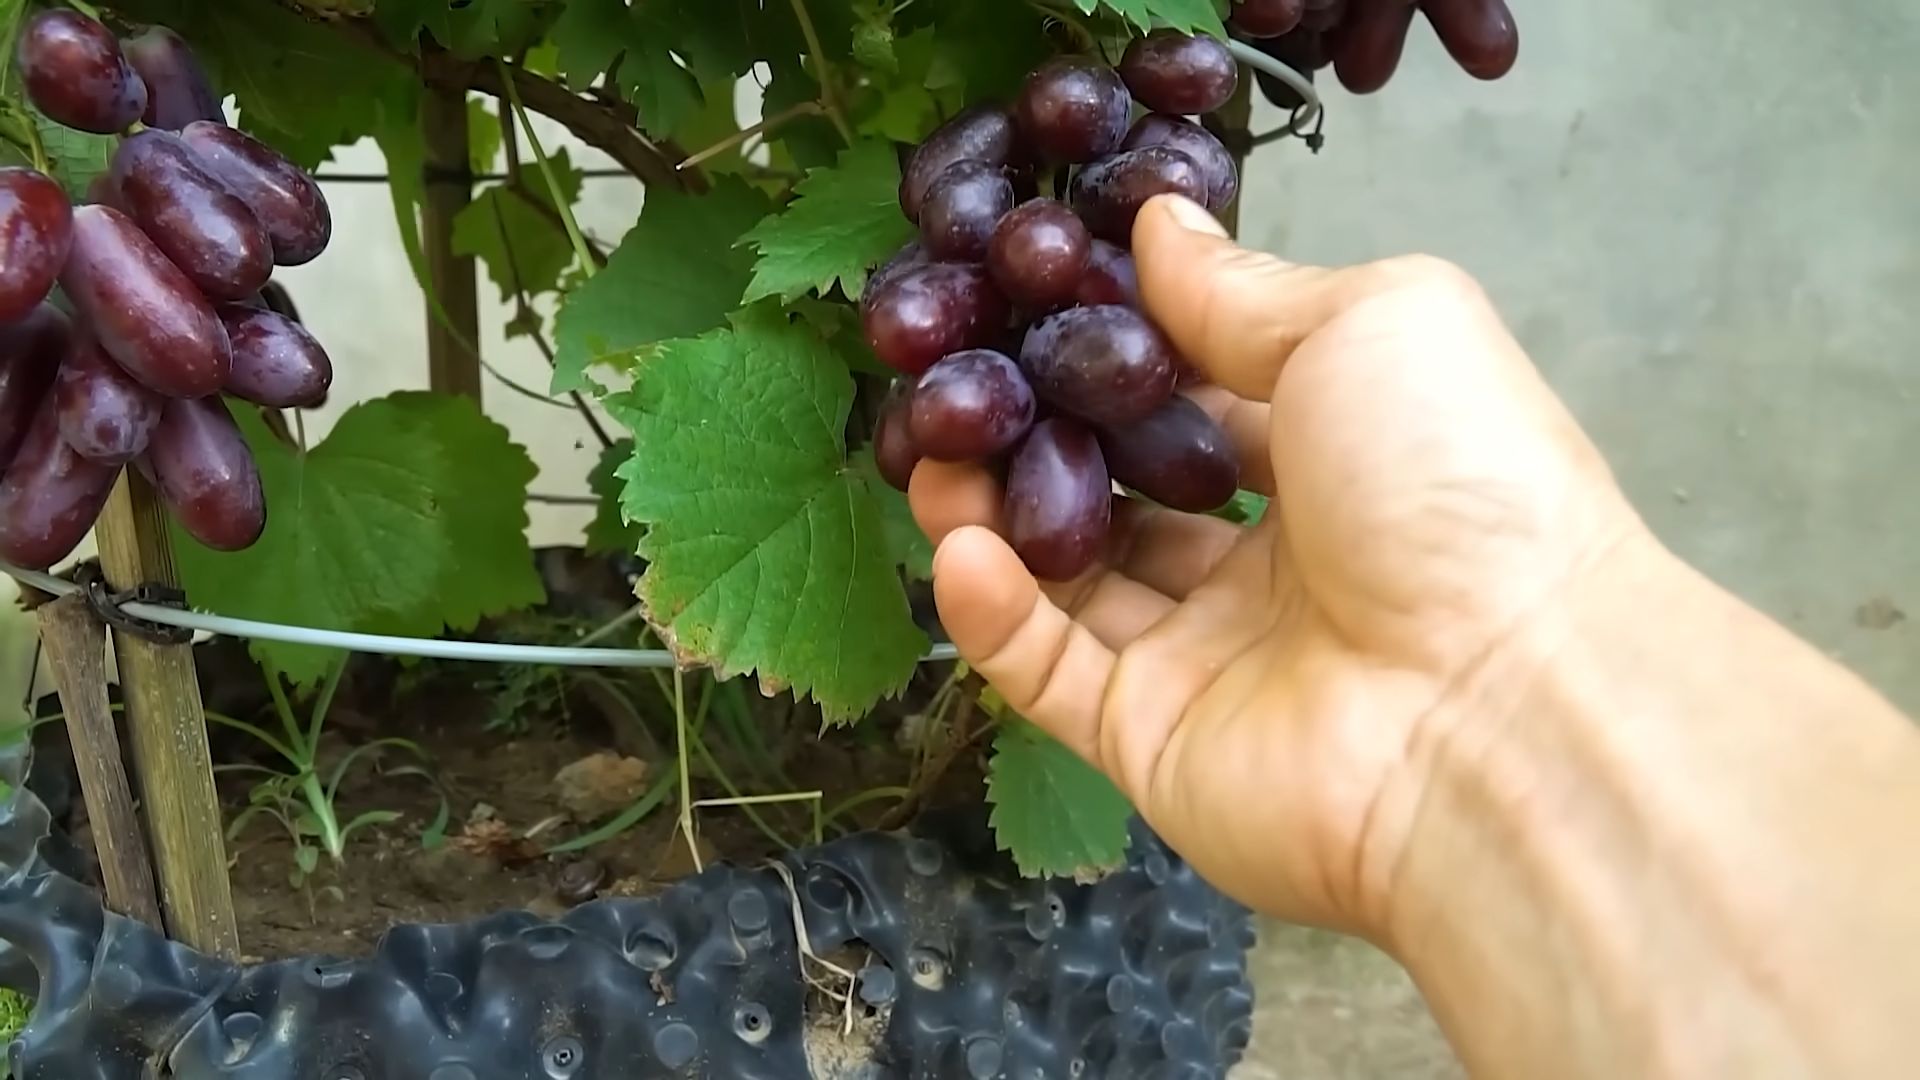
* Taste Test: This is the most reliable method. Sample a few grapes from different bunches. They should be sweet and flavorful, with a good balance of acidity.
* Color: The color should be uniform and characteristic of the grape variety. For example, red grapes should be a deep, rich red, and green grapes should be a translucent green or yellowish-green.
* Berry Size: The grapes should be plump and juicy, not shriveled or hard.
* Seed Color: Cut open a grape and check the seeds. They should be brown, not green. Green seeds indicate the grapes aren’t fully ripe.
* Ease of Removal: Ripe grapes should detach easily from the stem with a gentle tug.
* Sugar Content (Optional): If you’re serious about winemaking or just curious, you can use a refractometer to measure the sugar content (Brix) of the grape juice. The ideal Brix level depends on the grape variety and your desired outcome.
Tools You’ll Need
Before you head out to the vineyard (or your backyard!), gather these essentials:
* Sharp Pruning Shears or Grape Harvesting Knife: These are essential for cleanly cutting the grape bunches from the vine. Dull blades can damage the vine.
* Harvesting Baskets or Buckets: Choose containers that are clean, food-grade, and sturdy enough to hold the weight of the grapes. I prefer baskets with handles for easy carrying.
* Gloves (Optional): Protect your hands from thorns and potential irritants.
* Ladder or Step Stool (If Needed): For reaching high-hanging grapes. Safety first!
* Cooler with Ice Packs (Optional): If you’re harvesting on a hot day, this will help keep the grapes cool and prevent spoilage.
* Clean Towels: For wiping up spills and keeping your hands clean.
Harvesting the Grapes: A Step-by-Step Guide
Now for the fun part!
1. Prepare Your Containers: Line your baskets or buckets with clean towels or paper towels to cushion the grapes and absorb any moisture.
2. Inspect the Grape Bunches: Before cutting, carefully inspect each bunch for any damaged, diseased, or insect-infested grapes. Remove these and discard them.
3. Cut the Grape Bunch: Using your sharp pruning shears or grape harvesting knife, carefully cut the stem of the grape bunch close to the vine. Avoid damaging the vine itself.
4. Gently Place the Grapes in the Container: Handle the grapes gently to avoid bruising them. Don’t overcrowd the containers.
5. Repeat: Continue harvesting, inspecting, and placing the grapes in your containers until you’ve harvested all the ripe bunches.
6. Cool the Grapes (If Necessary): If it’s a hot day, immediately transfer the harvested grapes to a cooler with ice packs to keep them cool.
7. Transport Carefully: Transport the grapes carefully to your processing area, avoiding any bumps or jostling that could damage them.
Preparing the Grapes for Preservation: Cleaning and Sorting
Before you can turn your grapes into delicious treats, you need to clean and sort them.
1. Wash the Grapes: Gently wash the grapes in a large bowl or sink filled with cool water. Swirl them around to remove any dirt, debris, or insects.
2. Rinse Thoroughly: Rinse the grapes thoroughly under running water to remove any remaining dirt or residue.
3. Sort the Grapes: Carefully sort through the grapes, removing any that are damaged, bruised, overripe, or underripe. Also, remove any stems or leaves that may have made their way into the batch.
4. Dry the Grapes: Gently pat the grapes dry with clean towels or spread them out on a clean surface to air dry.
Preservation Methods: Unleash Your Inner Chef!
Now for the exciting part: preserving your grapes! Here are a few of my favorite methods:
Making Grape Juice: A Refreshing Treat
1. Choose Your Method: You can use a juicer, a steam juicer, or even a pot on the stovetop. I prefer using a steam juicer because it’s easy and yields a clear, flavorful juice.
2. Prepare the Grapes: Wash and sort the grapes as described above.
3. Juice the Grapes:
* Juicer: Follow the manufacturer’s instructions for your juicer.
* Steam Juicer: Place the grapes in the steam juicer basket and steam until the juice is extracted.
* Stovetop: Place the grapes in a large pot with a small amount of water (just enough to prevent sticking). Simmer over low heat until the grapes are soft and have released their juice. Strain the juice through a cheesecloth-lined colander.
4. Sweeten (Optional): If desired, sweeten the juice with sugar or honey to taste.
5. Pasteurize (Optional): To extend the shelf life of the juice, pasteurize it by heating it to 170°F (77°C) for 1 minute.
6. Store: Pour the juice into sterilized jars or bottles and seal tightly. Store in the refrigerator for up to a week or in the freezer for longer storage.
Grape Jam: A Sweet Spread
1. Prepare the Grapes: Wash, sort, and stem the grapes.
2. Cook the Grapes: Place the grapes in a large pot with a small amount of water (about 1/4 cup per pound of grapes). Cook over medium heat until the grapes are soft and have released their juice.
3. Mash the Grapes: Use a potato masher or immersion blender to mash the grapes.
4. Add Sugar: Add sugar to the grape mixture. The amount of sugar will depend on the sweetness of the grapes and your personal preference. A good starting point is about 3/4 cup of sugar per cup of mashed grapes.
5. Add Pectin (Optional): Pectin helps the jam to set properly. If you’re using grapes that are naturally low in pectin, you may need to add commercial pectin. Follow the instructions on the pectin package.
6. Cook the Jam: Bring the grape mixture to a boil over medium-high heat, stirring constantly to prevent sticking. Cook until the jam reaches the setting point. You can test the setting point by placing a small spoonful of jam on a cold plate and refrigerating it for a few minutes. If the jam wrinkles when you push it with your finger, it’s ready.
7. Process the Jam: Ladle the hot jam into sterilized jars, leaving 1/4 inch headspace. Wipe the jar rims clean, place the lids on the jars, and screw on the bands. Process the jars in a boiling water bath for the recommended time for your altitude.
8. Cool and Store: Remove the jars from the boiling water bath and let them cool completely. Check the seals. If the lids are concave and don’t flex when pressed, the jars are properly sealed. Store the jam in a cool, dark place.
Freezing Grapes: A Simple Snack
1. Prepare the Grapes: Wash, sort, and stem the grapes.
2. Dry the Grapes: Thoroughly dry the grapes with clean towels or spread them out on a clean surface to air dry. This is important to prevent ice crystals from forming.
3. Freeze in a Single Layer: Spread the grapes in a single layer on a baking sheet lined with parchment paper. Freeze for at least 2 hours, or until the grapes are frozen solid.
4. Transfer to Freezer Bags: Transfer the frozen grapes to freezer bags or containers. Label and date the bags.
5. Store: Store the frozen grapes in the freezer for up to 12 months.
Grape Leather: A Chewy Treat
1. Prepare the Grapes: Wash, sort, and stem the grapes.
2. Puree the Grapes: Place the grapes in a blender or food processor and puree until smooth.
3.
Conclusion
So, there you have it! Mastering these grape harvesting tips isn’t just about picking grapes; it’s about connecting with the land, understanding the rhythm of nature, and ultimately, enjoying the fruits (literally!) of your labor. We’ve covered everything from identifying the perfect ripeness to employing gentle harvesting techniques that protect your vines for years to come.
Why is this DIY approach a must-try? Because it empowers you to take control of the entire process, ensuring that every grape you savor is bursting with the authentic flavor you intended. Store-bought grapes, while convenient, often lack the nuanced sweetness and character that come from grapes harvested at their peak ripeness. Plus, there’s an undeniable satisfaction in knowing you nurtured these grapes from vine to table.
But the journey doesn’t end here! Feel free to experiment with different harvesting times to discover your preferred level of sweetness. Perhaps you prefer a slightly tart grape for jams and jellies, or an intensely sweet grape for snacking. Consider the weather conditions leading up to your harvest; a dry, sunny spell will concentrate the sugars, while a period of rain might dilute them slightly. Adjust your harvesting schedule accordingly.
Variations and Suggestions:
* Harvesting for Wine: If you’re planning to make wine, research the specific sugar and acid levels required for your chosen varietal. A refractometer can be a valuable tool for measuring these parameters.
* Harvesting for Juice: For juice, you might prefer a slightly riper grape with a higher sugar content.
* Harvesting with Kids: Make it a family affair! Involve children in the harvesting process, teaching them about where their food comes from and fostering a love for nature. Provide them with small, child-friendly harvesting tools.
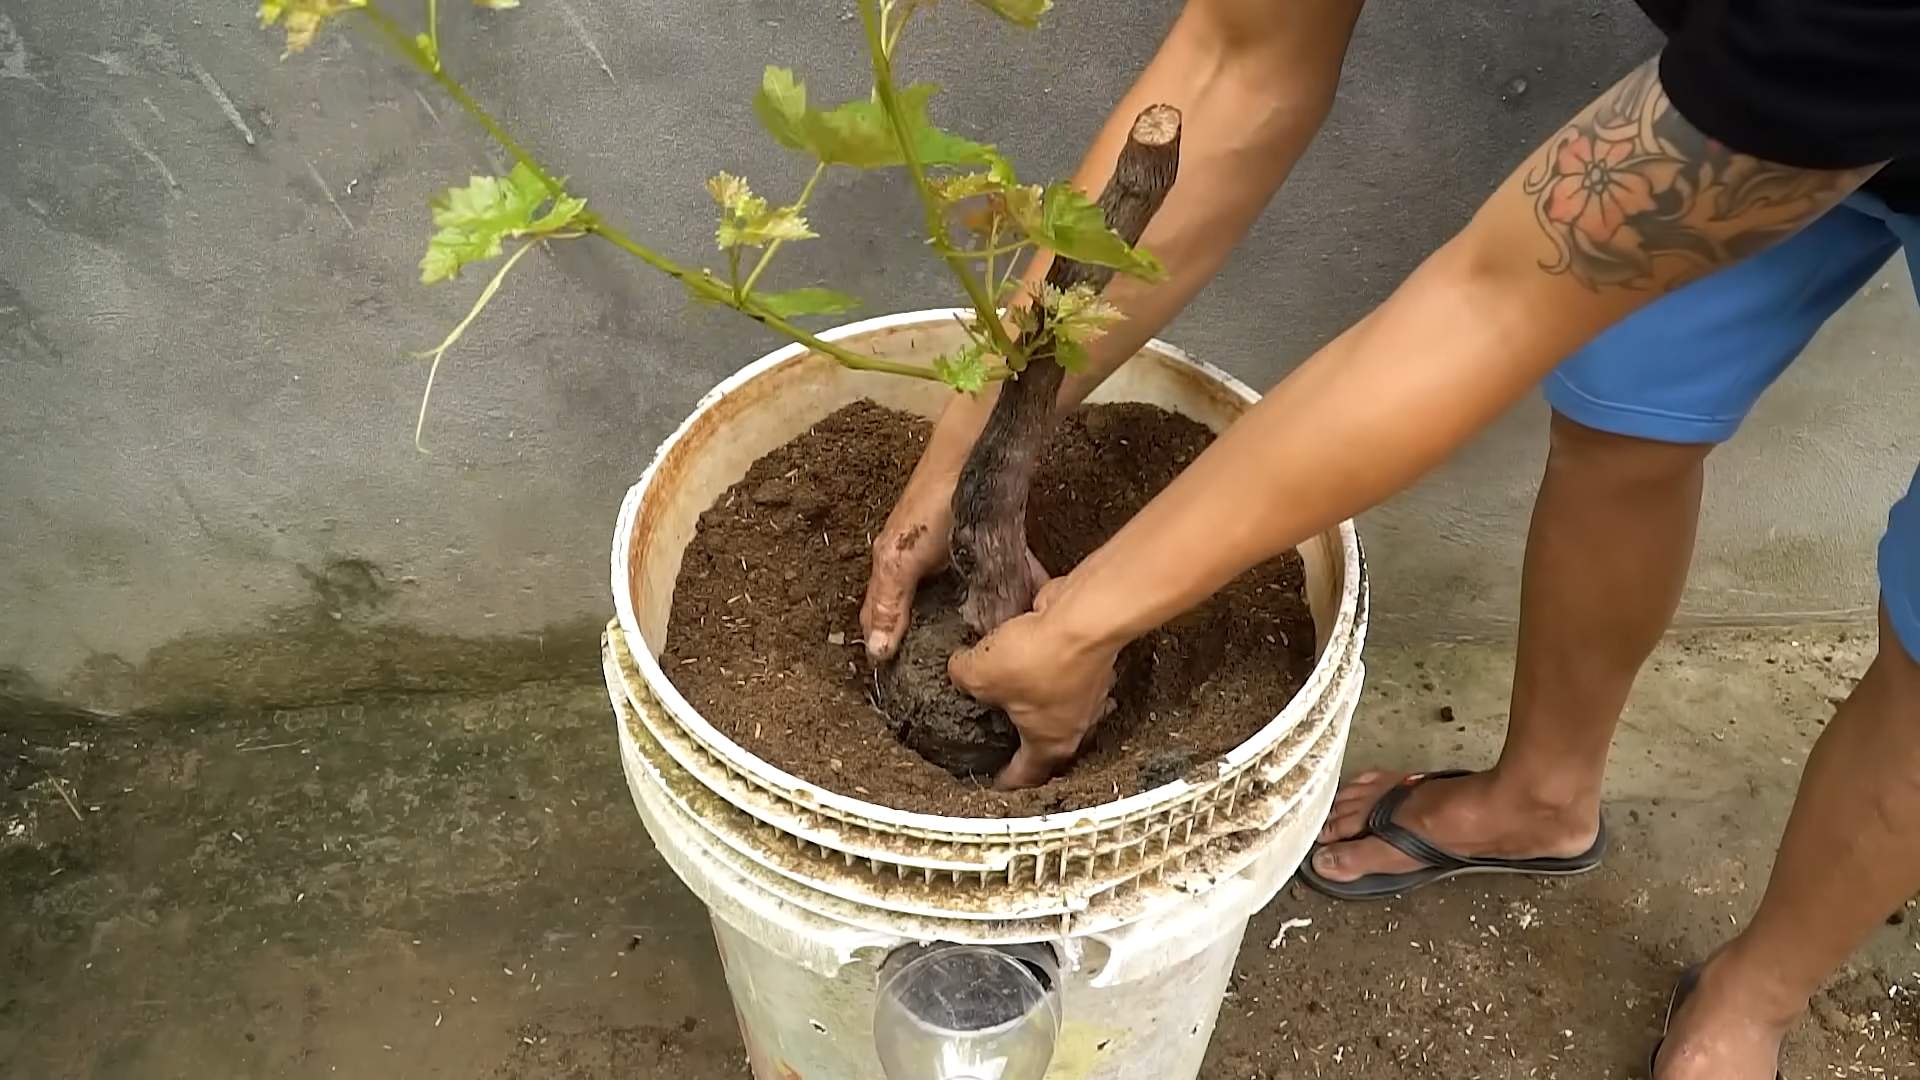
* Post-Harvest Care: After harvesting, remember to prune your vines appropriately to encourage healthy growth in the following season. Research the specific pruning requirements for your grape variety.
* Dealing with Pests: Keep an eye out for pests and diseases that might affect your grape harvest. Implement preventative measures such as netting or organic sprays.
We wholeheartedly encourage you to put these grape harvesting tips into practice. Don’t be afraid to get your hands dirty, learn from your experiences, and adapt the techniques to suit your specific needs and growing conditions.
Most importantly, we want to hear about your adventures! Share your grape harvesting experiences, tips, and photos with us in the comments section below. What challenges did you face? What successes did you celebrate? What unique variations did you discover? Your insights will not only enrich our community but also inspire others to embark on their own grape-growing journeys. Let’s cultivate a thriving community of grape enthusiasts, one vine at a time!
Frequently Asked Questions (FAQ)
Q: How do I know when my grapes are ripe enough to harvest?
A: Determining grape ripeness is a multi-sensory process. Look for these indicators:
* Color: The grape’s color should be uniform and characteristic of the variety. Green grapes will turn yellowish or golden, while red and purple grapes will deepen in color.
* Taste: Sample a few grapes from different parts of the vine. They should be sweet and flavorful, with a pleasant balance of acidity.
* Texture: Ripe grapes will be slightly soft to the touch but not mushy.
* Seed Color: The seeds should be brown and easily separated from the pulp. Green seeds indicate that the grapes are not yet fully ripe.
* Sugar Content: For more precise measurement, use a refractometer to determine the sugar content (Brix) of the grape juice. The ideal Brix level will vary depending on the grape variety and intended use.
Q: What tools do I need for grape harvesting?
A: The essential tools for grape harvesting include:
* Sharp Pruning Shears or Grape Harvesting Knife: These are necessary for cleanly cutting the grape bunches from the vine. Ensure they are sharp to avoid damaging the vine.
* Harvesting Baskets or Buckets: Choose containers that are sturdy and easy to carry. Avoid overfilling them to prevent crushing the grapes.
* Gloves: Gloves will protect your hands from thorns and potential irritants.
* Optional: Refractometer: For measuring the sugar content of the grapes, especially important for winemaking.
Q: What’s the best way to store harvested grapes?
A: Proper storage is crucial for maintaining the quality of your harvested grapes:
* Inspect and Sort: Remove any damaged, bruised, or rotten grapes.
* Refrigerate: Store the grapes in a single layer in a shallow container lined with paper towels. Refrigerate them at a temperature of 32-35°F (0-2°C) and high humidity.
* Avoid Washing: Do not wash the grapes until just before you are ready to eat or use them. Washing them beforehand can promote spoilage.
* Storage Duration: Properly stored grapes can last for several weeks in the refrigerator.
Q: How can I protect my grapevines from birds and other pests?
A: Protecting your grapes from pests is essential for a successful harvest:
* Netting: Cover your grapevines with bird netting to prevent birds from eating the grapes.
* Scare Devices: Use scarecrows, reflective tape, or noise-making devices to deter birds.
* Organic Sprays: Apply organic sprays such as neem oil or insecticidal soap to control insect pests.
* Traps: Use traps to catch specific pests, such as Japanese beetles.
* Maintain Vine Health: Healthy vines are more resistant to pests and diseases. Ensure proper watering, fertilization, and pruning.
Q: Can I harvest grapes after it rains?
A: Harvesting grapes immediately after rain is generally not recommended:
* Diluted Sugars: Rain can dilute the sugar content of the grapes, affecting their flavor and quality.
* Increased Risk of Rot: Wet grapes are more susceptible to fungal diseases and rot.
* Wait for Drying: Allow the grapes to dry thoroughly before harvesting. This may take a few days, depending on the weather conditions.
* Monitor Sugar Levels: If you must harvest after rain, check the sugar levels with a refractometer to ensure they are still acceptable.
Q: What do I do with my grape vines after harvesting the grapes?
A: Post-harvest care is crucial for the health and productivity of your grapevines:
* Pruning: Prune your grapevines during the dormant season (late winter or early spring) to remove dead, damaged, or unproductive wood. Pruning helps to shape the vine, improve air circulation, and promote fruit production in the following season.
* Fertilizing: Apply fertilizer to replenish the nutrients in the soil. Use a balanced fertilizer or one specifically formulated for grapevines.
* Watering: Continue to water your grapevines as needed, especially during dry periods.
* Weed Control: Remove weeds around the base of the vines to prevent competition for nutrients and water.
* Monitor for Pests and Diseases: Continue to monitor your grapevines for pests and diseases and take appropriate action if necessary.
Q: What are some creative ways to use my harvested grapes?
A: Beyond eating them fresh, there are many delicious ways to use your harvested grapes:
* Juice: Make fresh grape juice using a juicer or by simmering the grapes and straining the liquid.
* Jam and Jelly: Create homemade grape jam or jelly.
* Wine: If you have a large harvest, consider making your own wine.
* Grape Pies and Tarts: Use grapes in pies, tarts, and other desserts.
* Grape Leaf Dolmas: Use grape leaves to make dolmas, a traditional Mediterranean dish.
* Frozen Grapes: Freeze grapes for a refreshing and healthy snack.
* Grape Salsa: Make a unique and flavorful grape salsa to serve with grilled meats or fish.

Leave a Comment