

Grow Angled Luffa: Your Guide to a Bountiful Harvest and DIY Wonders
Growing angled luffa isn’t just about cultivating a fascinating vine; it’s about embarking on a rewarding journey of self-sufficiency and creative expression. I’ve always loved the idea of growing my own food, and the angled luffa, with its unique properties, became a particular fascination. This amazing plant, with its history stretching back centuries in Asia, offers not only delicious young fruits but also the potential for creating amazing, sustainable DIY projects. From ancient times, luffa has been used for everything from food to cleaning, showcasing its versatility and practical applications.
Why should you consider growing angled luffa? Well, for starters, it’s incredibly rewarding to nurture a plant from seed to harvest, witnessing its growth and the eventual bounty it provides. Beyond the delicious young luffa fruits, which can be enjoyed in stir-fries and other dishes, the mature fruits transform into those amazing, naturally grown loofahs! This is where the real DIY magic begins.
This article will guide you through every step of the process, from sowing the seeds to harvesting and crafting your own unique luffa creations. We’ll cover everything from optimal growing conditions and pest control to the simple techniques for transforming those dried luffa gourds into useful and beautiful items for your home. So, let’s dive in and discover the joy of growing angled luffa and unlocking its potential for a more sustainable and creative lifestyle. Get ready to experience the satisfaction of growing your own natural sponges and rediscovering the simple pleasures of homegrown goodness. You’ll be amazed at how easy it is to Grow Angled Luffa and reap the rewards!
Growing Angled Luffa: A Complete DIY Guide
I’ve always loved the idea of growing my own things, and luffas are just so fascinating! They’re not just fun to grow, but the finished product is incredibly useful. This guide will walk you through the entire process of growing your own angled luffa gourds, from seed to sponge.
Phase 1: Starting Seeds Indoors
- Choose your seeds: Select high-quality angled luffa seeds. You can find these online or at specialty garden centers. Look for descriptions that specify “angled luffa” to ensure you get the right variety.
- Start seeds early: Luffas are warm-weather plants, so starting them indoors 6-8 weeks before the last expected frost is crucial. This gives them a head start and ensures a longer growing season.
- Prepare your seed starting mix: Use a seed-starting mix, not garden soil. Garden soil is often too dense and can suffocate delicate seedlings. A well-draining mix is key.
- Plant the seeds: Sow seeds about ½ inch deep in small pots or seed trays. Gently water the soil, keeping it consistently moist but not soggy.
- Provide warmth and light: Place the pots in a warm location (around 70-75°F) with plenty of sunlight. A sunny windowsill or a grow light is ideal. Rotate the pots regularly to ensure even growth.
- Thin seedlings: Once the seedlings have developed their first true leaves (not the seed leaves), thin them out, leaving only the strongest seedling per pot. This prevents overcrowding and promotes healthy growth.
- Harden off seedlings: Before transplanting outdoors, gradually acclimate your seedlings to outdoor conditions. This process, called hardening off, involves gradually increasing their exposure to sunlight, wind, and temperature fluctuations over a period of 7-10 days.
- Fill small pots with seed-starting mix, leaving about ½ inch of space from the rim.
- Moisten the mix thoroughly but avoid overwatering.
- Plant one seed per pot, about ½ inch deep. Gently cover with the mix.
- Water gently again, ensuring the soil is moist but not waterlogged.
- Place the pots in a warm, sunny location. A heat mat can be beneficial for faster germination.
- Monitor the moisture level daily, keeping the soil consistently moist.
- Once seedlings emerge (usually within 7-10 days), provide them with plenty of sunlight. A grow light is recommended if natural sunlight is limited.
- After the seedlings develop their first true leaves, carefully thin out any weaker seedlings, leaving only the strongest one per pot.
- Begin the hardening-off process about a week before the last expected frost. Gradually expose the seedlings to outdoor conditions for increasing periods each day.
Phase 2: Transplanting and Growing Outdoors
- Choose a sunny location: Luffas need at least 6-8 hours of direct sunlight per day. Select a spot in your garden that receives ample sunlight.
- Prepare the soil: Luffas prefer well-drained, fertile soil. Amend heavy clay soil with compost or other organic matter to improve drainage and fertility.
- Space plants appropriately: Plant luffa seedlings about 3-4 feet apart to allow for adequate growth and air circulation. This helps prevent fungal diseases.
- Water regularly: Keep the soil consistently moist, especially during dry periods. Water deeply and less frequently rather than shallowly and often.
- Provide support: Luffas are vigorous climbers and need strong support. You can use a trellis, fence, or strong stakes. Train the vines to climb upwards.
- Fertilize as needed: Feed your luffas with a balanced fertilizer every few weeks, following the package instructions. Over-fertilizing can lead to excessive leaf growth at the expense of fruit production.
- Monitor for pests and diseases: Regularly inspect your plants for pests like aphids or squash bugs. Address any problems promptly using organic pest control methods if necessary.
- Select a sunny location in your garden with well-drained soil.
- Dig holes slightly larger than the root balls of your seedlings.
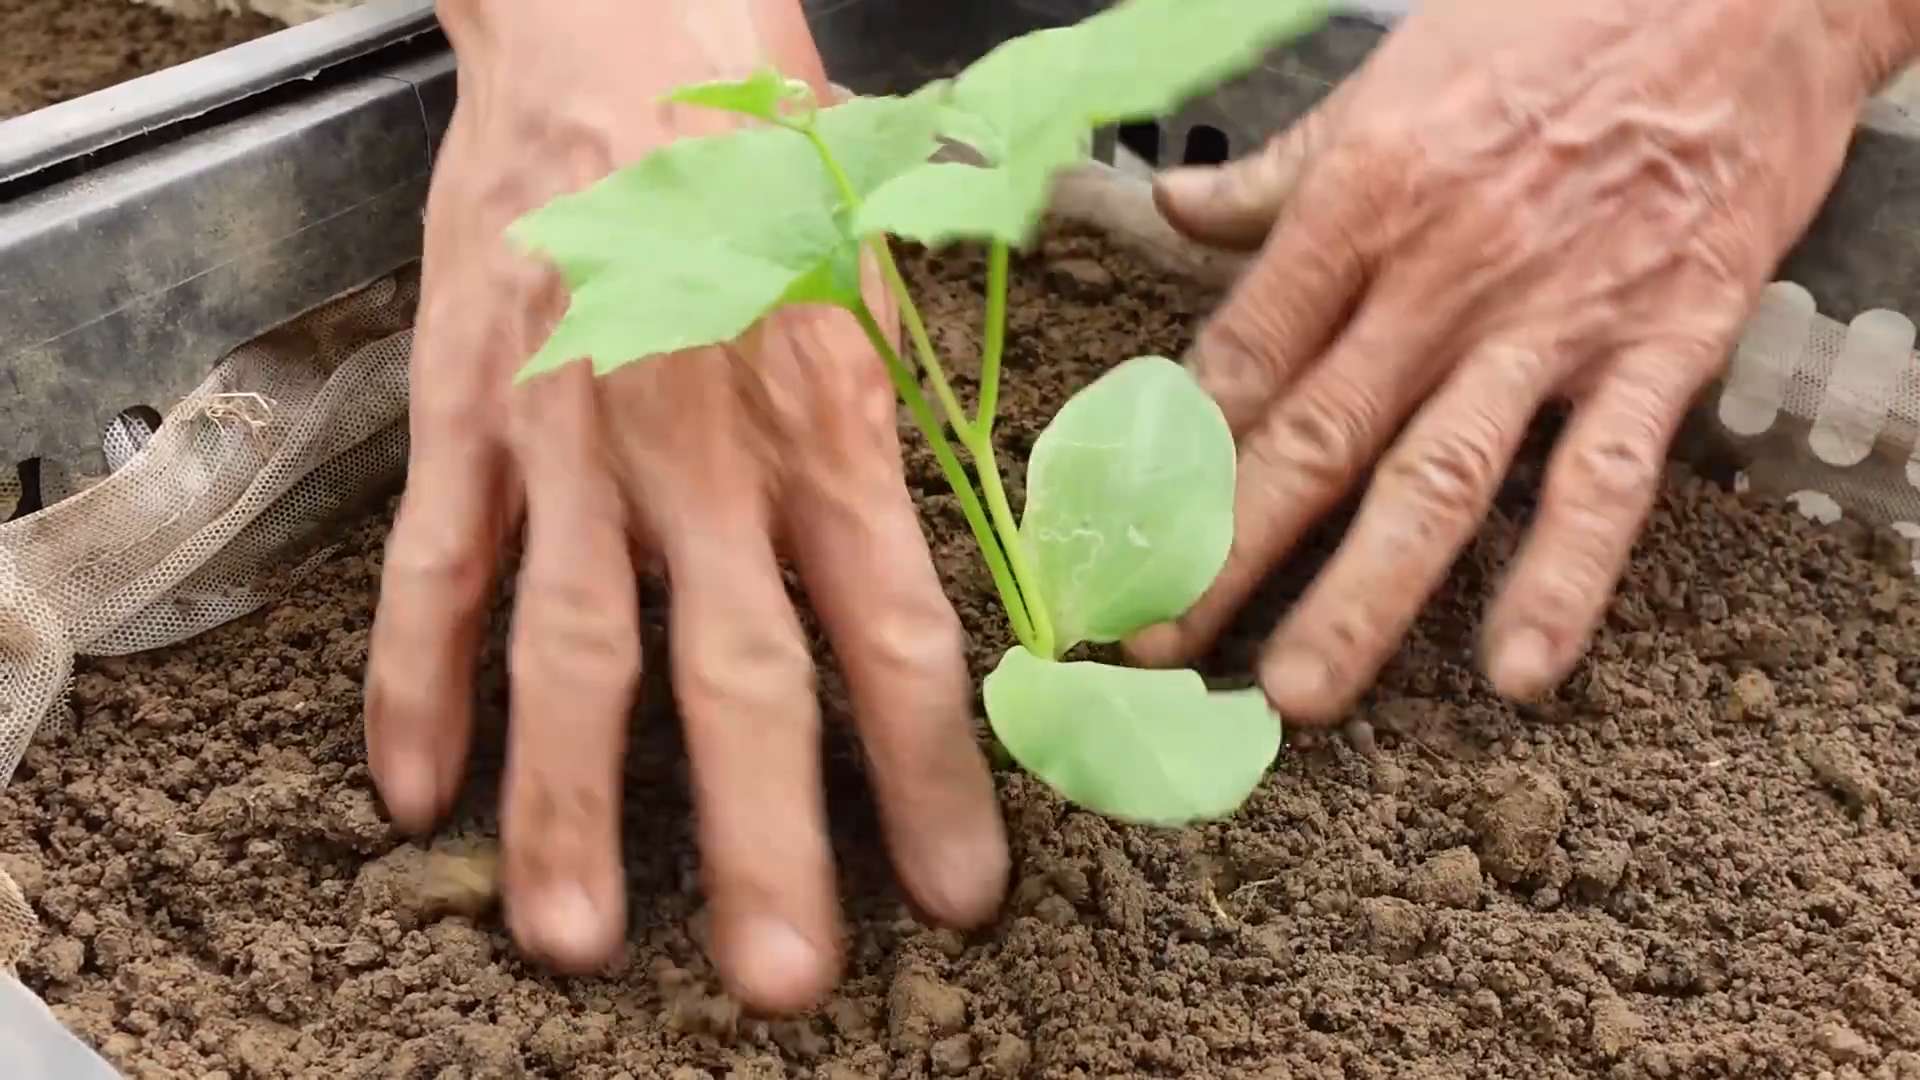
- Gently remove the seedlings from their pots, being careful not to damage the roots.
- Plant the seedlings in the prepared holes, ensuring the root balls are covered with soil.
- Water thoroughly after transplanting.
- Install a sturdy trellis, fence, or stake system to support the growing vines.
- Train the vines to climb the support structure by gently guiding them as they grow.
- Water regularly, keeping the soil consistently moist but not waterlogged.
- Fertilize every 2-3 weeks with a balanced fertilizer, following package instructions.
- Monitor for pests and diseases, taking appropriate action if necessary.
Phase 3: Harvesting and Drying
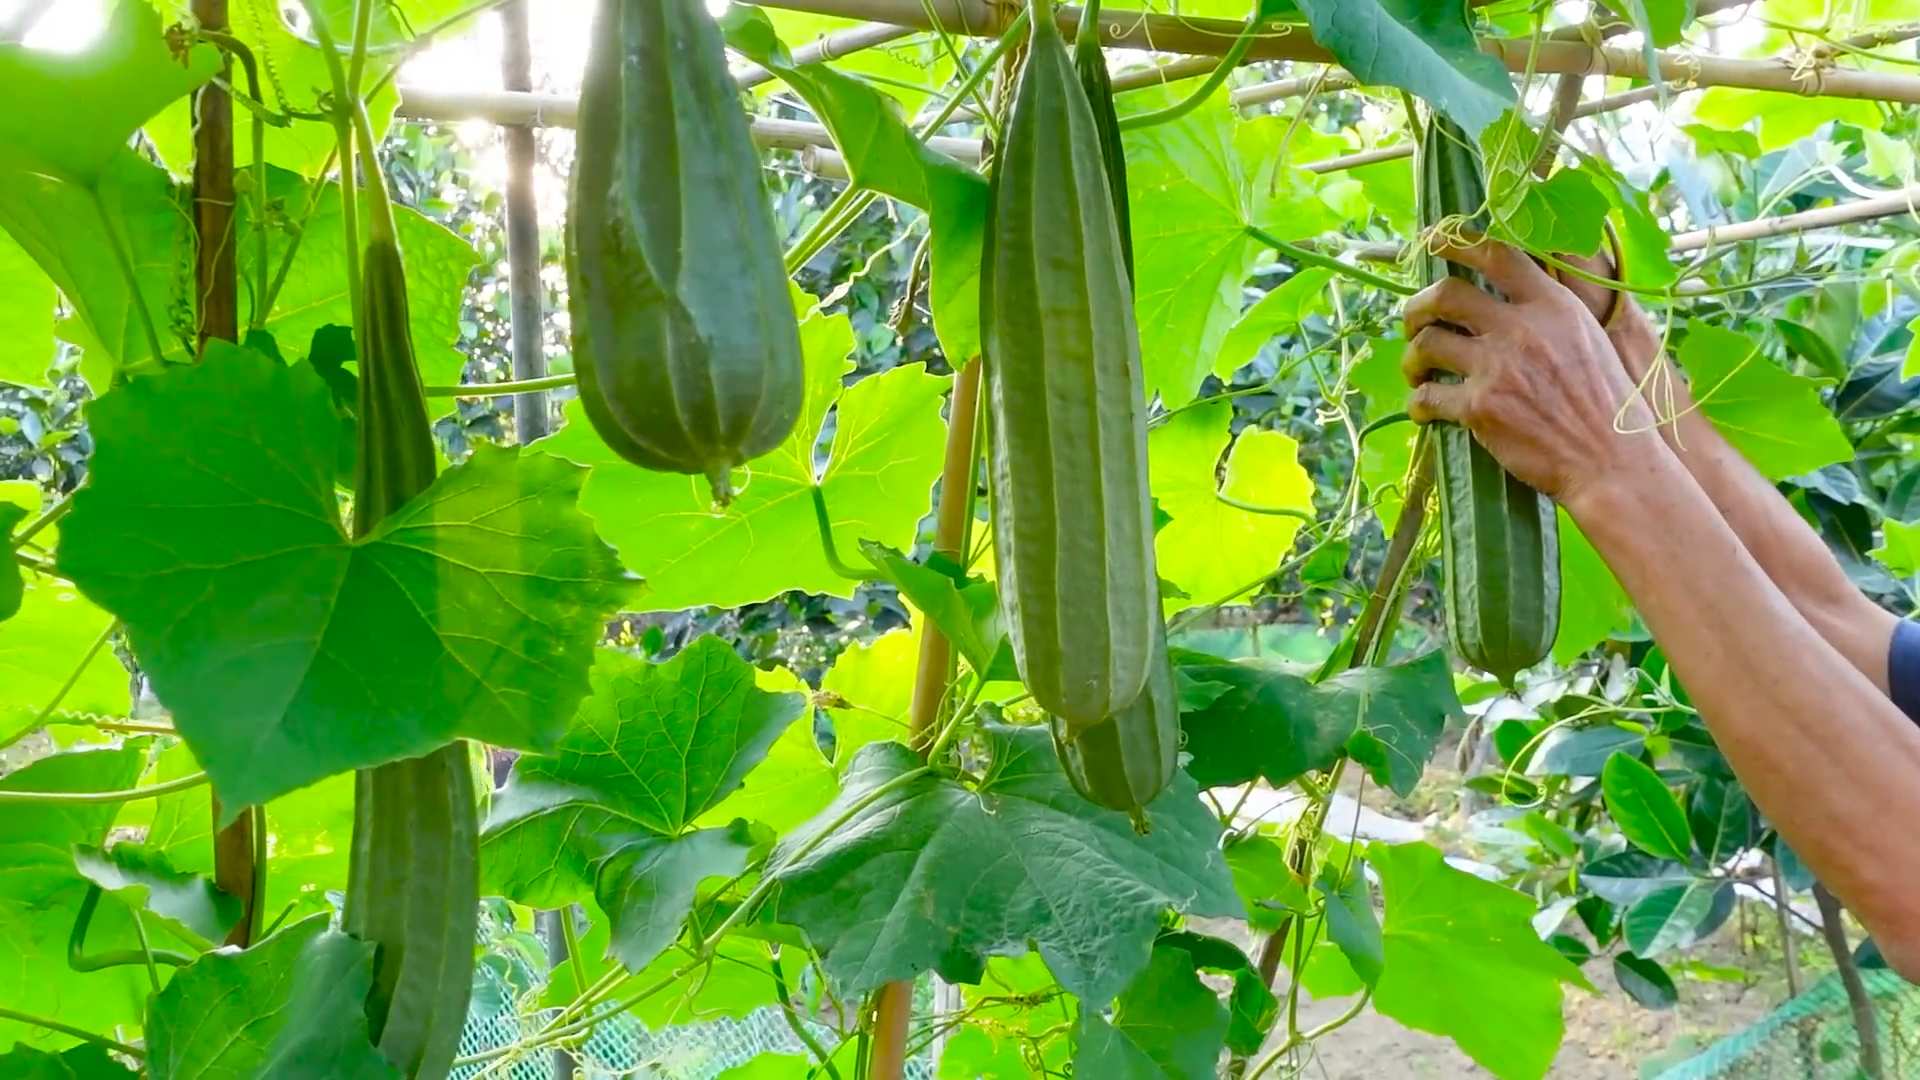
- Harvest at the right time: Luffa gourds are ready for harvest when they turn a light brown or tan color and feel hard and dry to the touch. This usually takes 3-4 months after planting.
- Harvest carefully: Use sharp pruning shears or a knife to cut the gourds from the vine, leaving about an inch of stem attached.
- Clean and dry the gourds: Remove any remaining leaves or stems from the harvested gourds. Allow them to dry completely in a well-ventilated area for several weeks or months. You can hang them upside down or lay them flat.
- Prepare the luffa sponges: Once completely dry, the outer skin of the luffa will easily peel away, revealing the fibrous sponge inside. You can use a stiff brush or your hands to remove any remaining pulp or seeds.
- Rinse and dry again: Rinse the luffa sponges thoroughly with water to remove any remaining debris. Allow them to dry completely before using them.
- Carefully examine your luffa gourds. They are ready for harvest when they turn a light brown or tan color and feel hard and dry to the touch.
- Use sharp pruning shears or a knife to carefully cut the gourds from the vine, leaving about an inch of stem attached.
- Clean the harvested gourds by removing any leaves or stems.
- Hang the gourds upside down in a well-ventilated area to dry completely. This process can take several weeks or even months, depending on the climate and humidity.
- Once completely dry, the outer skin of the luffa will become brittle and easily peel away. You can gently peel it off with your hands or use a stiff brush to help.
- Remove any remaining pulp or seeds from the inside of the luffa sponge using your hands or a stiff brush.
- Rinse the luffa sponge thoroughly with water to remove any remaining debris.
- Allow the luffa sponge to dry completely before using it. You can hang it to dry or lay it flat in a well-ventilated area.
Tips for Success:
Remember, patience is key! Growing luffas takes time, but the reward of harvesting your own natural sponges is well worth the effort. Happy gardening!
Conclusion
So there you have it – a complete guide to growing your own angled luffa! This DIY trick isn’t just about saving money on loofahs; it’s about connecting with nature, experiencing the satisfaction of nurturing a plant from seed to harvest, and ultimately, enjoying a completely natural and sustainable alternative to commercially produced bath sponges. Growing your own angled luffa is a rewarding experience that yields surprisingly beautiful plants and incredibly useful, long-lasting loofahs. The process is surprisingly simple, even for beginner gardeners, and the results are undeniably satisfying. You’ll be amazed by the texture and durability of your homemade luffas, and the knowledge that you’ve grown them yourself will add an extra layer of enjoyment to every shower.
Beyond the basic method outlined, there are numerous ways to personalize your angled luffa growing experience. Experiment with different companion planting techniques to enhance growth and deter pests. Consider using trellises of varying heights and designs to see how it affects the luffa’s growth habit. You could even try growing different varieties of luffa to compare their texture and size. For a truly unique experience, explore preserving your harvested luffas using natural dyes or oils to add a personal touch. The possibilities are as endless as your imagination!
We strongly encourage you to try this simple yet effective DIY trick. Growing your own angled luffa is a fantastic way to reduce your environmental impact, save money, and enjoy a rewarding gardening project. Share your experience with us! We’d love to see pictures of your thriving luffa plants and hear about your harvesting successes (or even your learning curves – we all have them!). Post your photos and stories on social media using #GrowAngledLuffa and tag us – let’s build a community of DIY luffa enthusiasts together. Let’s make sustainable living a little easier, one loofah at a time.
Frequently Asked Questions
What type of soil is best for growing angled luffa?
Angled luffa thrives in well-drained, fertile soil with a slightly acidic to neutral pH (6.0-7.0). Amend heavy clay soils with compost or other organic matter to improve drainage and aeration. Sandy soils may benefit from the addition of organic matter to retain moisture.
How much sunlight do angled luffa plants need?
Angled luffa plants are sun-worshippers! They need at least 6-8 hours of direct sunlight per day to flourish. Choose a location in your garden that receives ample sunlight throughout the day. Insufficient sunlight can lead to poor growth and reduced fruit production.
When is the best time to plant angled luffa seeds?
The best time to plant angled luffa seeds is after the last frost and when the soil temperature has warmed to at least 65-70°F (18-21°C). This typically falls in late spring or early summer, depending on your climate. You can start seeds indoors 4-6 weeks before the last expected frost to get a head start on the growing season.
How often should I water my angled luffa plants?
Water your angled luffa plants regularly, especially during dry periods. Aim to keep the soil consistently moist but not waterlogged. Overwatering can lead to root rot, while underwatering can stunt growth. The frequency of watering will depend on your climate, soil type, and weather conditions. Check the soil moisture regularly by sticking your finger a couple of inches into the soil – if it feels dry, it’s time to water.
How do I know when my angled luffa is ready to harvest?
Angled luffa are ready for harvest when the vines begin to dry and turn brown, and the fruits feel hard and dry to the touch. This typically occurs in late summer or early fall, about 3-4 months after planting. You’ll know they are ready when you can easily hear the seeds rattling inside the fruit.
What should I do with my harvested angled luffa?
Once harvested, allow the luffas to dry completely in a well-ventilated area. This can take several weeks to a couple of months, depending on the humidity. Once completely dry, you can remove the outer skin and seeds to reveal the soft, spongy loofah inside. You can then use your homemade loofahs for bathing or other cleaning purposes.
Can I grow angled luffa in containers?
Yes, you can grow angled luffa in large containers, provided they are at least 15-20 gallons in size to accommodate the plant’s extensive root system. Choose containers with drainage holes to prevent waterlogging. Ensure the containers receive ample sunlight.
What are some common pests or diseases that affect angled luffa?
Angled luffa can be susceptible to pests such as aphids, spider mites, and squash bugs. Regularly inspect your plants for signs of infestation and take appropriate measures to control pests, such as using insecticidal soap or neem oil. Fungal diseases like powdery mildew can also occur, especially in humid conditions. Ensure good air circulation around your plants to prevent fungal growth.
My angled luffa plants aren’t producing many fruits. What could be wrong?
Several factors can affect fruit production in angled luffa, including insufficient sunlight, inadequate watering, poor soil quality, and lack of pollination. Ensure your plants are receiving at least 6-8 hours of direct sunlight daily, are watered consistently, and are planted in well-drained, fertile soil. If pollination is a concern, hand-pollination might be necessary.
Where can I buy angled luffa seeds?
Angled luffa seeds are readily available online from various seed suppliers and garden centers. You can also find them at some local nurseries. Make sure to choose high-quality seeds from a reputable source to ensure successful germination and growth.
Leave a Comment