

Grow Asparagus at Home Easily? Absolutely! Imagine stepping into your backyard and harvesting fresh, tender asparagus spears, ready to be steamed, grilled, or tossed into a vibrant spring salad. Forget those expensive, often limp, bundles from the grocery store. With a little know-how, you can cultivate your own thriving asparagus patch, bringing a touch of gourmet goodness right to your table.
Asparagus has a rich history, dating back to ancient Greece and Rome, where it was prized for its medicinal properties and delicate flavor. Emperors and commoners alike enjoyed this springtime delicacy. Today, the tradition continues, and I’m here to show you how to participate, even if you don’t have acres of land.
Many people shy away from growing asparagus, thinking it’s too difficult or time-consuming. But I’m here to tell you that with the right techniques and a little patience, you can successfully grow asparagus at home easily, even in a small space. This DIY guide will break down the process into manageable steps, offering practical tips and tricks to ensure a bountiful harvest for years to come. From selecting the right variety to preparing your soil and protecting your plants from pests, we’ll cover everything you need to know to enjoy the satisfaction of homegrown asparagus. Let’s get started!
Growing Asparagus Yourself: A Comprehensive DIY Guide
Hello garden friends! Have you ever wondered how to grow this delicious spring vegetable, asparagus, by yourself? I’ve tried it, and I can tell you it’s not as difficult as you might think! With a little patience and the right steps, you can soon harvest your own fresh asparagus. Here’s my detailed guide to walk you through the entire process:
What You Need for Growing Asparagus
Before we begin, here’s a list of the things you’ll need:
- Asparagus plants (also called asparagus sprouts): The best are one- or two-year-old plants. Look for healthy, strong roots.
- Asparagus seeds (optional): If you want to start completely from scratch, you can grow asparagus from seeds. But keep in mind, it takes much longer before you can harvest.
- Garden tools: Spade, hoe, pruning shears, watering can or hose.
- Compost or well-rotted manure: For soil improvement.
- Organic fertilizer: For later care.
- Mulching material: Straw, wood chips, or grass clippings.
- Patience: Asparagus takes time to grow!
Proper Preparation Is Key
Before planting, good soil preparation is crucial. Asparagus is a perennial plant and stays in the same spot for many years, so it’s important to make sure the soil is well-prepared.
- Choosing the Right Location
- Sunny: Asparagus loves the sun! Choose a location that gets at least 6-8 hours of sunlight per day.
- Well-drained soil: Asparagus cannot tolerate waterlogging. The soil should be loose and well-drained.
- Wind protection: A wind-protected spot is ideal to protect the young shoots from damage.
- Soil Preparation
- Soil testing: A soil test can reveal the pH and nutrient composition. The ideal pH for asparagus is between 6.5 and 7.5.
- Loosening the soil: Dig the soil thoroughly, preferably to a depth of 50-60 cm. Remove stones, roots, and weeds.
- Improving the soil: Mix plenty of compost or well-rotted manure into the soil. This will improve the soil structure and provide asparagus with essential nutrients.
- Liming if necessary: If the soil is too acidic, you can amend it with lime.
Planting Asparagus: How to Do It Right
Now comes the exciting part: planting your asparagus plants!
- Digging Planting Trenches
- Depth: Dig planting trenches about 20-30 cm deep.
- Width: The trenches should be about 30-40 cm wide.
- Spacing: The distance between trenches should be about 120-150 cm.
- Forming hills: In the trenches, form small mounds of soil. These mounds will be where you place the asparagus plants.
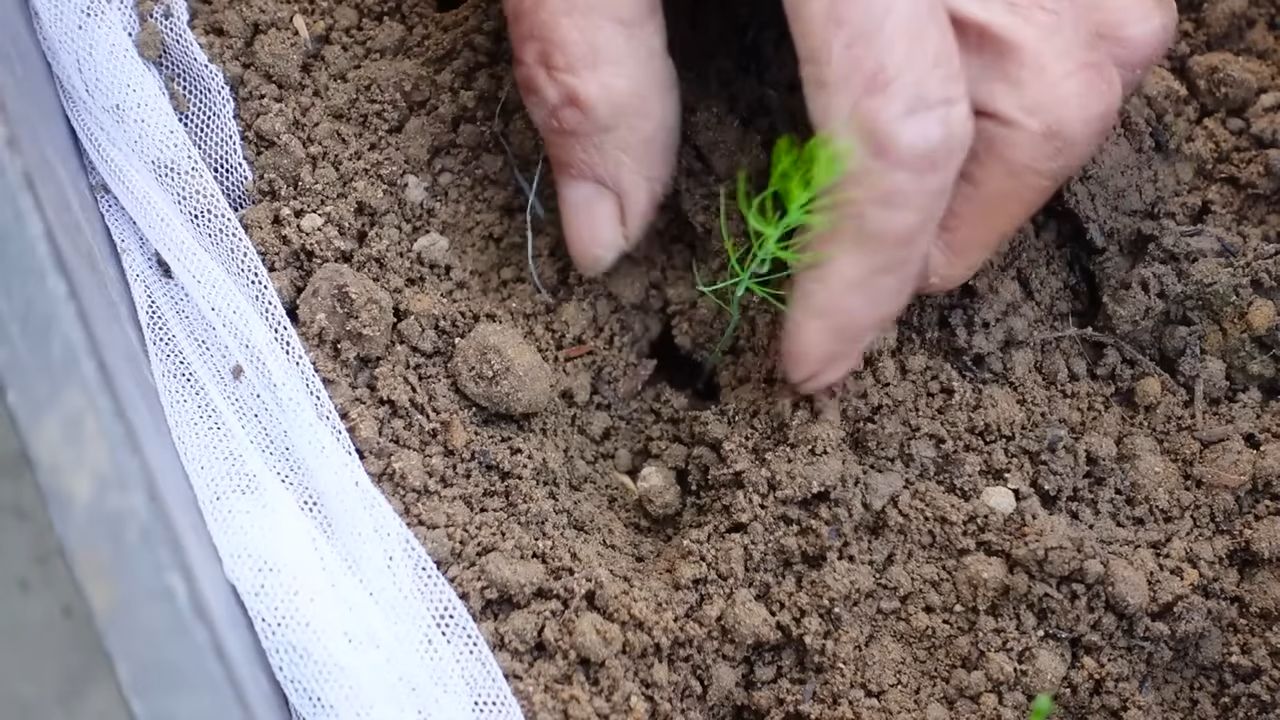
- Planting the Asparagus Plants
- Spreading the roots: Place the asparagus plants on top of the mounds and gently spread the roots.
- Spacing: The distance between plants in the trenches should be about 30-40 cm.
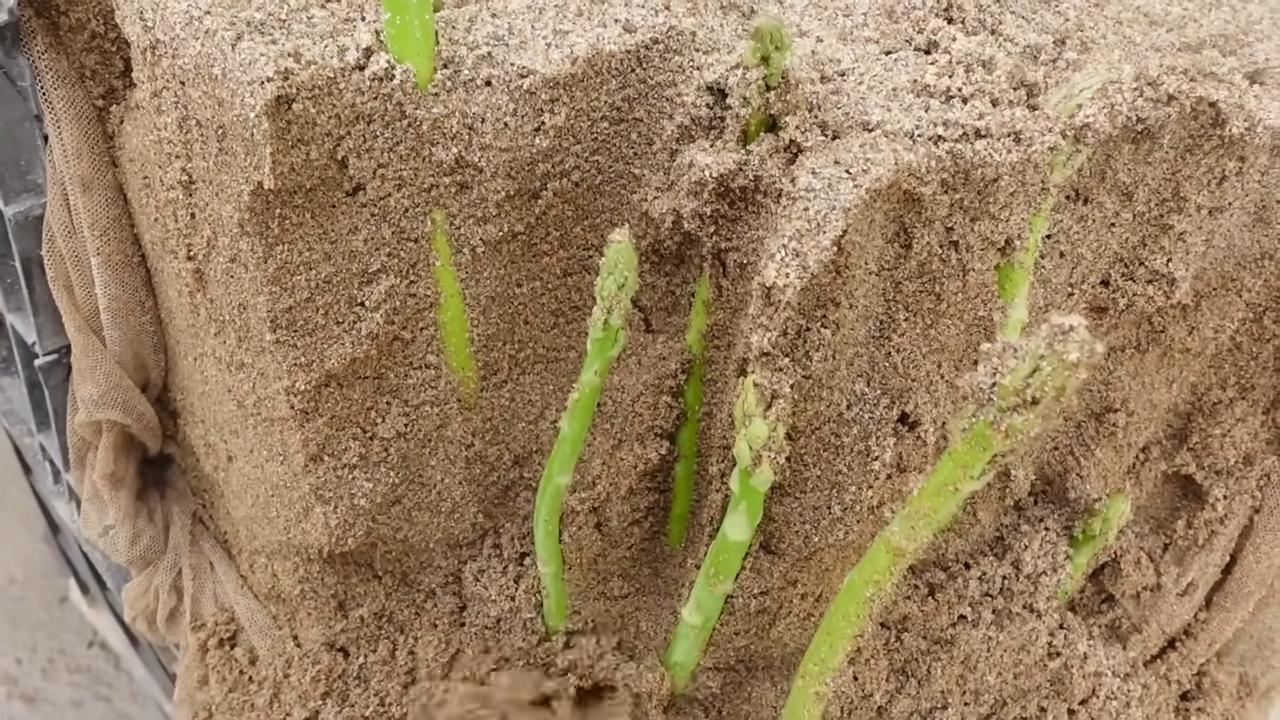
- Covering: Cover the roots with about 5-10 cm of soil. The tips of the shoots should still be visible.
- Watering: Water the plants thoroughly after planting.
- Filling the Trenches Gradually
- Let them grow: Let the asparagus plants grow. As the shoots get larger, gradually fill the trenches with soil until they are completely filled.
- Mulching: Cover the trenches with a layer of mulch. This will keep the soil moist, suppress weeds, and protect the plants from frost.
Proper Care for a Bountiful Harvest
While asparagus is relatively low-maintenance, there are a few things you should keep in mind to achieve a rich harvest.
- Watering
- Regular watering: Asparagus needs regular watering, especially during dry periods. Make sure the soil doesn’t dry out.
- Don’t overdo it: Avoid waterlogging, as this can lead to root rot.
- Fertilizing
- Organic fertilizer: Fertilize the asparagus in the spring with organic fertilizer, such as compost or horn meal.
- After harvest: Fertilize the asparagus after harvesting to strengthen the plants for the next year.
- Weed Control
- Regular weeding: Keep the asparagus free from weeds. Weeds compete with asparagus for nutrients and water.
- Mulching helps: A mulch layer helps suppress weed growth.
- Protection from Pests and Diseases
- Asparagus beetles: Asparagus beetles can infest the shoots and leaves. Collect the beetles by hand or use an organic insecticide.
- Rust: Rust is a fungal disease that appears as orange spots on the shoots. Remove affected shoots and ensure good ventilation.
The First Harvest: Patience Pays Off
Here’s the most important point: patience! In the first year after planting, you shouldn’t harvest any asparagus. Let the plants grow and develop. In the second year, you can carefully harvest a few spears. From the third year onwards, you can really start harvesting!
- Harvest Timing
- April to June: The asparagus harvest usually begins in April and ends traditionally on Midsummer’s Day (June 24).
- Spear Thickness: Harvest the spears when they are about 2-3 cm thick.
- Harvesting Technique
- Asparagus knife: Use a special asparagus knife to cut the spears just beneath the soil.
- Cut carefully: Gently insert the knife next to the spear and cut it about 20-25 cm below the soil.
- Close the hole: After cutting, cover the hole with soil again.
- After the Harvest
- Care for the plants: Fertilize and water the plants after harvest to prepare them for the next year.
- Allow the shoots to grow: Let the shoots grow after harvesting and develop into bushes. These bushes are important for photosynthesis and nutrient storage.
Growing Asparagus from Seeds (The Long Way)
If you’re particularly patient, you can also grow asparagus from seeds. But keep in mind, it takes much longer before you can harvest.
- Sowing
- Pre-grow: Start the seeds in pots or seed trays in the spring.
- Seed starting soil: Use special seed-starting soil.
- Keep moist: Keep the soil moist, but not soggy.
- Pricking out: Once the seedlings are large enough, prick them out into larger pots.
- Planting Outdoors
As described above: Prepare the soil and follow the same steps as for planting from plants.
In autumn: Plant the young plants outdoors in the fall in their final spot.
Conclusion
So, there you have it! Growing asparagus at home, while it requires patience, is an incredibly rewarding experience. Forget those expensive, often lackluster spears from the grocery store. Imagine stepping out into your own backyard and harvesting fresh, vibrant asparagus, bursting with flavor and nutrients. This isn’t just about saving money; it’s about connecting with your food, understanding its journey from seed (or crown) to plate, and enjoying the unparalleled taste of homegrown goodness.
This DIY trick for growing asparagus isn’t just a suggestion; it’s a game-changer for any home gardener, regardless of experience level. The initial investment of time and effort pays off exponentially in the years to come, providing you with a sustainable source of this delicious and nutritious vegetable. Think of it as planting a legacy – a gift that keeps on giving, year after year.
But don’t just take our word for it. The real magic happens when you try it yourself. Experiment with different varieties of asparagus to find your favorite flavor profile. Perhaps you prefer the classic green spears, or maybe you’re intrigued by the purple varieties, known for their sweeter taste and higher antioxidant content. Consider companion planting to maximize your garden’s yield and deter pests naturally. Marigolds, for example, are excellent companions for asparagus, helping to repel nematodes.
And the possibilities don’t stop there. Once you’ve mastered the basics, you can explore different growing methods. Try growing asparagus in raised beds for improved drainage and easier harvesting. Or, if you’re short on space, consider growing asparagus in containers. Just be sure to choose a large container with adequate drainage and provide plenty of sunlight.
We’ve armed you with the knowledge and inspiration to embark on your own asparagus-growing adventure. Now, it’s time to get your hands dirty! We encourage you to embrace the challenge, learn from your experiences, and share your successes (and even your failures) with the gardening community.
Don’t hesitate to adapt this DIY trick to your specific climate and growing conditions. Remember, gardening is all about experimentation and finding what works best for you. And most importantly, have fun! Growing your own asparagus should be a joyful and fulfilling experience.
We are confident that with a little patience and dedication, you’ll be enjoying the taste of homegrown asparagus in no time. So, grab your gardening gloves, prepare your soil, and get ready to experience the satisfaction of growing your own delicious and nutritious asparagus.
We are eager to hear about your experiences! Share your photos, tips, and tricks in the comments below. Let’s create a community of asparagus enthusiasts, sharing our knowledge and inspiring others to grow their own food. Happy gardening! Let us know how your **grow asparagus at home** project goes!
Frequently Asked Questions (FAQ)
1. How long does it take to grow asparagus from seed?
Growing asparagus from seed is a longer process compared to starting with crowns. It typically takes 2-3 years before you can harvest spears from seed-grown plants. The first year is focused on developing a strong root system. In the second year, the plants will continue to mature. By the third year, you should be able to harvest a small number of spears. Starting with crowns, which are one-year-old plants, reduces the wait time to about one year before harvesting.
2. What is the best time of year to plant asparagus?
The best time to plant asparagus crowns is in early spring, as soon as the ground can be worked. This allows the plants to establish themselves before the heat of summer. In warmer climates, you can also plant asparagus in the fall. If you are starting from seed, you can start them indoors 10-12 weeks before the last expected frost.
3. How much sunlight does asparagus need?
Asparagus needs at least 6-8 hours of direct sunlight per day to thrive. Choose a location in your garden that receives full sun for optimal growth and spear production. Insufficient sunlight can result in weak, spindly plants and reduced yields.
4. What type of soil is best for growing asparagus?
Asparagus prefers well-drained, sandy loam soil with a pH between 6.5 and 7.5. Amend heavy clay soil with compost and other organic matter to improve drainage and aeration. Asparagus roots can rot in waterlogged soil, so good drainage is essential.
5. How deep should I plant asparagus crowns?
Dig a trench that is 6-8 inches deep and 12 inches wide. Create a small mound of soil in the center of the trench and place the asparagus crown on top of the mound, spreading the roots out around it. Cover the crown with 2 inches of soil. As the spears emerge, gradually fill in the trench with soil until it is level with the surrounding ground.
6. How often should I water asparagus?
Water asparagus regularly, especially during dry periods. Keep the soil consistently moist, but avoid overwatering, which can lead to root rot. A good rule of thumb is to water deeply once or twice a week, depending on the weather conditions.
7. When can I start harvesting asparagus spears?
Do not harvest any spears during the first year after planting crowns. This allows the plants to establish a strong root system. In the second year, you can harvest spears for a short period (2-3 weeks). In subsequent years, you can harvest spears for a longer period (6-8 weeks).
8. How do I harvest asparagus spears?
Harvest asparagus spears when they are 6-8 inches tall and about as thick as your finger. Use a sharp knife to cut the spear at or slightly below the soil surface. Avoid damaging the surrounding spears or the crown.
9. How do I care for asparagus plants after the harvest?
After the harvest season, allow the asparagus plants to fern out. The ferns will produce energy that is stored in the roots, which will fuel the next year’s growth. Fertilize the plants with a balanced fertilizer in the spring and again after the harvest. Remove any dead or diseased ferns in the fall.
10. What are some common pests and diseases that affect asparagus?
Common pests of asparagus include asparagus beetles, aphids, and cutworms. Common diseases include asparagus rust and Fusarium crown and root rot. Monitor your plants regularly for signs of pests or diseases and take appropriate action to control them.
11. Can I grow asparagus in containers?
Yes, you can grow asparagus in containers, but you will need a large container (at least 18 inches in diameter and 24 inches deep) with good drainage. Use a well-draining potting mix and provide plenty of sunlight. Container-grown asparagus may require more frequent watering and fertilization than plants grown in the ground.
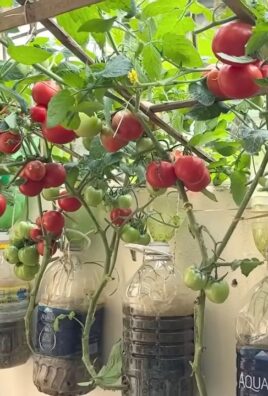
12. What are some good companion plants for asparagus?
Good companion plants for asparagus include tomatoes, basil, parsley, marigolds, and nasturtiums. These plants can help to deter pests, attract beneficial insects, and improve the overall health of your asparagus plants.
13. How long will asparagus plants produce?
With proper care, asparagus plants can produce for 15-20 years or even longer. The key is to provide them with the right growing conditions, including well-drained soil, plenty of sunlight, and regular fertilization.
14. Can I freeze asparagus?
Yes, you can freeze asparagus. To freeze asparagus, wash and trim the spears, then blanch them in boiling water for 2-3 minutes. Immediately transfer the spears to an ice bath to stop the cooking process. Drain the spears and pat them dry, then arrange them in a single layer on a baking sheet and freeze for several hours. Once frozen, transfer the spears to a freezer bag or container. Frozen asparagus can be stored for up to 12 months.
15. What are the nutritional benefits of asparagus?
Asparagus is a good source of vitamins A, C, E, and K, as well as folate, fiber, and antioxidants. It is also low in calories and sodium. Asparagus has been linked to a number of health benefits, including improved digestion, reduced inflammation, and a lower risk of chronic diseases.

Leave a Comment