

Grow Baby Carrots at Home: Ever dreamt of plucking perfectly petite, sweet baby carrots straight from your own backyard? I know I have! There’s something incredibly satisfying about nurturing your own food, and baby carrots are surprisingly easy and fun to grow, even if you’re short on space or experience. Forget those bland, pre-packaged carrots from the store; imagine the vibrant flavor and satisfying crunch of homegrown goodness.
The history of carrots is fascinating! Originally, they weren’t even orange! They were purple, white, and yellow. The orange carrot we know and love today was cultivated in the Netherlands in the 17th century. Now, centuries later, we’re bringing them back to our homes, one tiny carrot at a time.
Why should you learn to grow baby carrots at home? Well, for starters, you’ll have access to fresher, more nutritious vegetables. Plus, it’s a fantastic way to reduce your carbon footprint and connect with nature. But more importantly, it’s incredibly rewarding! This DIY guide will provide you with simple, step-by-step instructions and clever hacks to ensure a bountiful harvest of delicious baby carrots, no matter your gardening skill level. Let’s get growing!
Growing Baby Carrots at Home: A DIY Guide for Tiny Treats
Okay, let’s get our hands dirty! I’m going to walk you through everything you need to know to grow delicious, sweet baby carrots right in your own backyard (or even in containers!). It’s easier than you think, and the taste of homegrown carrots is simply unbeatable. Forget those bland, store-bought ones – we’re going for flavor explosions!
Choosing Your Carrot Variety
First things first, not all carrots are created equal when it comes to baby carrots. While you *can* harvest any carrot variety early, some are specifically bred to be small and tender. Here are a few of my favorites:
* ‘Thumbelina’: These are almost perfectly round, like little orange marbles. They’re super cute and have a mild, sweet flavor.
* ‘Parisian’: Similar to Thumbelina, these are round and mature quickly.
* ‘Little Finger’: As the name suggests, these are small and slender, perfect for snacking.
* ‘Short n Sweet’: This variety is known for its sweetness and shorter length, making it ideal for baby carrots.
* ‘Adelaide’: A Nantes type carrot that matures quickly and stays sweet even when small.
Preparing Your Growing Space
Carrots are a bit picky about their soil, so this step is crucial. They need loose, well-drained soil to grow straight and true. Rocky or compacted soil will result in forked, stunted carrots – and nobody wants that!
* Sunlight: Carrots need at least 6 hours of sunlight per day. Choose a spot in your garden that gets plenty of sunshine.
* Soil Type: The ideal soil is sandy loam. If your soil is heavy clay, you’ll need to amend it.
* Soil Preparation: This is where the magic happens!
1. Clear the Area: Remove any rocks, weeds, or debris from the planting area.
2. Loosen the Soil: Use a garden fork or tiller to loosen the soil to a depth of at least 12 inches. This is really important for baby carrots, as they still need room to grow downwards.
3. Amend the Soil: If your soil is heavy clay or compacted, add plenty of organic matter, such as compost, well-rotted manure, or peat moss. This will improve drainage and aeration. I usually add a generous layer of compost – about 2-3 inches – and work it into the soil.
4. Rake Smooth: Once you’ve amended the soil, rake it smooth to create a level planting surface.
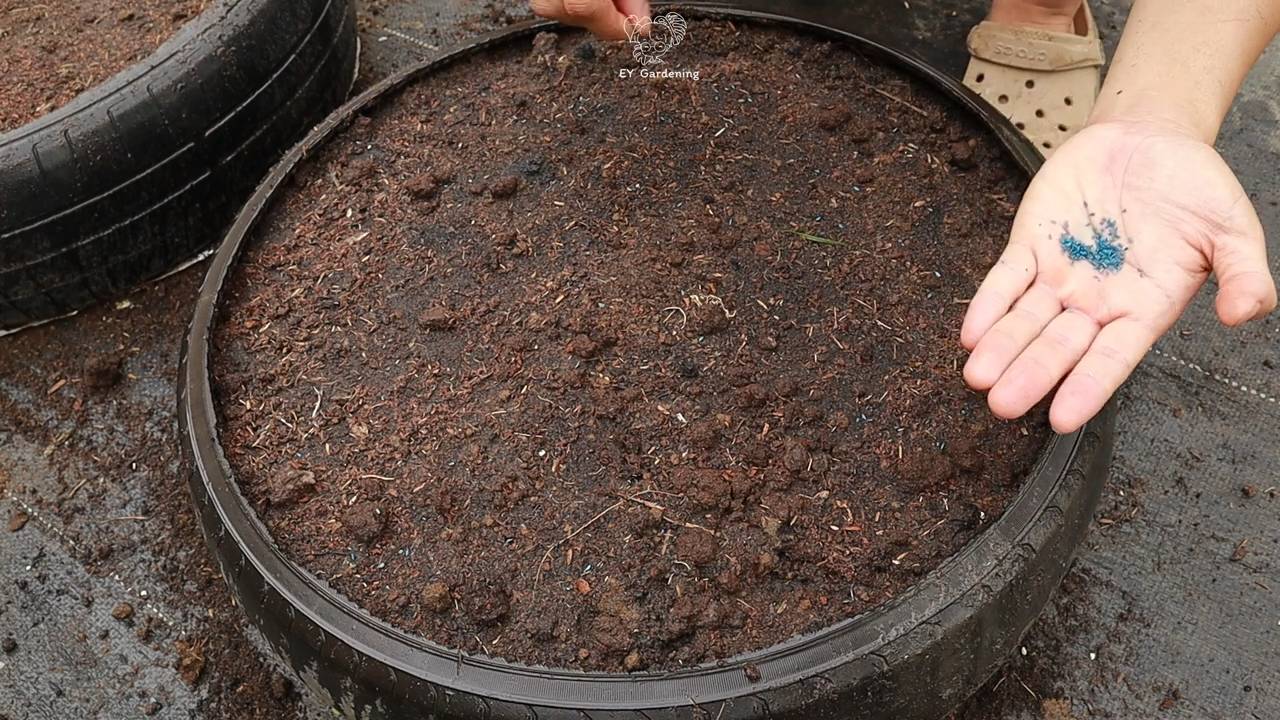
5. Avoid Nitrogen-Rich Fertilizers: Too much nitrogen can lead to leafy growth at the expense of root development. I prefer to use a balanced fertilizer or bone meal, which is rich in phosphorus, to encourage root growth.
Planting Your Carrot Seeds
Carrot seeds are tiny, so planting them can be a bit tricky. But don’t worry, I’ve got some tips to make it easier.
* Timing: Carrots are a cool-season crop, so the best time to plant them is in early spring or late summer. In the spring, plant them 2-3 weeks before the last expected frost. For a fall harvest, plant them 10-12 weeks before the first expected frost.
* Direct Sowing: Carrots don’t transplant well, so it’s best to sow the seeds directly into the ground.
* Spacing: Sow the seeds about 1/4 inch deep and 1/2 inch apart in rows that are 6-8 inches apart.
* Seed Tape: If you’re having trouble with the tiny seeds, consider using seed tape. This is a biodegradable tape with the seeds already spaced out. It makes planting much easier.
* Covering the Seeds: Gently cover the seeds with a thin layer of soil.
* Watering: Water the soil gently but thoroughly. Keep the soil consistently moist until the seeds germinate. I like to use a watering can with a gentle rose attachment to avoid washing away the seeds.
* Marking the Rows: It’s a good idea to mark the rows with labels so you know where you planted your carrots.
Caring for Your Carrot Plants
Once your carrot seeds have germinated, it’s important to provide them with the right care to ensure a bountiful harvest.
* Thinning: This is probably the most important step! When the seedlings are about 1-2 inches tall, thin them to about 1-2 inches apart. This will give the carrots enough room to grow. Don’t be afraid to thin them aggressively – it’s better to have fewer, larger carrots than a bunch of crowded, stunted ones. You can use small scissors to snip the seedlings at the soil line, or gently pull them out. If you pull them, be careful not to disturb the roots of the remaining plants.
* Watering: Carrots need consistent moisture to grow well. Water them regularly, especially during dry spells. Aim for about 1 inch of water per week. Avoid overwatering, as this can lead to root rot.
* Weeding: Keep the area around your carrot plants free of weeds. Weeds compete with the carrots for nutrients and water. Gently hand-pull any weeds that pop up. Be careful not to disturb the carrot roots.
* Fertilizing: If your soil is poor, you may need to fertilize your carrot plants. Use a balanced fertilizer or a fertilizer that is high in phosphorus and potassium. Avoid fertilizers that are high in nitrogen, as this can lead to leafy growth at the expense of root development. I like to side-dress my carrots with compost tea every few weeks.
* Pest Control: Carrots are relatively pest-free, but they can be susceptible to carrot rust flies. These flies lay their eggs near the base of the plants, and the larvae burrow into the roots, causing damage. To prevent carrot rust flies, cover your carrot plants with row covers. You can also use sticky traps to catch the flies.
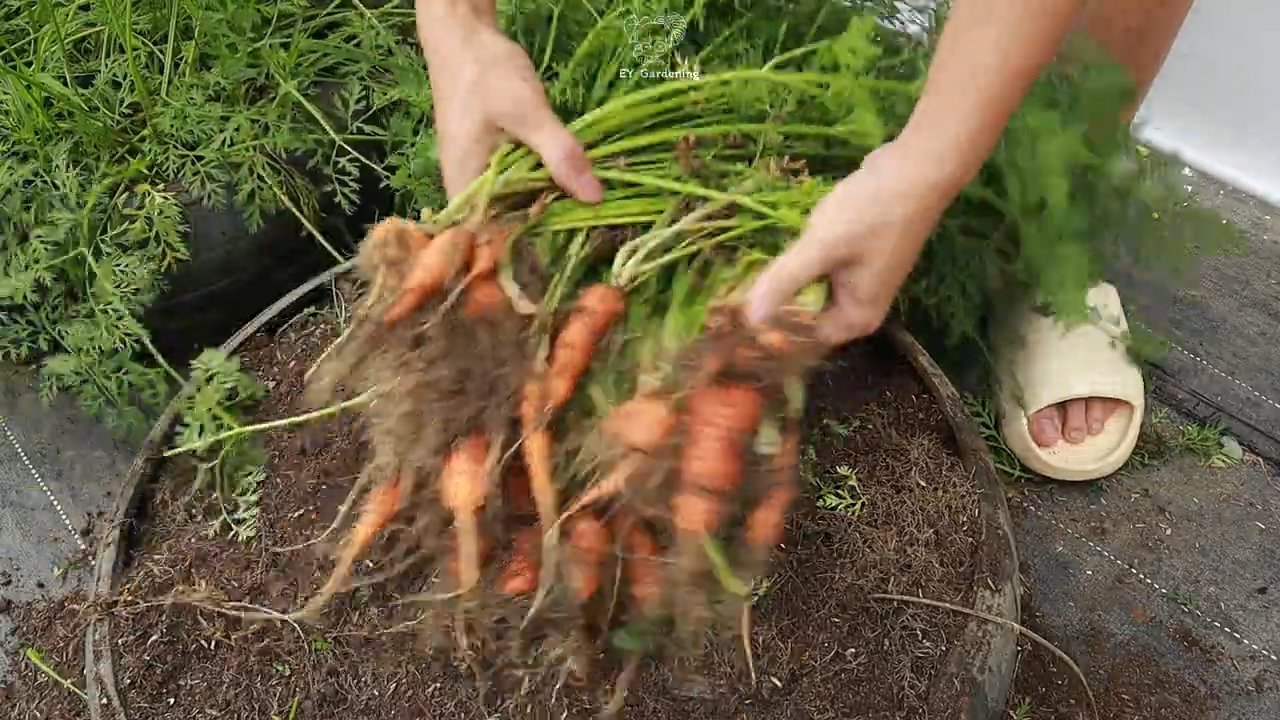
Harvesting Your Baby Carrots
This is the fun part! You can start harvesting your baby carrots when they are about 2-3 inches long.
* Timing: The exact time to harvest will depend on the variety of carrot you’re growing and your personal preference. But generally, baby carrots are ready to harvest about 50-60 days after planting.
* Checking for Readiness: Gently brush away the soil around the base of the plant to check the size of the carrot.
* Harvesting: Gently pull the carrots out of the ground. If the soil is dry, you may need to loosen it with a garden fork first.
* Washing: Wash the carrots thoroughly to remove any dirt.
* Storing: Store the carrots in the refrigerator in a plastic bag or container. They will keep for several weeks.
Growing Carrots in Containers
Don’t have a garden? No problem! You can easily grow baby carrots in containers.
* Container Size: Choose a container that is at least 8-10 inches deep. This will give the carrots enough room to grow.
* Potting Mix: Use a high-quality potting mix that is well-draining.
* Planting: Follow the same planting instructions as for growing carrots in the ground.
* Watering: Container-grown carrots will need to be watered more frequently than carrots grown in the ground. Check the soil moisture regularly and water when the top inch of soil is dry.
* Fertilizing: Fertilize your container-grown carrots every few weeks with a balanced fertilizer.
* Sunlight: Place the container in a location that gets at least 6 hours of sunlight per day.
Troubleshooting
Even with the best care, you may encounter some problems when growing carrots. Here are a few common issues and how to fix them:
* Forked Carrots: This is usually caused by rocky or compacted soil. Make sure to prepare your soil properly before planting.
* Stunted Growth: This can be caused by a lack of nutrients or water. Make sure to fertilize your carrots regularly and water them consistently.
* Pests: Carrot rust flies can damage the roots of your carrots. Cover your plants with row covers to prevent them.
* Bolting: This is when the carrot plants start to produce flowers and seeds prematurely. It’s usually caused by stress, such as hot weather or inconsistent watering. Try to keep your carrot plants cool and well-watered.
Enjoying Your Homegrown Baby Carrots
Now that you’ve harvested your delicious baby carrots, it’s time to enjoy them! Here are a few ideas:
* Snack on them raw: Baby carrots are a healthy and delicious snack.
* Add them to salads: They add a sweet and crunchy element to salads.
* Roast them: Roasted baby
Conclusion
So, there you have it! Growing baby carrots at home is not only achievable but also incredibly rewarding. Forget the pre-packaged, often bland, supermarket versions. Imagine biting into a sweet, crisp, and perfectly sized baby carrot that you nurtured from seed to harvest. The difference in flavor and texture is truly remarkable, and the satisfaction of knowing exactly where your food comes from is unparalleled.
This DIY trick for growing baby carrots is a must-try for several reasons. First, it’s surprisingly easy, even for beginner gardeners. You don’t need acres of land or specialized equipment. A simple container, some good quality soil, and a sunny spot are all you need to get started. Second, it’s a fantastic way to save money. Those bags of baby carrots at the grocery store can add up, and growing your own is a much more economical option. Third, and perhaps most importantly, it’s a healthier choice. You control the growing environment, ensuring that your carrots are free from harmful pesticides and chemicals.
But the benefits don’t stop there. Growing baby carrots is also a fun and educational activity for the whole family. It’s a great way to teach children about where their food comes from and to encourage them to eat their vegetables. Plus, it’s a relaxing and therapeutic hobby that can help you de-stress and connect with nature.
Ready to take your baby carrot game to the next level? Consider these variations:
* **Rainbow Baby Carrots:** Plant a mix of carrot seeds in different colors, such as purple, yellow, and white, for a vibrant and visually appealing harvest.
* **Spiced Baby Carrots:** Add a pinch of cinnamon or nutmeg to the soil before planting for a subtle hint of spice in your carrots.
* **Herb-Infused Baby Carrots:** Plant herbs like dill, parsley, or cilantro alongside your carrots to infuse them with a fresh, aromatic flavor.
* **Container Gardening Experiment:** Try different types of containers and soil mixes to see which ones produce the best results.
Don’t be afraid to experiment and get creative! The beauty of DIY gardening is that there are no hard and fast rules. The most important thing is to have fun and enjoy the process.
We are confident that once you try this DIY trick for growing baby carrots at home, you’ll be hooked. The taste, the convenience, and the satisfaction are simply unbeatable. So, grab your seeds, get your hands dirty, and start growing your own delicious baby carrots today!
We’d love to hear about your experience! Share your photos, tips, and tricks in the comments below. Let’s create a community of baby carrot enthusiasts and inspire others to grow their own food. Happy gardening!
Frequently Asked Questions (FAQ)
What kind of soil is best for growing baby carrots?
The ideal soil for growing baby carrots is loose, well-draining, and rich in organic matter. Carrots need to push through the soil easily, so avoid heavy clay soils that can become compacted. A sandy loam soil is perfect. You can amend your soil with compost, aged manure, or other organic materials to improve its texture and fertility. When growing in containers, use a high-quality potting mix specifically formulated for vegetables. Avoid mixes that contain large chunks of wood or other debris, as these can hinder root development.
How much sunlight do baby carrots need?
Baby carrots need at least six hours of direct sunlight per day to thrive. Choose a sunny spot in your garden or on your patio where your carrots will receive ample sunlight. If you live in a particularly hot climate, you may want to provide some afternoon shade to prevent the soil from drying out too quickly. If you’re growing indoors, use grow lights to supplement natural sunlight.
How often should I water my baby carrots?
Water your baby carrots regularly, keeping the soil consistently moist but not waterlogged. Carrots need consistent moisture to develop properly, so don’t let the soil dry out completely. Water deeply whenever the top inch of soil feels dry to the touch. Avoid overhead watering, as this can promote fungal diseases. Instead, water at the base of the plants or use a soaker hose.
When is the best time to plant baby carrots?
The best time to plant baby carrots depends on your climate. In cooler climates, you can plant carrots in early spring or late summer for a fall harvest. In warmer climates, you can plant carrots in the fall or winter for a spring harvest. Carrots prefer cooler temperatures, so avoid planting them during the hottest months of the year. Check your local planting calendar for specific dates.
How long does it take for baby carrots to grow?
Baby carrots typically take 50-70 days to mature, depending on the variety and growing conditions. You can harvest them when they are about 3-4 inches long and about half an inch in diameter. To check if your carrots are ready to harvest, gently pull back the soil around the base of the plant to expose the top of the carrot. If it looks like the right size, you can carefully pull it out of the ground.
What are some common problems when growing baby carrots?
Some common problems when growing baby carrots include poor germination, stunted growth, and pest infestations. Poor germination can be caused by using old seeds, planting too deeply, or not keeping the soil moist enough. Stunted growth can be caused by poor soil, lack of sunlight, or nutrient deficiencies. Pests that can attack carrots include carrot rust flies, aphids, and nematodes. To prevent these problems, use fresh seeds, plant at the correct depth, keep the soil moist, amend your soil with compost, provide ample sunlight, and use organic pest control methods.
Can I grow baby carrots in containers?
Yes, you can definitely grow baby carrots in containers! In fact, container gardening is a great way to grow baby carrots, especially if you have limited space or poor soil. Choose a container that is at least 6-8 inches deep and has drainage holes. Fill the container with a high-quality potting mix and plant your carrot seeds according to the instructions on the seed packet. Water regularly and fertilize every few weeks with a balanced fertilizer.
How do I prevent my baby carrots from splitting?
Splitting carrots are often caused by inconsistent watering. When the soil dries out and then is suddenly flooded with water, the carrots can grow too quickly and split. To prevent this, water your carrots regularly and consistently, keeping the soil evenly moist. You can also mulch around your carrots to help retain moisture in the soil.
What are the best varieties of carrots to grow as baby carrots?
Several carrot varieties are well-suited for growing as baby carrots. Some popular choices include ‘Thumbelina,’ ‘Parisian,’ ‘Little Finger,’ and ‘Short ‘n Sweet.’ These varieties are naturally small and round, making them perfect for snacking and salads. They also tend to mature more quickly than larger carrot varieties.
How do I store my harvested baby carrots?
To store your harvested baby carrots, first wash them thoroughly and remove any excess soil. Then, trim off the green tops, leaving about half an inch of stem. Place the carrots in a plastic bag or container lined with a damp paper towel. Store them in the refrigerator for up to two weeks. The damp paper towel will help keep the carrots crisp and prevent them from drying out.

Leave a Comment