

Grow Better Tomatoes at Home – who doesn’t dream of plucking juicy, sun-ripened tomatoes straight from their own garden? I know I do! There’s just something incredibly satisfying about nurturing a plant from a tiny seed to a bountiful producer, especially when that producer is the star of summer salads and homemade sauces.
For centuries, tomatoes have held a special place in cuisines around the world. Originating in South America, they were initially met with suspicion in Europe, but eventually, their vibrant color and delicious flavor won everyone over. Now, they’re a staple in gardens and kitchens everywhere, and I’m here to help you make the most of your tomato-growing experience.
But let’s be honest, sometimes growing tomatoes can feel like a battle against pests, diseases, and unpredictable weather. That’s where these DIY tricks and hacks come in! I’ve compiled a collection of simple, effective techniques that will help you grow better tomatoes at home, regardless of your gardening experience. Whether you’re a seasoned gardener or just starting out, these tips will empower you to cultivate a thriving tomato patch and enjoy the fruits (or should I say, vegetables?) of your labor. Get ready to unlock the secrets to a bumper crop of delicious, homegrown tomatoes!
Grow Better Tomatoes at Home: My Foolproof DIY Guide
Hey there, fellow tomato enthusiasts! I’m so excited to share my tried-and-true method for growing the juiciest, most flavorful tomatoes right in your own backyard. Forget those bland, store-bought tomatoes – with a little DIY magic, you can have a bumper crop of homegrown goodness. This guide is packed with tips and tricks I’ve learned over the years, and I promise, even if you’re a beginner, you can achieve amazing results. Let’s get started!
Choosing the Right Tomato Variety
Before we even think about soil or sunlight, let’s talk about tomato varieties. This is crucial because different types thrive in different climates and have varying needs.
* Determinate vs. Indeterminate: This is the first big decision. Determinate tomatoes grow to a certain size and produce all their fruit at once, making them great for canning. Indeterminate tomatoes, on the other hand, keep growing and producing fruit throughout the season. I personally prefer indeterminate varieties because I love having a continuous supply of fresh tomatoes.
* Heirloom vs. Hybrid: Heirloom tomatoes are open-pollinated varieties that have been passed down through generations. They often have unique flavors and colors, but can be more susceptible to diseases. Hybrid tomatoes are bred for specific traits like disease resistance and higher yields. I usually grow a mix of both to get the best of both worlds.
* Consider Your Climate: If you live in a cooler climate, opt for early-maturing varieties like ‘Early Girl’ or ‘Stupice’. If you have a longer growing season, you can experiment with later-maturing varieties like ‘Brandywine’ or ‘Cherokee Purple’.
I always recommend checking with your local nursery or garden center for recommendations on the best tomato varieties for your specific area. They’ll have the inside scoop on what thrives locally.
Preparing the Soil: The Foundation for Success
Tomatoes are heavy feeders, meaning they need nutrient-rich soil to thrive. Proper soil preparation is absolutely essential for a healthy and productive tomato plant.
* Sunlight is Key: Tomatoes need at least 6-8 hours of direct sunlight per day. Choose a location in your garden that gets plenty of sun.
* Soil Testing: If you’re unsure about your soil’s pH or nutrient levels, get a soil test. Most garden centers offer soil testing services. Tomatoes prefer a slightly acidic soil with a pH between 6.0 and 6.8.
* Amend, Amend, Amend!: This is where the magic happens. I like to amend my soil with plenty of organic matter, such as compost, well-rotted manure, and leaf mold. This improves drainage, aeration, and nutrient content.
* Raised Beds vs. In-Ground Planting: Both options work well, but I personally prefer raised beds because they offer better drainage and allow me to control the soil quality more easily.
Step-by-Step Soil Preparation:
1. Clear the Area: Remove any weeds, grass, or debris from the planting area.
2. Loosen the Soil: Use a garden fork or tiller to loosen the soil to a depth of at least 12 inches.
3. Add Organic Matter: Spread a 3-4 inch layer of compost, well-rotted manure, and leaf mold over the soil.
4. Incorporate the Amendments: Use a garden fork or tiller to thoroughly incorporate the organic matter into the soil.
5. Rake Smooth: Rake the soil smooth and level.
Starting Your Tomato Plants: Seedlings vs. Transplants
You have two options for starting your tomato plants: starting from seed or buying transplants from a nursery.
* Starting from Seed: This gives you more control over the varieties you grow and can be more cost-effective. However, it requires more time and effort. I usually start my seeds indoors about 6-8 weeks before the last expected frost.
* Buying Transplants: This is a convenient option, especially if you’re short on time or space. Choose healthy-looking plants with sturdy stems and no signs of disease.
Starting Tomato Seeds Indoors:
1. Choose Your Seeds: Select the tomato varieties you want to grow.
2. Prepare Your Seed Starting Mix: Use a seed starting mix, which is a lightweight and sterile medium that’s ideal for germinating seeds.
3. Sow the Seeds: Fill seed starting trays or small pots with the seed starting mix. Sow the seeds about 1/4 inch deep.
4. Water Gently: Water the seeds gently to moisten the soil.
5. Provide Warmth and Light: Place the trays or pots in a warm location (around 70-75°F) and provide plenty of light. A heat mat and grow lights can be helpful.
6. Keep the Soil Moist: Keep the soil consistently moist, but not soggy.
7. Harden Off the Seedlings: Before transplanting the seedlings outdoors, you need to harden them off. This means gradually exposing them to outdoor conditions over a period of 1-2 weeks. Start by placing them in a sheltered location for a few hours each day, gradually increasing the amount of time they spend outdoors.
Transplanting Your Tomato Plants: Setting Them Up for Success
Once your tomato plants are ready to be transplanted outdoors, it’s important to do it correctly to minimize stress and ensure they get off to a good start.
* Wait for Warm Weather: Don’t transplant your tomato plants until the danger of frost has passed and the soil has warmed up to at least 60°F.
* Choose a Cloudy Day: Transplanting on a cloudy day will help prevent the plants from drying out.
* Dig a Hole: Dig a hole that’s deep enough to bury the bottom part of the stem. This encourages the plant to develop more roots, making it stronger and more productive.
* Add Fertilizer: Add a handful of slow-release fertilizer to the bottom of the hole.
* Plant Deep: Gently remove the tomato plant from its container and place it in the hole. Bury the bottom part of the stem, leaving only the top few sets of leaves above the ground.
* Water Thoroughly: Water the plant thoroughly after transplanting.
* Mulch: Apply a layer of mulch around the base of the plant to help retain moisture, suppress weeds, and regulate soil temperature. I like to use straw or shredded leaves.
My Secret Planting Trick:
I have a little secret that I swear by: I add a crushed eggshell to the bottom of each planting hole. Eggshells are a great source of calcium, which helps prevent blossom-end rot, a common problem with tomatoes.
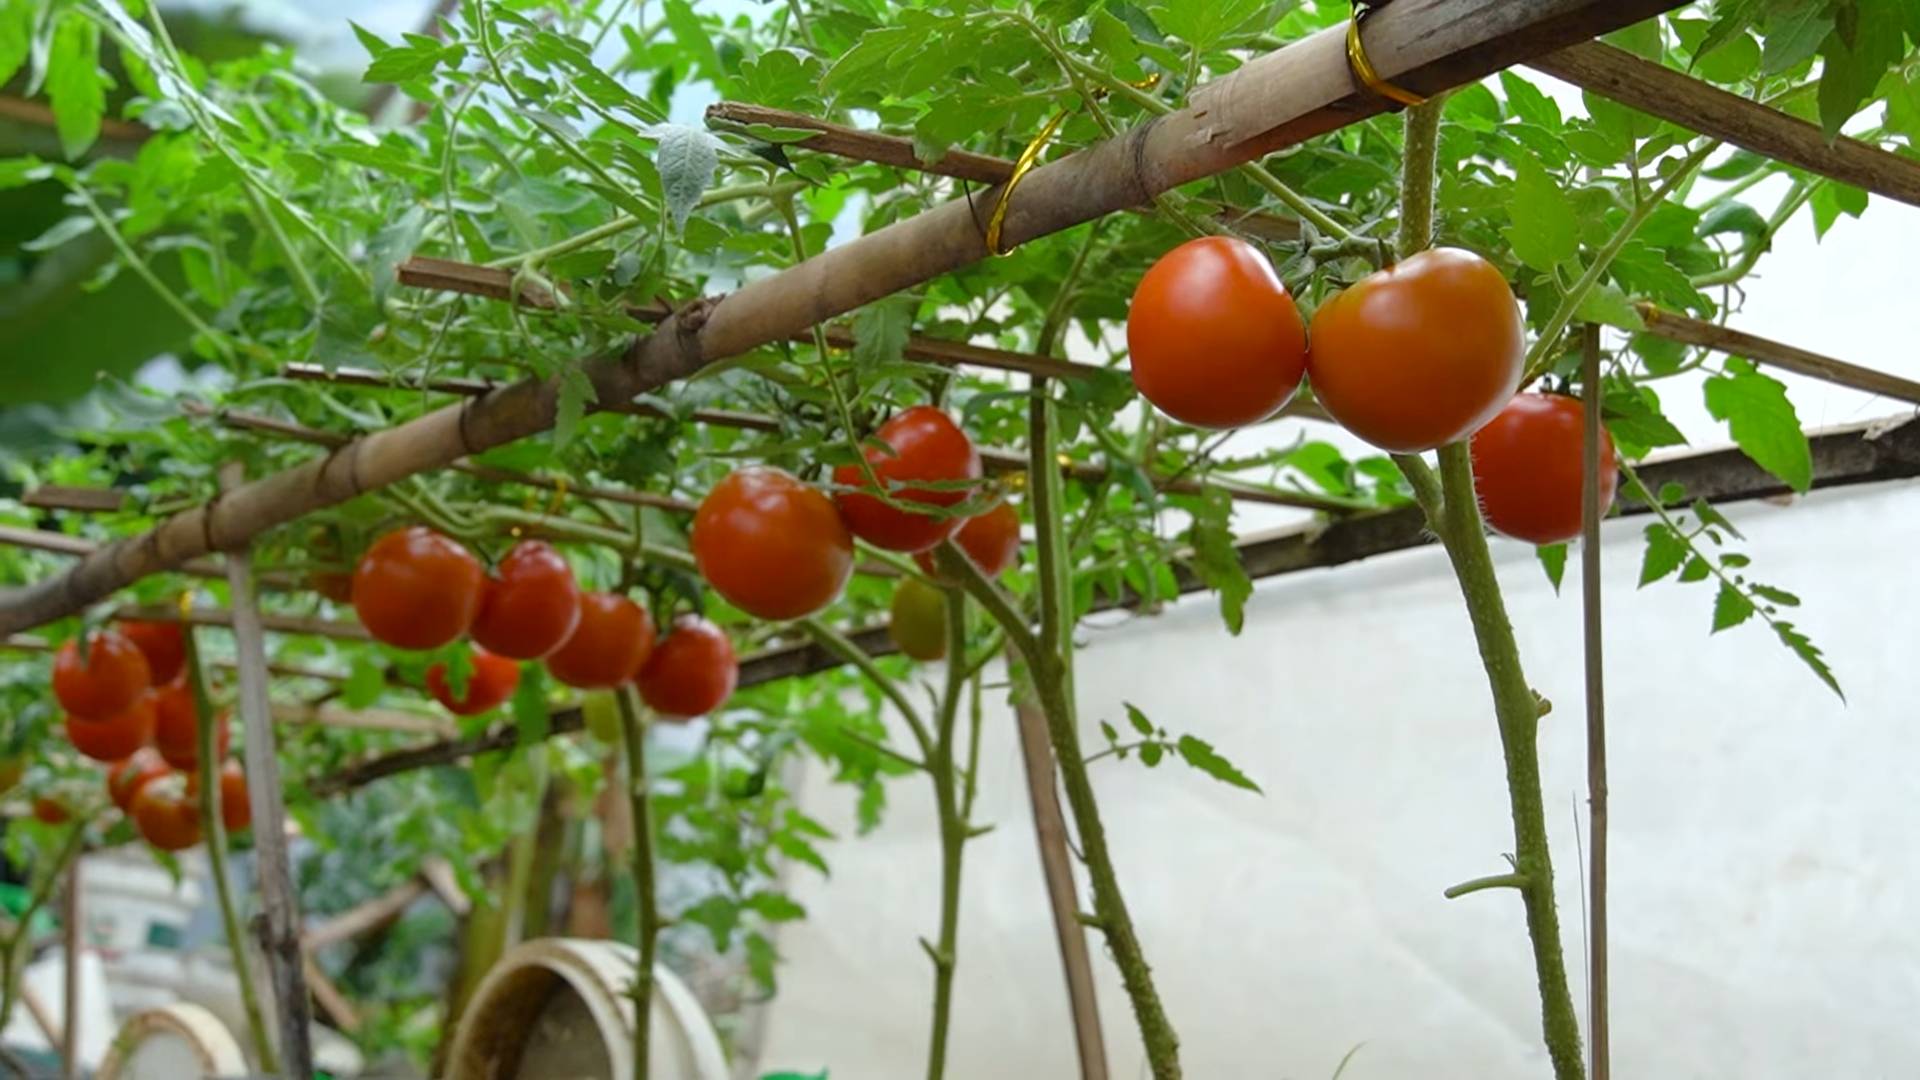
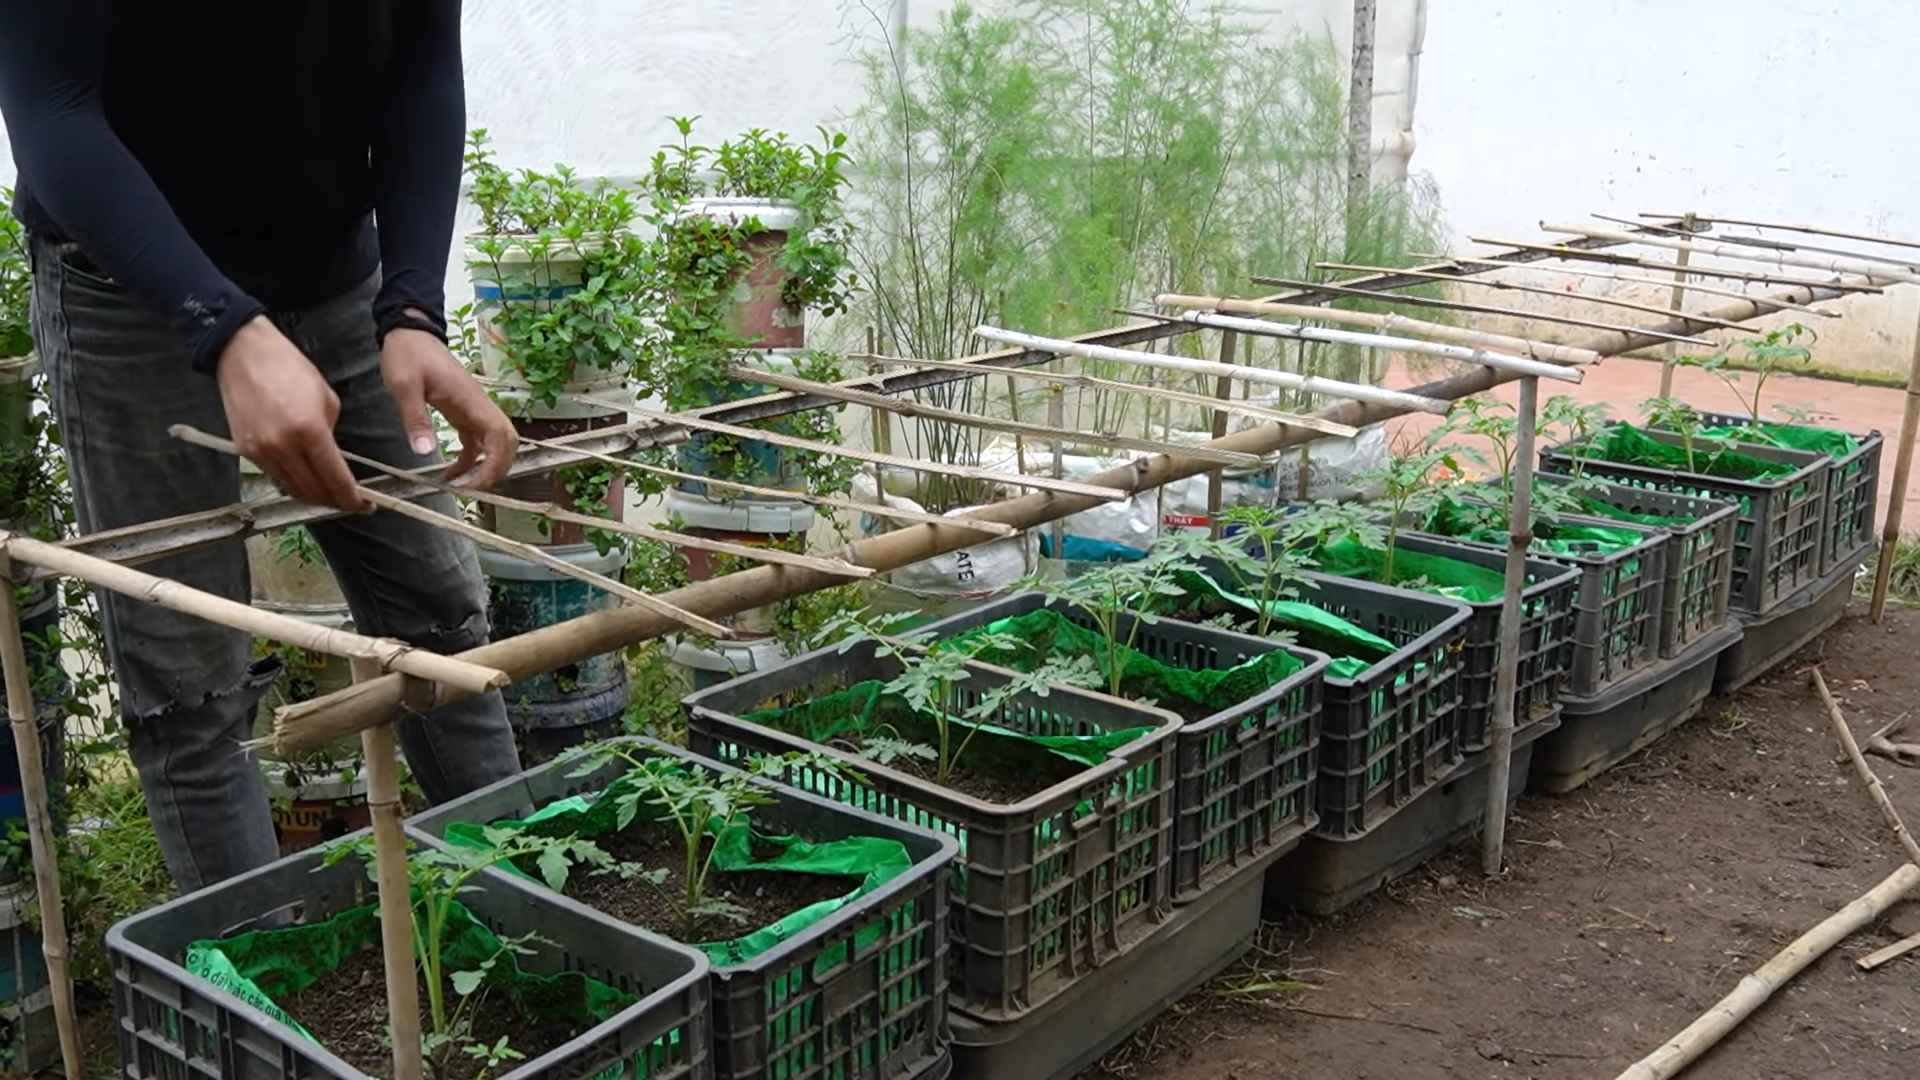
Supporting Your Tomato Plants: Staking, Caging, or Trellising
Tomato plants can get quite large and heavy, especially when they’re loaded with fruit. Providing support is essential to prevent them from falling over and breaking.
* Staking: This is a simple and inexpensive option. Drive a sturdy stake into the ground next to the plant and tie the stem to the stake with soft twine or plant ties.
* Caging: Tomato cages provide more support than stakes and are a good option for bushier varieties.
* Trellising: This is a great option for indeterminate varieties, as it allows them to grow vertically and saves space.
I personally prefer using tomato cages because they’re easy to set up and provide good support.
Watering and Fertilizing: Keeping Your Plants Happy and Healthy
Consistent watering and fertilization are crucial for healthy tomato plants and a bountiful harvest.
* Watering: Water deeply and regularly, especially during hot, dry weather. Aim to water at the base of the plant to avoid wetting the foliage, which can lead to disease.
* Fertilizing: Fertilize your tomato plants every 2-3 weeks with a balanced fertilizer or a tomato-specific fertilizer. Follow the instructions on the fertilizer package.
My Watering Tip:
I like to water my tomato plants in the morning so that the foliage has time to dry out before nightfall. This helps prevent fungal diseases.
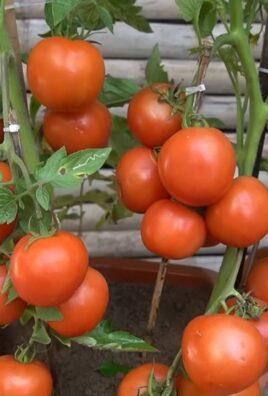
Pruning Your Tomato Plants: Encouraging Fruit Production
Pruning can help improve air circulation, reduce disease, and encourage fruit production.
* Suckers: Remove the suckers, which are the small shoots that grow in the crotch between the main stem and the branches. These suckers can steal energy from the plant and reduce fruit production.
* Lower Leaves: Remove any yellowing or diseased leaves from the bottom of the plant.
Pruning Tips:
* Use clean, sharp pruning shears to avoid spreading disease.
* Prune in the morning so that the cuts have time to dry out during the day.
Dealing with Pests and Diseases: Protecting Your Crop
Tomato plants can be susceptible to a variety of pests and diseases. It’s important to be vigilant and take action quickly if you notice any problems.
*
Conclusion
So, there you have it! This simple, yet incredibly effective DIY trick for growing better tomatoes at home is a game-changer. Forget expensive fertilizers and complicated gardening techniques. This method is accessible to everyone, regardless of their gardening experience or the size of their growing space. The beauty of this approach lies in its simplicity and the remarkable results it yields. You’ll be amazed at the difference it makes in the size, flavor, and overall health of your tomato plants.
Why is this a must-try? Because it addresses the core needs of tomato plants in a natural and sustainable way. It provides essential nutrients directly to the roots, promoting vigorous growth and abundant fruit production. It also helps to improve soil drainage and aeration, creating an optimal environment for healthy root development. Plus, it’s a fantastic way to recycle kitchen scraps and reduce your environmental footprint.
But don’t just take our word for it. We encourage you to experiment and see the results for yourself. There are countless variations you can try to tailor this DIY trick to your specific needs and preferences. For example, if you’re growing tomatoes in containers, you can adjust the amount of the amendment to suit the size of the pot. You can also experiment with different types of organic matter, such as coffee grounds, crushed eggshells, or even banana peels, to see which combinations work best for your plants.
Consider adding a small amount of Epsom salts to the planting hole. Epsom salts contain magnesium sulfate, which can help prevent blossom-end rot, a common problem in tomatoes. Just a tablespoon or two mixed into the soil is usually sufficient.
Another variation is to create a “tomato tea” by soaking the organic matter in water for a few days before adding it to the planting hole. This allows the nutrients to leach out into the water, creating a nutrient-rich solution that can be poured directly onto the roots of the tomato plants.
If you’re concerned about pests, you can add a layer of diatomaceous earth around the base of the plants. Diatomaceous earth is a natural insecticide that can help control slugs, snails, and other common tomato pests.
The key is to observe your plants closely and adjust your approach as needed. Every garden is different, and what works well for one person may not work as well for another. Don’t be afraid to experiment and find what works best for you.
We are confident that this DIY trick will transform your tomato-growing experience. Imagine biting into a juicy, sun-ripened tomato that you grew yourself, knowing that you achieved those results with a simple, natural, and cost-effective method. The satisfaction is unparalleled.
So, grab your gardening gloves, gather your supplies, and get ready to grow the best tomatoes you’ve ever tasted. We can’t wait to hear about your experiences! Share your photos, tips, and success stories in the comments below. Let’s build a community of tomato-growing enthusiasts and learn from each other. Happy gardening! Remember, the secret to success is in the soil, and this DIY trick is the perfect way to unlock its potential and grow better tomatoes at home.
Frequently Asked Questions (FAQ)
What exactly is the DIY trick you’re referring to?
The DIY trick involves amending the soil in the planting hole with organic matter before transplanting your tomato seedlings. This organic matter acts as a slow-release fertilizer, providing essential nutrients to the plants throughout the growing season. It also improves soil drainage and aeration, creating a healthier root environment. The most common organic matter used is compost, well-rotted manure, or a combination of both. The key is to incorporate this material directly into the planting hole, ensuring that the tomato roots have immediate access to these beneficial resources.
What kind of organic matter should I use?
Compost and well-rotted manure are excellent choices. Compost provides a balanced mix of nutrients and improves soil structure. Well-rotted manure is rich in nitrogen, which is essential for leafy growth. You can also use other organic materials, such as coffee grounds, crushed eggshells, banana peels, or even grass clippings (ensure they are free of herbicides). Experiment with different combinations to see what works best for your soil and your plants. Avoid using fresh manure, as it can burn the roots of the tomato plants.
How much organic matter should I add to the planting hole?
A good rule of thumb is to add about one-third to one-half the volume of the planting hole with organic matter. For example, if you’re digging a hole that’s 12 inches wide and 12 inches deep, you would add about 4-6 inches of organic matter to the bottom of the hole. Mix the organic matter with the existing soil before planting the tomato seedling. Adjust the amount based on the size of the container if you are growing in pots.
When should I add the organic matter to the planting hole?
Add the organic matter to the planting hole at the time of transplanting your tomato seedlings. This ensures that the roots have immediate access to the nutrients and improved soil conditions. Don’t wait until after the plants are established, as it will be more difficult to incorporate the organic matter without disturbing the roots.
Can I use this trick for other plants besides tomatoes?
Yes, this trick can be used for other plants that benefit from nutrient-rich soil and improved drainage. Peppers, eggplants, and squash are all good candidates. The specific type and amount of organic matter may need to be adjusted depending on the needs of the plant. For example, plants that prefer slightly acidic soil, such as blueberries, may benefit from the addition of peat moss to the planting hole.
What if I don’t have access to compost or manure?
If you don’t have access to compost or manure, you can use other organic materials, such as coffee grounds, crushed eggshells, banana peels, or grass clippings (ensure they are free of herbicides). You can also purchase commercially available organic fertilizers or soil amendments. Look for products that are specifically formulated for tomatoes or vegetables.
Will this trick prevent all tomato diseases?
No, this trick will not prevent all tomato diseases. However, it will help to improve the overall health and vigor of the plants, making them more resistant to disease. It’s also important to practice good gardening hygiene, such as removing diseased leaves and avoiding overhead watering, to prevent the spread of disease.
How often should I fertilize my tomato plants after using this trick?
Even with this DIY trick, you may still need to fertilize your tomato plants during the growing season. Monitor your plants closely and look for signs of nutrient deficiencies, such as yellowing leaves or stunted growth. If you notice any of these signs, you can supplement with a balanced organic fertilizer. Follow the instructions on the fertilizer label for application rates.
What if my tomato plants are already planted? Can I still use this trick?
While it’s best to incorporate the organic matter at the time of planting, you can still benefit from this trick even if your tomato plants are already planted. Gently dig a shallow trench around the base of the plants and add the organic matter to the trench. Mix the organic matter with the existing soil and water well. Be careful not to damage the roots of the plants.
How long will it take to see results from this trick?
You should start to see results within a few weeks of using this trick. The tomato plants will be more vigorous, with darker green leaves and stronger stems. You should also see an increase in fruit production. The exact timing will depend on the variety of tomato, the growing conditions, and the overall health of the plants.
Is this method safe for organic gardening?
Yes, this method is perfectly safe for organic gardening, provided you use organic materials. Ensure that the compost, manure, or other organic matter you use is free of synthetic fertilizers, pesticides, and herbicides. This will help you maintain a healthy and sustainable garden.
Can I use this trick in raised beds or containers?
Absolutely! This trick is highly effective in raised beds and containers. In fact, it’s even more important to amend the soil in these environments, as the soil volume is limited. Adjust the amount of organic matter based on the size of the raised bed or container.
What are some other tips for growing better tomatoes?
In addition to this DIY trick, there are several other things you can do to grow better tomatoes. Choose a sunny location with well-drained soil. Water regularly, especially during dry periods. Provide support for the plants with stakes or cages. Prune the plants to improve air circulation and prevent disease. And be sure to harvest the tomatoes when they are fully ripe for the best flavor.
Leave a Comment