

Grow Broccoli Easily, even if you think you have a brown thumb! Have you ever dreamt of harvesting your own vibrant, green broccoli heads, bursting with flavor and nutrients, right from your backyard? I know I have! For centuries, broccoli has been a staple in diets around the world, tracing its roots back to ancient Roman civilization. They valued it not only for its taste but also for its incredible health benefits.
But let’s be honest, the thought of growing your own can be a little intimidating. Maybe you’ve tried before and ended up with spindly stalks or heads that bolted before they even matured. Or perhaps you’re just short on space and think you don’t have room for a proper vegetable garden. That’s where these DIY tricks and hacks come in!
I’m here to tell you that growing broccoli easily is absolutely achievable, even for beginners. These simple, yet effective techniques will help you overcome common challenges, maximize your yield, and enjoy the satisfaction of harvesting your own delicious, homegrown broccoli. So, ditch the grocery store produce aisle and let’s get our hands dirty! I’m excited to share my favorite tips and tricks that will have you enjoying fresh, homegrown broccoli in no time.
Growing Broccoli Like a Pro: A DIY Guide for Beginners
Hey there, fellow garden enthusiasts! I’m so excited to share my foolproof method for growing broccoli. Forget those tiny, expensive heads from the grocery store – with a little effort, you can harvest your own bountiful crop of fresh, delicious broccoli right in your backyard. This guide is designed for beginners, so don’t worry if you’ve never grown anything before. I’ll walk you through every step, from choosing the right seeds to harvesting your beautiful broccoli heads. Let’s get started!
Choosing the Right Broccoli Variety
Before we dive into the nitty-gritty, let’s talk about broccoli varieties. There are tons of options out there, and choosing the right one can make a big difference in your success. Here are a few of my favorites:
* ‘Waltham 29’: This is a classic, reliable variety that’s known for its good flavor and heat tolerance. It’s a great choice for beginners.
* ‘DiCicco’: This variety produces smaller main heads, but it also yields a lot of side shoots, which means you’ll get a longer harvest.
* ‘Packman’: If you’re looking for a fast-growing variety, ‘Packman’ is a good option. It matures quickly, making it ideal for shorter growing seasons.
* ‘Romanesco’: Want something a little different? ‘Romanesco’ broccoli has a unique, fractal-like appearance and a mild, nutty flavor.
When choosing a variety, consider your local climate and growing season. Some varieties are better suited to warmer or cooler temperatures. Check the seed packet for specific recommendations.
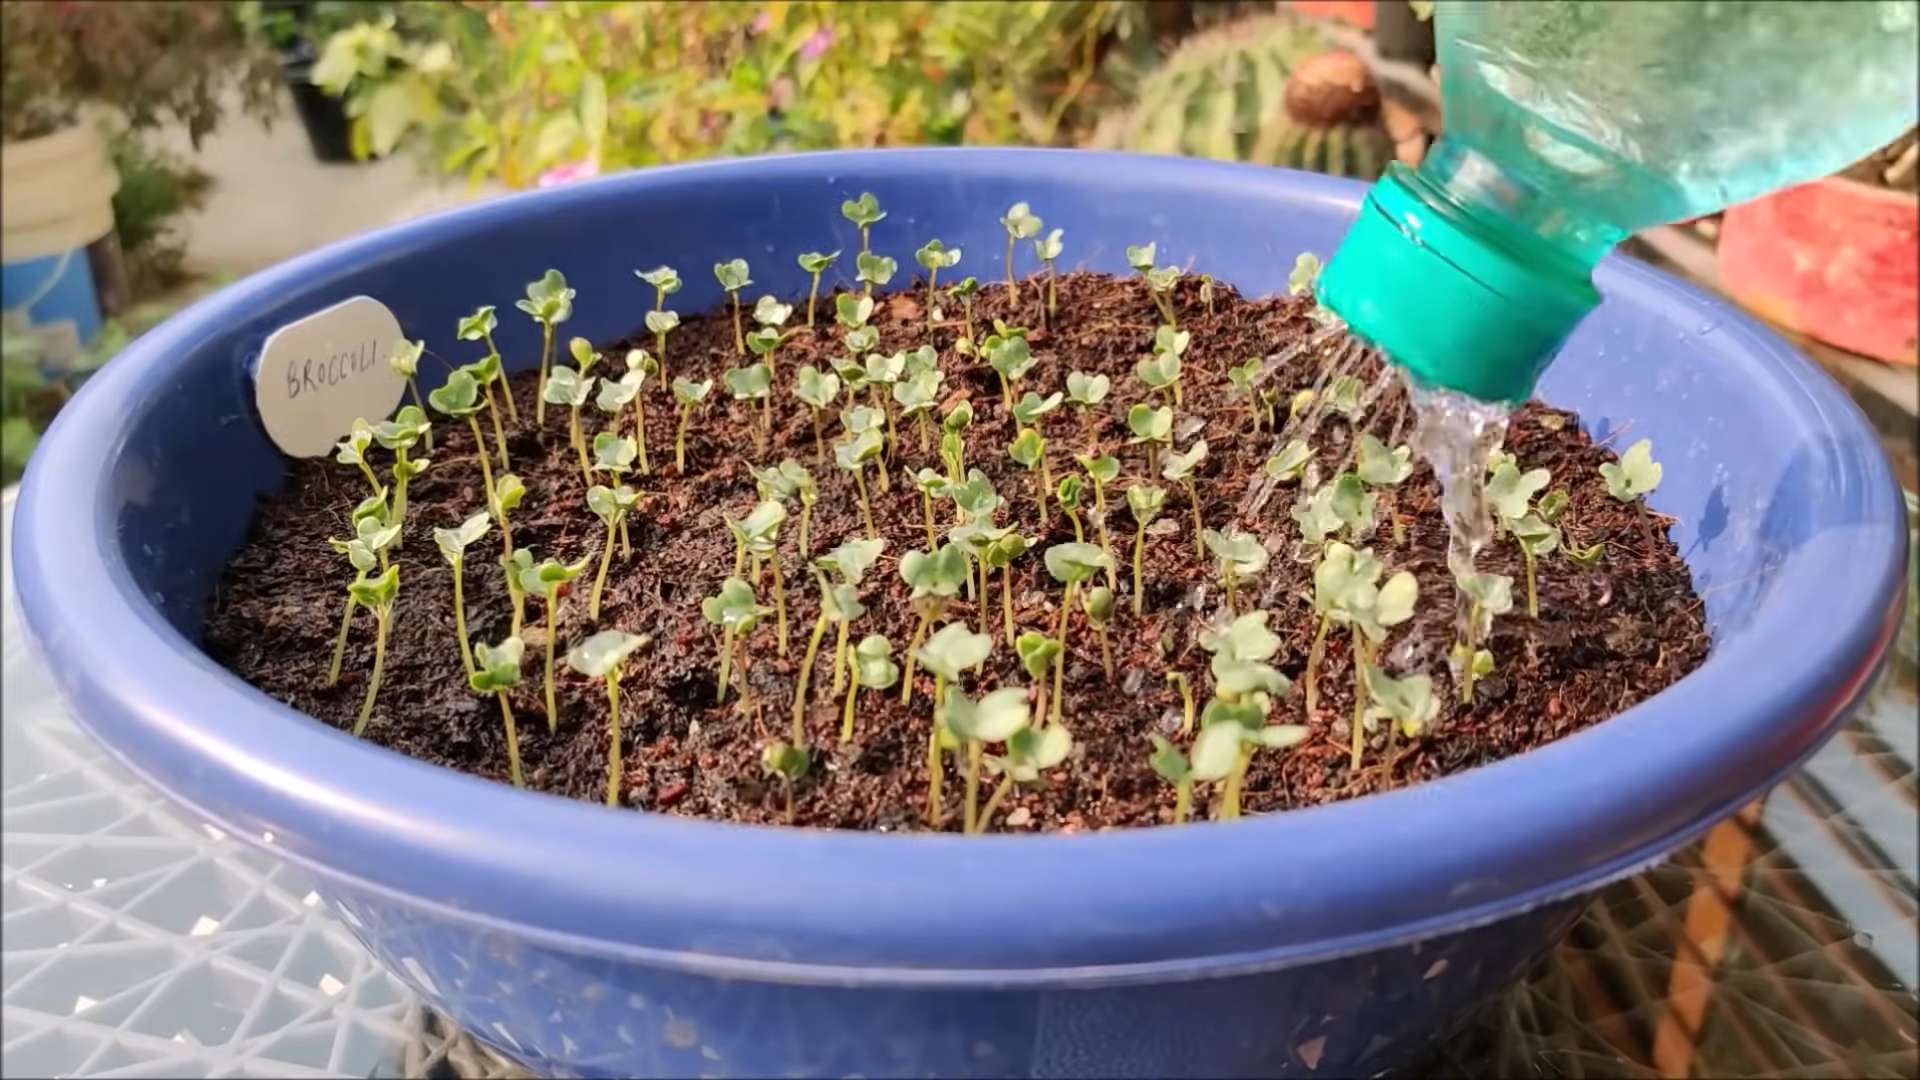
Starting Your Broccoli Seeds
You can either start your broccoli seeds indoors or sow them directly in the garden. I prefer starting them indoors because it gives them a head start and protects them from pests.
Starting Seeds Indoors:
1. Gather your supplies: You’ll need seed starting trays or small pots, seed starting mix, broccoli seeds, a spray bottle, and a grow light (optional).
2. Fill the trays or pots with seed starting mix: Make sure the mix is moist but not soggy.
3. Sow the seeds: Plant two or three seeds per cell or pot, about ¼ inch deep.
4. Water gently: Use a spray bottle to moisten the soil. Avoid overwatering, which can lead to damping off (a fungal disease that kills seedlings).
5. Provide light: Place the trays or pots under a grow light or in a sunny window. If you’re using a window, rotate the trays regularly to prevent the seedlings from leaning towards the light.
6. Keep the soil moist: Check the soil daily and water as needed to keep it moist but not soggy.
7. Thin the seedlings: Once the seedlings have their first true leaves (the second set of leaves), thin them to one plant per cell or pot. Snip off the weaker seedlings at the soil line.
Direct Sowing:
1. Prepare the soil: Choose a sunny spot in your garden and amend the soil with compost or other organic matter. Broccoli needs well-drained soil that’s rich in nutrients.
2. Sow the seeds: Plant the seeds about ½ inch deep and 18-24 inches apart.
3. Water gently: Keep the soil moist until the seeds germinate.
4. Thin the seedlings: Once the seedlings are a few inches tall, thin them to one plant every 18-24 inches.
Transplanting Your Broccoli Seedlings
Once your seedlings are about 4-6 weeks old and have several sets of true leaves, it’s time to transplant them into the garden.
1. Harden off the seedlings: Before transplanting, you need to harden off the seedlings to acclimate them to outdoor conditions. This means gradually exposing them to sunlight, wind, and cooler temperatures over a period of about a week. Start by placing the seedlings outdoors for a few hours each day, gradually increasing the amount of time they spend outside.
2. Prepare the planting site: Choose a sunny spot in your garden with well-drained soil. Amend the soil with compost or other organic matter.
3. Dig holes: Dig holes that are slightly larger than the root balls of the seedlings, spacing them 18-24 inches apart.
4. Transplant the seedlings: Gently remove the seedlings from their trays or pots and place them in the holes. Make sure the top of the root ball is level with the surrounding soil.
5. Fill the holes: Fill the holes with soil and gently pat it down.
6. Water thoroughly: Water the seedlings well after transplanting.
Caring for Your Broccoli Plants
Broccoli plants need regular care to thrive. Here’s what you need to do:
* Watering: Broccoli needs consistent moisture, especially during hot weather. Water deeply whenever the top inch of soil feels dry.
* Fertilizing: Broccoli is a heavy feeder, so it needs regular fertilization. Apply a balanced fertilizer every few weeks, following the instructions on the package. You can also side-dress the plants with compost or aged manure.
* Weeding: Keep the area around your broccoli plants free of weeds. Weeds compete with the broccoli for water and nutrients.
* Mulching: Apply a layer of mulch around the plants to help retain moisture, suppress weeds, and regulate soil temperature.
* Pest control: Broccoli is susceptible to several pests, including cabbage worms, aphids, and flea beetles. Check your plants regularly for signs of pests and take action as needed. I like to use organic pest control methods, such as insecticidal soap or neem oil. You can also cover your plants with row covers to protect them from pests.
* Supporting: Some broccoli varieties may need support as they grow, especially if they produce large heads. You can use stakes or cages to support the plants.
Dealing with Common Broccoli Problems
Even with the best care, you may encounter some problems when growing broccoli. Here are a few common issues and how to deal with them:
* Cabbage worms: These green caterpillars can quickly devour your broccoli plants. Handpick them off the plants or use Bacillus thuringiensis (Bt), a natural insecticide.
* Aphids: These tiny insects suck the sap from plants, causing them to weaken and become distorted. Spray the plants with insecticidal soap or neem oil.
* Flea beetles: These small, jumping beetles can create tiny holes in the leaves of your broccoli plants. Cover the plants with row covers or spray them with insecticidal soap or neem oil.
* Clubroot: This fungal disease causes the roots of broccoli plants to become swollen and distorted. Prevent clubroot by planting broccoli in well-drained soil and rotating your crops. If you have clubroot in your garden, you can amend the soil with lime to raise the pH.
* Bolting: Bolting occurs when broccoli plants flower prematurely, usually due to hot weather. Prevent bolting by planting broccoli in the spring or fall, when temperatures are cooler. Choose heat-tolerant varieties.
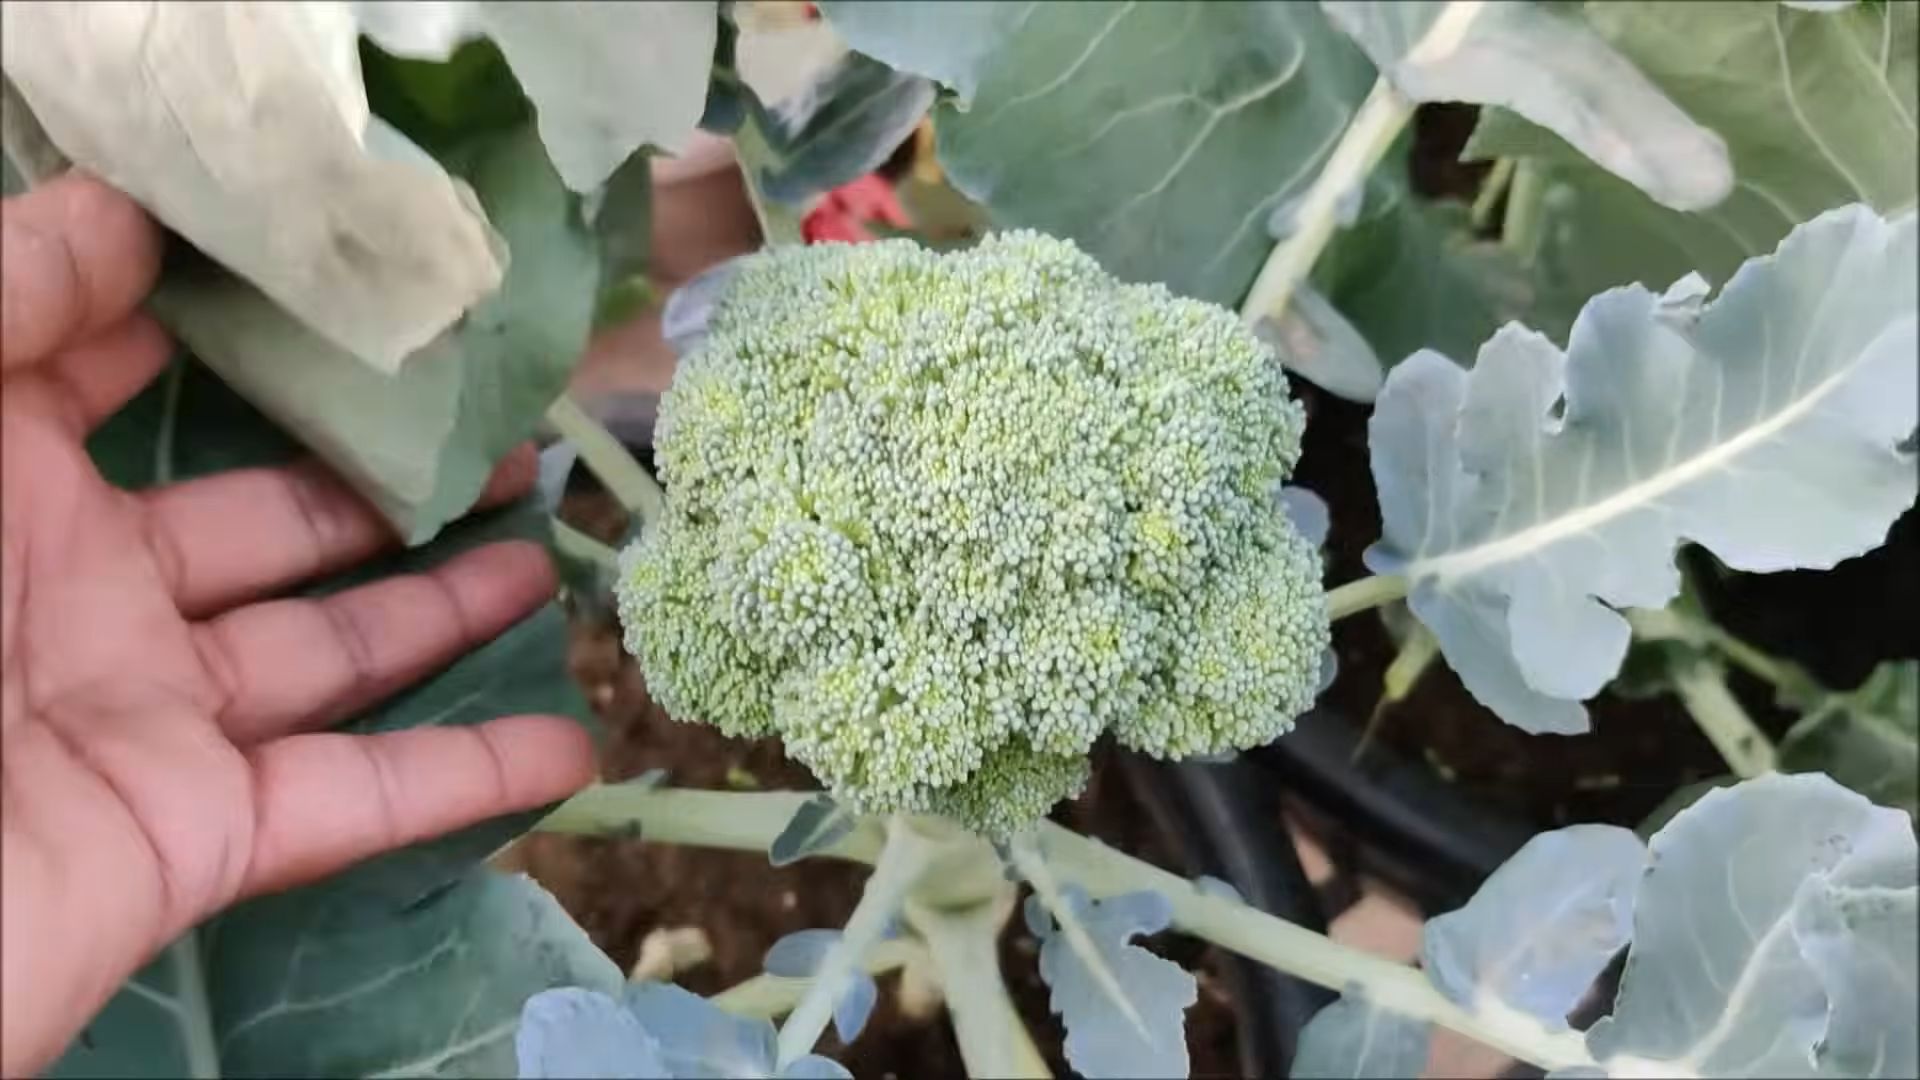
Harvesting Your Broccoli
The moment you’ve been waiting for! Harvesting your broccoli is the most rewarding part of the process.
1. When to harvest: Harvest your broccoli when the heads are firm and tight, before the flower buds start to open. The size of the head will depend on the variety, but most varieties are ready to harvest when the head is about 6-8 inches in diameter.
2. How to harvest: Use a sharp knife to cut the main head off the plant, leaving a few inches of stem.
3. Encourage side shoots: After harvesting the main head, the plant will produce side shoots. These smaller heads will continue to grow for several weeks, giving you a longer harvest.
4. Store your broccoli: Store your freshly harvested broccoli in the refrigerator for up to a week.
Enjoying Your Homegrown Broccoli
Now that you’ve harvested your broccoli, it’s time to enjoy it! There are endless ways to cook and eat broccoli. Here are a few of my favorites:
* Steamed broccoli: Steaming broccoli is a quick and easy way to cook it. Simply steam the broccoli florets for a few minutes until they’re tender-crisp.
* Roasted broccoli: Roasting broccoli brings out its natural sweetness. Toss the broccoli florets with olive oil, salt, and pepper, and roast them in a preheated oven at 400°F (200°C) for about 20 minutes.
* Broccoli soup: Broccoli soup is a healthy and delicious way to use up a lot of broccoli.
* Broccoli salad: Broccoli salad is a classic side dish that’s perfect for potlucks and barbecues.
* Stir-fried broccoli: Broccoli is a great addition to stir-fries.
Growing your own broccoli is a rewarding experience that will
Conclusion
So, there you have it! Growing broccoli easily, right in your own backyard (or even in containers on your balcony!), is not only achievable but incredibly rewarding. Forget those expensive, often lackluster heads from the grocery store. Imagine biting into crisp, vibrant green florets bursting with flavor, knowing you nurtured them from seed to table. This DIY approach to broccoli cultivation empowers you to control the entire process, from selecting the perfect variety for your climate to ensuring it’s grown organically and free from harmful pesticides.
This isn’t just about saving money; it’s about connecting with your food, understanding its journey, and enjoying the unparalleled taste of homegrown goodness. The satisfaction of harvesting your own broccoli is truly unmatched. Plus, you’ll be contributing to a more sustainable lifestyle by reducing your reliance on commercially grown produce.
But the benefits don’t stop there. By following these simple steps, you’ll also be improving your gardening skills and gaining a deeper appreciation for the natural world. You’ll learn about soil composition, watering techniques, pest control, and the fascinating life cycle of this nutritious vegetable.
Why is this DIY trick a must-try? Because it puts you in control. You choose the variety, you control the growing environment, and you reap the rewards of fresh, delicious, and healthy broccoli. It’s a win-win-win!
Looking for variations? Consider these options:
* Succession Planting: Plant new broccoli seeds every few weeks to ensure a continuous harvest throughout the growing season.
* Companion Planting: Plant broccoli alongside herbs like rosemary, thyme, and sage to deter pests and enhance flavor. Marigolds are also excellent companions for pest control.
* Container Gardening: If you’re short on space, grow broccoli in large containers (at least 5 gallons). Choose dwarf varieties specifically bred for container gardening.
* Different Varieties: Experiment with different broccoli varieties, such as ‘Waltham 29’ for its heat tolerance or ‘DiCicco’ for its early maturity. Romanesco broccoli, with its unique fractal pattern, is another visually stunning and delicious option.
* Broccoli Raab: Try growing broccoli raab, also known as rapini. It has a slightly bitter, peppery flavor and is harvested before the broccoli head forms. It’s delicious sautéed with garlic and olive oil.
We wholeheartedly encourage you to give this DIY trick a try. Don’t be intimidated if you’re a beginner gardener. Broccoli is surprisingly resilient, and with a little care and attention, you’ll be amazed at what you can achieve.
Once you’ve harvested your first head of homegrown broccoli, we’d love to hear about your experience! Share your photos, tips, and any challenges you encountered in the comments below. Let’s build a community of broccoli-growing enthusiasts and inspire others to embrace the joys of homegrown food. Happy gardening!
FAQ
What is the best time of year to plant broccoli?
The best time to plant broccoli depends on your climate. In cooler regions with mild summers, you can plant broccoli in both spring and fall. For a spring crop, start seeds indoors 6-8 weeks before the last expected frost. Transplant seedlings outdoors 2-3 weeks before the last frost. For a fall crop, start seeds indoors in mid-summer and transplant seedlings outdoors in late summer or early fall. In warmer regions with hot summers, it’s best to focus on a fall or winter crop, as broccoli doesn’t thrive in high temperatures. Check your local extension office for specific planting recommendations for your area.
How much sunlight does broccoli need?
Broccoli requires at least 6 hours of direct sunlight per day to thrive. Choose a sunny location in your garden where your broccoli plants will receive ample sunlight throughout the day. If you’re growing broccoli in containers, make sure to place them in a sunny spot. If you don’t have enough natural sunlight, you can supplement with grow lights.
What kind of soil is best for growing broccoli?
Broccoli prefers well-drained, fertile soil that is rich in organic matter. The ideal soil pH is between 6.0 and 7.0. Before planting, amend your soil with compost, aged manure, or other organic matter to improve its fertility and drainage. You can also add a slow-release fertilizer to provide your broccoli plants with the nutrients they need. If your soil is heavy clay, consider adding sand or perlite to improve drainage.
How often should I water my broccoli plants?
Broccoli plants need consistent moisture to thrive. Water deeply and regularly, especially during dry periods. Aim to keep the soil consistently moist but not waterlogged. Water at the base of the plants to avoid wetting the foliage, which can increase the risk of fungal diseases. Mulching around your broccoli plants can help retain moisture in the soil and suppress weeds.
What are some common pests and diseases that affect broccoli?
Broccoli is susceptible to several pests and diseases, including cabbage worms, aphids, flea beetles, clubroot, and downy mildew. To prevent pest problems, inspect your plants regularly and handpick any pests you find. You can also use row covers to protect your plants from insects. To prevent diseases, choose disease-resistant varieties, practice crop rotation, and avoid overhead watering. If you encounter serious pest or disease problems, consult your local extension office for recommendations on appropriate treatments.
How do I know when my broccoli is ready to harvest?
Broccoli is ready to harvest when the central head is firm and the florets are tightly closed. The size of the head will vary depending on the variety, but generally, it should be about 6-8 inches in diameter. Use a sharp knife to cut the head from the plant, leaving a few inches of stem. After harvesting the central head, side shoots will often develop, providing you with additional harvests.
Can I grow broccoli in containers?
Yes, you can grow broccoli in containers, but you’ll need to choose a large container (at least 5 gallons) and use a well-draining potting mix. Dwarf varieties of broccoli are best suited for container gardening. Make sure to provide your container-grown broccoli plants with plenty of sunlight and water. You may also need to fertilize them more frequently than broccoli grown in the ground.
How do I store harvested broccoli?
To store harvested broccoli, wrap it loosely in plastic wrap and store it in the refrigerator. It will keep for about 3-5 days. You can also blanch and freeze broccoli for longer storage. To blanch broccoli, cut it into florets and boil it for 3-5 minutes. Then, immediately plunge it into ice water to stop the cooking process. Drain the broccoli and freeze it in freezer bags or containers.
Is it possible to grow broccoli from scraps?
While you can’t regrow a full broccoli head from scraps, you can potentially sprout the stem and grow broccoli microgreens. Cut the stem about 2 inches below the florets and place it in a shallow dish of water. Keep the dish in a sunny location and change the water every day. After a few days, small roots and shoots will start to emerge. You can then transplant the stem to a pot of soil and grow broccoli microgreens. These microgreens are packed with nutrients and can be used in salads, sandwiches, and other dishes.

Leave a Comment