

Grow Choi Sum Successfully, even if you think you have a “brown thumb”! Have you ever dreamt of stepping into your backyard and harvesting fresh, vibrant greens for a delicious stir-fry? Or perhaps you’re tired of paying exorbitant prices for organic vegetables at the grocery store? Well, dream no more! This DIY guide is your passport to a bountiful Choi Sum harvest, right from the comfort of your own home.
Choi Sum, also known as Chinese flowering cabbage, has been a staple in Asian cuisine for centuries. Its tender stalks and delicate leaves offer a slightly sweet and peppery flavor that elevates any dish. Beyond its culinary appeal, growing your own Choi Sum connects you to a rich agricultural heritage, a tradition passed down through generations.
But why should *you* bother with this DIY project? Because growing your own food is empowering! It’s a fantastic way to ensure you’re eating healthy, pesticide-free produce. Plus, it’s incredibly rewarding to nurture a plant from seed to table. This article will provide you with simple, effective tricks and hacks to grow Choi Sum successfully, regardless of your gardening experience. I’ll walk you through everything from seed selection to harvesting, ensuring you have a thriving Choi Sum patch in no time. Let’s get our hands dirty and start growing!
Choi Sum erfolgreich selbst anbauen: Dein umfassender DIY-Leitfaden
Hallo Gartenfreunde! Ich freue mich riesig, euch heute zu zeigen, wie ihr Choi Sum, dieses köstliche und vielseitige asiatische Blattgemüse, ganz einfach in eurem eigenen Garten oder sogar auf dem Balkon anbauen könnt. Choi Sum ist nicht nur superlecker, sondern auch reich an Vitaminen und Mineralstoffen. Und das Beste daran? Es ist wirklich unkompliziert anzubauen, selbst wenn ihr noch nicht so viel Erfahrung mit dem Gärtnern habt. Also, lasst uns loslegen!
Was du für den Choi Sum Anbau brauchst:
* Choi Sum Samen: Am besten Bio-Qualität, damit ihr sicher sein könnt, dass keine schädlichen Pestizide verwendet wurden.
* Anzuchterde oder Aussaaterde: Diese ist feiner und nährstoffärmer als normale Blumenerde und ideal für die Keimung der Samen.
* Töpfe oder Anzuchtschalen: Für die Voranzucht im Haus oder Gewächshaus.
* Gartenerde oder Gemüseerde: Für das spätere Umpflanzen ins Beet oder in größere Töpfe.
* Kompost oder organischer Dünger: Um den Boden mit Nährstoffen anzureichern.
* Gießkanne oder Sprühflasche: Für die Bewässerung.
* Gartengeräte: Spaten, Harke, Pflanzkelle.
* (Optional) Vlies oder Netz: Zum Schutz vor Schädlingen.
Die Vorbereitung: Der Schlüssel zum Erfolg
Bevor wir mit dem eigentlichen Anbau beginnen, ist eine gute Vorbereitung das A und O. Choi Sum mag einen sonnigen bis halbschattigen Standort und einen lockeren, nährstoffreichen Boden.
* Standortwahl: Sucht euch einen Platz in eurem Garten oder auf eurem Balkon aus, der mindestens 4-6 Stunden Sonne am Tag bekommt. Halbschatten ist auch in Ordnung, besonders in den heißen Sommermonaten.
* Boden vorbereiten: Lockert den Boden gründlich auf und entfernt Unkraut, Steine und Wurzeln. Mischt Kompost oder organischen Dünger unter, um den Boden mit Nährstoffen anzureichern. Wenn ihr Choi Sum in Töpfen anbauen wollt, verwendet hochwertige Gemüseerde.
Aussaat: So bringst du die Samen zum Keimen
Es gibt zwei Möglichkeiten, Choi Sum anzubauen: direkt ins Beet säen oder die Samen vorziehen. Ich persönlich bevorzuge die Voranzucht, da ich so die Kontrolle über die Keimung habe und die jungen Pflänzchen vor Schnecken und anderen Schädlingen schützen kann.
Voranzucht im Haus oder Gewächshaus:
1. Anzuchtschalen vorbereiten: Füllt die Anzuchtschalen oder Töpfe mit Anzuchterde.
2. Samen aussäen: Verteilt die Samen gleichmäßig auf der Erde und bedeckt sie leicht mit Erde (ca. 0,5 cm).
3. Bewässern: Befeuchtet die Erde vorsichtig mit einer Sprühflasche. Die Erde sollte feucht, aber nicht nass sein.
4. Warm stellen: Stellt die Anzuchtschalen an einen warmen und hellen Ort (ca. 18-20°C). Ein Mini-Gewächshaus oder eine Fensterbank eignen sich gut.
5. Feucht halten: Haltet die Erde gleichmäßig feucht, indem ihr sie regelmäßig besprüht.
6. Keimung abwarten: Die Samen keimen in der Regel innerhalb von 5-10 Tagen.
Direktsaat ins Beet:
1. Boden vorbereiten: Lockert den Boden gründlich auf und entfernt Unkraut, Steine und Wurzeln. Mischt Kompost oder organischen Dünger unter.
2. Saatrillen ziehen: Zieht mit einer Harke oder einem Stock Saatrillen im Abstand von ca. 20 cm.
3. Samen aussäen: Verteilt die Samen gleichmäßig in den Saatrillen und bedeckt sie leicht mit Erde (ca. 0,5 cm).
4. Bewässern: Befeuchtet die Erde vorsichtig mit einer Gießkanne.
5. Feucht halten: Haltet die Erde gleichmäßig feucht, bis die Samen keimen.
6. Vereinzeln: Sobald die Pflänzchen groß genug sind, vereinzelt ihr sie auf einen Abstand von ca. 15 cm.
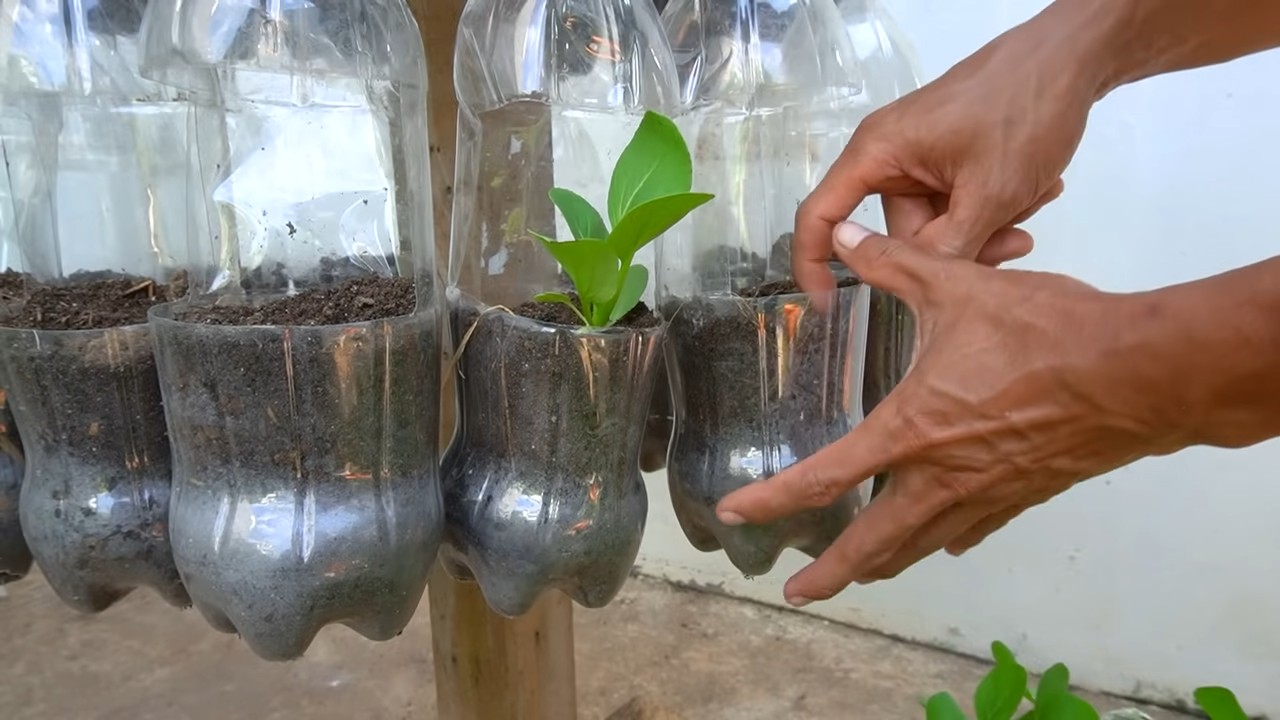
Umpflanzen: Den Pflänzchen mehr Platz geben
Sobald die jungen Choi Sum Pflänzchen kräftig genug sind (ca. 5-7 cm hoch), können sie ins Beet oder in größere Töpfe umgepflanzt werden.
1. Vorbereitung: Lockert den Boden im Beet oder füllt die Töpfe mit Gemüseerde.
2. Pflanzlöcher graben: Grabt Pflanzlöcher im Abstand von ca. 15-20 cm.
3. Pflänzchen vorsichtig ausheben: Hebt die Pflänzchen vorsichtig aus den Anzuchtschalen oder Töpfen. Achtet darauf, die Wurzeln nicht zu beschädigen.
4. Einsetzen: Setzt die Pflänzchen in die Pflanzlöcher und füllt sie mit Erde auf.
5. Andrücken: Drückt die Erde leicht an.
6. Bewässern: Gießt die Pflänzchen gründlich an.
Pflege: So bleibt dein Choi Sum gesund und kräftig
Choi Sum ist relativ pflegeleicht, aber ein paar Dinge solltet ihr beachten, damit er gut gedeiht.
* Bewässerung: Choi Sum braucht regelmäßig Wasser, besonders in trockenen Perioden. Die Erde sollte immer leicht feucht sein, aber nicht nass.
* Düngung: Düngt den Choi Sum alle 2-3 Wochen mit einem organischen Dünger oder Komposttee.
* Unkraut entfernen: Entfernt regelmäßig Unkraut, damit der Choi Sum nicht von Nährstoffen und Wasser konkurriert wird.
* Schutz vor Schädlingen: Choi Sum kann von Schnecken, Erdflöhen und Kohlweißlingen befallen werden. Schützt die Pflanzen mit einem Vlies oder Netz. Ihr könnt auch natürliche Schädlingsbekämpfungsmittel verwenden, wie z.B. Neemöl oder Brennnesseljauche.
* Blütenbildung verhindern: Choi Sum neigt dazu, schnell Blüten zu bilden, besonders bei hohen Temperaturen. Wenn die Pflanzen blühen, werden die Blätter bitter. Um die Blütenbildung zu verzögern, solltet ihr die Pflanzen regelmäßig ernten und für ausreichend Bewässerung sorgen.
Ernte: Der Lohn deiner Mühe
Choi Sum kann bereits 4-6 Wochen nach der Aussaat geerntet werden. Am besten erntet ihr die Pflanzen, bevor sie blühen.
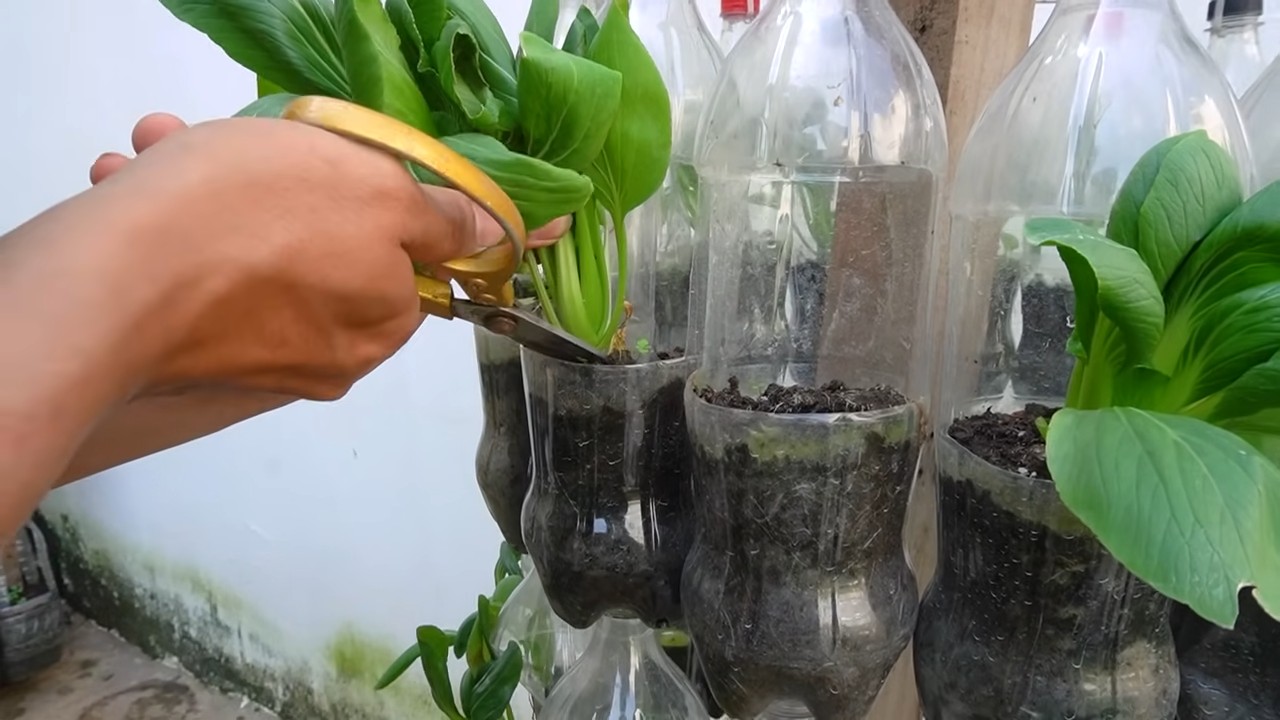
1. Ernten: Schneidet die Stängel mit einem scharfen Messer oder einer Schere knapp über dem Boden ab.
2. Regelmäßig ernten: Durch regelmäßiges Ernten fördert ihr das Wachstum neuer Blätter.
3. Lagerung: Choi Sum ist nicht lange haltbar. Am besten verarbeitet ihr ihn direkt nach der Ernte. Im Kühlschrank hält er sich in einem feuchten Tuch gewickelt ca. 2-3 Tage.
Choi Sum in der Küche: Vielseitig und lecker
Choi Sum ist ein unglaublich vielseitiges Gemüse, das in der asiatischen Küche sehr beliebt ist. Ihr könnt es roh in Salaten verwenden, dünsten, braten, kochen oder in Suppen und Eintöpfen verarbeiten.
* Roh: In Salaten oder als Beilage zu Dips.
* Gedünstet: Mit etwas Knoblauch und Ingwer gedünstet ist Choi Sum eine köstliche Beilage.
* Gebraten: In Wok-Gerichten oder als Zutat in Nudel- und Reisgerichten.
* Gekocht: In Suppen, Eintöpfen oder als Beilage zu Fleisch und Fisch.
Ich hoffe, dieser Leitfaden hat euch geholfen, Choi Sum erfolgreich selbst anzubauen. Es ist wirklich ein lohnendes Projekt, das euch mit frischem, gesundem und leckerem Gemüse belohnt. Viel Spaß beim Gärtnern!
Conclusion
So, there you have it! Growing your own Choi Sum successfully isn’t some mystical gardening feat reserved for seasoned professionals. It’s an achievable and incredibly rewarding experience that brings fresh, vibrant greens right to your kitchen table. We’ve walked through the essential steps, from seed selection and soil preparation to pest control and harvesting, providing you with the knowledge and confidence to embark on this delicious journey.
Why is this DIY trick a must-try? Because store-bought Choi Sum simply can’t compare to the flavor and satisfaction of harvesting your own. Imagine the crisp, slightly sweet taste of freshly picked leaves, knowing exactly where they came from and that they’re free from harmful pesticides. Beyond the taste, growing your own food connects you to nature, reduces your carbon footprint, and provides a healthy, sustainable source of vegetables. Plus, it’s a fantastic way to de-stress and enjoy the simple pleasures of gardening.
But the beauty of growing Choi Sum lies in its adaptability. Feel free to experiment with different varieties! Try growing dwarf Choi Sum for smaller spaces or explore cultivars with different leaf colors for added visual appeal. Consider companion planting with herbs like basil or mint to deter pests and enhance the flavor of your Choi Sum. You can also adjust the planting schedule to extend your harvest season, ensuring a continuous supply of fresh greens throughout the year.
Don’t be afraid to get your hands dirty and embrace the learning process. Gardening is all about experimentation and adapting to your local climate and conditions. Even if you encounter a few challenges along the way, remember that every mistake is an opportunity to learn and improve.
We wholeheartedly encourage you to give this DIY trick a try. Start small, be patient, and most importantly, have fun! We’re confident that you’ll be amazed by the results. And once you’ve harvested your first batch of homegrown Choi Sum, we’d love to hear about your experience. Share your tips, successes, and even your challenges in the comments below. Let’s build a community of Choi Sum enthusiasts and inspire others to discover the joys of growing their own food. Your insights could be invaluable to fellow gardeners!
Remember, the key to growing Choi Sum successfully is consistent care and attention. So, grab your seeds, prepare your soil, and get ready to enjoy the delicious rewards of your labor. Happy gardening!
Frequently Asked Questions (FAQ)
What is the best time of year to plant Choi Sum?
Choi Sum thrives in cooler weather, making spring and fall the ideal planting seasons. In regions with mild winters, you can even grow it year-round. Avoid planting during the hottest months of summer, as high temperatures can cause the plants to bolt (go to seed prematurely), resulting in bitter-tasting leaves. For spring planting, start seeds indoors 4-6 weeks before the last expected frost. For fall planting, sow seeds directly into the garden 6-8 weeks before the first expected frost. Consider your local climate and adjust planting times accordingly.
How much sunlight does Choi Sum need?
Choi Sum requires at least 6 hours of sunlight per day to grow optimally. Choose a location in your garden that receives full sun for most of the day. If you live in a particularly hot climate, providing some afternoon shade can help prevent the plants from bolting. If you’re growing Choi Sum indoors, use grow lights to supplement natural sunlight and ensure adequate light exposure.
What type of soil is best for growing Choi Sum?
Choi Sum prefers well-drained, fertile soil that is rich in organic matter. Amend your garden soil with compost or well-rotted manure before planting to improve drainage and nutrient content. The ideal soil pH for Choi Sum is between 6.0 and 7.5. You can test your soil pH using a soil testing kit and adjust it accordingly with lime (to raise pH) or sulfur (to lower pH).
How often should I water Choi Sum?
Choi Sum needs consistent moisture to thrive. Water deeply and regularly, especially during dry periods. Aim to keep the soil consistently moist but not waterlogged. Overwatering can lead to root rot, while underwatering can cause the plants to wilt and become stressed. Check the soil moisture regularly an
So, there you have it! Growing your own Choi Sum successfully isn’t some mystical gardening feat reserved for seasoned professionals. It’s an achievable and incredibly rewarding experience that brings fresh, vibrant greens right to your kitchen table. We’ve walked through the essential steps, from seed selection and soil preparation to pest control and harvesting, providing you with the knowledge and confidence to embark on this delicious journey.
Why is this DIY trick a must-try? Because store-bought Choi Sum simply can’t compare to the flavor and satisfaction of harvesting your own. Imagine the crisp, slightly sweet taste of freshly picked leaves, knowing exactly where they came from and that they’re free from harmful pesticides. Beyond the taste, growing your own food connects you to nature, reduces your carbon footprint, and provides a healthy, sustainable source of vegetables. Plus, it’s a fantastic way to de-stress and enjoy the simple pleasures of gardening.
But the beauty of growing Choi Sum lies in its adaptability. Feel free to experiment with different varieties! Try growing dwarf Choi Sum for smaller spaces or explore cultivars with different leaf colors for added visual appeal. Consider companion planting with herbs like basil or mint to deter pests and enhance the flavor of your Choi Sum. You can also adjust the planting schedule to extend your harvest season, ensuring a continuous supply of fresh greens throughout the year.
Don’t be afraid to get your hands dirty and embrace the learning process. Gardening is all about experimentation and adapting to your local climate and conditions. Even if you encounter a few challenges along the way, remember that every mistake is an opportunity to learn and improve.
We wholeheartedly encourage you to give this DIY trick a try. Start small, be patient, and most importantly, have fun! We’re confident that you’ll be amazed by the results. And once you’ve harvested your first batch of homegrown Choi Sum, we’d love to hear about your experience. Share your tips, successes, and even your challenges in the comments below. Let’s build a community of Choi Sum enthusiasts and inspire others to discover the joys of growing their own food. Your insights could be invaluable to fellow gardeners!
Remember, the key to growing Choi Sum successfully is consistent care and attention. So, grab your seeds, prepare your soil, and get ready to enjoy the delicious rewards of your labor. Happy gardening!
Frequently Asked Questions (FAQ)
What is the best time of year to plant Choi Sum?
Choi Sum thrives in cooler weather, making spring and fall the ideal planting seasons. In regions with mild winters, you can even grow it year-round. Avoid planting during the hottest months of summer, as high temperatures can cause the plants to bolt (go to seed prematurely), resulting in bitter-tasting leaves. For spring planting, start seeds indoors 4-6 weeks before the last expected frost. For fall planting, sow seeds directly into the garden 6-8 weeks before the first expected frost. Consider your local climate and adjust planting times accordingly.
How much sunlight does Choi Sum need?
Choi Sum requires at least 6 hours of sunlight per day to grow optimally. Choose a location in your garden that receives full sun for most of the day. If you live in a particularly hot climate, providing some afternoon shade can help prevent the plants from bolting. If you’re growing Choi Sum indoors, use grow lights to supplement natural sunlight and ensure adequate light exposure.
What type of soil is best for growing Choi Sum?
Choi Sum prefers well-drained, fertile soil that is rich in organic matter. Amend your garden soil with compost or well-rotted manure before planting to improve drainage and nutrient content. The ideal soil pH for Choi Sum is between 6.0 and 7.5. You can test your soil pH using a soil testing kit and adjust it accordingly with lime (to raise pH) or sulfur (to lower pH).
How often should I water Choi Sum?
Choi Sum needs consistent moisture to thrive. Water deeply and regularly, especially during dry periods. Aim to keep the soil consistently moist but not waterlogged. Overwatering can lead to root rot, while underwatering can cause the plants to wilt and become stressed. Check the soil moisture regularly and adjust your watering schedule as needed. Mulching around the plants can help retain moisture and suppress weeds.
What are some common pests and diseases that affect Choi Sum?
Common pests that can affect Choi Sum include aphids, flea beetles, cabbage worms, and slugs. Regularly inspect your plants for signs of infestation and take appropriate action. You can use organic pest control methods such as insecticidal soap, neem oil, or diatomaceous earth to control pests. Diseases that can affect Choi Sum include downy mildew and clubroot. Ensure good air circulation around the plants and avoid overhead watering to prevent fungal diseases. Practice crop rotation to reduce the risk of soilborne diseases.
How do I harvest Choi Sum?
You can begin harvesting Choi Sum when the plants are about 6-8 inches tall. Harvest the outer leaves first, allowing the inner leaves to continue growing. You can also harvest the entire plant by cutting it off at the base. Harvest Choi Sum in the morning when the leaves are crisp and fresh. Regular harvesting encourages continued growth and prevents the plants from bolting.
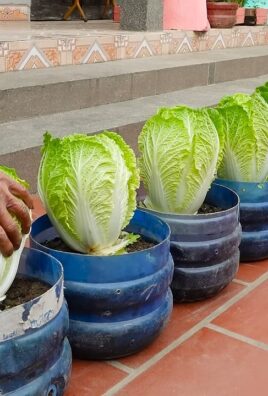
Can I grow Choi Sum in containers?
Yes, Choi Sum can be successfully grown in containers. Choose a container that is at least 8-10 inches deep and wide to provide adequate space for the roots to grow. Use a well-draining potting mix and ensure that the container has drainage holes. Water regularly and fertilize every 2-3 weeks with a balanced liquid fertilizer. Place the container in a location that receives at least 6 hours of sunlight per day.
How do I prevent Choi Sum from bolting?
Bolting is a common problem with Choi Sum, especially during hot weather. To prevent bolting, choose bolt-resistant varieties, plant during cooler seasons, provide afternoon shade, and water regularly. Avoid stressing the plants by providing adequate nutrients and protecting them from pests and diseases. Harvest regularly to encourage continued growth and prevent the plants from going to seed.
Can I eat the flowers of Choi Sum?
Yes, the flowers of Choi Sum are edible and have a slightly sweet, peppery flavor. You can add them to salads, stir-fries, or use them as a garnish. However, once the plant starts to flower, the leaves may become more bitter.
How do I store harvested Choi Sum?
Store harvested Choi Sum in the refrigerator in a plastic bag or container. It will keep for several days. For longer storage, you can blanch and freeze the leaves.
Leave a Comment