

Grow Lemongrass at Home: Imagine stepping outside your door and snipping fresh, fragrant lemongrass to add a zesty kick to your favorite Thai curry or a soothing cup of herbal tea. Sounds dreamy, right? Well, it doesn’t have to be just a dream! This DIY guide will unlock the secrets to cultivating your own thriving lemongrass patch, right in your backyard or even on your sunny windowsill.
Lemongrass, with its vibrant citrusy aroma, has been a staple in Asian cuisine and traditional medicine for centuries. Originating in Southeast Asia, it’s revered not only for its culinary uses but also for its potential health benefits, from aiding digestion to repelling pesky insects. For generations, families have passed down the knowledge of how to grow lemongrass at home, ensuring a constant supply of this versatile herb.
In today’s busy world, who has time to run to the store every time a recipe calls for lemongrass? Plus, store-bought lemongrass can sometimes be a bit… lackluster. That’s where this DIY trick comes in! I’m going to show you a simple, cost-effective method to propagate lemongrass from store-bought stalks. Not only will you save money, but you’ll also have the satisfaction of nurturing your own little lemongrass jungle. Get ready to ditch the grocery store runs and embrace the joy of homegrown flavor!
Zitronengras zu Hause anbauen: Ein DIY-Leitfaden
Hallo zusammen! Ich liebe den frischen, zitronigen Duft und Geschmack von Zitronengras. Es ist nicht nur eine fantastische Zutat für asiatische Gerichte, sondern auch ein natürliches Insektenschutzmittel und kann für beruhigende Tees verwendet werden. Anstatt es immer im Supermarkt zu kaufen, habe ich beschlossen, es selbst anzubauen. Und rate mal was? Es ist einfacher als du denkst! Hier ist meine Schritt-für-Schritt-Anleitung, wie du dein eigenes Zitronengras zu Hause anbauen kannst, egal ob du einen Garten oder nur einen sonnigen Fensterplatz hast.
Was du brauchst
Bevor wir loslegen, hier eine Liste der Dinge, die du benötigst:
* Zitronengrasstängel: Am besten aus dem Supermarkt oder Asiamarkt. Achte darauf, dass sie an der Basis noch Wurzeln haben oder zumindest eine kleine Verdickung, aus der Wurzeln wachsen können.
* Ein Glas oder eine Vase: Um die Stängel zu bewurzeln.
* Wasser: Leitungswasser ist in Ordnung.
* Ein Pflanzgefäß: Wenn du es in einen Topf pflanzen möchtest.
* Blumenerde: Gut durchlässige Blumenerde ist ideal.
* Gartenschere oder ein scharfes Messer: Zum Trimmen der Stängel.
* Dünger (optional): Für zusätzliches Wachstum. Ich verwende gerne einen organischen Flüssigdünger.
* Ein sonniger Standort: Zitronengras liebt die Sonne!
Zitronengras bewurzeln: Schritt-für-Schritt-Anleitung
Dieser erste Schritt ist entscheidend, um sicherzustellen, dass dein Zitronengras gut anwächst.
1. Die Stängel vorbereiten: Nimm deine Zitronengrasstängel und entferne alle trockenen oder braunen äußeren Blätter. Schneide die oberen Enden der Stängel mit einer Gartenschere oder einem scharfen Messer auf etwa 5-8 cm Länge zurück. Dies hilft dem Stängel, seine Energie auf die Wurzelbildung zu konzentrieren.
2. Die Stängel ins Wasser stellen: Fülle dein Glas oder deine Vase mit Wasser. Stelle die vorbereiteten Zitronengrasstängel so hinein, dass die Basis (das Ende, an dem die Wurzeln sein sollten) im Wasser steht. Achte darauf, dass die Blätter nicht im Wasser sind, da sie sonst faulen können.
3. An einen sonnigen Ort stellen: Stelle das Glas mit den Stängeln an einen sonnigen Ort, z. B. auf eine Fensterbank. Zitronengras braucht viel Licht, um zu wachsen.
4. Wasser wechseln: Wechsle das Wasser alle paar Tage, um es frisch und sauber zu halten. Dies verhindert das Wachstum von Bakterien und fördert die Wurzelbildung.
5. Geduld haben: Es kann ein paar Wochen dauern, bis die Wurzeln wachsen. Sei geduldig und beobachte die Stängel genau. Du solltest innerhalb von 1-3 Wochen kleine weiße Wurzeln sehen, die aus der Basis sprießen.
Zitronengras einpflanzen: So geht’s
Sobald deine Zitronengrasstängel Wurzeln haben, ist es Zeit, sie einzupflanzen!
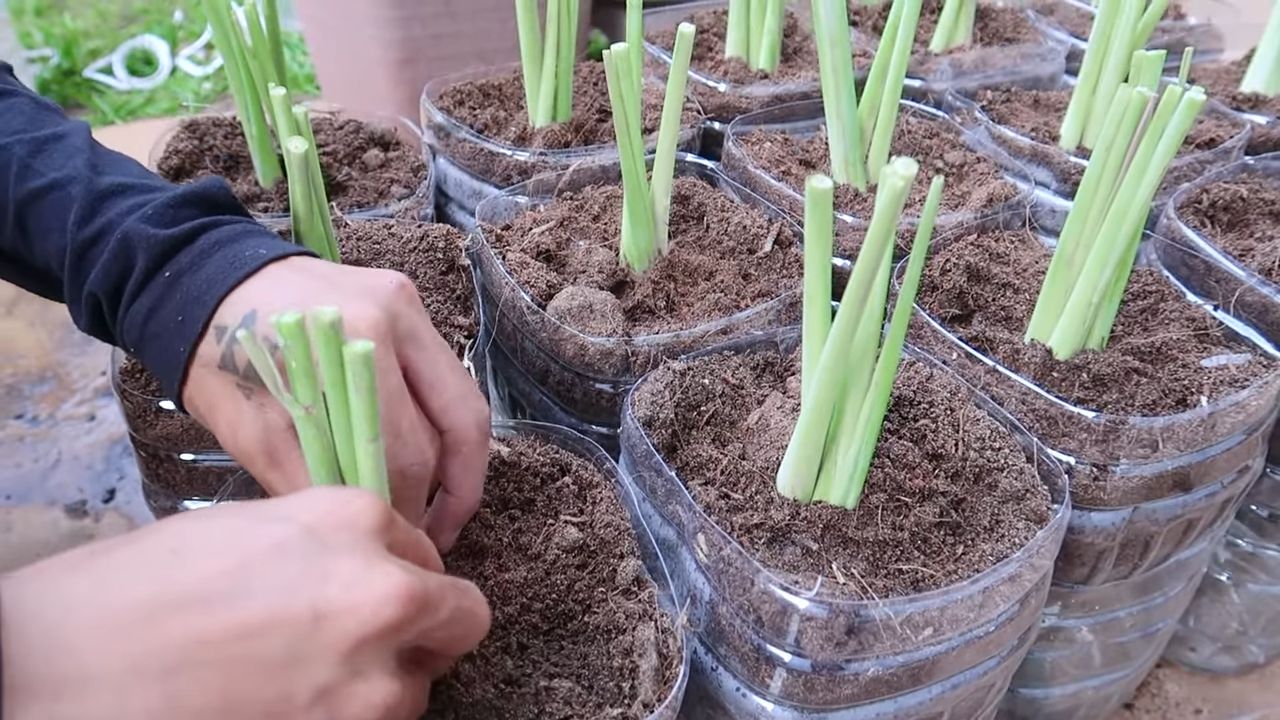
1. Das Pflanzgefäß vorbereiten: Wähle ein Pflanzgefäß, das mindestens 30 cm breit und tief ist. Zitronengras braucht Platz zum Wachsen. Fülle das Pflanzgefäß mit gut durchlässiger Blumenerde.
2. Die Stängel einpflanzen: Grabe ein kleines Loch in die Erde, das groß genug ist, um die Wurzeln des Zitronengrases aufzunehmen. Nimm den bewurzelten Stängel vorsichtig aus dem Wasser und setze ihn in das Loch. Achte darauf, dass die Wurzeln gut bedeckt sind.
3. Die Erde andrücken: Drücke die Erde um den Stängel herum leicht an, um ihn zu stabilisieren.
4. Gießen: Gieße das Zitronengras gründlich, bis das Wasser aus den Drainagelöchern des Pflanzgefäßes abläuft.
5. An einen sonnigen Ort stellen: Stelle das Pflanzgefäß an einen sonnigen Ort, an dem das Zitronengras mindestens 6 Stunden Sonnenlicht pro Tag bekommt.
Zitronengras pflegen: Tipps und Tricks
Die Pflege deines Zitronengrases ist entscheidend für ein gesundes Wachstum und eine reiche Ernte.
1. Gießen: Zitronengras braucht regelmäßige Bewässerung, besonders während der heißen Sommermonate. Halte die Erde feucht, aber nicht durchnässt. Überprüfe die Erde regelmäßig und gieße, wenn sich die oberste Schicht trocken anfühlt.
2. Düngen: Dünge dein Zitronengras alle paar Wochen mit einem organischen Flüssigdünger. Dies fördert das Wachstum und sorgt für gesunde, kräftige Stängel. Ich verwende gerne einen Dünger, der reich an Stickstoff ist, da dies das Blattwachstum fördert.
3. Schneiden: Schneide die Blätter regelmäßig, um das Wachstum zu fördern. Du kannst die Blätter einfach mit einer Schere abschneiden, wenn du sie zum Kochen benötigst. Entferne auch alle trockenen oder braunen Blätter, um die Pflanze gesund zu halten.
4. Überwintern: Wenn du in einer Region mit kalten Wintern lebst, musst du dein Zitronengras überwintern. Zitronengras ist nicht frosthart und stirbt ab, wenn es Frost ausgesetzt ist. Du kannst das Pflanzgefäß ins Haus holen und es an einen sonnigen Ort stellen. Reduziere die Bewässerung während der Wintermonate. Alternativ kannst du die Stängel ausgraben und sie in einem kühlen, dunklen Raum lagern, bis das Frühjahr kommt.
5. Schädlinge und Krankheiten: Zitronengras ist relativ resistent gegen Schädlinge und Krankheiten. Gelegentlich können sich Blattläuse oder Spinnmilben ansiedeln. Du kannst diese mit einem kräftigen Wasserstrahl oder mit einem biologischen Insektizid bekämpfen.
Zitronengras ernten: Wann und wie
Das Ernten von Zitronengras ist der lohnendste Teil des Anbaus!
1. Wann ernten: Du kannst dein Zitronengras ernten, sobald die Stängel mindestens 30 cm hoch sind.
2. Wie ernten: Schneide die Stängel mit einem scharfen Messer oder einer Gartenschere an der Basis ab. Entferne die äußeren Blätter und verwende nur den inneren, zarten Teil des Stängels zum Kochen.
3. Lagerung: Du kannst Zitronengras im Kühlschrank in einem Plastikbeutel bis zu einer Woche aufbewahren. Alternativ kannst du es einfrieren, um es länger haltbar zu machen.
Zusätzliche Tipps und Tricks
* Vermehrung: Du kannst Zitronengras auch durch Teilung vermehren. Teile die Pflanze im Frühjahr oder Herbst in mehrere Teile und pflanze sie in separate Pflanzgefäße.
* Boden: Zitronengras bevorzugt gut durchlässigen Boden, der reich an organischen Stoffen ist. Du kannst Kompost oder andere organische Materialien in die Erde einarbeiten, um die Bodenqualität zu verbessern.
* Sonnenlicht: Zitronengras braucht mindestens 6 Stunden Sonnenlicht pro Tag. Wenn du es im Haus anbaust, stelle es an ein sonniges Fenster oder verwende eine Pflanzenlampe.
* Wasserqualität: Vermeide es, Zitronengras mit hartem Wasser zu gießen, da dies das Wachstum beeinträchtigen kann. Verwende stattdessen Regenwasser oder gefiltertes Wasser.
* Verwendung: Zitronengras ist vielseitig einsetzbar. Du kannst es zum Kochen, für Tees, als Insektenschutzmittel oder zur Herstellung von ätherischen Ölen verwenden.
Häufige Probleme und Lösungen
* Gelbe Blätter: Gelbe Blätter können ein Zeichen für Überwässerung oder Nährstoffmangel sein. Reduziere die Bewässerung und dünge die Pflanze.
* Braune Blätter: Braune Blätter können ein Zeichen für Trockenheit oder Sonnenbrand sein. Gieße die Pflanze regelmäßig und stelle sie an einen Ort mit etwas Schatten.
* Langsames Wachstum: Langsames Wachstum kann ein Zeichen für zu wenig Sonnenlicht oder Nährstoffm
Conclusion
So, there you have it! Growing lemongrass at home is not only achievable, but it’s also incredibly rewarding. Forget those wilted, overpriced stalks at the grocery store. Imagine stepping into your own backyard or onto your balcony and harvesting fresh, fragrant lemongrass whenever you need it. This simple DIY trick transforms a humble grocery store purchase into a thriving, sustainable source of flavor for your culinary adventures.
Why is this a must-try? Because it’s economical, environmentally friendly, and empowers you to control the quality of your ingredients. You’ll have access to fresher, more flavorful lemongrass than you could ever buy, and you’ll reduce your reliance on commercially grown produce, which often travels long distances and contributes to carbon emissions. Plus, the process itself is surprisingly easy and satisfying. Watching those roots sprout and the stalks grow is a miniature miracle right before your eyes.
But the benefits don’t stop there. Think of the possibilities! You can experiment with different varieties of lemongrass, each with its own unique aroma and flavor profile. You can use your homegrown lemongrass to brew fragrant teas, infuse oils and vinegars, or create your own signature spice blends. You can even dry the leaves for long-term storage, ensuring you always have a supply on hand.
Consider these variations to personalize your lemongrass growing experience:
* Container Gardening: If you’re short on space, grow your lemongrass in a large pot on your patio or balcony. Choose a well-draining potting mix and ensure the pot has adequate drainage holes.
* Hydroponics: For a more advanced approach, try growing lemongrass hydroponically. This method allows you to control the nutrient levels and growing environment, potentially leading to faster growth and higher yields.
* Companion Planting: Plant lemongrass alongside other herbs and vegetables that benefit from its presence. Lemongrass is known to repel certain pests, making it a valuable addition to your garden.
Ultimately, growing lemongrass at home is about more than just saving money or having access to fresh ingredients. It’s about connecting with nature, learning new skills, and taking control of your food supply. It’s about experiencing the joy of nurturing a plant from a simple stalk to a thriving source of flavor and fragrance.
We wholeheartedly encourage you to give this DIY trick a try. It’s a simple, rewarding project that will enhance your culinary creations and bring a touch of the tropics to your home. Once you’ve experienced the satisfaction of harvesting your own lemongrass, you’ll never go back to buying it at the store.
Don’t be shy! Share your experiences with us. We’d love to hear about your successes, your challenges, and any variations you’ve tried. Post photos of your lemongrass plants, share your favorite recipes, and let us know how this DIY trick has transformed your cooking. Let’s create a community of lemongrass growers and inspire others to embrace the joy of homegrown herbs. So, grab a stalk of lemongrass, a glass of water, and get ready to embark on a flavorful adventure! Your journey to fresh, homegrown lemongrass starts now.
Frequently Asked Questions (FAQ)
How long does it take for lemongrass to root in water?
Generally, you can expect to see roots emerging from your lemongrass stalk within 2-4 weeks. The exact timeframe can vary depending on factors such as the temperature of the water, the quality of the lemongrass stalk, and the amount of sunlight it receives. Be patient and change the water every few days to keep it fresh. If you don’t see any roots after four weeks, it might be worth trying a different stalk or adjusting the growing conditions.
What is the best type of water to use for rooting lemongrass?
Tap water is generally fine for rooting lemongrass, but it’s best to let it sit out for 24 hours to allow chlorine to dissipate. Alternatively, you can use filtered water or rainwater. Avoid using distilled water, as it lacks the minerals that can benefit root growth.
How much sunlight does lemongrass need?
Lemongrass thrives in full sun, meaning it needs at least 6-8 hours of direct sunlight per day. If you’re growing it indoors, place it near a sunny window or supplement with a grow light. Insufficient sunlight can lead to weak, leggy growth.
What kind of soil is best for planting lemongrass?
Lemongrass prefers well-draining soil that is rich in organic matter. A good potting mix for containers would be a blend of potting soil, compost, and perlite or vermiculite. If planting in the ground, amend the soil with compost or other organic matter to improve drainage and fertility. The ideal soil pH is between 6.0 and 7.0.
How often should I water my lemongrass plant?
Water your lemongrass plant regularly, especially during hot, dry weather. The soil should be kept consistently moist, but not waterlogged. Check the soil moisture by sticking your finger into the soil. If the top inch feels dry, it’s time to water. Reduce watering during the winter months when the plant is not actively growing.
How do I harvest lemongrass?
To harvest lemongrass, simply cut off the stalks near the base of the plant. Use a sharp knife or pruning shears to make a clean cut. You can harvest individual stalks as needed, or you can harvest the entire plant at once. When harvesting, focus on the thicker, more mature stalks, leaving the younger, thinner stalks to continue growing.
Can I grow lemongrass indoors year-round?
Yes, you can grow lemongrass indoors year-round, provided you give it enough sunlight and water. Place it near a sunny window or supplement with a grow light. Be sure to rotate the plant regularly to ensure even growth. You may need to repot it into a larger container as it grows.
Is lemongrass a perennial or an annual?
Lemongrass is a perennial in warm climates (USDA zones 9-11). In colder climates, it is typically grown as an annual or overwintered indoors. If you live in a cold climate, you can bring your lemongrass plant indoors before the first frost and keep it in a sunny location until spring.
How do I overwinter lemongrass?
To overwinter lemongrass, dig it up from the garden before the first frost and pot it in a large container. Cut back the foliage to about 6 inches. Place the container in a cool, bright location, such as a sunroom or greenhouse. Water sparingly, allowing the soil to dry out slightly between waterings. In the spring, gradually acclimate the plant to outdoor conditions before planting it back in the garden.
What are some common problems with growing lemongrass?
Some common problems with growing lemongrass include:
* Yellowing leaves: This can be caused by overwatering, underwatering, nutrient deficiencies, or pests.
* Root rot: This is caused by overwatering and poor drainage.
* Pests: Lemongrass can be susceptible to pests such as aphids, spider mites, and mealybugs.
* Lack of sunlight: Insufficient sunlight can lead to weak, leggy growth.
Can I grow lemongrass from seed?
While it’s possible to grow lemongrass from seed, it’s generally easier and faster to propagate it from cuttings. Seeds can be slow to germinate and may not produce plants that are true to type.
What are the culinary uses for lemongrass?
Lemongrass is a versatile ingredient that can be used in a variety of dishes. It is commonly used in Southeast Asian cuisine, particularly in Thai, Vietnamese, and Indonesian dishes. It can be used to flavor soups, stews, curries, stir-fries, and marinades. It can also be used to make tea or infused into oils and vinegars. The lower, more tender part of the stalk is typically used in cooking.
Is lemongrass safe for pets?
While lemongrass is generally considered safe for pets in small amounts, it can cause digestive upset if ingested in large quantities. It’s best to keep lemongrass plants out of reach of pets.
Does lemongrass have any health benefits?
Lemongrass is believed to have several health benefits, including anti-inflammatory, antioxidant, and antimicrobial properties. It is also a good source of vitamins and minerals. However, more research is needed to confirm these benefits.


Leave a Comment