

Grow Lemons Indoors from Seed? Absolutely! Imagine plucking a sun-kissed lemon, bursting with flavor, right from a tree you nurtured inside your very own home. Sounds like a dream, right? Well, it’s a dream within reach, and I’m here to guide you through the surprisingly simple process of cultivating your own indoor citrus oasis.
For centuries, citrus fruits have held a special place in cultures around the world, symbolizing prosperity, health, and even cleansing. From ancient Roman gardens to the elaborate orangeries of European royalty, the allure of growing these vibrant fruits has captivated gardeners for generations. While traditionally grown in warmer climates, modern techniques now allow us to bring the sunshine indoors and grow lemons indoors from seed, regardless of our geographical location.
But why bother, you might ask? Well, beyond the sheer joy of watching a tiny seed sprout into a thriving tree, growing your own lemons offers a unique connection to nature, a sustainable source of fresh fruit, and a beautiful, fragrant addition to your home. Plus, store-bought lemons can sometimes lack that intense, zesty flavor. With your own homegrown lemons, you’ll have the freshest, most flavorful fruit at your fingertips, perfect for everything from lemonade to gourmet cooking. So, ditch the store-bought lemons and let’s embark on this exciting journey together! I’m excited to share my favorite tips and tricks to help you successfully grow lemons indoors from seed.
Growing Lemons Indoors from Seed: A Zesty DIY Adventure!
Okay, lemon lovers, gather ’round! Ever dreamt of having your own little lemon tree, bursting with sunshine-yellow fruit, right in your living room? Well, you can! Growing lemons from seed is a bit of a long game, but it’s incredibly rewarding. Plus, it’s a fantastic DIY project that’ll keep you busy and bring a touch of the Mediterranean to your home. Let’s dive in!
What You’ll Need: Your Lemon-Growing Arsenal
Before we get our hands dirty, let’s make sure we have everything we need. This is our checklist for lemon-growing success:
* Lemon Seeds: Obviously! Choose organic lemons from your local grocery store or farmer’s market. Organic is key to avoid seeds that may have been treated.
* Small Pots or Seedling Trays: These will be our nurseries for the baby lemon trees.
* Potting Mix: A well-draining potting mix is crucial. Citrus-specific mixes are great, but a general-purpose mix amended with perlite works too.
* Clear Plastic Wrap or a Plastic Bag: To create a mini-greenhouse effect.
* Spray Bottle: For misting the soil.
* Warm, Sunny Location: Lemons love sunshine!
* Grow Light (Optional): If you don’t have a super sunny spot, a grow light can be a lifesaver, especially during winter.
* Larger Pot (Eventually): For when your seedlings outgrow their initial homes.
* Fertilizer: A citrus-specific fertilizer will keep your lemon tree happy and healthy.
* Patience: This is probably the most important ingredient! Growing lemons from seed takes time.
Phase 1: Seed Preparation – Waking Up the Little Guys
Lemon seeds have a tough outer shell, so we need to give them a little nudge to help them germinate. Here’s how we do it:
1. Extract the Seeds: Cut open your lemon and carefully remove the seeds. Try to choose seeds that look plump and healthy.
2. Clean the Seeds: Rinse the seeds thoroughly under running water to remove any pulp or sugary residue. This is important to prevent mold growth.
3. The Paper Towel Method: This is my favorite way to germinate seeds. Dampen a paper towel (not soaking wet, just damp) and place the seeds on one half. Fold the other half of the paper towel over the seeds.
4. Bag It Up: Place the damp paper towel with the seeds inside a plastic bag or a sealed container. This will help retain moisture.
5. Warmth is Key: Store the bag in a warm place, like on top of your refrigerator or near a radiator. The ideal temperature is around 70-75°F (21-24°C).
6. Check Regularly: Check the paper towel every few days to make sure it’s still damp. If it’s drying out, lightly mist it with water. You should start to see tiny roots emerging from the seeds within a week or two.
Phase 2: Planting the Germinated Seeds – Giving Them a Home
Once your seeds have sprouted, it’s time to give them a proper home in some soil.
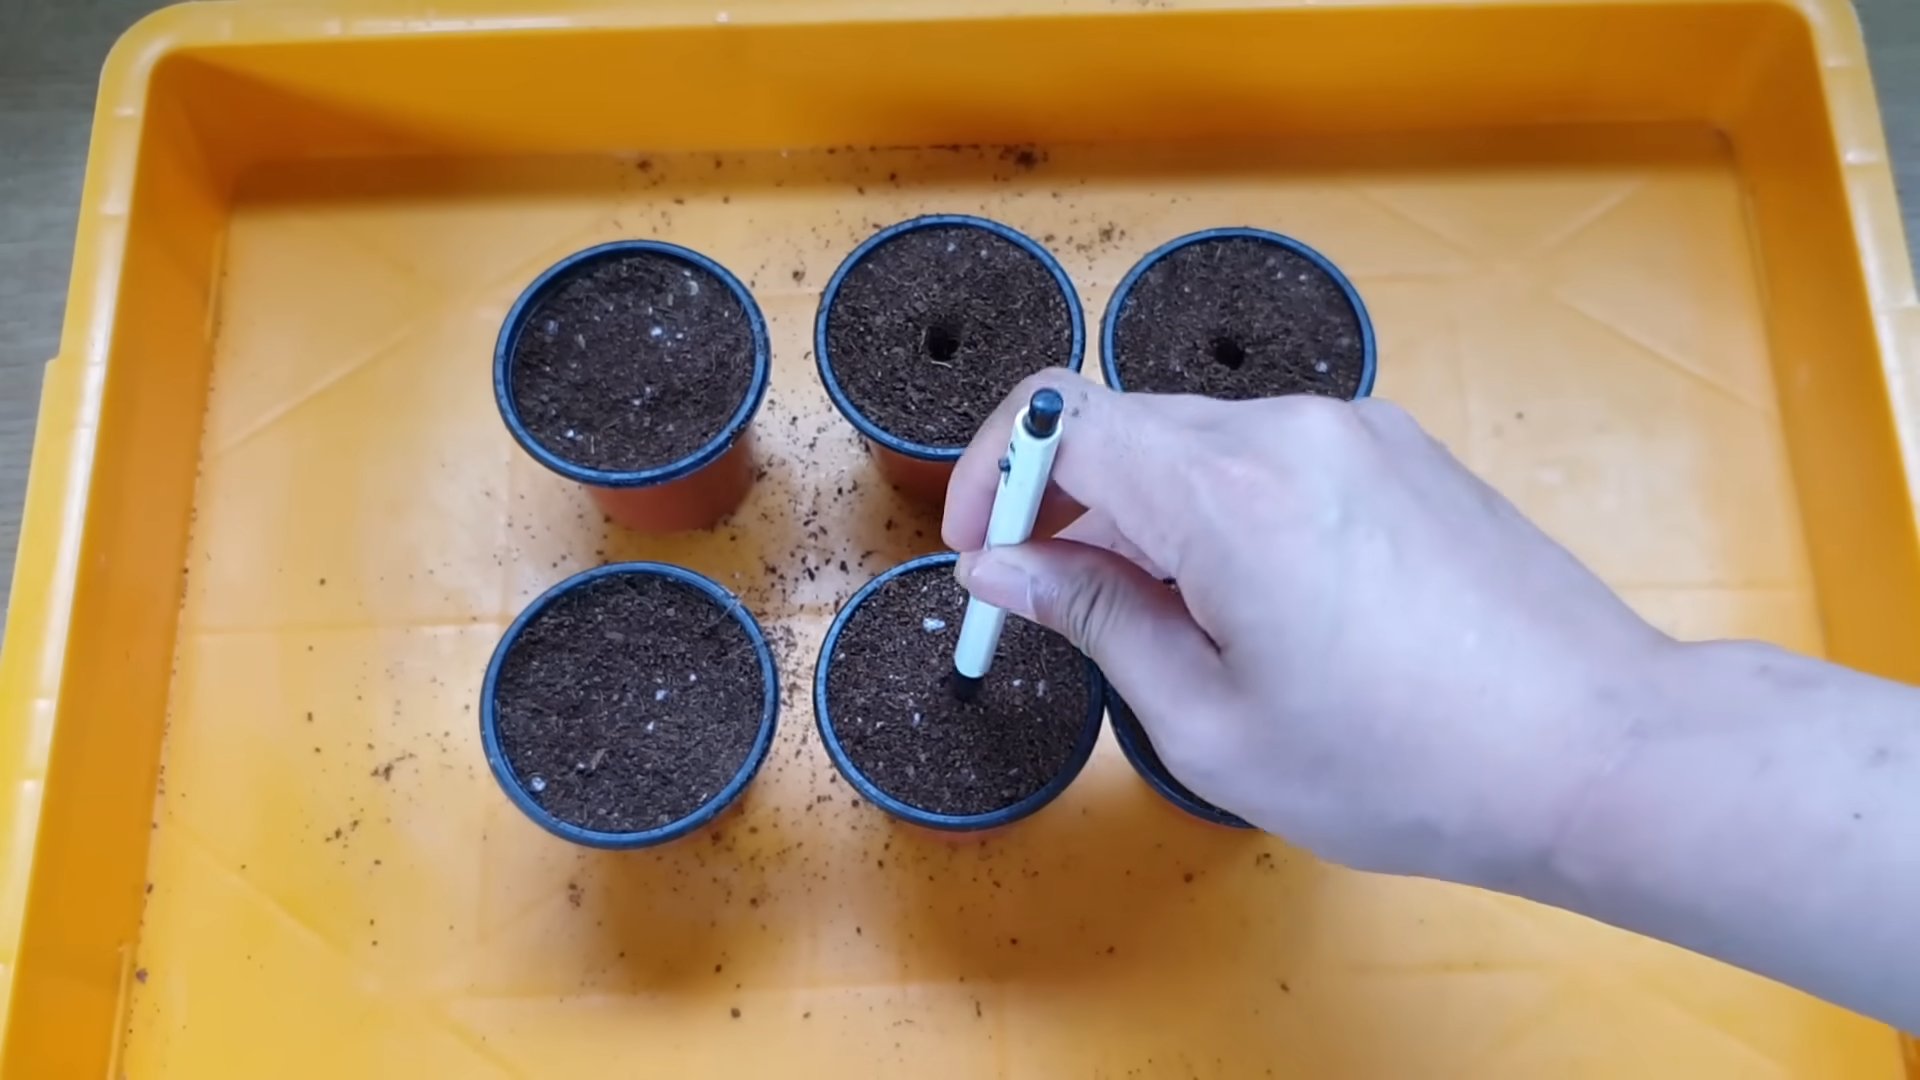
1. Prepare Your Pots: Fill your small pots or seedling trays with well-draining potting mix. Leave about half an inch of space at the top of the pot.
2. Make a Hole: Use your finger or a pencil to create a small hole in the center of each pot, about half an inch deep.
3. Gently Plant the Seeds: Carefully remove the sprouted seeds from the paper towel. Be very gentle, as the roots are delicate. Place each seed in a hole with the root facing down.
4. Cover the Seeds: Gently cover the seeds with potting mix.
5. Water Carefully: Water the soil gently with a spray bottle until it’s moist but not soggy.
6. Create a Mini-Greenhouse: Cover each pot with clear plastic wrap or place the entire tray inside a plastic bag. This will help retain moisture and create a warm, humid environment.
7. Find a Sunny Spot: Place the pots in a warm, sunny location. If you don’t have enough natural light, use a grow light.
8. Monitor and Mist: Check the soil regularly to make sure it’s still moist. Mist the soil with water as needed. Remove the plastic wrap or bag for a few hours each day to allow for air circulation and prevent mold growth.
Phase 3: Nurturing Your Seedlings – Watching Them Grow
This is where the real fun begins! Watching your little lemon seedlings sprout and grow is incredibly satisfying.
1. Be Patient: It can take several weeks for the seedlings to emerge from the soil, so don’t get discouraged if you don’t see anything right away.
2. Provide Plenty of Light: Once the seedlings emerge, they’ll need plenty of light to thrive. Place them in a sunny window or under a grow light.
3. Water Regularly: Water the seedlings when the top inch of soil feels dry to the touch. Avoid overwatering, as this can lead to root rot.
4. Fertilize Sparingly: Once the seedlings have a few sets of true leaves (the leaves that look like miniature lemon leaves), you can start fertilizing them with a citrus-specific fertilizer. Follow the instructions on the fertilizer label carefully. I usually dilute the fertilizer to half strength to avoid burning the delicate seedlings.
5. Thin Out the Seedlings: If you planted multiple seeds in each pot, you’ll need to thin them out to give the strongest seedling room to grow. Choose the healthiest-looking seedling and carefully snip off the others at the soil line.
6. Rotate the Pots: Rotate the pots regularly to ensure that the seedlings receive even light on all sides. This will help them grow straight and strong.
Phase 4: Transplanting – Moving to a Bigger Home
As your lemon seedlings grow, they’ll eventually outgrow their small pots. It’s time to transplant them into larger containers.
1. Choose a Larger Pot: Select a pot that’s a few inches larger in diameter than the current pot. Make sure the pot has drainage holes.
2. Prepare the Potting Mix: Fill the larger pot with well-draining potting mix.
3. Gently Remove the Seedling: Carefully remove the seedling from its current pot. Try to disturb the roots as little as possible. You can gently loosen the soil around the edges of the pot to make it easier to remove the seedling.
4. Place the Seedling in the New Pot: Place the seedling in the center of the new pot. Make sure the top of the root ball is level with the soil surface.
5. Fill in with Potting Mix: Fill in the space around the seedling with potting mix. Gently press down on the soil to secure the seedling in place.
6. Water Thoroughly: Water the seedling thoroughly after transplanting.
7. Provide Extra Care: For the first few days after transplanting, keep the seedling in a slightly shaded location to help it adjust to its new home.
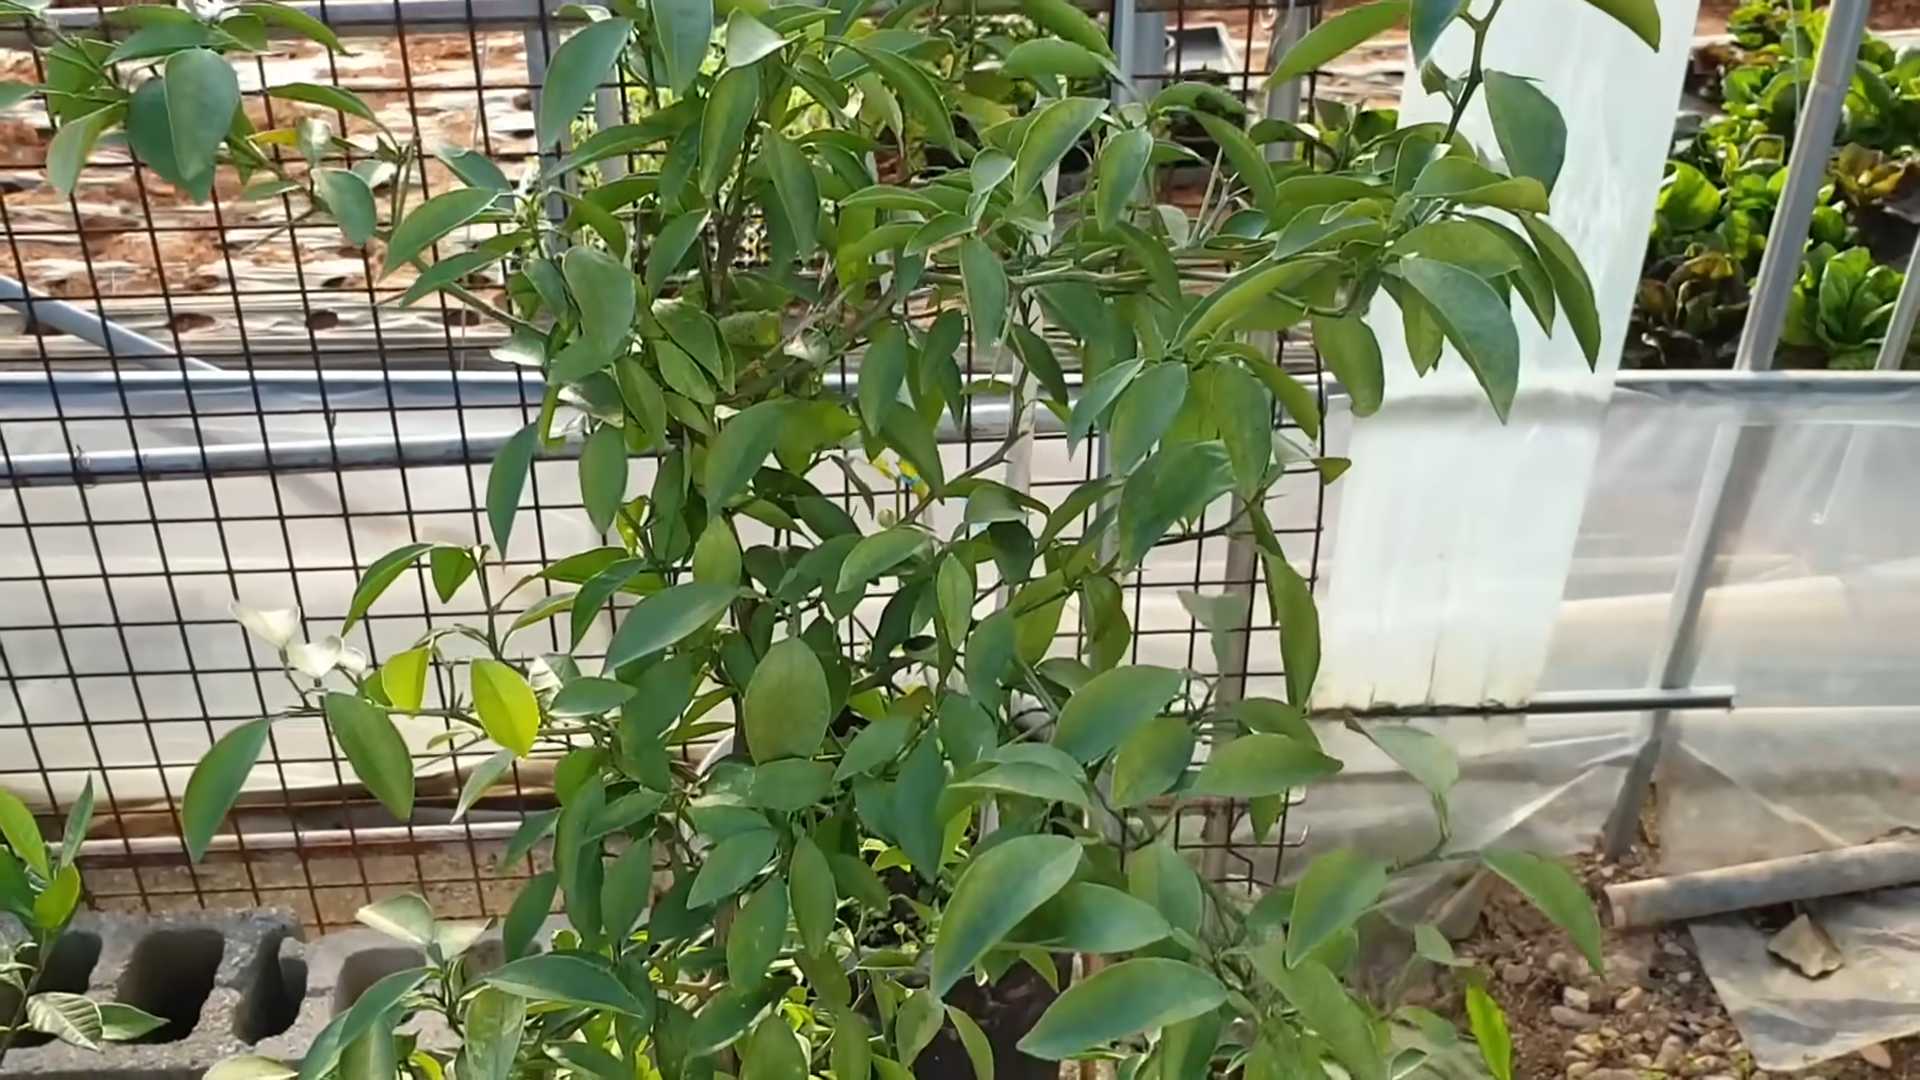
Phase 5: Ongoing Care – Keeping Your Lemon Tree Happy
Now that your lemon tree is established, it’s important to provide ongoing care to keep it healthy and productive.
1. Sunlight: Lemons need at least 6-8 hours of sunlight per day. If you don’t have a sunny window, use a grow light.
2. Watering: Water your lemon tree when the top inch of soil feels dry to the touch. Avoid overwatering, as this can lead to root rot.
3. Fertilizing: Fertilize your lemon tree regularly with a citrus-specific fertilizer. Follow the instructions on the fertilizer label carefully. I usually fertilize my lemon tree every 2-3 months during the growing season (spring and summer).
4. Pruning: Prune your lemon tree to maintain its shape and encourage branching. Remove any dead, damaged, or crossing branches.
5. Pest Control: Keep an eye out for pests, such as aphids, spider mites, and scale. If you find any pests, treat them with an appropriate insecticide or horticultural oil.
6. Humidity: Lemons prefer a humid environment. If your home is dry, you can increase the humidity around your lemon tree by placing it on a tray filled with pebbles and water or by using a humidifier.
7. Overwintering: If you live in a cold climate, you’ll need to bring your lemon tree indoors during the winter. Place it in a sunny location and reduce watering.
Important Considerations: Things to Keep in Mind
* Fruiting Takes Time: Don’t expect to harvest lemons right away. It can take
Conclusion
So, there you have it! Growing lemons indoors from seed might seem like a daunting task, but with a little patience, the right conditions, and this simple DIY trick, you can cultivate your own miniature citrus grove right in your home. Forget expensive store-bought lemons laden with pesticides; imagine the satisfaction of squeezing fresh, homegrown juice into your lemonade, cocktails, or culinary creations.
This isn’t just about saving money; it’s about connecting with nature, learning about the life cycle of a plant, and enjoying the unique experience of nurturing something from seed to fruit. The aroma of lemon blossoms filling your home is an added bonus that no air freshener can replicate.
The DIY trick we’ve outlined – focusing on proper drainage, consistent watering, and supplemental lighting – is a game-changer for indoor lemon cultivation. It addresses the most common challenges faced by aspiring indoor citrus growers, significantly increasing your chances of success.
Don’t be afraid to experiment! Consider these variations to personalize your lemon-growing journey:
* Grafting for Faster Fruiting: While growing from seed is rewarding, it can take several years to see fruit. Grafting a cutting from a mature, fruit-bearing lemon tree onto your seedling’s rootstock can significantly speed up the process. Research compatible rootstocks and grafting techniques for optimal results.
* Different Lemon Varieties: Meyer lemons are a popular choice for indoor growing due to their smaller size and sweeter flavor. However, don’t limit yourself! Explore other dwarf lemon varieties like ‘Improved Meyer,’ ‘Ponderosa,’ or ‘Lisbon’ to find the perfect fit for your taste and space.
* Hydroponic Lemon Growing: For the tech-savvy gardener, consider exploring hydroponic systems for growing lemons indoors. This soilless method can provide precise control over nutrients and water, potentially leading to faster growth and higher yields.
* Companion Planting: Enhance your lemon tree’s health and deter pests by planting companion herbs like basil, rosemary, or thyme in the same pot. These herbs can also attract beneficial insects that will help pollinate your lemon blossoms.
We understand that growing lemons indoors from seed requires dedication, but the rewards are well worth the effort. The vibrant green foliage, the fragrant blossoms, and the eventual harvest of juicy lemons will bring a touch of sunshine into your home year-round.
We wholeheartedly encourage you to give this DIY trick a try. Start small, be patient, and don’t be afraid to learn from your mistakes. Most importantly, share your experiences with us! We’d love to hear about your successes, challenges, and any variations you’ve discovered. Post pictures of your lemon trees, share your tips, and let’s create a community of indoor lemon growers. Let’s all work together to make growing lemons indoors from seed a common and rewarding experience!
Frequently Asked Questions (FAQ)
How long does it really take to grow lemons indoors from seed?
This is probably the most common question, and the honest answer is: it varies. Generally, you can expect to wait anywhere from 3 to 6 years before your lemon tree grown from seed starts producing fruit. This is because seedlings need time to mature and develop a strong root system before they can dedicate energy to fruit production. Factors like the specific lemon variety, the growing conditions (light, temperature, humidity), and your overall care will all influence the timeline. Grafting, as mentioned earlier, can significantly reduce this waiting period.
What kind of soil is best for growing lemons indoors?
Lemon trees need well-draining soil to prevent root rot. A good potting mix for citrus trees should be slightly acidic (pH 6.0-7.0) and contain a mix of ingredients that promote drainage and aeration. A common mix includes equal parts of:
* Potting soil
* Peat moss or coco coir (for moisture retention)
* Perlite or vermiculite (for drainage)
Avoid using garden soil, as it tends to be too heavy and compact for container gardening. You can also find commercially available citrus potting mixes at most garden centers.
How much sunlight do indoor lemon trees need?
Lemon trees are sun-loving plants and require at least 6-8 hours of direct sunlight per day to thrive. If you don’t have a south-facing window that provides sufficient sunlight, you’ll need to supplement with artificial lighting. Grow lights, particularly LED grow lights, are an excellent option. Position the grow light a few inches above the tree and keep it on for 12-16 hours per day. Rotate the tree regularly to ensure all sides receive adequate light.
How often should I water my indoor lemon tree?
Watering frequency depends on several factors, including the size of the pot, the type of soil, the temperature, and the humidity. As a general rule, water your lemon tree when the top inch of soil feels dry to the touch. Water thoroughly until excess water drains out of the drainage holes. Avoid overwatering, as this can lead to root rot. During the winter months, when the tree is less active, you’ll need to water less frequently.
What about fertilizing my lemon tree?
Lemon trees are heavy feeders and require regular fertilization to produce healthy growth and abundant fruit. Use a citrus-specific fertilizer that contains micronutrients like iron, zinc, and manganese. Fertilize every 4-6 weeks during the growing season (spring and summer) and reduce the frequency to every 2-3 months during the dormant season (fall and winter). Follow the instructions on the fertilizer label carefully to avoid over-fertilizing, which can damage the tree.
How do I deal with pests on my indoor lemon tree?
Indoor lemon trees can be susceptible to pests like aphids, spider mites, scale, and mealybugs. Regularly inspect your tree for signs of infestation. If you spot pests, you can try these methods:
* Horticultural Oil: Apply horticultural oil to smother the pests. Follow the instructions on the product label carefully.
* Insecticidal Soap: Insecticidal soap is another effective treatment for soft-bodied pests.
* Neem Oil: Neem oil is a natural insecticide that can help control a variety of pests.
* Manual Removal: For small infestations, you can manually remove pests with a cotton swab dipped in rubbing alcohol.
My lemon tree is dropping leaves. What’s wrong?
Leaf drop can be caused by several factors, including:
* Overwatering or Underwatering: Check the soil moisture and adjust your watering accordingly.
* Insufficient Light: Make sure your tree is receiving enough sunlight.
* Temperature Stress: Avoid exposing your tree to sudden temperature changes or drafts.
* Nutrient Deficiency: Fertilize your tree with a citrus-specific fertilizer.
* Pest Infestation: Inspect your tree for pests and treat accordingly.
How do I encourage my lemon tree to bloom and fruit?
To encourage blooming and fruiting, ensure your tree is receiving adequate sunlight, water, and nutrients. You can also try these techniques:
* Temperature Fluctuations: Expose your tree to slightly cooler temperatures (around 55-65°F) during the winter months to simulate a dormant period.
* Pruning: Prune your tree in late winter or early spring to remove dead or crossing branches and encourage new growth.
* Hand Pollination: If you’re not seeing fruit set, you can try hand-pollinating the blossoms with a small brush.
Can I grow lemons indoors in a small apartment?
Absolutely! Dwarf lemon varieties are well-suited for small spaces. Choose a smaller pot and prune your tree regularly to maintain its size. Supplemental lighting can compensate for limited natural sunlight. With a little care and attention, you can enjoy the benefits of growing lemons indoors even in a small apartment.
What are the benefits of growing lemons indoors from seed?
Beyond the satisfaction of nurturing a plant from seed to fruit, growing lemons indoors offers several benefits:
* Fresh, Organic Lemons: Enjoy fresh, pesticide-free lemons whenever you need them.
* Aromatic Blossoms: The fragrant lemon blossoms will fill your home with a delightful scent.
* Air Purification: Plants help purify the air by absorbing carbon dioxide and releasing oxygen.
* Stress Relief: Gardening has been shown to reduce stress and improve mental well-being.
* Educational Experience: Growing lemons indoors is a great way to learn about plant biology and horticulture.

Leave a Comment