

Grow mushrooms at home? Absolutely! Imagine harvesting fresh, delicious mushrooms right from your own kitchen – it’s easier than you think! For centuries, cultivating fungi has been a practice steeped in tradition, from ancient Chinese medicinal practices to European culinary delights. But you don’t need to be an expert mycologist to enjoy the fruits (or rather, fungi) of your labor.
In today’s fast-paced world, we’re all looking for ways to connect with nature and enjoy healthier, more sustainable food options. That’s where this DIY guide comes in. Learning to grow mushrooms at home not only provides you with a constant supply of fresh, organic ingredients, but it’s also a fascinating and rewarding hobby. Think of the satisfaction of nurturing a tiny spore into a flavorful mushroom, ready to enhance your favorite dishes!
I’m going to share some simple, effective tricks and hacks that will have you harvesting your own gourmet mushrooms in no time. Whether you’re a seasoned gardener or a complete beginner, this guide will equip you with the knowledge and confidence to embark on your mushroom-growing journey. So, let’s get started and unlock the secrets to cultivating these fascinating fungi in the comfort of your own home!
Grow Your Own Gourmet Mushrooms at Home: A Beginner’s Guide
Okay, mushroom lovers, gather ’round! I’m going to walk you through the surprisingly simple process of growing your own delicious mushrooms right in your home. Forget those expensive grocery store prices – fresh, flavorful fungi are just a few steps away! We’ll be focusing on growing oyster mushrooms, as they’re one of the easiest varieties for beginners and incredibly rewarding.
What You’ll Need: The Mushroom Growing Toolkit
Before we dive in, let’s make sure you have everything you need. This is crucial for a successful mushroom-growing adventure.
* Oyster Mushroom Spawn: This is the “seed” of your mushrooms. You can find it online or at specialized gardening stores. Make sure it’s a reputable source to ensure quality.
* Substrate: This is what your mushrooms will grow on. Straw is a fantastic and readily available option. You can also use coffee grounds, but we’ll stick with straw for this guide.
* Large Container: A bucket, laundry basket, or even a large plastic bag will work. Just make sure it’s clean and can hold the straw and spawn.
* Heat-Resistant Bags: These are for pasteurizing the straw. Oven bags or specialized mushroom growing bags are ideal.
* Spray Bottle: For misting the mushrooms as they grow.
* Bleach: For sanitizing your workspace and equipment.
* Gloves: To keep everything clean and prevent contamination.
* Thermometer: To monitor the temperature during pasteurization.
* Large Pot or Container: For pasteurizing the straw.
* Drill or Knife: To create holes in the container for mushroom growth.
Phase 1: Preparing the Substrate (Straw Pasteurization)
This is arguably the most important step. We need to eliminate any competing organisms in the straw that could prevent our mushrooms from thriving. Pasteurization isn’t sterilization; we’re just reducing the competition, not eliminating everything.
1. Chop the Straw: Using scissors or a knife, chop the straw into smaller pieces, about 2-3 inches long. This makes it easier for the mushroom mycelium (the “roots” of the mushroom) to colonize.
2. Soak the Straw: Place the chopped straw in a large container and cover it with water. Let it soak for at least 24 hours. This hydrates the straw, which is essential for mushroom growth.
3. Pasteurize the Straw (Hot Water Method): This is my preferred method, as it’s relatively easy and effective.
* Heat the Water: Fill a large pot or container with water and bring it to a temperature of 160-180°F (71-82°C). Use a thermometer to monitor the temperature.
* Submerge the Straw: Carefully place the soaked straw into the hot water. You might need to do this in batches to ensure all the straw is submerged.
* Maintain the Temperature: Keep the water temperature between 160-180°F (71-82°C) for 60-90 minutes. This is crucial for proper pasteurization. Use a thermometer to monitor the temperature and adjust the heat as needed.
* Drain the Straw: After pasteurization, carefully remove the straw from the hot water and let it drain thoroughly. You want it to be moist but not dripping wet. I usually let it sit in a colander for several hours.
4. Pasteurize the Straw (Oven Bag Method): This is an alternative method if you don’t have a large pot.
* Place Straw in Oven Bags: Pack the soaked straw into heat-resistant oven bags. Don’t overfill them; leave some room for steam.
* Seal the Bags: Seal the oven bags tightly, following the manufacturer’s instructions.
* Bake the Straw: Place the bags in a preheated oven at 170°F (77°C) for 2-3 hours. Use a thermometer to ensure the oven temperature is accurate.
* Cool and Drain: Allow the bags to cool completely before opening them. Once cooled, drain the excess water from the straw.
Phase 2: Inoculation (Mixing Spawn and Substrate)
Now for the fun part – introducing the mushroom spawn to the prepared straw!
1. Sanitize Your Workspace: Before you start, thoroughly clean your workspace with a bleach solution (1 part bleach to 10 parts water). This will help prevent contamination.
2. Sanitize Your Hands: Wear gloves to avoid introducing any unwanted bacteria or fungi to the mixture.
3. Layer the Straw and Spawn: In your chosen container (bucket, laundry basket, etc.), create layers of straw and spawn. Start with a layer of straw, then sprinkle a layer of spawn on top. Repeat this process until you’ve used all the straw and spawn. The general rule is to use about 5-10% spawn by weight of the straw.
4. Mix Thoroughly: Gently mix the straw and spawn together to ensure even distribution. This will help the mycelium colonize the straw more quickly.
5. Pack Lightly: Don’t pack the straw too tightly, as the mycelium needs air to breathe. Just gently press it down to create a stable mass.
Phase 3: Incubation (Mycelium Colonization)
This is where the magic happens! The mycelium will start to grow and spread throughout the straw.
1. Find a Suitable Location: Place the container in a dark, humid, and well-ventilated area. A basement, closet, or spare room works well. The ideal temperature is between 65-75°F (18-24°C).
2. Maintain Humidity: Keep the humidity high by misting the straw regularly with a spray bottle. You want the straw to be moist but not soaking wet. You can also cover the container with a damp towel or plastic wrap to help retain moisture.
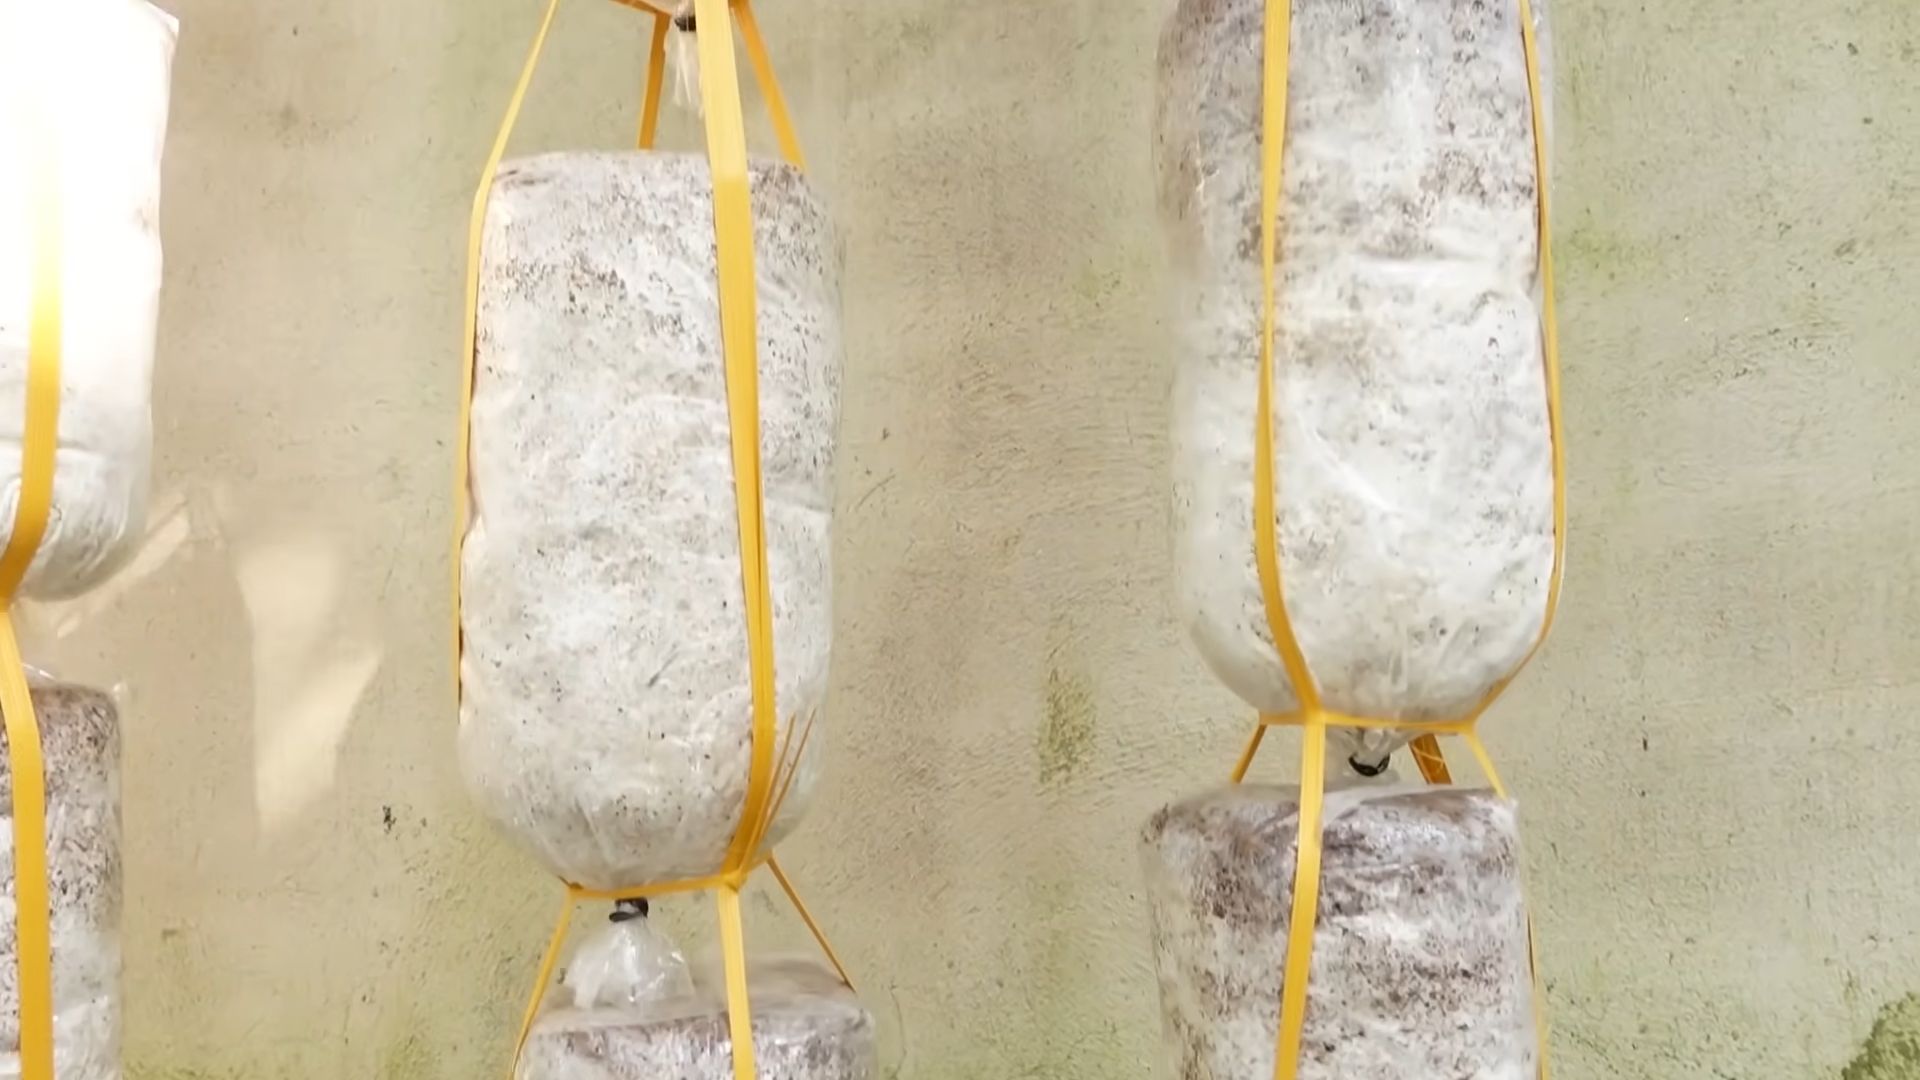
3. Monitor Colonization: Over the next few weeks, you’ll notice white, fuzzy growth spreading throughout the straw. This is the mycelium colonizing the substrate.
4. Be Patient: Colonization can take anywhere from 2-4 weeks, depending on the temperature and humidity. Don’t disturb the container during this time.
Phase 4: Fruiting (Mushroom Growth)
Once the straw is fully colonized (covered in white mycelium), it’s time to initiate fruiting – the formation of mushrooms!
1. Introduce Light: Move the container to a location with indirect light. Mushrooms need light to trigger fruiting.
2. Increase Ventilation: Increase ventilation by opening the container or removing the cover. Fresh air is essential for mushroom growth.
3. Maintain Humidity: Continue to mist the mushrooms regularly to keep them moist.
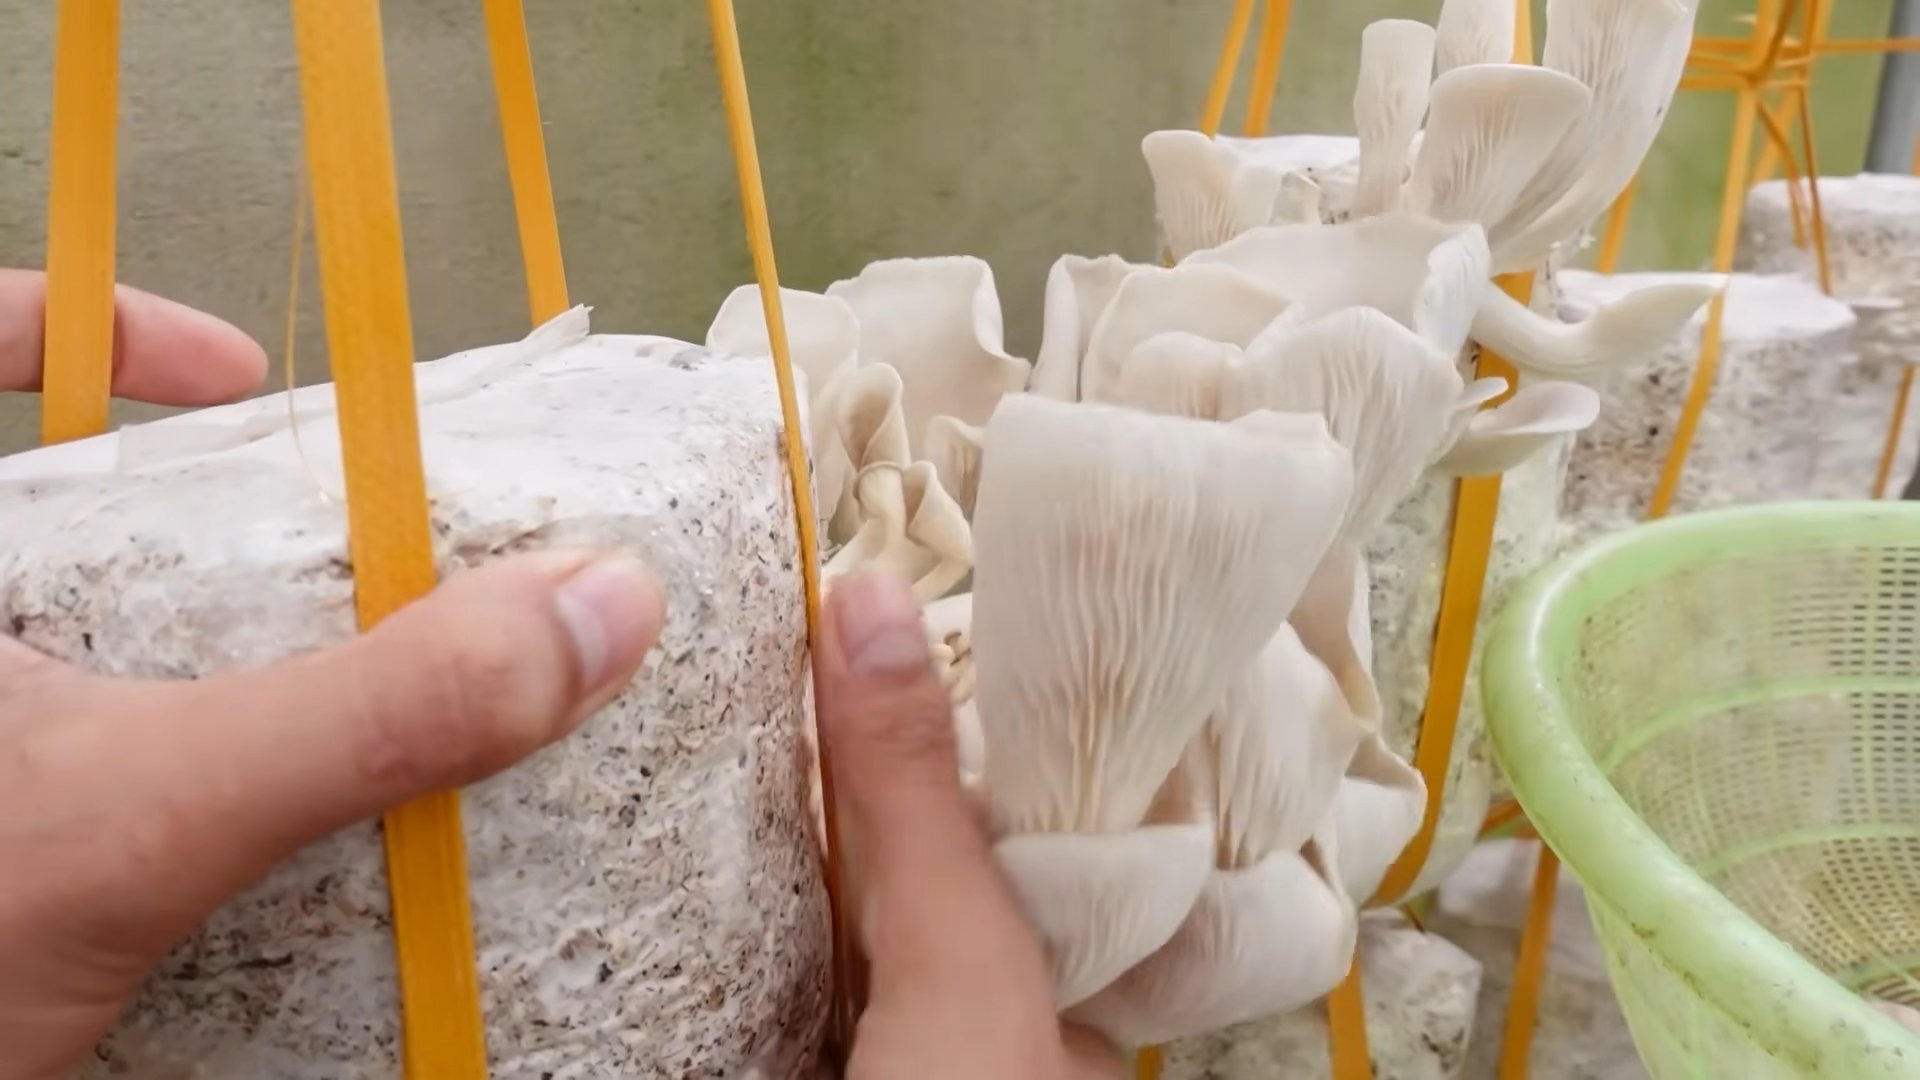
4. Create Fruiting Holes: If you’re using a bucket or container, drill or cut holes (about 2-3 inches in diameter) around the sides. This will provide a place for the mushrooms to grow.
5. Wait for Pins: Small, white bumps (called “pins”) will start to form on the surface of the straw or around the fruiting holes. These are the baby mushrooms!
6. Watch Them Grow: Over the next few days, the pins will grow rapidly into mature oyster mushrooms.
Phase 5: Harvesting and Enjoying Your Mushrooms
The moment you’ve been waiting for!
1. Harvest When Mature: Harvest the mushrooms when the caps are fully developed but before they start to drop spores (a powdery substance).
2. Twist and Pull: Gently twist and pull the mushrooms from the straw.
3. Enjoy Your Harvest: Freshly harvested oyster mushrooms are incredibly delicious! Use them in stir-fries, soups, omelets, or any other dish you like.
4. Second Flush: After harvesting, the straw will often produce a second (or even third) flush of mushrooms. Simply continue to mist the straw and maintain the humidity.
Troubleshooting: Common Problems and Solutions
Even with the best intentions, things can sometimes go wrong. Here are a few common problems and how to fix them:
* Contamination: If you see green, black, or other colored molds growing on the straw, it’s likely contaminated. Unfortunately, there’s not much you can do at this point except discard the contaminated substrate. To prevent contamination in the future, make sure to pasteurize the straw properly and sanitize your workspace.
* Slow Colonization: If the mycelium is growing slowly, it could be due to low temperature, low humidity, or poor ventilation. Make sure the temperature is between 65-75°F (18-24°C), the humidity is high, and there’s adequate
Conclusion
So, there you have it! Cultivating your own mushrooms at home is not just a fun project; it’s a rewarding experience that connects you to the natural world and provides you with a sustainable source of fresh, delicious food. We’ve walked you through the process, highlighting the simplicity and accessibility of this DIY trick. Forget the expensive grocery store prices and the uncertainty of where your food comes from. With a little patience and the right setup, you can enjoy a continuous harvest of flavorful mushrooms right from your own home.
Why is this a must-try? Because it empowers you to take control of your food supply. You know exactly what goes into your mushrooms – no pesticides, no hidden ingredients, just pure, natural goodness. Plus, the satisfaction of nurturing something from start to finish is unparalleled. Imagine the pride you’ll feel serving a dish made with mushrooms you grew yourself!
But the adventure doesn’t stop here. Feel free to experiment with different mushroom varieties. Oyster mushrooms are a great starting point, but once you’ve mastered the basics, why not try shiitake, lion’s mane, or even wine cap mushrooms? Each variety offers a unique flavor profile and texture, opening up a world of culinary possibilities.
Consider also experimenting with different substrates. While we’ve focused on readily available materials like straw or coffee grounds, you can also explore using wood chips, cardboard, or even old cotton clothing. Just be sure to research the specific needs of the mushroom variety you’re growing and ensure the substrate is properly sterilized.
Another variation to consider is the growing environment. While a dark, humid space is generally ideal, you can fine-tune the temperature and humidity levels to optimize growth for specific mushroom types. A simple humidity tent or a small greenhouse can make a big difference.
Ultimately, the key to successful home mushroom cultivation is experimentation and observation. Don’t be afraid to try new things, learn from your mistakes, and adapt your approach as needed. This is a journey of discovery, and the rewards are well worth the effort.
We wholeheartedly encourage you to embark on this exciting adventure. Start small, be patient, and most importantly, have fun! Once you’ve harvested your first batch of homegrown mushrooms, we’d love to hear about your experience. Share your photos, tips, and stories in the comments below. Let’s build a community of home mushroom growers and inspire others to discover the joys of this amazing DIY trick. Let us know what worked for you, what challenges you faced, and any creative solutions you came up with. Together, we can unlock the full potential of home mushroom cultivation and enjoy the delicious fruits (or rather, fungi) of our labor.
Frequently Asked Questions (FAQ)
What are the easiest types of mushrooms to grow at home for beginners?
Oyster mushrooms are generally considered the easiest to grow for beginners. They are fast-growing, relatively forgiving of environmental fluctuations, and can thrive on a variety of substrates, including straw, coffee grounds, and even cardboard. Shiitake mushrooms are also a good option, although they require a bit more patience as they take longer to fruit. Avoid more demanding varieties like morels until you have some experience under your belt.
What kind of setup do I need to grow mushrooms at home?
The basic setup includes a growing container (bucket, tub, or bag), a suitable substrate (straw, coffee grounds, wood chips, etc.), mushroom spawn (the “seeds” of the mushrooms), and a dark, humid environment. You’ll also need a spray bottle to mist the mushrooms regularly and maintain humidity. A thermometer and hygrometer can be helpful for monitoring temperature and humidity levels. You don’t need a fancy setup to start; a simple plastic tub in a basement or closet can work perfectly well.
How long does it take to grow mushrooms at home?
The time it takes to grow mushrooms varies depending on the variety and the growing conditions. Oyster mushrooms can typically be harvested within 2-4 weeks of inoculation. Shiitake mushrooms take longer, usually 6-12 months to fruit on logs, but faster on supplemented sawdust blocks. Be patient and follow the instructions for your chosen mushroom variety.
How do I maintain the humidity levels for growing mushrooms?
Maintaining adequate humidity is crucial for successful mushroom cultivation. You can increase humidity by misting the mushrooms regularly with water, covering the growing container with a plastic bag or lid, or using a humidifier. Aim for a humidity level of 80-90%. A humidity tent can be easily constructed using plastic sheeting and some supports.
What are the common problems when growing mushrooms at home and how to solve them?
Common problems include contamination (mold or other fungi), insufficient humidity, and improper temperature. To prevent contamination, sterilize your substrate thoroughly before inoculation. Maintain adequate humidity by misting regularly and covering the growing container. Ensure the temperature is within the optimal range for your chosen mushroom variety. If you encounter mold, remove the affected area immediately and improve ventilation.
Can I use coffee grounds to grow mushrooms?
Yes, coffee grounds are an excellent substrate for growing mushrooms, especially oyster mushrooms. They are readily available, rich in nutrients, and already partially sterilized by the brewing process. Be sure to use fresh coffee grounds and mix them with other substrates like straw or wood chips for best results.
How do I know when my mushrooms are ready to harvest?
Mushrooms are typically ready to harvest when the caps have fully opened but before they start to drop spores. The exact timing will vary depending on the mushroom variety. For oyster mushrooms, harvest when the caps are still slightly curled downwards. For shiitake mushrooms, harvest when the caps have flattened out and the edges are starting to curl upwards.
Are there any safety precautions I should take when growing mushrooms at home?
Always wash your hands thoroughly before handling mushroom spawn or substrate. Sterilize your substrate properly to prevent contamination. Only grow edible mushroom varieties and be absolutely certain of their identification before consuming them. If you are unsure, consult with a mycologist or experienced mushroom grower.
What do I do with the substrate after harvesting the mushrooms?
The spent substrate can be used as compost in your garden. It is rich in nutrients and beneficial microorganisms that can improve soil health. You can also add it to your compost pile or use it as mulch around plants.
How can I scale up my home mushroom growing operation?
Once you’ve mastered the basics, you can scale up your operation by using larger containers, growing multiple varieties of mushrooms, or even building a dedicated mushroom growing room. Consider investing in automated humidity and temperature control systems to streamline the process. You can also explore selling your homegrown mushrooms at local farmers’ markets or to restaurants.
Leave a Comment