

Grow Onions Easily, even if you think you have a brown thumb! Let’s face it, store-bought onions are fine, but there’s nothing quite like the satisfaction of pulling a plump, juicy onion from your own backyard. For centuries, onions have been a staple in cuisines around the world, dating back to ancient Egypt where they were even revered as symbols of eternity. From humble peasant fare to gourmet dishes, onions add depth and flavor that’s simply irreplaceable.
But what if you don’t have a sprawling garden? Or what if you’ve tried growing onions before and ended up with something resembling a sad, green sprig? Don’t worry, I’ve been there! That’s why I’m so excited to share these simple, yet effective, DIY tricks and hacks that will help you grow onions easily, no matter your space or experience level.
In this article, we’ll unlock the secrets to successful onion cultivation, from choosing the right variety to mastering the art of watering and fertilizing. Imagine the joy of harvesting your own flavorful onions, knowing exactly where they came from and how they were grown. Not only will you save money at the grocery store, but you’ll also enjoy the unmatched taste of homegrown goodness. So, grab your gardening gloves, and let’s get started on this onion-growing adventure together!
Grow Onions Easily: A Beginner’s Guide to Bountiful Bulbs
Hey there, fellow gardening enthusiasts! I’m so excited to share my tried-and-true method for growing onions. Forget those tiny, expensive supermarket onions – with a little patience and these simple steps, you’ll be harvesting a bumper crop of your own in no time! This guide is designed for beginners, so don’t worry if you’ve never grown anything before. Let’s get started!
Choosing Your Onion Type
Before we even think about planting, we need to decide what kind of onions we want to grow. There are three main types:
* Short-day onions: These are best suited for southern climates with mild winters and shorter days. They start forming bulbs when daylight hours are around 10-12 hours. Popular varieties include ‘Granex’, ‘White Bermuda’, and ‘Red Creole’.
* Long-day onions: These thrive in northern climates with longer summer days. They need 14-16 hours of daylight to bulb properly. ‘Walla Walla Sweet’, ‘Yellow Spanish’, and ‘Red Burgundy’ are great choices.
* Intermediate-day onions: As the name suggests, these are a bit more adaptable and can grow well in a wider range of climates. They need around 12-14 hours of daylight. ‘Candy’ and ‘Superstar’ are popular intermediate-day varieties.
How to choose? Consider your location’s climate and the length of your growing season. If you’re unsure, check with your local garden center or agricultural extension office for recommendations. I personally love growing ‘Walla Walla Sweet’ because they are so mild and delicious!
Preparing Your Onion Bed
Onions are heavy feeders, meaning they need nutrient-rich soil to thrive. Proper soil preparation is crucial for a successful harvest.
* Sunlight: Onions need at least 6-8 hours of direct sunlight per day. Choose a location in your garden that gets plenty of sun.
* Soil: Onions prefer well-drained, loose soil with a pH between 6.0 and 7.0. If your soil is heavy clay or sandy, you’ll need to amend it.
* Amendments: Add plenty of organic matter, such as compost, well-rotted manure, or peat moss, to improve soil drainage and fertility. I like to use a combination of compost and aged manure.
* Fertilizer: Incorporate a balanced fertilizer into the soil before planting. Look for a fertilizer with an NPK ratio of around 10-10-10. Follow the instructions on the fertilizer package for application rates.
Step-by-step soil preparation:
1. Clear the area: Remove any weeds, rocks, or debris from the planting area.
2. Till or dig: Loosen the soil to a depth of at least 12 inches. This will help the onion roots penetrate the soil easily.
3. Amend the soil: Spread a 2-3 inch layer of compost and aged manure over the soil surface.
4. Incorporate the amendments: Use a garden fork or tiller to mix the compost and manure into the soil.
5. Add fertilizer: Sprinkle the fertilizer evenly over the soil surface.
6. Rake the soil: Rake the soil smooth and level.
Planting Your Onions
You can grow onions from seeds, sets (small, immature bulbs), or transplants. I personally prefer using sets or transplants because they are easier to handle and get a head start on the growing season.
* Onion Sets: These are small, dormant onion bulbs that are planted directly into the ground. They are a great option for beginners because they are relatively easy to grow.
* Onion Transplants: These are young onion plants that have been started indoors or in a greenhouse. They are a good option if you want to grow a specific variety or if you have a short growing season.
* Onion Seeds: Starting from seed gives you the widest variety of options, but it requires more time and effort. You’ll need to start the seeds indoors 8-10 weeks before the last expected frost.
Planting Onion Sets:
1. Timing: Plant onion sets in early spring, as soon as the soil can be worked.
2. Spacing: Plant the sets 4-6 inches apart in rows that are 12-18 inches apart.
3. Depth: Plant the sets about 1 inch deep, with the pointed end facing up.
4. Watering: Water the sets thoroughly after planting.
Planting Onion Transplants:
1. Timing: Plant onion transplants in early spring, after the last expected frost.
2. Spacing: Plant the transplants 4-6 inches apart in rows that are 12-18 inches apart.
3. Depth: Plant the transplants at the same depth they were growing in their containers.
4. Watering: Water the transplants thoroughly after planting.
Planting Onion Seeds (Starting Indoors):
1. Timing: Start seeds indoors 8-10 weeks before the last expected frost.
2. Containers: Use seed starting trays or small pots filled with seed starting mix.
3. Sowing: Sow the seeds about 1/4 inch deep.
4. Watering: Keep the soil moist but not soggy.
5. Light: Provide plenty of light, either from a sunny window or a grow light.
6. Hardening off: Gradually acclimate the seedlings to outdoor conditions before transplanting them into the garden.
Caring for Your Onions
Once your onions are planted, it’s important to provide them with proper care to ensure a healthy and productive crop.
* Watering: Onions need consistent moisture, especially during bulb formation. Water deeply whenever the top inch of soil feels dry. Avoid overwatering, as this can lead to rot.
* Weeding: Keep the onion bed free of weeds, as weeds can compete with the onions for nutrients and water. Hand-pull weeds carefully to avoid disturbing the onion roots.
* Fertilizing: Side-dress the onions with a nitrogen-rich fertilizer every 2-3 weeks during the growing season. I like to use fish emulsion or compost tea.
* Mulching: Apply a layer of mulch around the onions to help retain moisture, suppress weeds, and regulate soil temperature. Straw, shredded leaves, or wood chips are good mulching options.
* Pest and Disease Control: Onions are relatively pest-resistant, but they can be susceptible to certain pests and diseases, such as onion thrips, onion maggots, and fungal diseases. Monitor your onions regularly for signs of pests or diseases and take appropriate action if necessary. Insecticidal soap or neem oil can be used to control many common onion pests. For fungal diseases, use a copper-based fungicide.
Tips for Watering:
* Water early in the morning to allow the foliage to dry before nightfall.
* Use a soaker hose or drip irrigation to deliver water directly to the roots.
* Avoid overhead watering, as this can promote fungal diseases.
Tips for Weeding:
* Weed regularly to prevent weeds from getting established.
* Use a hoe or hand cultivator to loosen the soil around the onions before weeding.
* Be careful not to damage the onion roots when weeding.
Tips for Fertilizing:
* Apply fertilizer when the soil is moist.
* Avoid getting fertilizer on the onion foliage.
* Follow the instructions on the fertilizer package for application rates.
Harvesting Your Onions
The time to harvest your onions depends on the variety and the growing conditions. Generally, onions are ready to harvest when the tops begin to fall over and turn yellow or brown.
* Timing: Harvest onions when about two-thirds of the tops have fallen over.
* Lifting: Gently lift the onions from the soil with a garden fork.
* Curing: Cure the onions in a warm, dry, well-ventilated place for 2-3 weeks. This will help them to develop a papery outer skin and prevent them from rotting.
* Storing: Store cured onions in a cool, dry, dark place. They should last for several months.
Step-by-step harvesting:
1. Check for readiness: Look for onions with tops that have fallen over and turned yellow or brown.
2. Loosen the soil: Use a garden fork to loosen the soil around the onions.
3. Lift the onions: Gently lift the onions from the soil, being careful not to damage them.
4. Remove excess soil: Brush off any excess soil from the onions.
5. Curing: Spread the onions out in a single layer on a screen or rack in a warm, dry
Conclusion
So, there you have it! Growing onions easily at home is not only achievable but also incredibly rewarding. Forget those bland, store-bought onions that lack that certain zing. With this simple DIY trick, you can cultivate a garden brimming with flavorful, fresh onions that will elevate your culinary creations to a whole new level.
This method isn’t just about saving money (although that’s a definite perk!). It’s about connecting with your food, understanding where it comes from, and enjoying the satisfaction of nurturing something from seed (or seedling!) to table. The taste difference between a homegrown onion and a commercially grown one is truly remarkable. You’ll notice a brighter, more intense flavor that adds depth and complexity to your dishes.
But the benefits don’t stop there. Growing your own onions allows you to control the entire process, ensuring that your produce is free from harmful pesticides and chemicals. You can choose organic methods and feel good about feeding your family healthy, wholesome food.
Why is this DIY trick a must-try? Because it simplifies the onion-growing process, making it accessible to even the most novice gardeners. It maximizes your yield, ensuring a bountiful harvest of delicious onions. And it empowers you to take control of your food supply, promoting a healthier and more sustainable lifestyle.
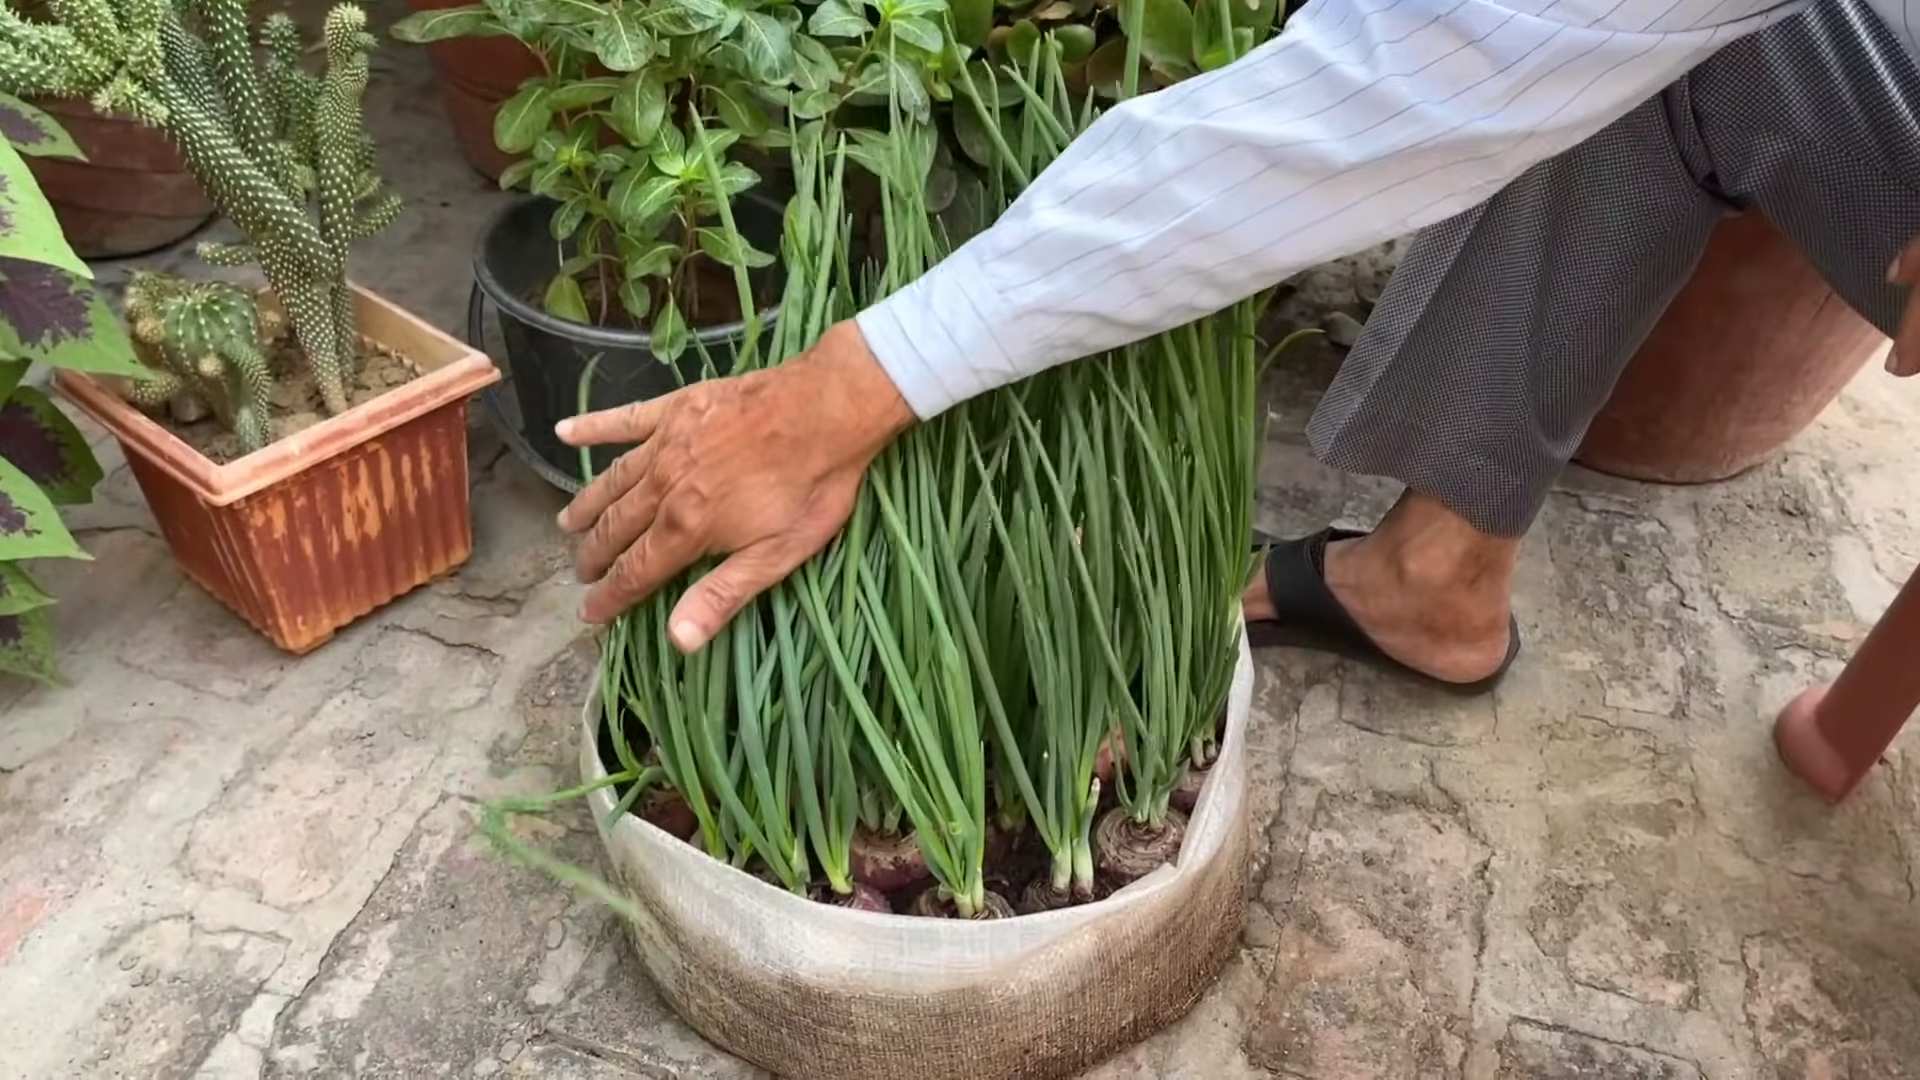
Looking for variations? Consider experimenting with different onion varieties. From sweet Vidalia onions to pungent red onions, the possibilities are endless. You can also try growing onions in containers if you have limited space. Just make sure to choose a pot that is large enough to accommodate the onion bulbs as they grow. Another variation is to use different types of soil amendments to improve drainage and fertility. Compost, aged manure, and bone meal are all excellent choices.
Don’t be afraid to get creative and adapt this DIY trick to your specific needs and preferences. The most important thing is to have fun and enjoy the process.
We wholeheartedly encourage you to give this DIY trick a try. You’ll be amazed at how easy it is to grow your own onions and how much better they taste. Imagine the satisfaction of harvesting your own onions and using them to create delicious meals for your family and friends.
Once you’ve tried it, we’d love to hear about your experience! Share your tips, tricks, and photos in the comments below. Let’s create a community of onion-growing enthusiasts and inspire others to embrace the joys of homegrown produce. Let us know what worked for you, what challenges you faced, and any modifications you made to the process. Your feedback will help us refine this DIY trick and make it even more accessible to everyone.
So, grab your seeds (or seedlings), get your hands dirty, and prepare to embark on a rewarding onion-growing adventure. You won’t regret it! Happy gardening!
Frequently Asked Questions (FAQ)
What is the best time of year to plant onions?
The timing for planting onions depends on your climate and the type of onion you’re growing. Generally, onions are classified as either long-day or short-day varieties. Long-day onions need 14-16 hours of daylight to form bulbs and are best suited for northern regions. Short-day onions need 10-12 hours of daylight and are ideal for southern regions. In most areas, you can plant onion sets or seedlings in the early spring, as soon as the ground can be worked. For fall planting in warmer climates, start in late summer or early fall. Check your local extension office for specific recommendations for your area.
What kind of soil is best for growing onions?
Onions thrive in well-drained, fertile soil that is rich in organic matter. The ideal soil pH is between 6.0 and 7.0. Before planting, amend your soil with compost, aged manure, or other organic materials to improve drainage and fertility. Avoid heavy clay soils, as they can retain too much moisture and lead to bulb rot. If you have clay soil, consider growing onions in raised beds or containers. Adding sand and peat moss can also help improve drainage.
How much sunlight do onions need?
Onions require at least 6-8 hours of direct sunlight per day to grow properly. Choose a planting location that receives full sun throughout the day. If you’re growing onions in containers, make sure to place them in a sunny spot. Insufficient sunlight can result in small, underdeveloped bulbs.
How often should I water my onions?
Onions need consistent moisture, especially during bulb formation. Water deeply and regularly, aiming to keep the soil consistently moist but not waterlogged. Avoid overhead watering, as it can promote fungal diseases. Instead, use a soaker hose or drip irrigation system to water the soil directly. During dry periods, you may need to water more frequently. Check the soil moisture regularly and adjust your watering schedule accordingly.
How do I fertilize my onions?
Onions are heavy feeders and benefit from regular fertilization. Apply a balanced fertilizer (e.g., 10-10-10) at planting time and then side-dress with nitrogen fertilizer every 2-3 weeks during the growing season. Avoid over-fertilizing, as it can lead to excessive foliage growth and reduced bulb size. Organic fertilizers, such as compost tea or fish emulsion, are also excellent choices.
What are some common onion pests and diseases?
Onions are susceptible to several pests and diseases, including onion maggots, thrips, and fungal diseases like downy mildew and botrytis blight. To prevent pest and disease problems, practice good garden hygiene, such as removing plant debris and weeds. Use insecticidal soap or neem oil to control pests. Apply fungicides to prevent or treat fungal diseases. Crop rotation can also help reduce the risk of soilborne diseases.
How do I know when my onions are ready to harvest?
Onions are typically ready to harvest when the tops begin to fall over and turn yellow or brown. This usually occurs in late summer or early fall. Once the tops have fallen over, stop watering the onions and allow them to dry out in the ground for a few days. Then, carefully dig up the bulbs and cure them in a warm, dry, well-ventilated place for 2-3 weeks. Curing helps to toughen the outer skin and prevent rot during storage.
How do I store my harvested onions?
Store cured onions in a cool, dry, well-ventilated place, such as a basement or garage. Braiding the tops together and hanging the onions is a traditional storage method. You can also store onions in mesh bags or crates. Avoid storing onions near potatoes, as they can cause each other to spoil more quickly. Properly stored onions can last for several months.
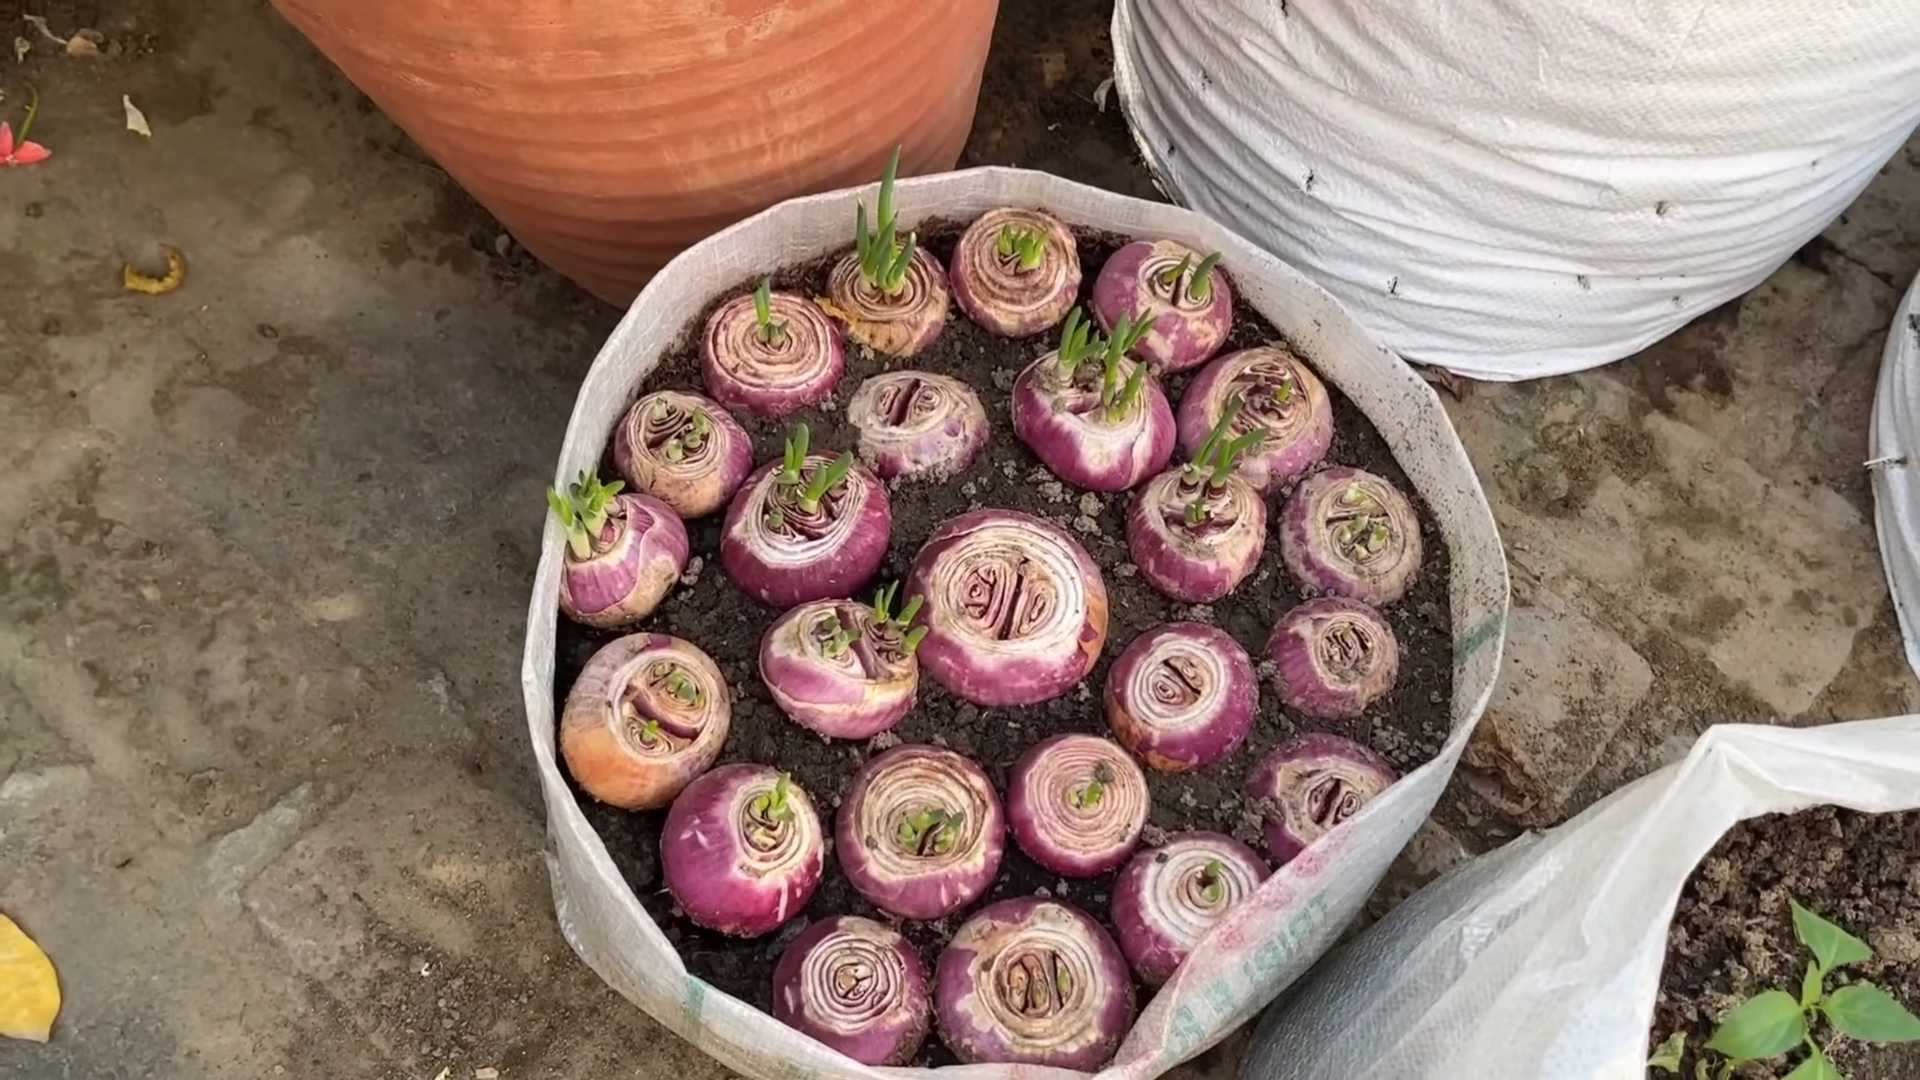
Can I grow onions from scraps?
Yes, you can regrow onions from scraps! Save the root end of an onion (about an inch or two) and plant it in soil. Keep the soil moist and in a sunny location. The onion will start to sprout new green shoots. You can harvest these shoots for use as green onions or allow the plant to continue growing and form a new bulb. This is a great way to reduce food waste and get a continuous supply of fresh onions.
What are the benefits of growing my own onions?
Growing your own onions offers numerous benefits, including:
* **Fresh, flavorful onions:** Homegrown onions taste significantly better than store-bought onions.
* **Cost savings:** Growing your own onions can save you money on groceries.
* **Control over growing practices:** You can choose organic methods and avoid harmful pesticides and chemicals.
* **Sustainability:** Growing your own food reduces your carbon footprint.
* **Gardening satisfaction:** Nurturing plants from seed to harvest is a rewarding experience.
Leave a Comment