

Grow Peanuts at Home
Have you ever dreamed of enjoying the sweet, earthy taste of homegrown peanuts, freshly dug from your own backyard? Well, dream no more! This article is your guide to successfully growing peanuts at home, a surprisingly simple and rewarding gardening project. I’ll walk you through everything you need to know, from selecting the right peanut variety to harvesting your delicious bounty. Forget expensive grocery store peanuts – let’s unlock the secrets to cultivating your own peanut patch!
Growing peanuts isn’t just a modern trend; it boasts a rich history. Peanuts, or Arachis hypogaea, originated in South America and have been cultivated for thousands of years, playing a significant role in various cultures. Their versatility in cuisine and their nutritional value have cemented their place as a global staple. But there’s something truly special about enjoying peanuts you’ve nurtured from tiny seed to mature plant.
Why Grow Your Own Peanuts?
Beyond the satisfaction of growing your own food, growing peanuts at home offers several compelling advantages. You’ll have complete control over the growing process, ensuring your peanuts are free from pesticides and other harmful chemicals. You’ll also be able to savor the freshest, most flavorful peanuts imaginable, a taste that simply can’t be replicated by store-bought varieties. Plus, it’s a fun and educational project for the whole family, teaching valuable lessons about nature and the food cycle.
So, are you ready to embark on this exciting gardening adventure? Let’s get started and learn how to grow peanuts at home, transforming your backyard into a peanut paradise!
Growing Peanuts at Home: A Complete Guide
Growing your own peanuts is a surprisingly rewarding experience! It’s easier than you might think, and the fresh taste of homegrown peanuts is unbeatable. This guide will walk you through the entire process, from seed selection to harvest.
Phase 1: Preparation and Planting
- Choose the right peanut variety: Research peanut varieties suitable for your climate. Some are better suited to warmer climates, while others tolerate cooler temperatures. Consider factors like growing season length and disease resistance.
- Source your seeds: You can purchase peanut seeds online or from garden centers. Make sure to get seeds specifically labeled for planting, not those intended for eating. Avoid using peanuts from the grocery store, as they’ve been treated and are unlikely to germinate.
- Prepare your soil: Peanuts need well-drained, sandy loam soil. Amend heavy clay soils with compost or other organic matter to improve drainage. Peanuts prefer a slightly acidic soil pH (around 6.0-6.8). Test your soil pH using a home testing kit and adjust accordingly.
- Select a sunny location: Peanuts need at least six to eight hours of direct sunlight per day. Choose a location in your garden that receives ample sunlight.
- Prepare the planting area: Till the soil to a depth of about 6-8 inches. Remove any rocks or debris. This ensures good root penetration and prevents compaction.
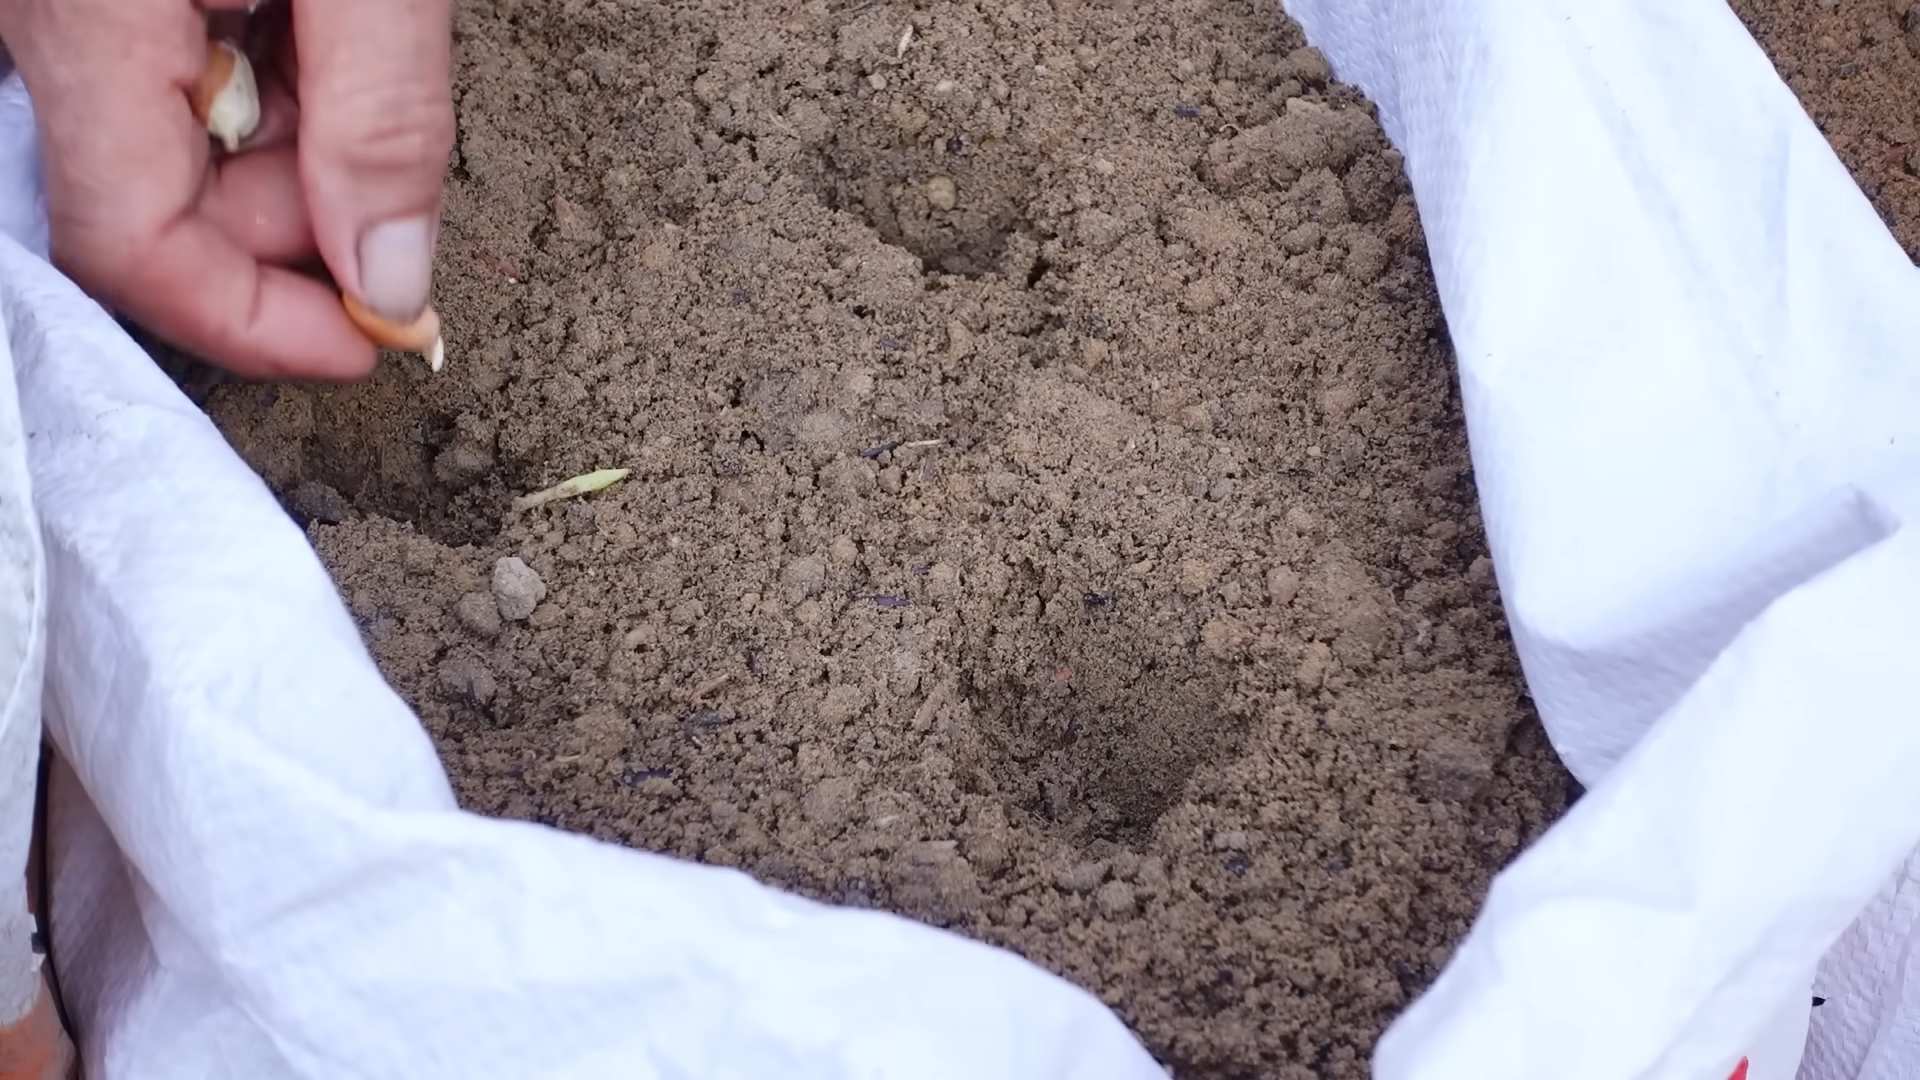
- Plant your seeds: Plant peanut seeds about 1-2 inches deep and 6-12 inches apart, depending on the variety. Plant in rows spaced 2-3 feet apart. This spacing allows for adequate air circulation and prevents overcrowding.
- Water thoroughly after planting: Give the newly planted seeds a good watering to help them settle into the soil and begin germination.
- Maintain consistent moisture: Keep the soil consistently moist but not waterlogged. Overwatering can lead to root rot. Water deeply and less frequently rather than shallowly and often.
Phase 2: Care and Maintenance
- Weed regularly: Keep the area around your peanut plants free of weeds. Weeds compete with peanuts for nutrients and water.
- Monitor for pests and diseases: Regularly inspect your plants for signs of pests or diseases. Common peanut pests include aphids, spider mites, and leafhoppers. Common diseases include leaf spot and fungal blights. Address any issues promptly using appropriate organic or chemical controls.
- Provide support (optional): Depending on the variety and the height of your plants, you may need to provide support to prevent the plants from sprawling on the ground. You can use stakes or trellises.
- Fertilize (optional): While peanuts are relatively low-maintenance, you can improve yields by applying a balanced fertilizer. Follow the instructions on the fertilizer package for application rates.
- Hilling up the plants: As the plants grow, gently hill up soil around the base of the stems. This encourages more peanut development underground. Do this carefully to avoid damaging the plants.
- Continue watering: Maintain consistent moisture throughout the growing season. Reduce watering slightly as the plants mature and the pods begin to develop.
- Monitor plant growth: Observe your plants regularly for any signs of stress or disease. Adjust your care accordingly.
Phase 3: Harvesting and Curing
Knowing when to harve
Growing your own peanuts is a surprisingly rewarding experience! It’s easier than you might think, and the fresh taste of homegrown peanuts is unbeatable. This guide will walk you through the entire process, from seed selection to harvest.
Phase 1: Preparation and Planting
- Choose the right peanut variety: Research peanut varieties suitable for your climate. Some are better suited to warmer climates, while others tolerate cooler temperatures. Consider factors like growing season length and disease resistance.
- Source your seeds: You can purchase peanut seeds online or from garden centers. Make sure to get seeds specifically labeled for planting, not those intended for eating. Avoid using peanuts from the grocery store, as they’ve been treated and are unlikely to germinate.
- Prepare your soil: Peanuts need well-drained, sandy loam soil. Amend heavy clay soils with compost or other organic matter to improve drainage. Peanuts prefer a slightly acidic soil pH (around 6.0-6.8). Test your soil pH using a home testing kit and adjust accordingly.
- Select a sunny location: Peanuts need at least six to eight hours of direct sunlight per day. Choose a location in your garden that receives ample sunlight.
- Prepare the planting area: Till the soil to a depth of about 6-8 inches. Remove any rocks or debris. This ensures good root penetration and prevents compaction.
- Plant your seeds: Plant peanut seeds about 1-2 inches deep and 6-12 inches apart, depending on the variety. Plant in rows spaced 2-3 feet apart. This spacing allows for adequate air circulation and prevents overcrowding.
- Water thoroughly after planting: Give the newly planted seeds a good watering to help them settle into the soil and begin germination.
- Maintain consistent moisture: Keep the soil consistently moist but not waterlogged. Overwatering can lead to root rot. Water deeply and less frequently rather than shallowly and often.
Phase 2: Care and Maintenance
- Weed regularly: Keep the area around your peanut plants free of weeds. Weeds compete with peanuts for nutrients and water.
- Monitor for pests and diseases: Regularly inspect your plants for signs of pests or diseases. Common peanut pests include aphids, spider mites, and leafhoppers. Common diseases include leaf spot and fungal blights. Address any issues promptly using appropriate organic or chemical controls.
- Provide support (optional): Depending on the variety and the height of your plants, you may need to provide support to prevent the plants from sprawling on the ground. You can use stakes or trellises.
- Fertilize (optional): While peanuts are relatively low-maintenance, you can improve yields by applying a balanced fertilizer. Follow the instructions on the fertilizer package for application rates.
- Hilling up the plants: As the plants grow, gently hill up soil around the base of the stems. This encourages more peanut development underground. Do this carefully to avoid damaging the plants.
- Continue watering: Maintain consistent moisture throughout the growing season. Reduce watering slightly as the plants mature and the pods begin to develop.
- Monitor plant growth: Observe your plants regularly for any signs of stress or disease. Adjust your care accordingly.
Phase 3: Harvesting and Curing
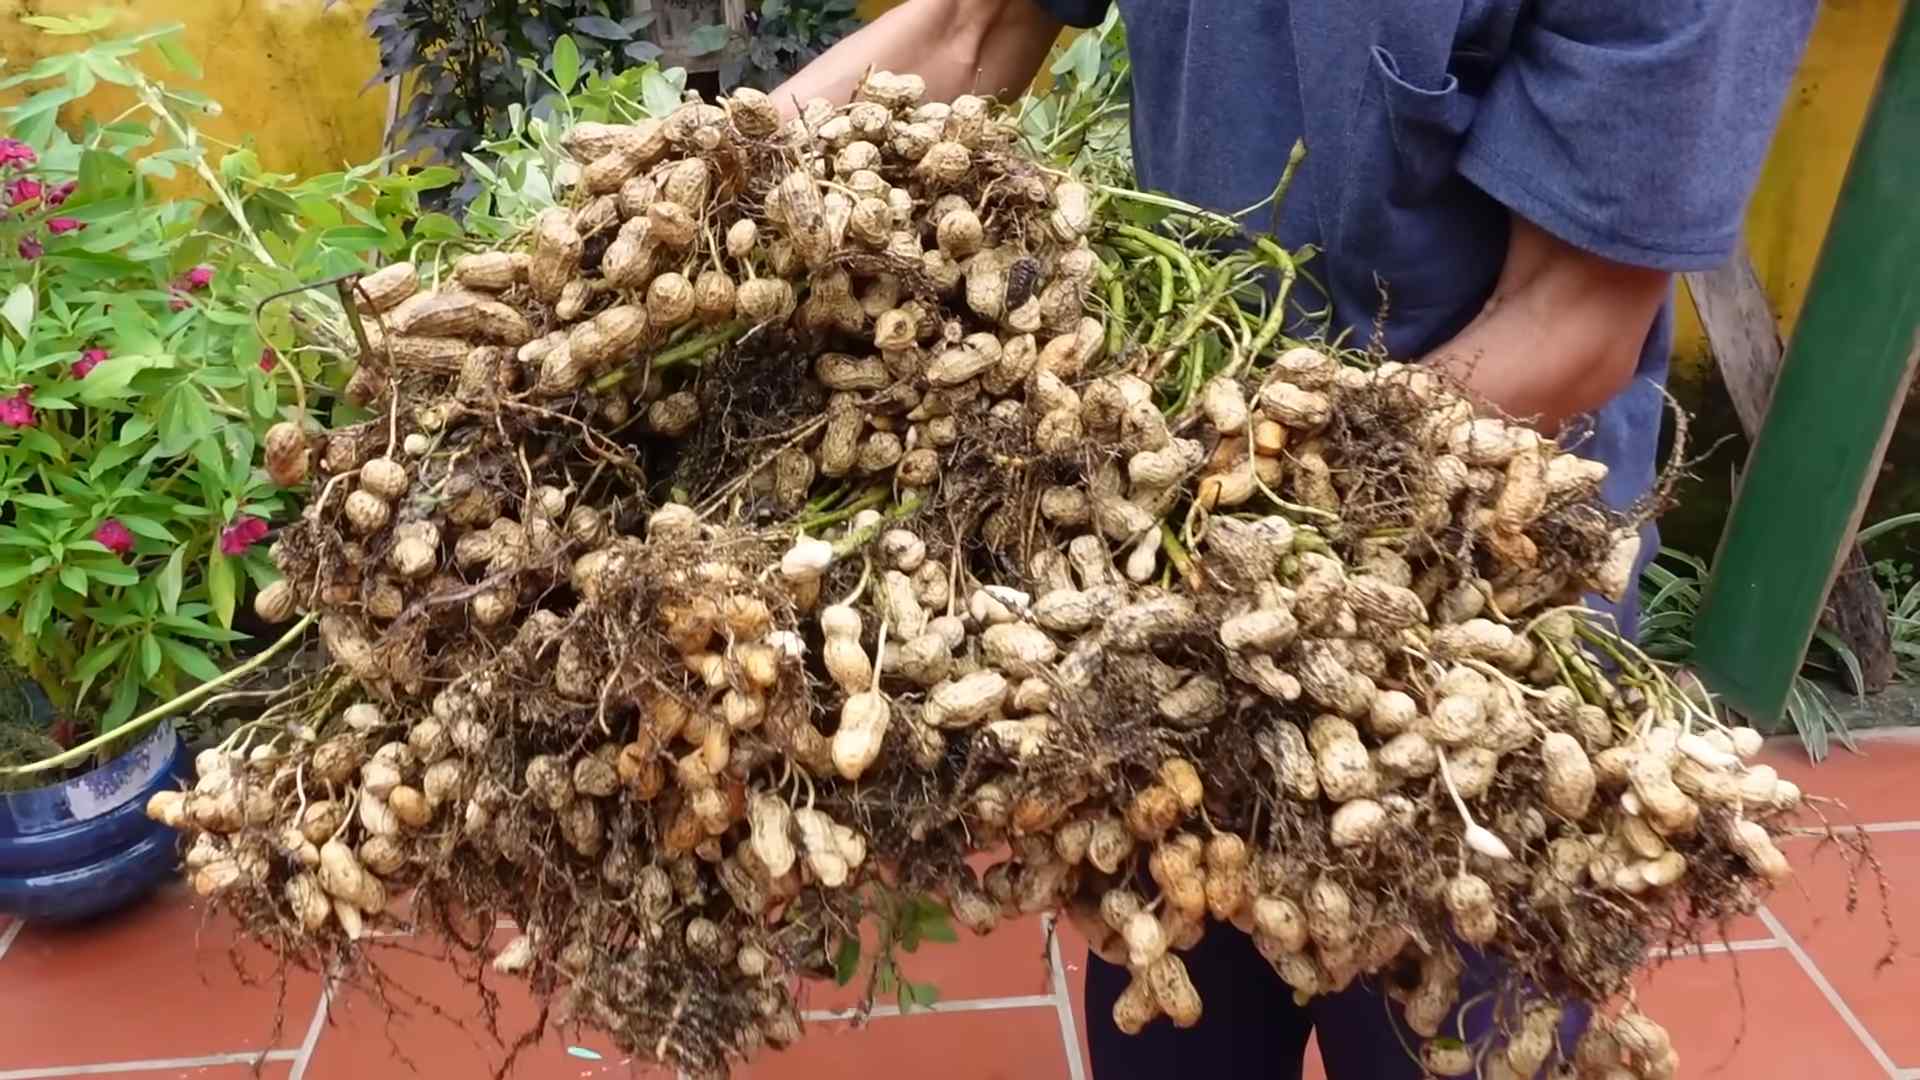
Knowing when to harvest is crucial. The harvesting time depends on the variety you planted and your climate. Generally, peanuts are ready for harvest 100-130 days after planting. Look for the following signs:
- Leaves turn yellow and die back: This is a natural sign of maturity.
- Pods are mature: Dig up a few plants to check the maturity of the pods. Mature pods will be firm and dry.
- Dig up the plants: Carefully dig up the entire peanut plant, making sure not to damage the pods. Use a garden fork or shovel to loosen the soil around the plants.
- Shake off excess soil: Gently shake off the excess soil from the plants.
- Allow the plants to dry: Spread the plants out in a dry, well-ventilated area for a few days to allow them to dry further. This helps prevent mold and rot.
- Remove the peanuts from the plants: Once the plants are dry, carefully remove the peanuts from the plants. You can rub the pods together to loosen the peanuts.
- Cure the peanuts: Spread the peanuts in a single layer on a screen or tray in a dry, well-ventilated area for several weeks. This allows the peanuts to cure properly and develop their full flavor. Regularly turn the peanuts to ensure even drying.
- Store the peanuts: Once the peanuts are fully cured, store them in airtight containers in a cool, dry place. Properly stored peanuts can last for several months.
Phase 4: Troubleshooting
Common Problems and Solutions
- Poor Germination: Ensure proper soil preparation, adequate moisture, and suitable planting depth. Use high-quality seeds.
- Root Rot: Improve soil drainage, avoid overwatering, and ensure good air circulation around the plants.
- Pest Infestations: Monitor plants regularly and address pest problems promptly using appropriate methods. Consider using organic pest control options.
- Disease: Choose disease-resistant varieties, ensure good air circulation, and avoid overhead watering.
Remember to always research the specific needs of your chosen peanut variety for optimal results!
Conclusion
Growing your own peanuts at home is a surprisingly rewarding experience, offering a unique connection to your food and a delightful sense of accomplishment. This DIY trick isn’t just about harvesting your own peanuts; it’s about embracing a simpler, more sustainable way of life. The ease of the process, coupled with the delicious, fresh taste of homegrown peanuts, makes this a must-try for anyone with even a small patch of land or a few containers on a balcony. You’ll be amazed by the quality and flavor compared to store-bought peanuts, and the satisfaction of nurturing a plant from seed to harvest is unparalleled. Beyond the simple joy of growing your own food, you’ll also gain a deeper appreciation for the agricultural process and the effort that goes into producing the snacks we often take for granted. This method of growing peanuts is perfect for beginners, requiring minimal specialized tools or extensive knowledge. The entire process, from planting to harvesting, is a fantastic learning experience for adults and children alike, making it a wonderful family activity. So, what are you waiting for? Embrace the challenge, get your hands dirty, and experience the magic of growing your own peanuts! Share your photos and experiences with us – we’d love to see your thriving peanut plants and hear about your bountiful harvest! Remember to tag us on social media and use #GrowPeanutsAtHome to connect with other home gardeners.
Frequently Asked Questions
Can I grow peanuts in pots?
Absolutely! Peanuts are surprisingly adaptable and can thrive in containers. Choose a large pot – at least 12 inches in diameter and 18 inches deep – to allow for sufficient root growth. Ensure the pot has drainage holes to prevent waterlogging. You’ll need to provide adequate support for the plants as they grow, perhaps using stakes or a trellis.
What type of soil is best for growing peanuts?
Peanuts prefer well-drained, sandy loam soil with a slightly acidic pH (around 6.0-6.8). Amend heavy clay soils with plenty of organic matter like compost to improve drainage. Good drainage is crucial to prevent root rot, a common problem for peanuts. Avoid overly rich soils, as this can lead to excessive vegetative growth at the expense of peanut production.
How much sunlight do peanuts need?
Peanuts are sun-worshippers! They need at least six to eight hours of direct sunlight per day to thrive. Choose a sunny location in your garden or place your containers in a spot that receives ample sunlight. Insufficient sunlight will result in poor growth and reduced peanut yield.
When is the best time to plant peanuts?
The best time to plant peanuts depends on your climate. In warmer climates, you can plant them directly outdoors after the last frost. In cooler climates, you may need to start them indoors several weeks before the last frost and then transplant them outdoors once the weather warms up. Check your local frost dates for the most accurate planting time.
How long does it take for peanuts to mature?
The time it takes for peanuts to mature varies depending on the variety and growing conditions, but generally, it takes around 120-150 days from planting to harvest. Be patient; the wait is worth it!
How do I know when my peanuts are ready to harvest?
Peanuts are ready for harvest when the foliage begins to yellow and die back. This usually occurs about 3-4 months after planting. Gently dig up a few plants to check the maturity of the peanuts. The pods should be firm and well-developed.
What should I do with my harvested peanuts?
Once harvested, carefully remove the peanuts from the pods. Allow them to dry completely in a well-ventilated area for several weeks before storing them in a cool, dry place. Proper drying is essential to prevent mold and spoilage. You can then enjoy your homegrown peanuts in various ways – roasted, boiled, or used in your favorite recipes!
What are some common problems when growing peanuts?
Common problems include root rot (due to poor drainage), fungal diseases (like leaf spot), and insect pests (like aphids). Ensure good drainage, provide adequate spacing between plants for good air circulation, and monitor your plants regularly for signs of pests or diseases. Organic pest control methods are often effective.
Can I save seeds from my homegrown peanuts to plant next year?
Yes, you can save seeds from your homegrown peanuts, but it’s important to select the healthiest and most productive plants for seed saving. Allow the peanuts to dry completely before storing them in a cool, dry place. Proper storage is crucial for seed viability.
What are some variations on this method?
You can experiment with different peanut varieties to find ones that suit your climate and taste preferences. Consider companion planting with other nitrogen-fixing plants to improve soil fertility. You can also try different methods of drying and curing your peanuts to achieve different flavor profiles. The possibilities are endless!
Leave a Comment