

Grow Radishes Indoors? Absolutely! Imagine plucking crisp, peppery radishes fresh from your indoor garden, even when the snow is falling outside. Forget those bland, store-bought radishes – we’re talking about vibrant, flavorful roots bursting with homegrown goodness.
For centuries, humans have cultivated gardens indoors, from the orangeries of Renaissance Europe to the humble windowsills of today. The desire to nurture life and enjoy fresh produce year-round is deeply ingrained in us. But let’s be honest, not everyone has the space or climate for a sprawling outdoor garden. That’s where the magic of indoor gardening comes in, and learning how to grow radishes indoors is a fantastic place to start!
This DIY guide is your ticket to radish-growing success. We’ll break down everything you need to know, from choosing the right container and soil to mastering watering and lighting. Why struggle with lackluster salads when you can easily add a zesty kick with your own homegrown radishes? Plus, it’s incredibly rewarding to watch those tiny seeds sprout and transform into edible delights. So, grab your gardening gloves, and let’s get started on this exciting indoor gardening adventure!
Grow Your Own Radishes Indoors: A Beginner’s Guide
Hey there, fellow gardening enthusiasts! Ever thought about growing radishes indoors? It’s easier than you might think, and it’s a fantastic way to enjoy fresh, peppery radishes even when the weather outside is frightful. I’m going to walk you through the whole process, step-by-step, so you can have a thriving indoor radish garden in no time.
What You’ll Need
Before we dive in, let’s gather our supplies. Here’s a checklist of everything you’ll need to successfully grow radishes indoors:
* **Radish Seeds:** Choose varieties specifically suited for container gardening, like ‘Cherry Belle’, ‘French Breakfast’, or ‘Easter Egg’. These tend to mature quickly and stay relatively compact.
* **Containers:** You’ll need containers that are at least 6 inches deep. Radishes need room to grow downwards. I prefer using plastic pots with drainage holes, but you can also use repurposed containers like yogurt tubs or plastic storage bins (just make sure to add drainage holes!).
* **Potting Mix:** Use a well-draining potting mix. Avoid using garden soil, as it can compact and hinder root growth. A mix of peat moss, perlite, and vermiculite works wonders.
* **Grow Lights (Optional but Recommended):** While radishes can grow indoors with natural light, they’ll thrive with supplemental grow lights, especially during the darker months. Fluorescent or LED grow lights are excellent choices.
* **Watering Can or Spray Bottle:** For gentle watering.
* **Fertilizer (Optional):** A balanced liquid fertilizer can give your radishes a boost, but it’s not strictly necessary.
* **Small Trowel or Spoon:** For planting the seeds.
* **Labels:** To keep track of what you’ve planted and when.
Choosing the Right Radish Variety
Not all radishes are created equal, especially when it comes to indoor growing. Here’s a little more detail on some of my favorite varieties for containers:
* **’Cherry Belle’:** This is a classic, reliable choice. It matures quickly (around 22 days) and produces bright red, round radishes with a mild flavor.
* **’French Breakfast’:** These radishes are elongated with a red top and white bottom. They have a slightly spicier flavor than ‘Cherry Belle’ and mature in about 25 days.
* **’Easter Egg’:** If you want a colorful harvest, ‘Easter Egg’ radishes are the way to go! They come in a mix of red, pink, purple, and white. They mature in about 28 days.
* **’Sparkler’:** Similar to Cherry Belle, but with a white tip.
Planting Your Radish Seeds
Okay, now for the fun part – planting!
1. **Prepare Your Containers:** Fill your containers with potting mix, leaving about an inch of space at the top. Gently pat down the soil to remove any large air pockets.
2. **Sow the Seeds:** Radishes need to be spaced about an inch apart. You can either sprinkle the seeds evenly over the surface of the soil or create small furrows (shallow trenches) with your finger or a spoon. If you’re using furrows, make them about ½ inch deep.
3. **Cover the Seeds:** Gently cover the seeds with a thin layer of potting mix.
4. **Water Thoroughly:** Water the soil gently but thoroughly until it’s evenly moist. Avoid overwatering, which can lead to seed rot. A spray bottle is great for this step.
5. **Label Your Containers:** Don’t forget to label your containers with the radish variety and the date you planted them. This will help you keep track of your progress.
Providing the Right Environment
Radishes are relatively easy to care for, but they do have a few specific needs:
1. **Light:** Radishes need at least 6 hours of sunlight per day. If you don’t have a sunny window, use grow lights. Position the grow lights about 6-12 inches above the plants. I usually keep my grow lights on for about 12-14 hours a day.
2. **Temperature:** Radishes prefer cool temperatures, ideally between 60-70°F (15-21°C). Avoid placing them near heat sources, such as radiators or vents.
3. **Watering:** Keep the soil consistently moist, but not soggy. Water when the top inch of soil feels dry to the touch. Overwatering can lead to root rot, while underwatering can cause the radishes to become tough and bitter.
4. **Fertilizing (Optional):** If you want to give your radishes a boost, you can fertilize them every two weeks with a balanced liquid fertilizer diluted to half strength. I usually start fertilizing about two weeks after the seeds have germinated.
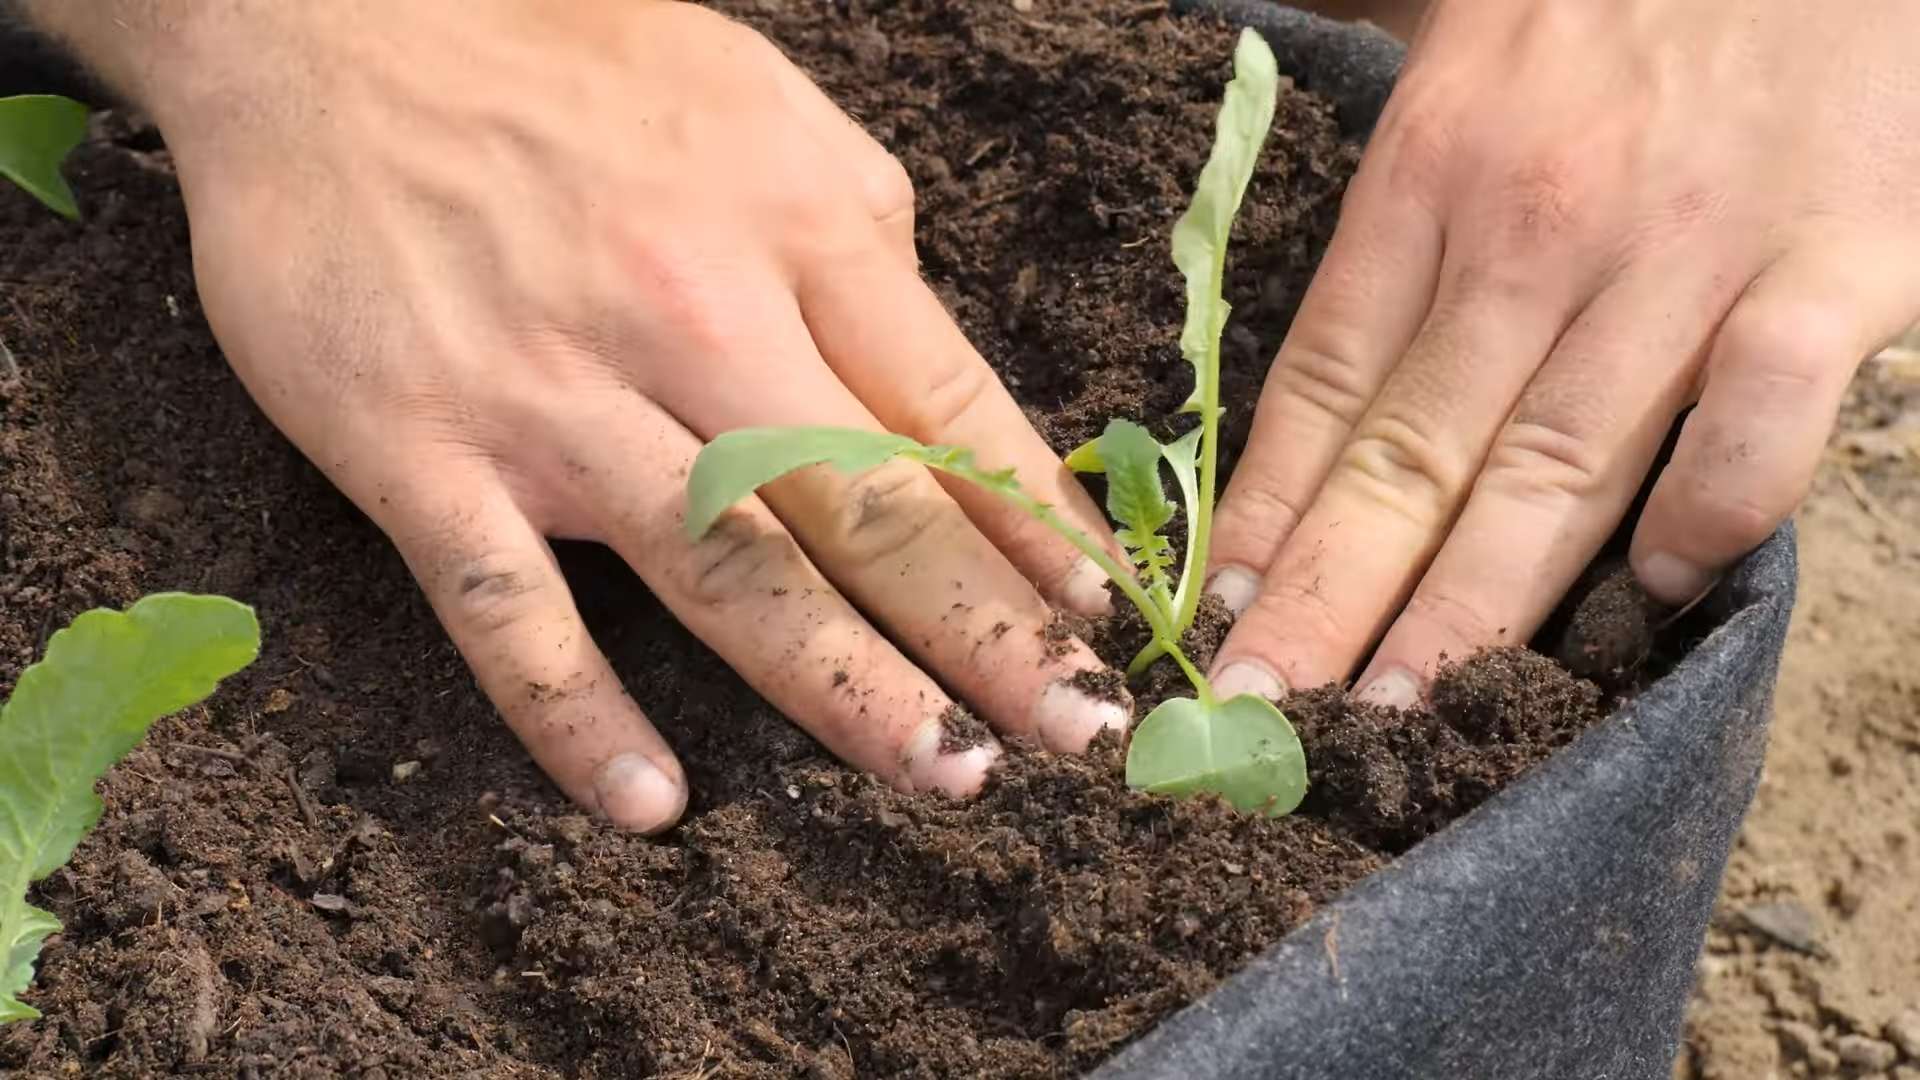
Thinning Your Radishes
Once your radish seedlings have emerged (usually within a few days), you’ll need to thin them out. This means removing some of the seedlings to give the remaining ones enough space to grow.
1. **Identify the Strongest Seedlings:** Choose the healthiest and strongest-looking seedlings in each container.
2. **Remove the Weaker Seedlings:** Gently pull out the weaker seedlings, being careful not to disturb the roots of the remaining plants. You can use small scissors to snip them off at the soil line if you prefer.
3. **Space the Seedlings:** Aim for a spacing of about 1 inch between each radish plant.
Dealing with Pests and Diseases
Fortunately, radishes are relatively pest-resistant. However, here are a few potential problems to watch out for:
* **Flea Beetles:** These tiny beetles can chew small holes in the leaves. If you notice flea beetles, you can try spraying your plants with insecticidal soap or neem oil.
* **Root Rot:** This is a fungal disease that can occur if the soil is too wet. To prevent root rot, make sure your containers have good drainage and avoid overwatering.
* **Aphids:** These small, sap-sucking insects can weaken your plants. You can control aphids by spraying them with a strong stream of water or by using insecticidal soap.
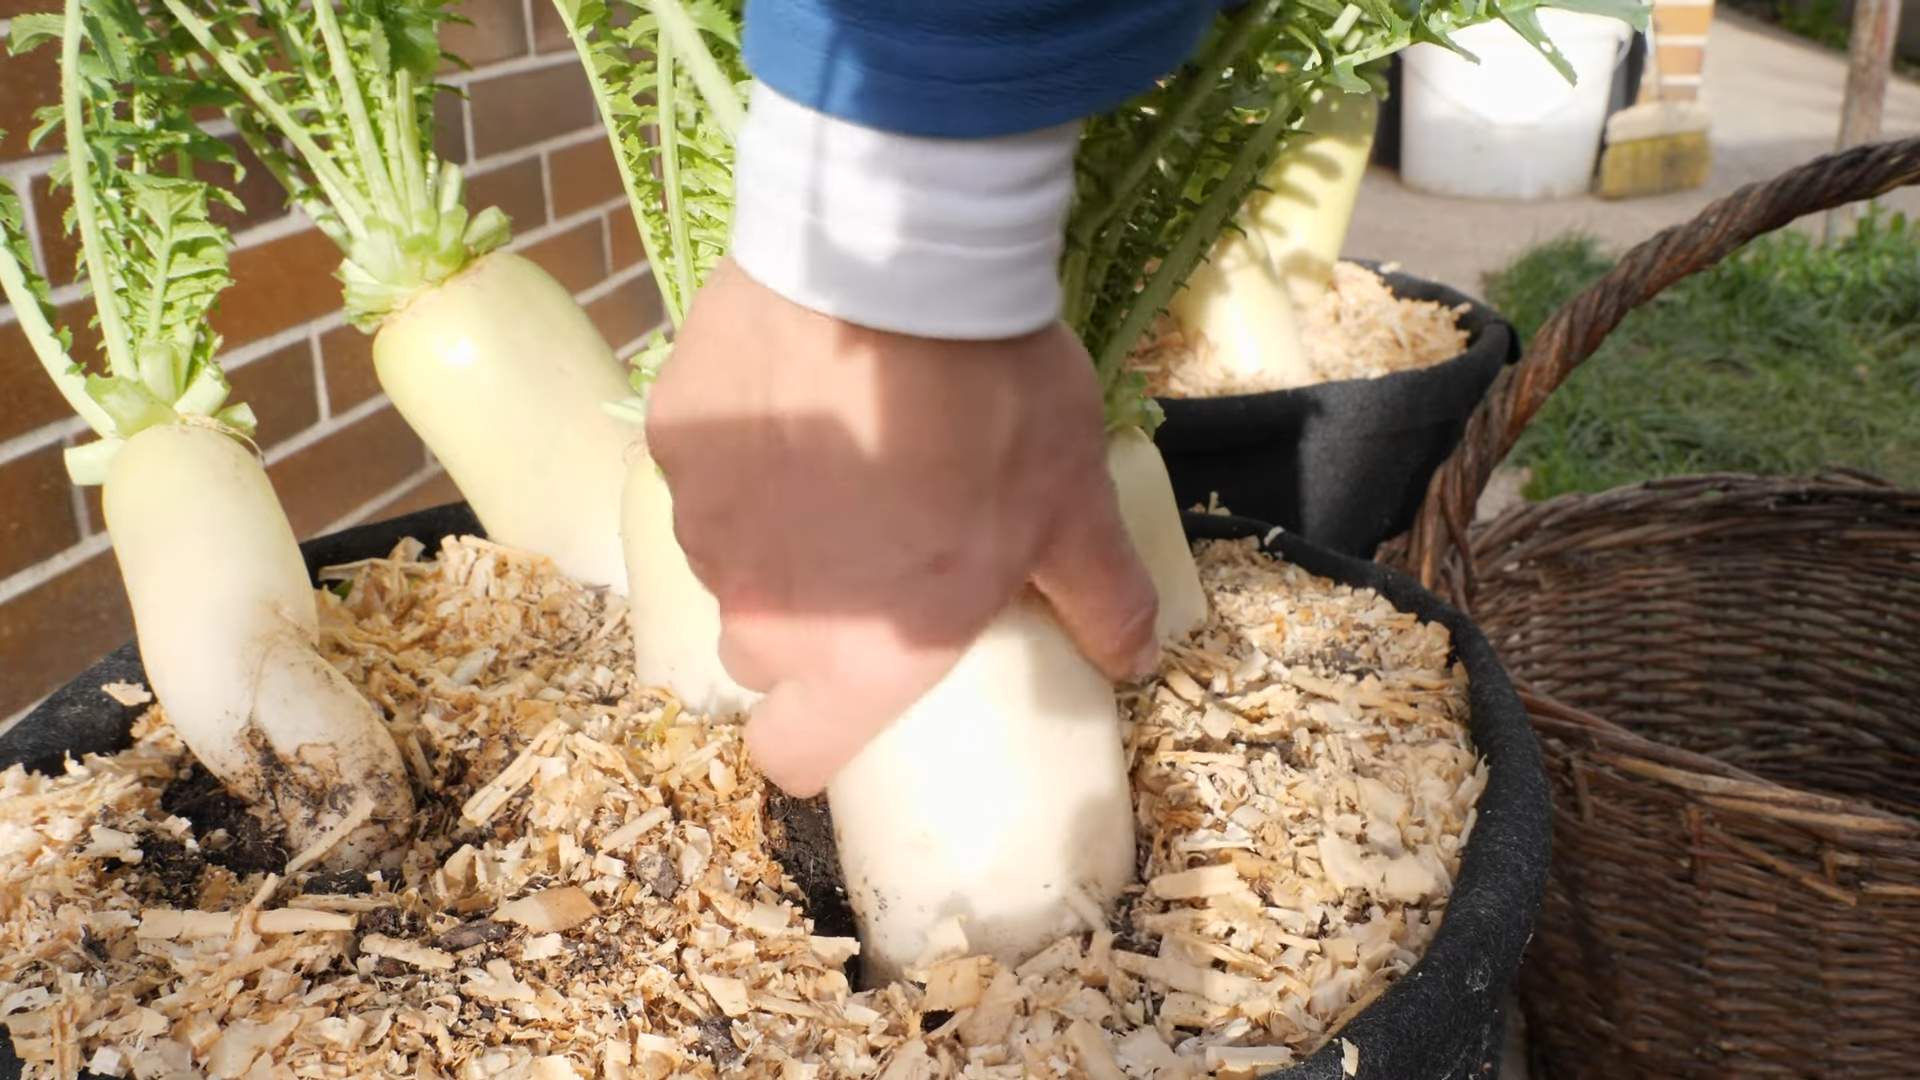
Harvesting Your Radishes
The best part of growing radishes is, of course, harvesting them! Radishes are typically ready to harvest in about 22-30 days, depending on the variety.
1. **Check for Maturity:** Gently brush away the soil around the base of the radish to check its size. Radishes are usually ready to harvest when they are about 1 inch in diameter.
2. **Harvest Carefully:** Gently pull the radishes out of the soil, being careful not to break them. If the soil is dry, you may need to water it first to make it easier to pull the radishes out.
3. **Wash and Store:** Wash the radishes thoroughly and remove the leaves. Store them in a plastic bag in the refrigerator for up to a week.
Troubleshooting Tips
* **Radishes are not forming bulbs:** This could be due to several factors, including overcrowding, lack of sunlight, or poor soil. Make sure you thin your radishes properly, provide them with enough light, and use a well-draining potting mix.
* **Radishes are tough and bitter:** This is often caused by underwatering or growing them in hot weather. Keep the soil consistently moist and try to keep the temperature cool.
* **Radishes are splitting:** This can be caused by inconsistent watering. Try to water your radishes regularly and avoid letting the soil dry out completely.
* **Radishes are bolting (going to seed):** This is usually caused by hot weather or stress. If your radishes start to bolt, harvest them immediately, as they will become bitter.
Enjoying Your Homegrown Radishes
Now that you’ve harvested your radishes, it’s time to enjoy them! Here are a few ideas:
* **Eat them raw:** Radishes are delicious eaten raw in salads, sandwiches, or as a snack.
* **Roast them:** Roasting radishes mellows out their flavor and makes them tender and sweet.
* **Pickle them:** Pickled radishes are a tangy and flavorful addition to any meal.
* **Use the greens:** Don’t throw away the radish greens! They’re edible and can be used in salads, soups, or stir-fries.
Growing radishes indoors is a rewarding experience that anyone can enjoy. With a little bit of care and attention, you can have a continuous supply of fresh, peppery radishes all year round. Happy gardening!
Conclusion
So, there you have it! Growing radishes indoors is not only possible, but it’s also surprisingly simple and rewarding. Forget those bland, store-bought radishes that lack that peppery zing. With just a few basic supplies and a little bit of attention, you can cultivate your own vibrant, crisp, and flavorful radishes right in the comfort of your home, regardless of the season.
Why is this DIY trick a must-try? Because it puts you in control. You control the soil, the light, and the watering, ensuring that your radishes are grown without harmful pesticides or herbicides. You also get the satisfaction of nurturing something from seed to harvest, a truly fulfilling experience. Plus, fresh, homegrown radishes taste infinitely better than anything you can buy at the grocery store. The difference in flavor and texture is remarkable.
But the benefits don’t stop there. Growing radishes indoors is a fantastic way to introduce children to gardening and teach them about where their food comes from. It’s also a great way to add a touch of green to your living space, especially during the colder months when outdoor gardening is limited. And let’s not forget the convenience – having fresh radishes readily available for salads, snacks, or garnishes is a real game-changer.
Ready to take your indoor radish growing to the next level? Consider experimenting with different radish varieties. ‘Cherry Belle’ is a classic choice for its bright red color and mild flavor, but you could also try ‘French Breakfast’ for its elongated shape and slightly sweeter taste, or ‘Black Spanish’ for a more pungent and spicy kick. You can also play around with different soil mixes to see what works best for your growing environment. Some gardeners swear by a mix of compost, perlite, and vermiculite, while others prefer a simple potting mix.
Another variation to consider is succession planting. By planting a small batch of radish seeds every week or two, you can ensure a continuous harvest throughout the growing season. This way, you’ll always have fresh radishes on hand whenever you need them. Don’t be afraid to get creative and adapt the techniques to suit your own preferences and resources.
We wholeheartedly encourage you to give this DIY trick a try. It’s an easy, affordable, and incredibly rewarding way to enjoy fresh, homegrown radishes all year round. Once you’ve experienced the joy of harvesting your own radishes, you’ll never want to go back to store-bought ones again.
And most importantly, we want to hear about your experience! Share your tips, tricks, and photos with us in the comments below. Let us know what worked well for you, what challenges you encountered, and any variations you tried. Your feedback will help other readers learn and grow, and together, we can create a thriving community of indoor radish growers. So, grab your seeds, soil, and containers, and get ready to embark on a delicious and rewarding gardening adventure. Happy growing! Remember, mastering the art of how to grow radishes indoors is easier than you think!
Frequently Asked Questions (FAQ)
What is the best time of year to grow radishes indoors?
The beauty of growing radishes indoors is that you can do it any time of year! Unlike outdoor gardening, you’re not limited by the seasons. As long as you provide adequate light, water, and temperature, your radishes will thrive regardless of the weather outside. This makes indoor radish growing a perfect solution for gardeners in colder climates or those who simply want to enjoy fresh radishes year-round.
How much light do radishes need when grown indoors?
Radishes need at least 6 hours of direct sunlight per day to grow properly. If you don’t have a sunny windowsill, you can supplement with grow lights. Fluorescent or LED grow lights are excellent options. Position the lights a few inches above the seedlings and adjust as they grow. Insufficient light can result in leggy plants with small, underdeveloped roots.
What type of soil is best for growing radishes indoors?
Radishes prefer loose, well-draining soil. A good quality potting mix is a great starting point. You can also amend the soil with compost or perlite to improve drainage and aeration. Avoid heavy clay soils, as they can compact and hinder root development. The ideal pH for radish growth is between 6.0 and 7.0.
How often should I water my indoor radishes?
Keep the soil consistently moist, but not waterlogged. Water when the top inch of soil feels dry to the touch. Overwatering can lead to root rot, while underwatering can stunt growth. Check the soil moisture regularly and adjust your watering schedule accordingly. The frequency of watering will depend on factors such as temperature, humidity, and the type of container you’re using.
How long does it take for radishes to mature indoors?
One of the great things about radishes is that they are quick to mature. Most varieties are ready to harvest in just 3-4 weeks. Check the seed packet for specific maturity times. You’ll know your radishes are ready when the roots are about an inch in diameter. Don’t let them get too big, as they can become woody and bitter.
Can I grow radishes in containers? What size container is best?
Yes, radishes are well-suited for container gardening. Choose containers that are at least 6 inches deep to allow the roots to develop properly. Make sure the containers have drainage holes to prevent waterlogging. You can grow several radishes in a single container, spacing them about an inch apart.
What are some common problems when growing radishes indoors, and how can I prevent them?
Some common problems include:
* **Leggy plants:** This is usually caused by insufficient light. Provide more light or move the plants to a sunnier location.
* **Root rot:** This is caused by overwatering. Ensure proper drainage and allow the soil to dry out slightly between waterings.
* **Pests:** Aphids and flea beetles can sometimes attack indoor radishes. Inspect your plants regularly and treat any infestations with insecticidal soap or neem oil.
* **Bitter taste:** This can be caused by letting the radishes grow too large or by exposing them to high temperatures. Harvest the radishes when they are the right size and keep them cool.
Can I eat the radish greens?
Absolutely! Radish greens are edible and nutritious. They have a peppery flavor similar to the roots. You can add them to salads, stir-fries, or soups. Just make sure to wash them thoroughly before eating.
How do I harvest radishes grown indoors?
Gently pull the radishes from the soil when they are the desired size. If the soil is dry, you may need to loosen it first. Wash the radishes and trim off the greens, leaving about an inch of stem. Store the radishes in the refrigerator for up to a week.
What are some good companion plants for radishes grown indoors?
Radishes are good companions for many other plants, both indoors and outdoors. Some good choices include lettuce, spinach, carrots, and cucumbers. Companion planting can help to deter pests, improve soil health, and maximize space.

Leave a Comment